
Replacing our Reach-in Closet with an Ikea Pax Closet System
Do you want to make the most efficient use of space in a reach-in closet? I’m sharing how we replaced our reach-in closet with an Ikea Pax system as part of our most recent master bedroom makeover.
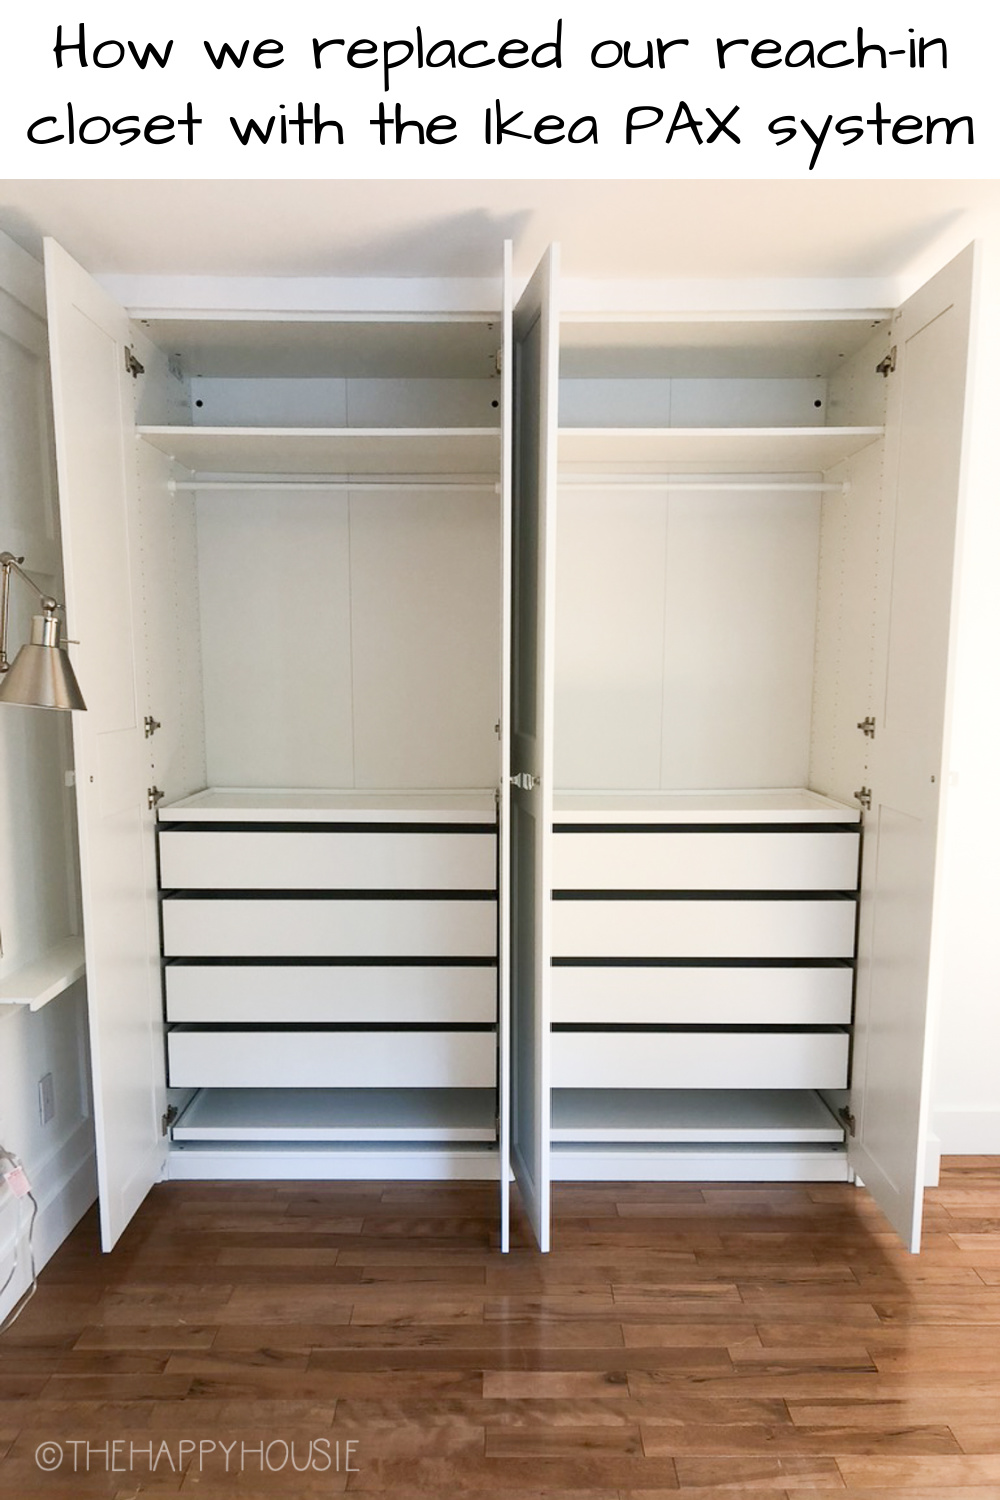
The Ikea Pax closet system has been a favourite of mine for several years now, ever since we did our first small walk-in closet makeover using the Ikea Pax system in our previous lake house. Since that time we have turned 3 other reach-in closets into a much more efficient use of space by installing an Ikea Pax system wardrobes in them and we also plan to outfit our walk-in closet at the new build house with Ikea Pax systems. Not only are Ikea Pax wardrobes highly functional and beautifully integrated with a huge assortment of organizing options, but the it has a polished look that elevates your closet and bedroom space. Today I’m sharing the details about how we replaced our reach-in closet at the forest house with two Pax wardrobes and trimmed them out to look like a built-in wardrobe.
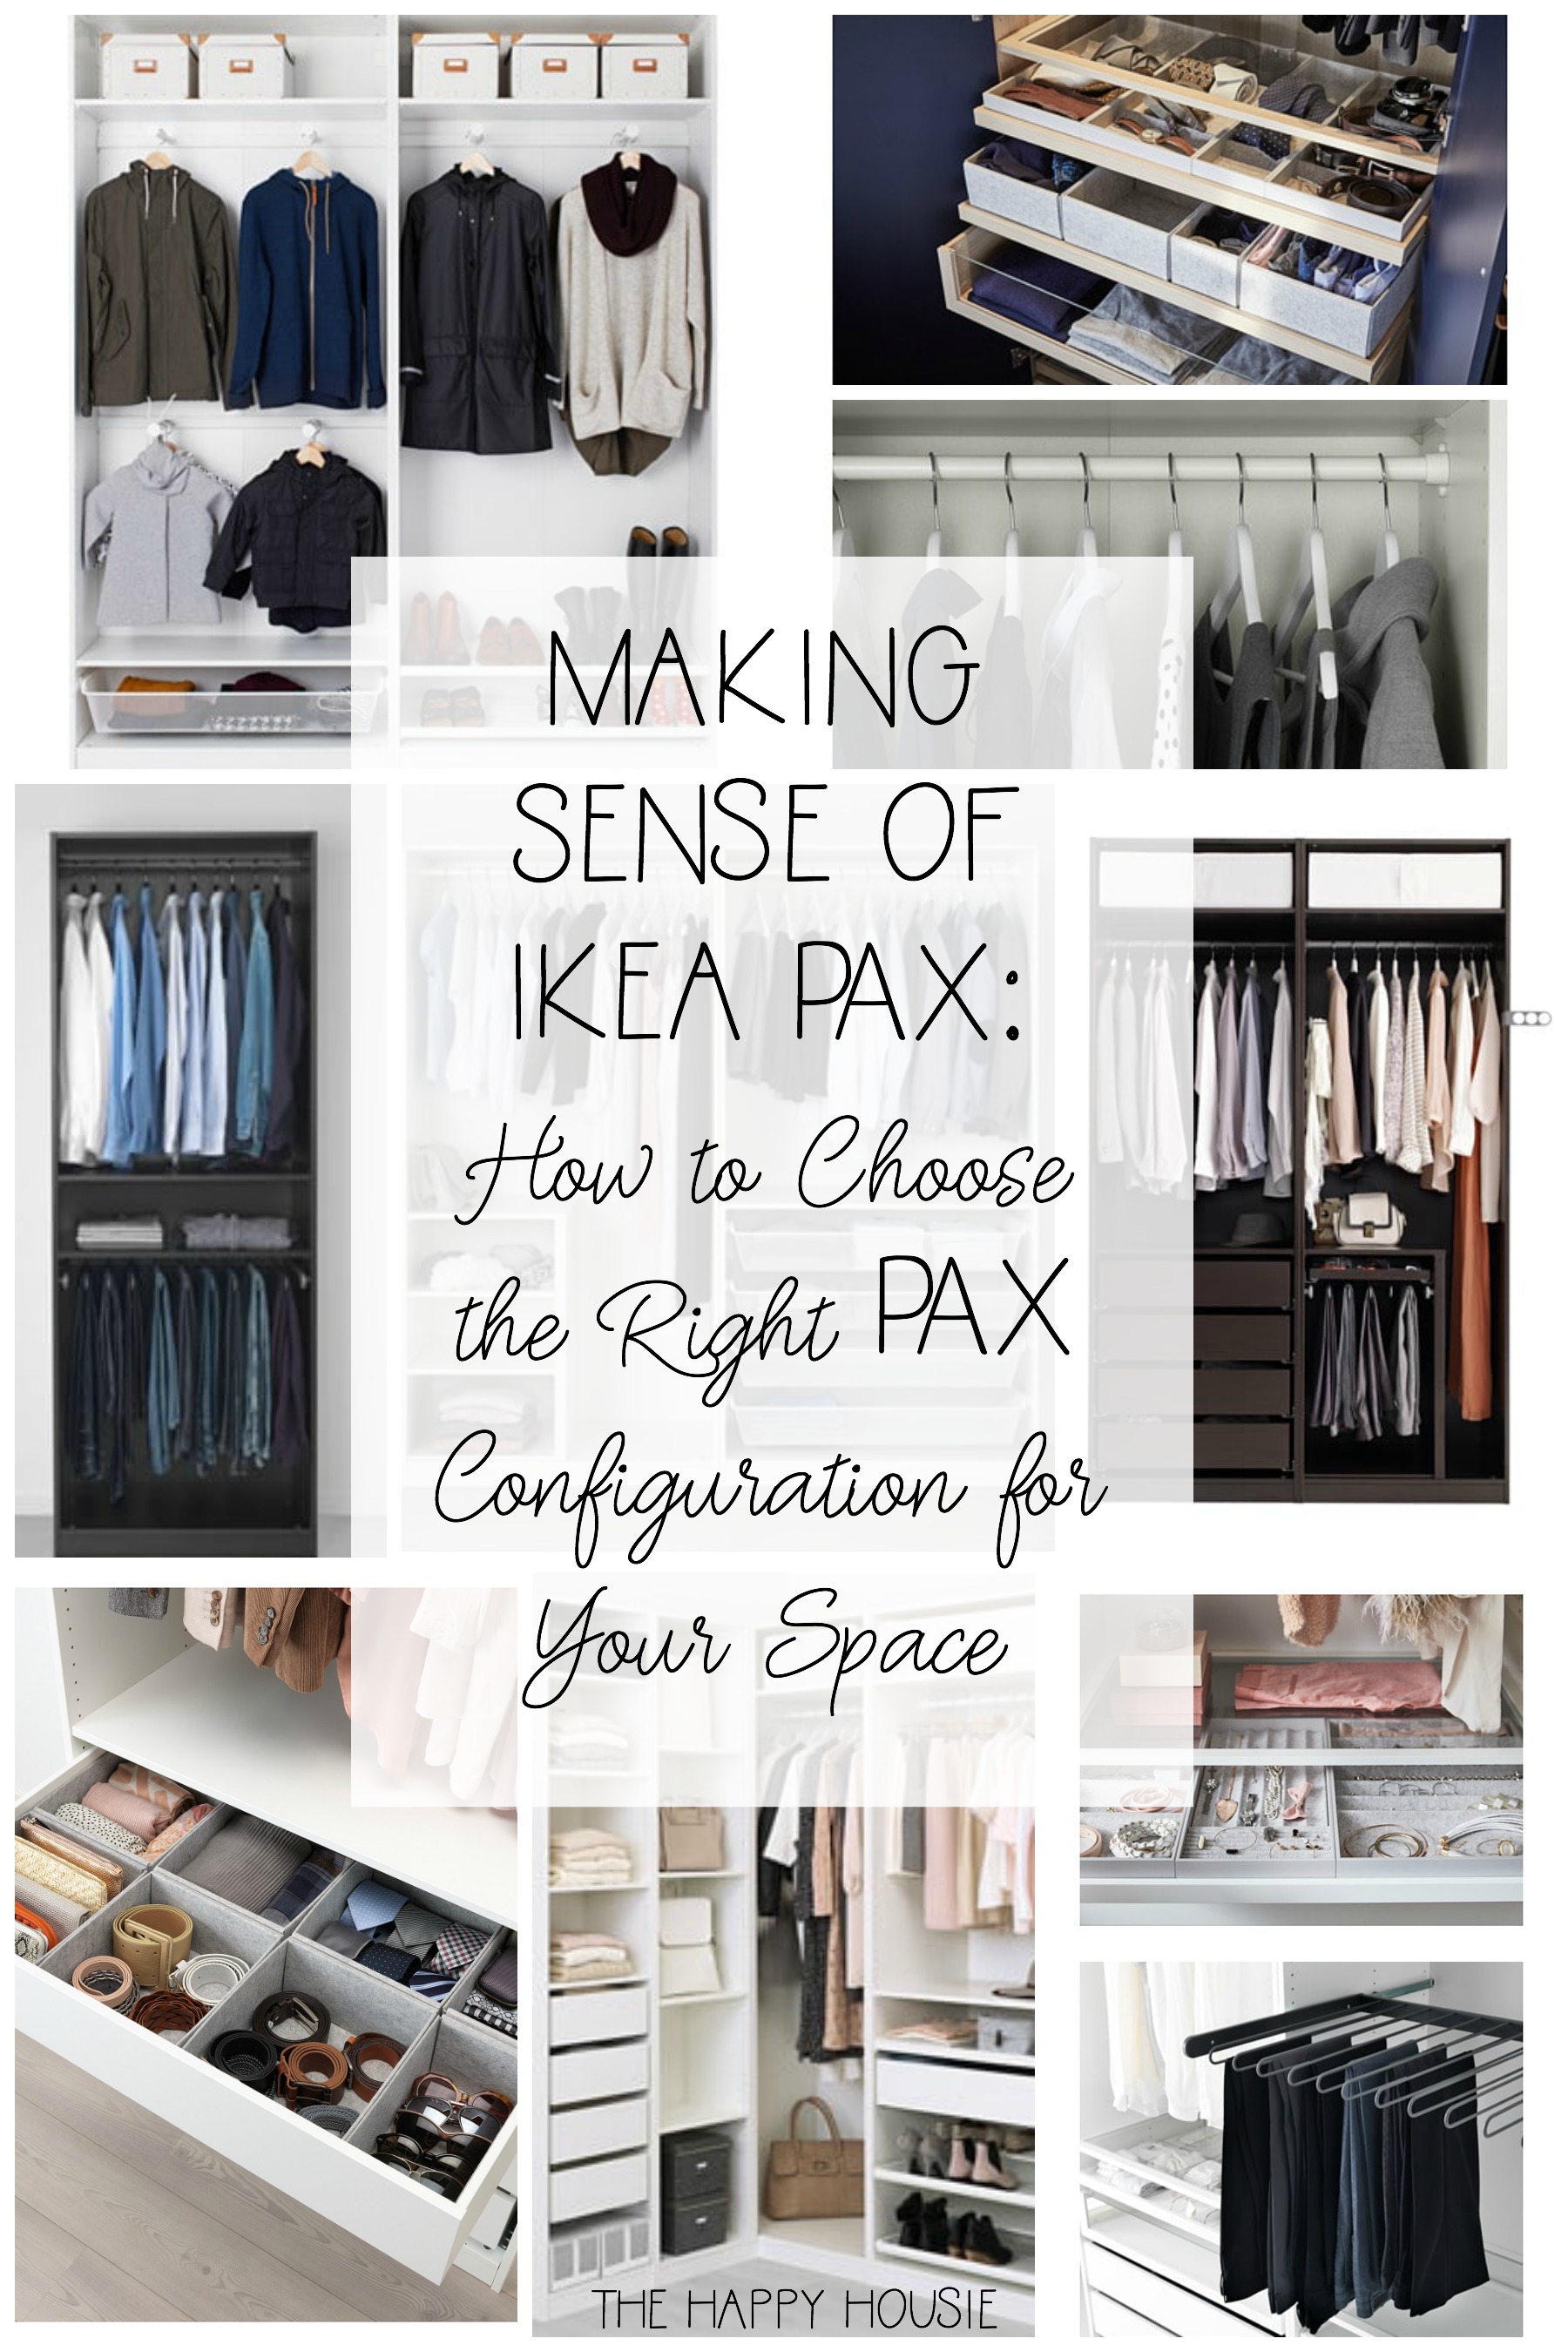
I think what I love most about the Ikea Pax wardrobe system is that by using it you can turn even a small closet space into a super-functional storage area. The number of organizers that are available for the Pax ensure that you have a space to store all kinds of clothing, shoes, and accessories, and you can completely customize your unit to suit your exact storage needs. Using an Ikea Pax wardrobe, you can revamp your bedroom storage situation at the same time as creating a more cohesive feeling and inviting space at the same time. If you are considering using the Pax system, I recommend you also read this post I wrote about how to choose the right Pax system configuration for your space.
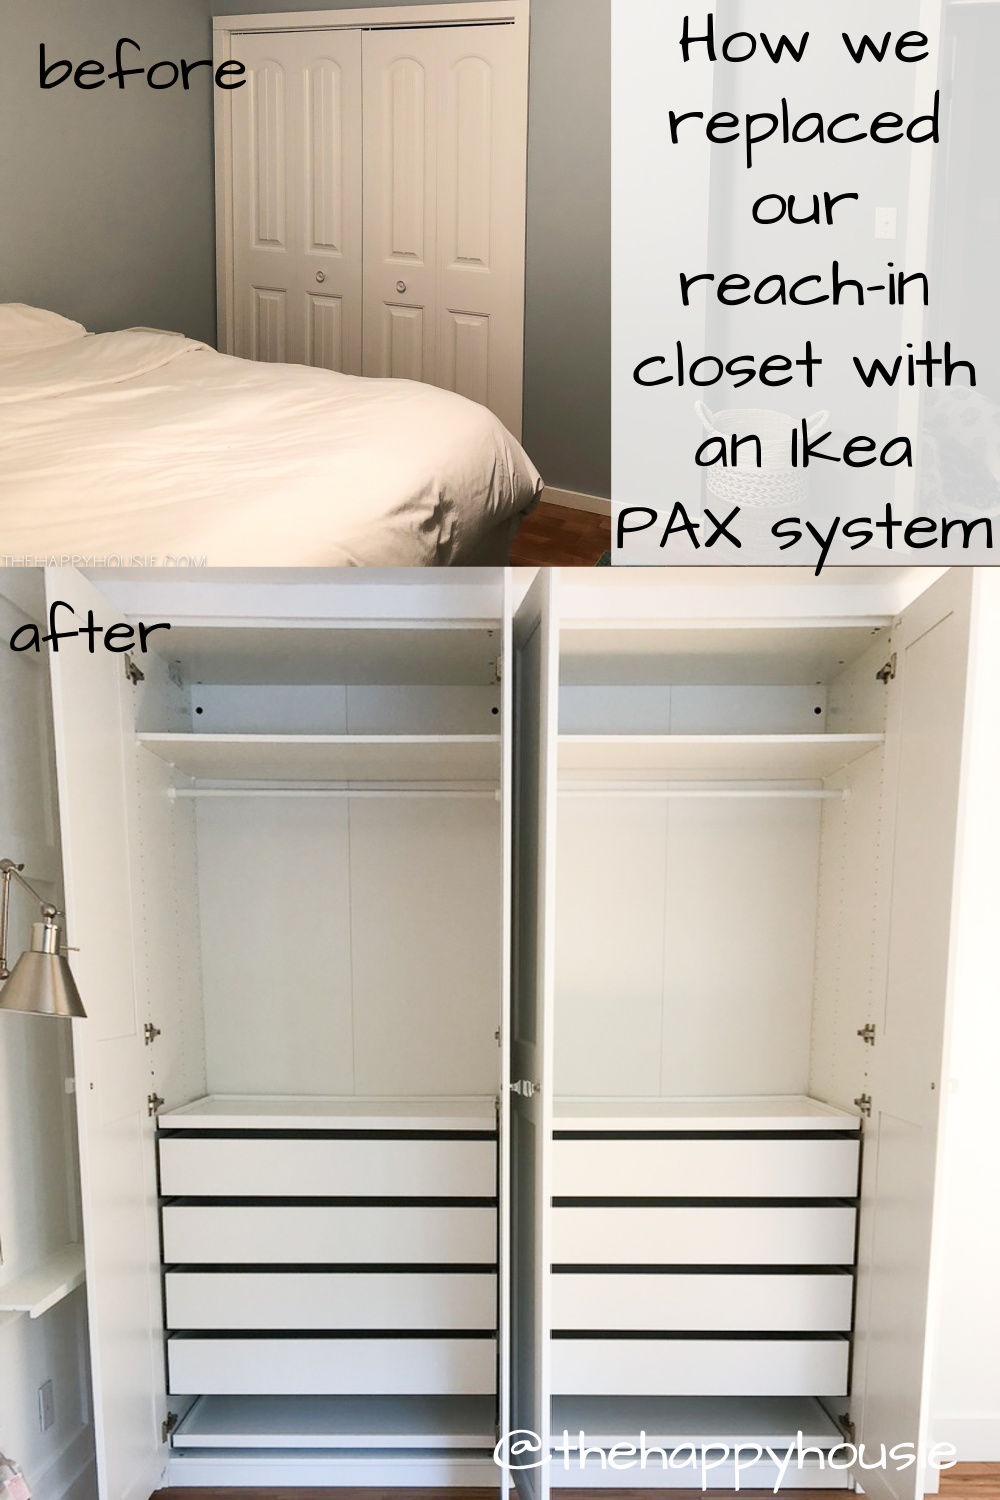
When we renovated our master bedroom at the forest house, we removed one of the two reach-in closets in the bedroom in order to create room in the adjoining (two piece) ensuite for a shower. Before the renovations we had one larger closet on the wall adjacent to the bed…
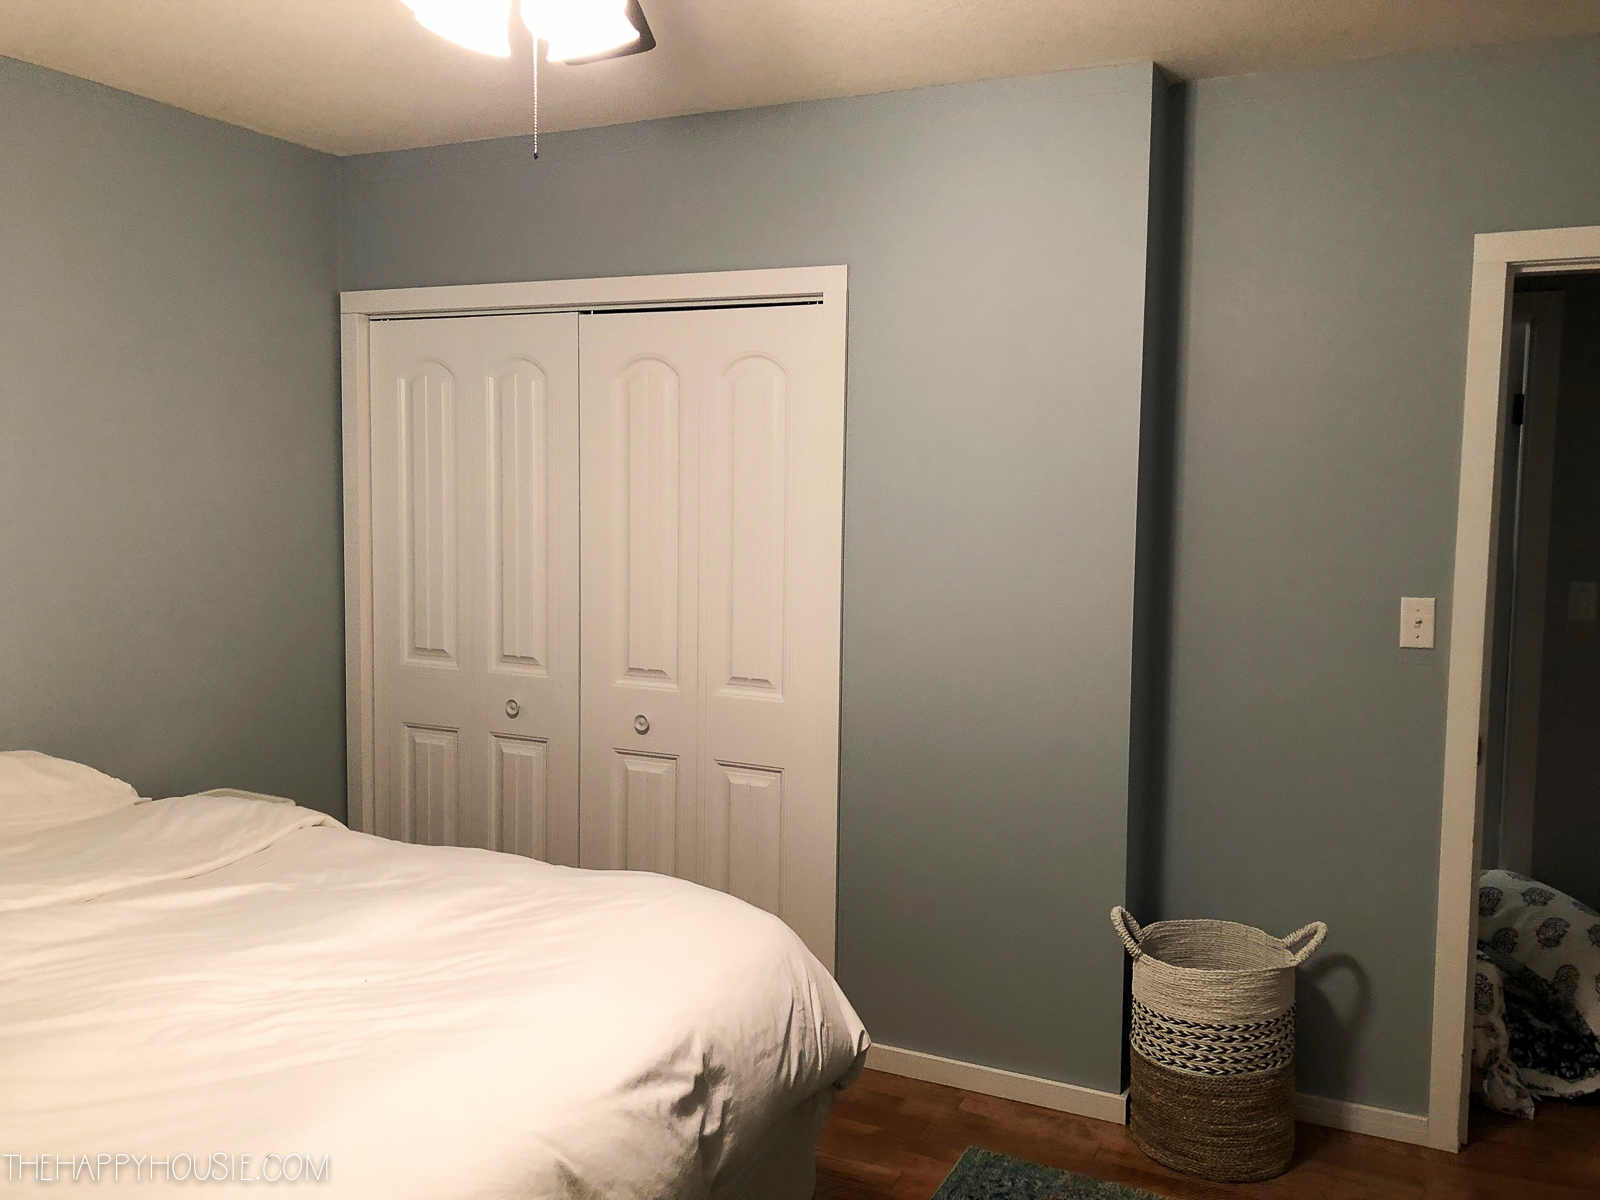
And another smaller closet on the wall directly opposite the bed…
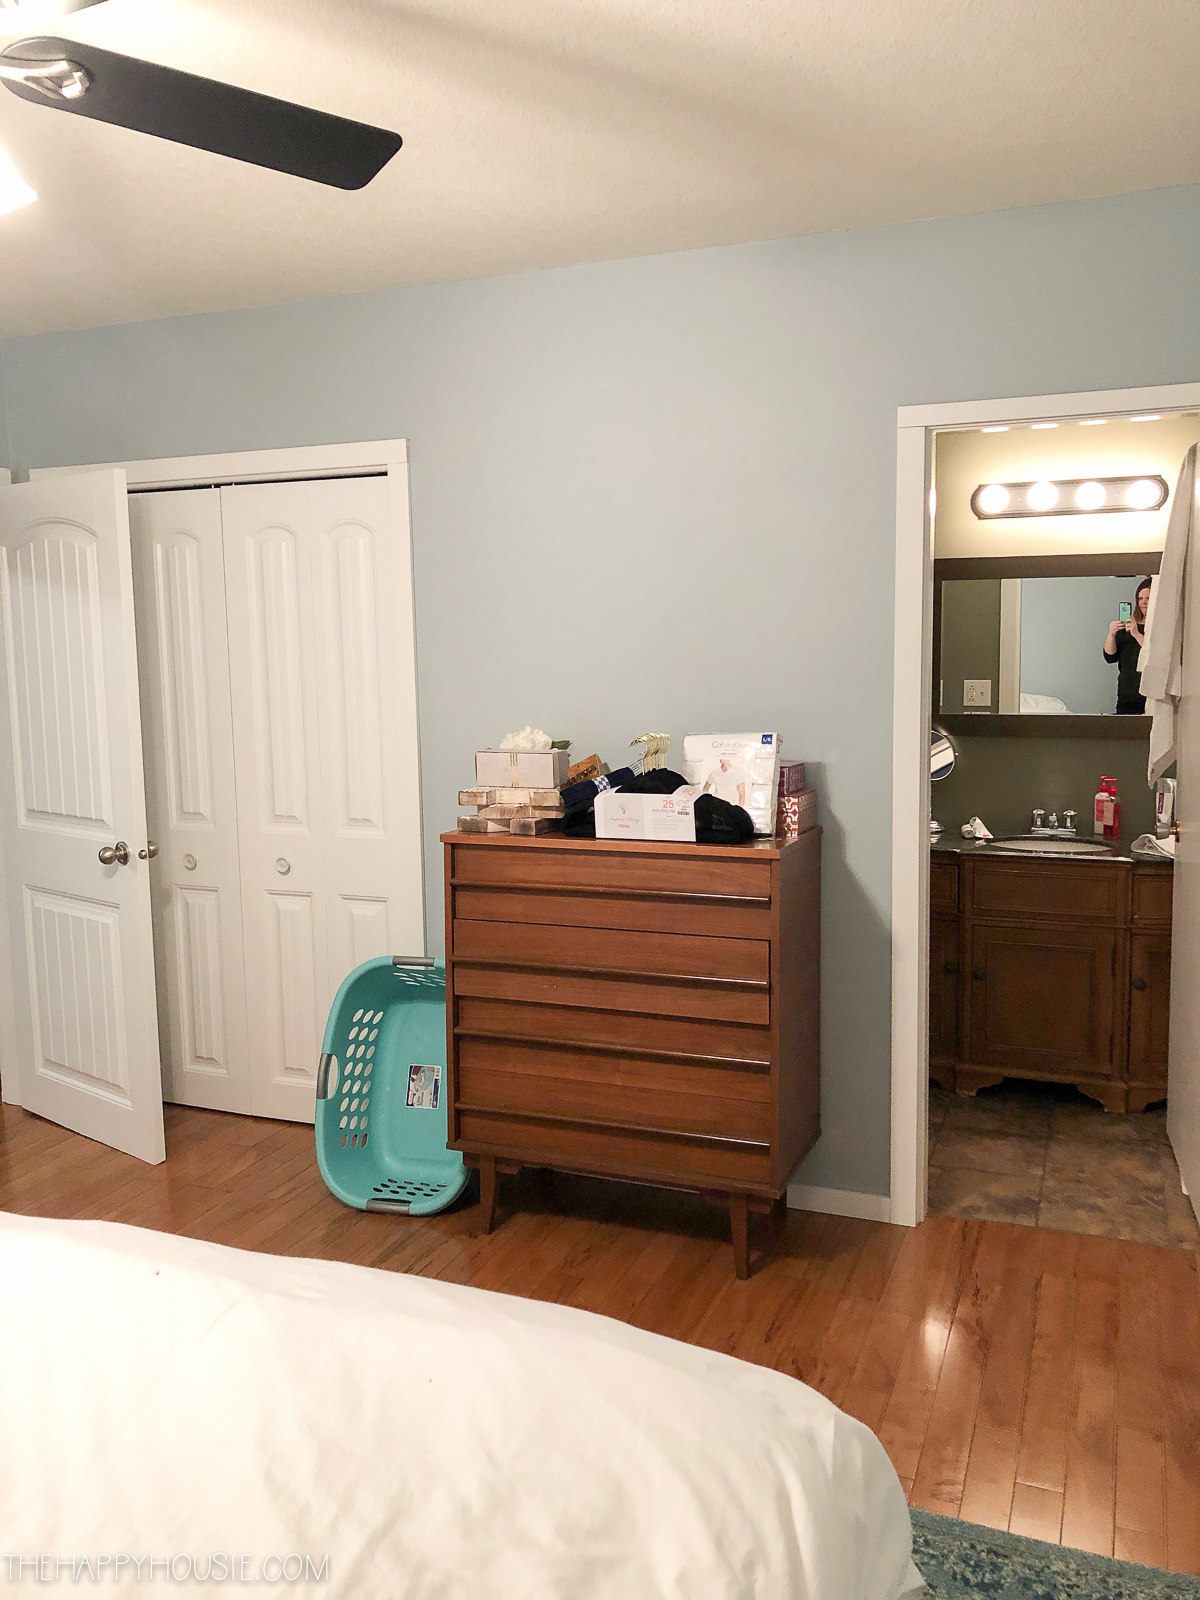
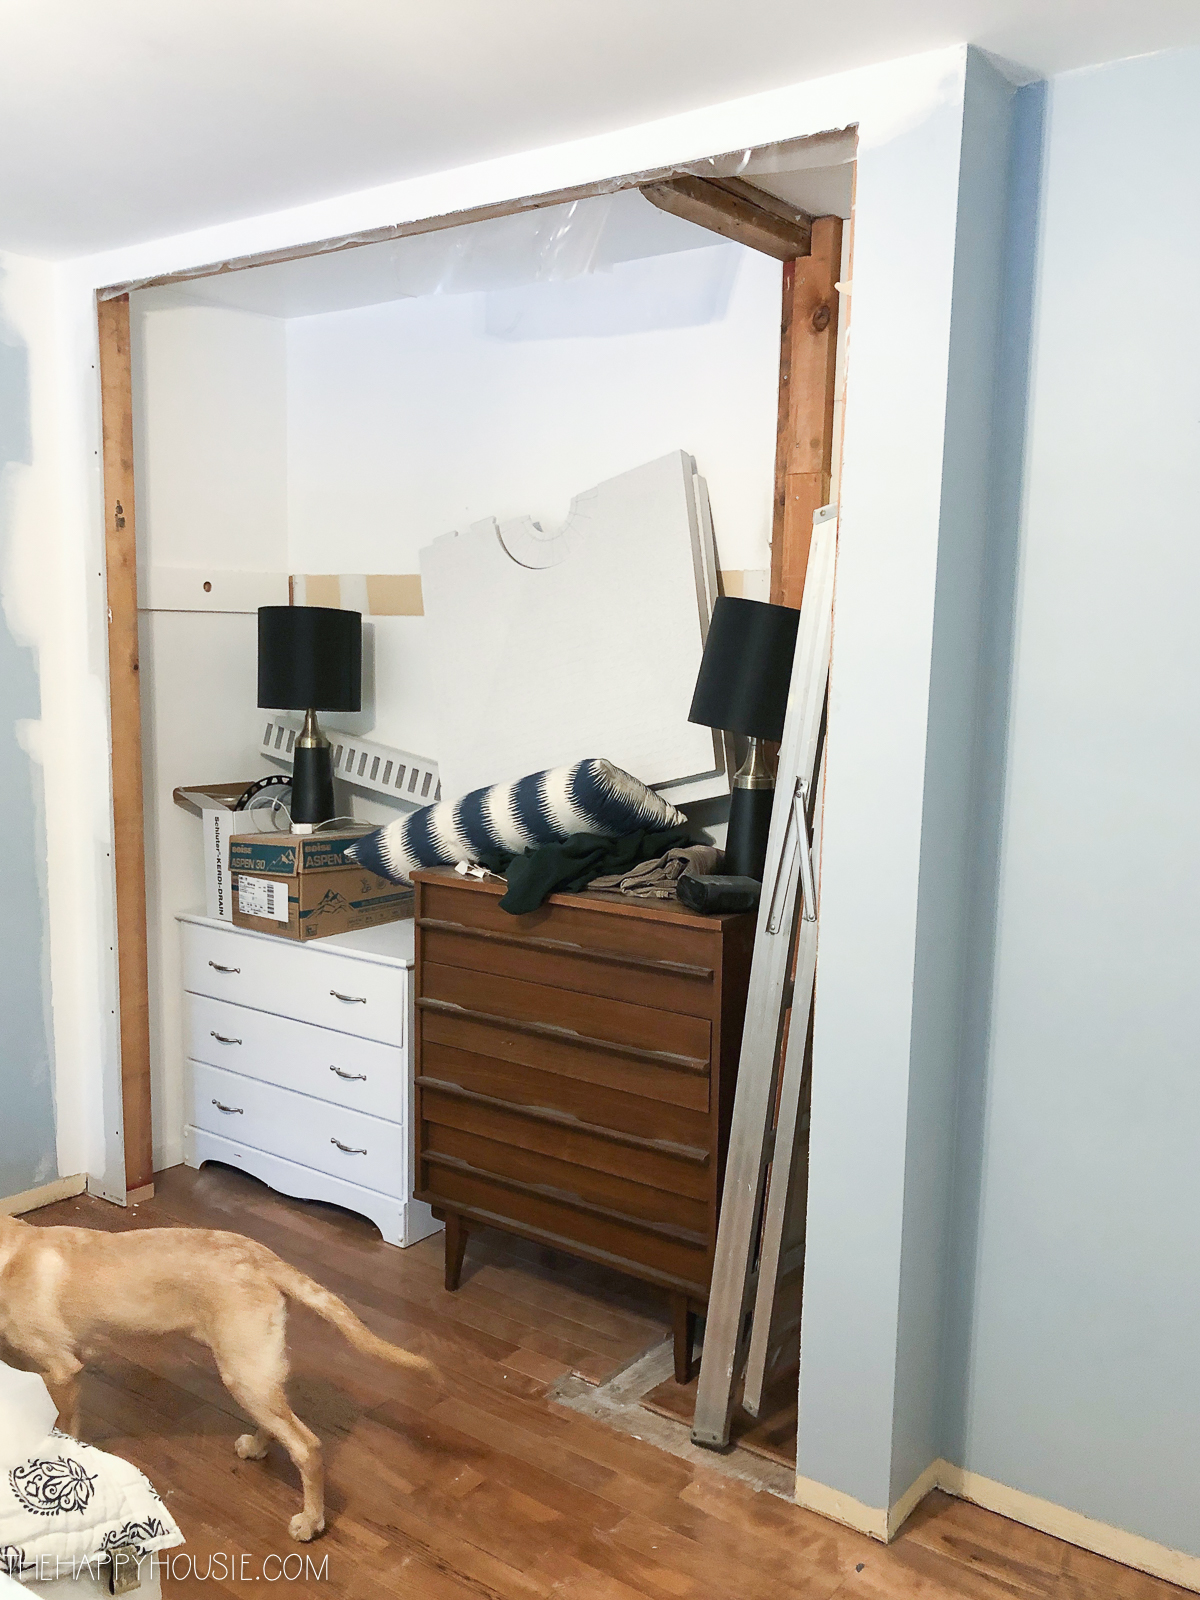
The closet below was removed in order to add the square footage to the adjoining ensuite….

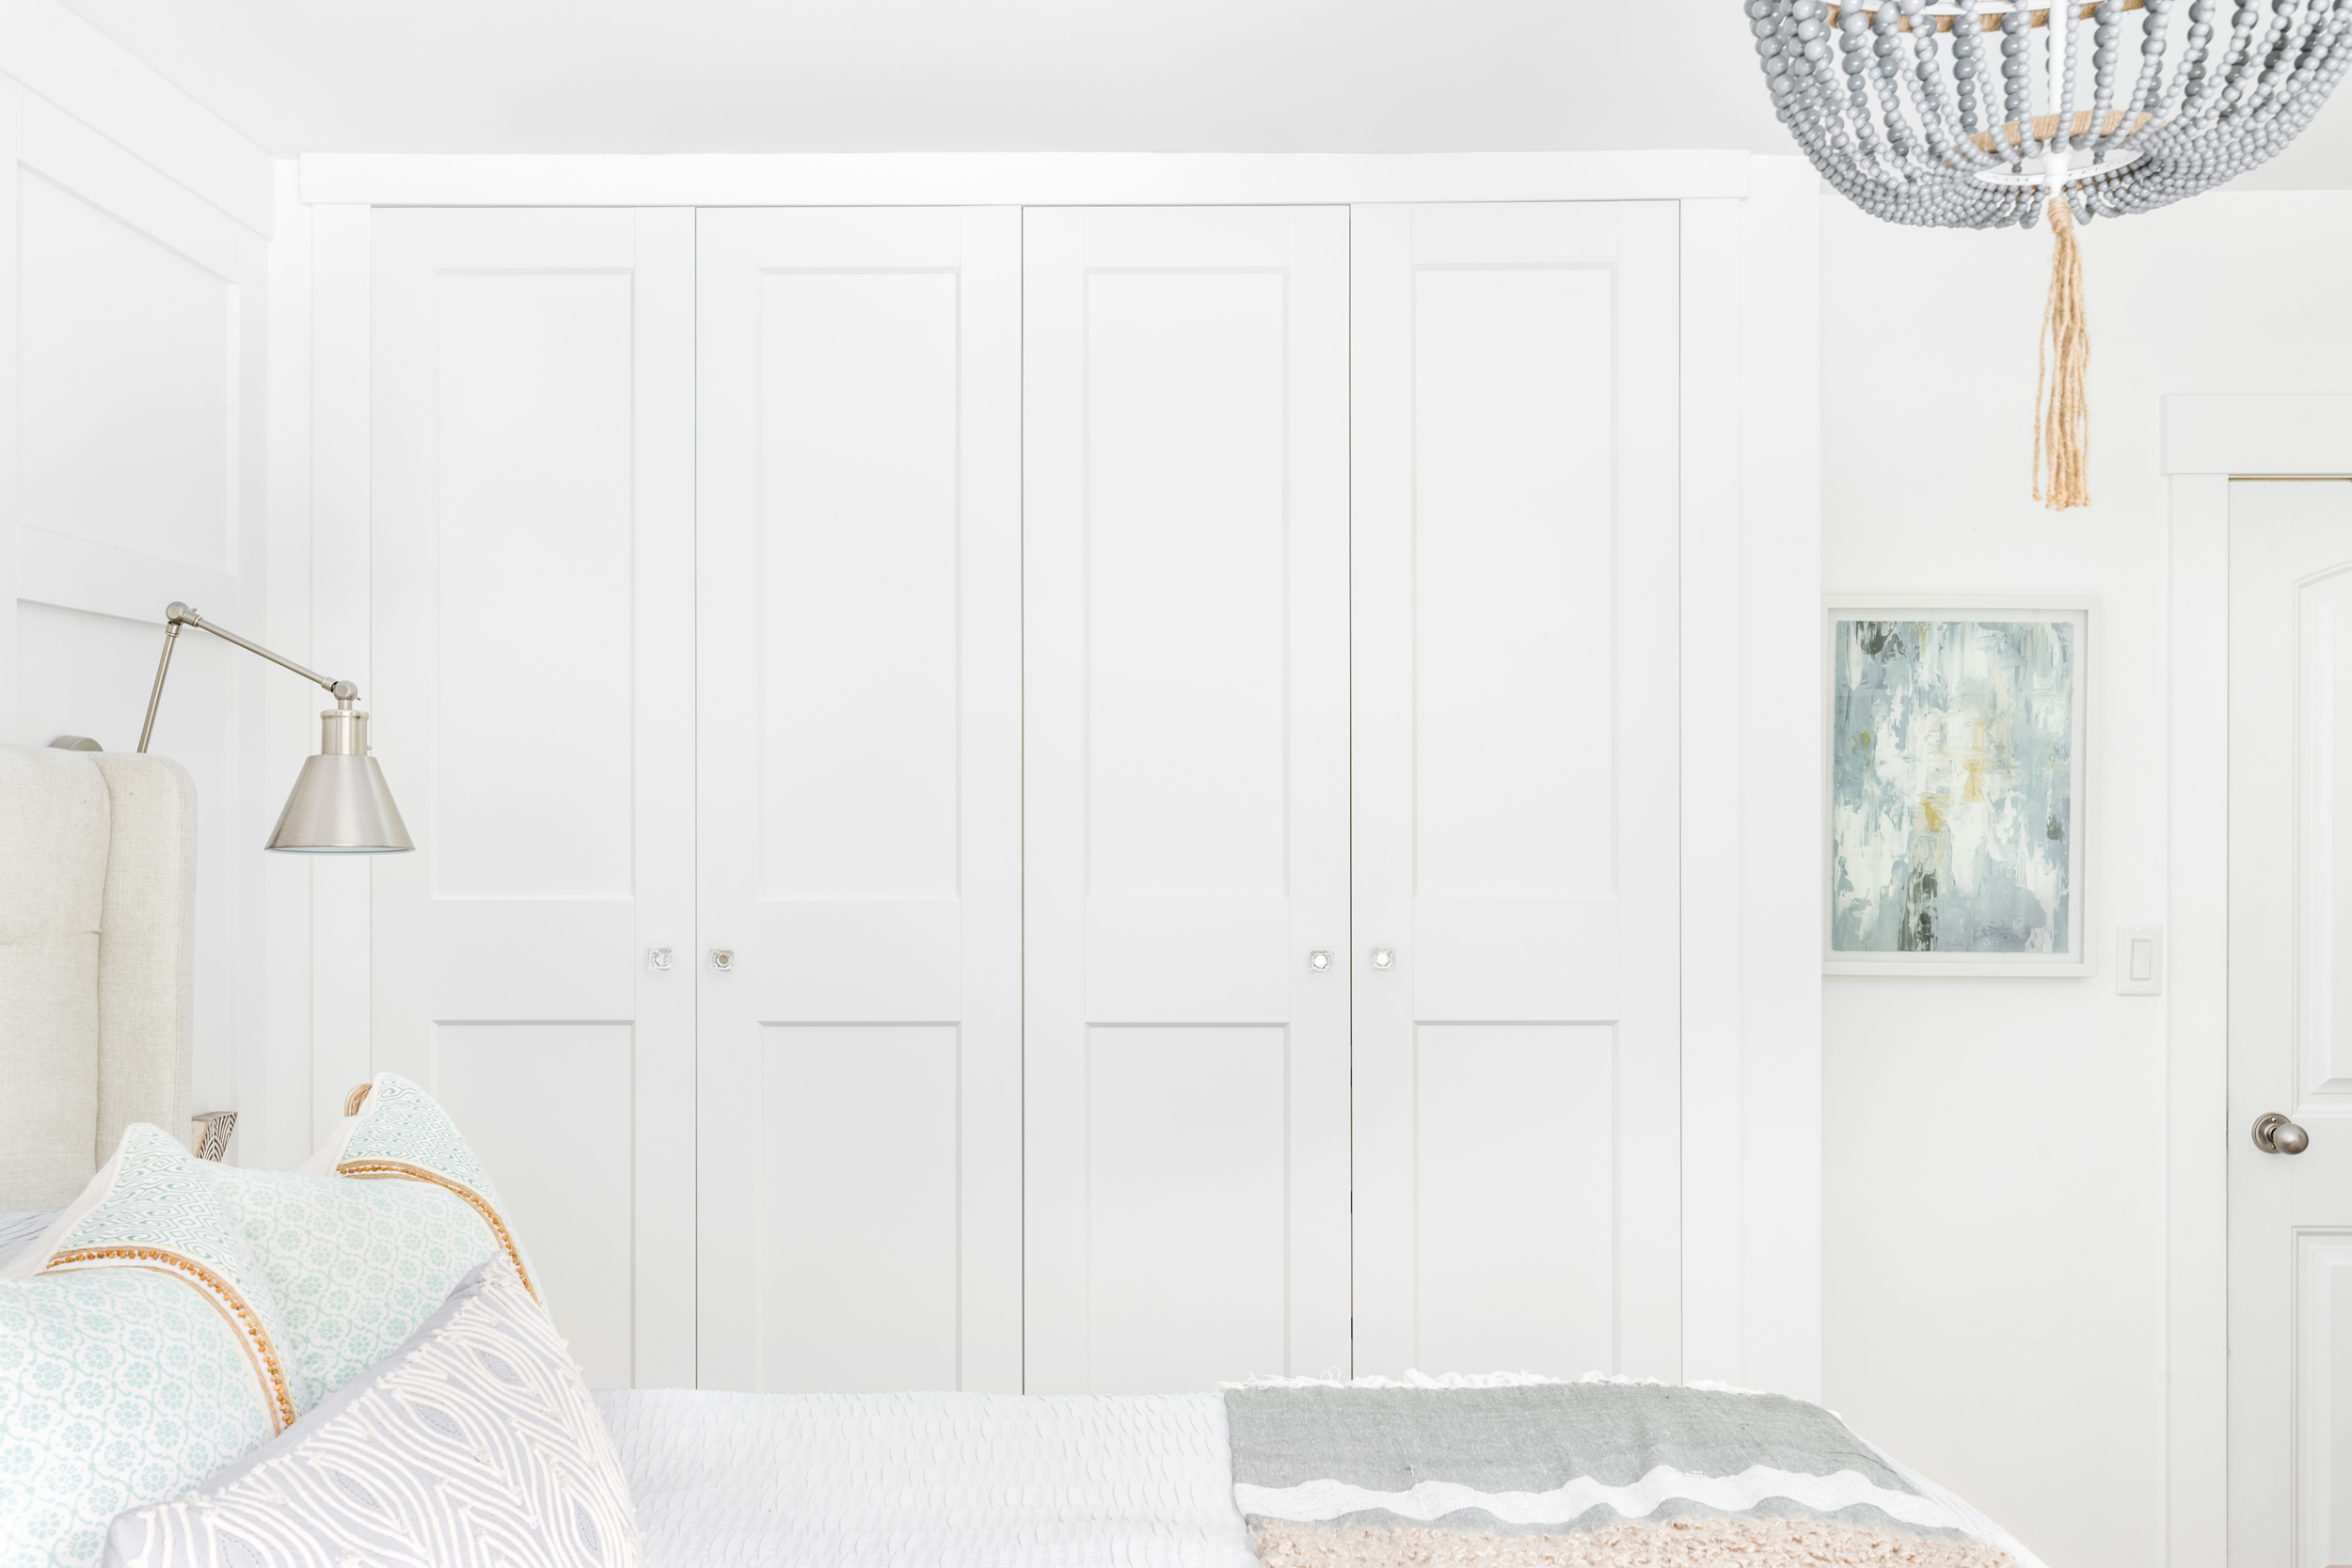
We knew that we wanted to enlarge the space where the larger closet was in order to accommodate two 40″ Ikea Pax system units. We opened the wall up to close to ceiling height in order to fit the full height 90″ Pax wardrobes. We also were able to borrow a bit of space from the hall linen closet to give us the full 80″. Note: truth be told, Ikea’s Pax system measurements are slightly below 40″ and add up to slightly less than 80″ but I use these rounded numbers for ease of understanding. Ikea Pax system wardrobe sections come in 20″, 30″, and 40″ widths with 15″ or 23″ depths (read this post here for more on choosing the right Pax system configuration for your space).
You can see in the image below where the framing was for the linen closet (the wood framing to the far left side of the closet).
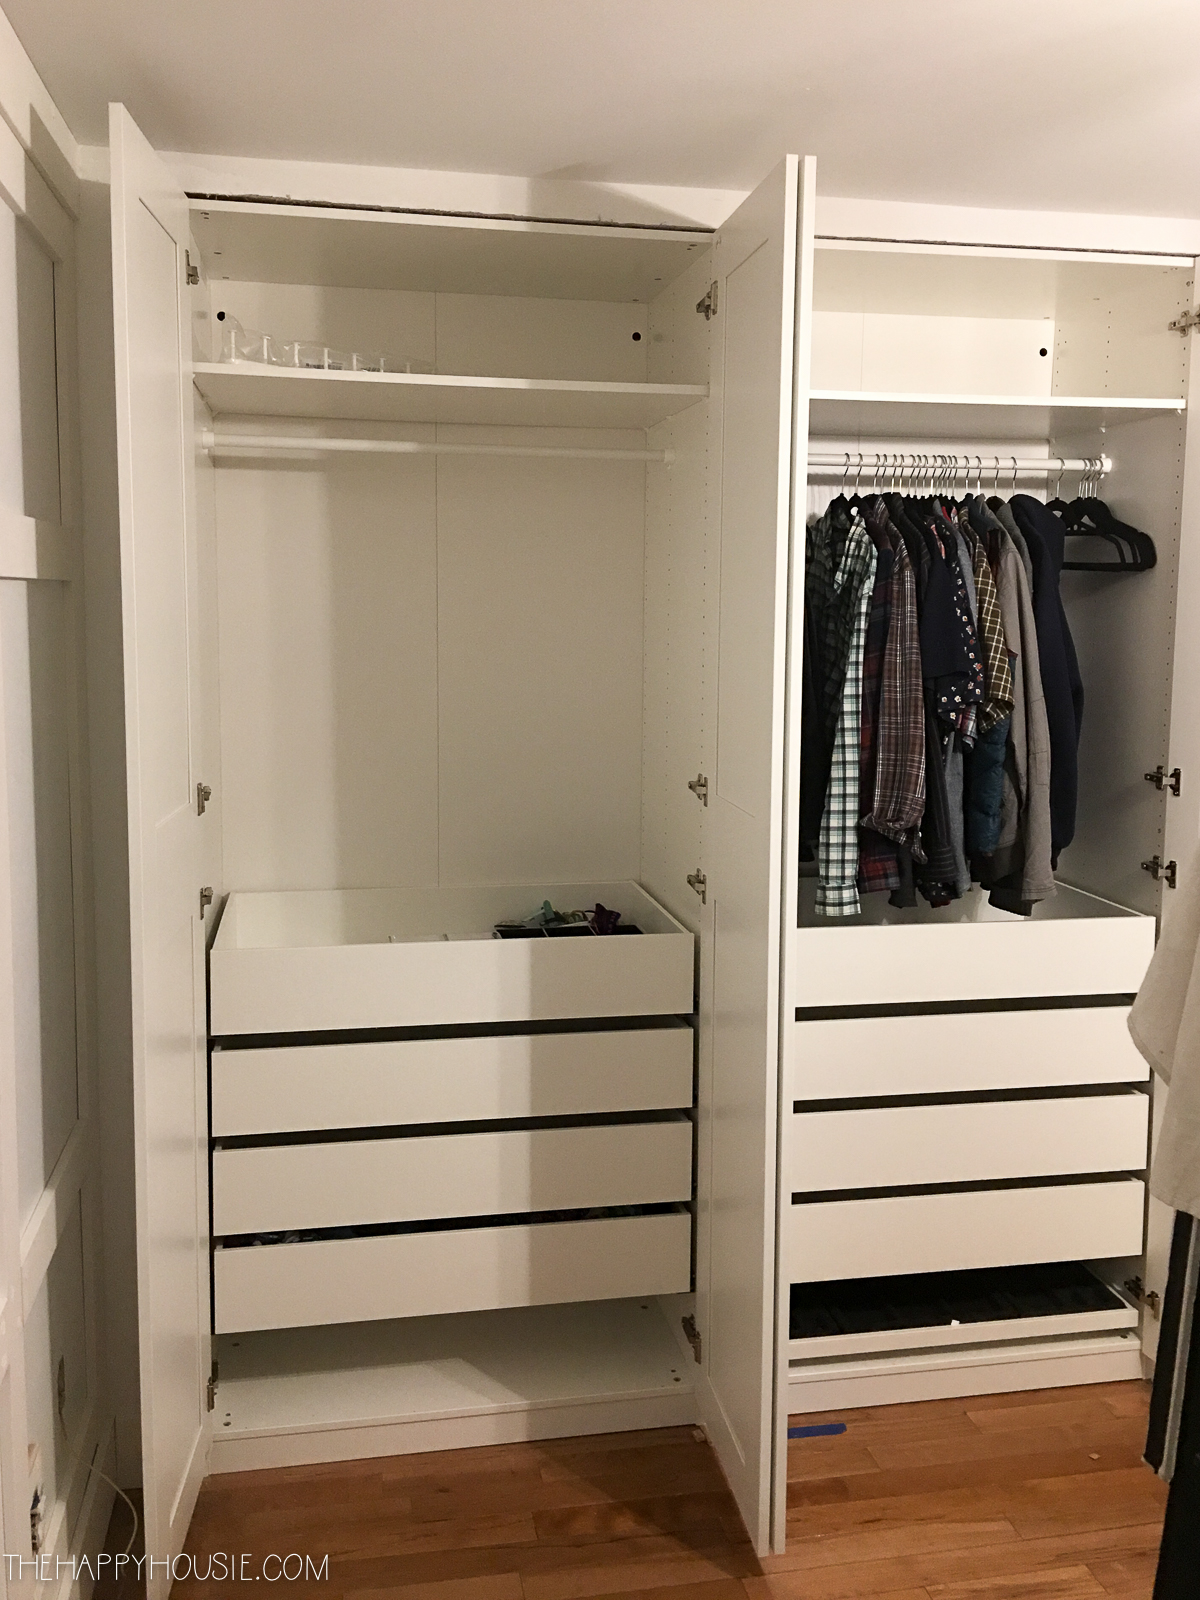
The Pax units were quite easy to install from this point forward. We simply build the wardrobe units according to the instructions, attaching the backs before they were slid into place in our framed our hole in the wall. We then installed the drawers and doors, as per the instructions that the units come with.
The final step was to use trim moulding, much the same as we used elsewhere in the house, and nail (using a nail gun) it along the top and sides of the unit to give the whole thing a finished appearance. In the image below, you can see we’ve added the trim for the sides of the wardrobe but not yet the top…
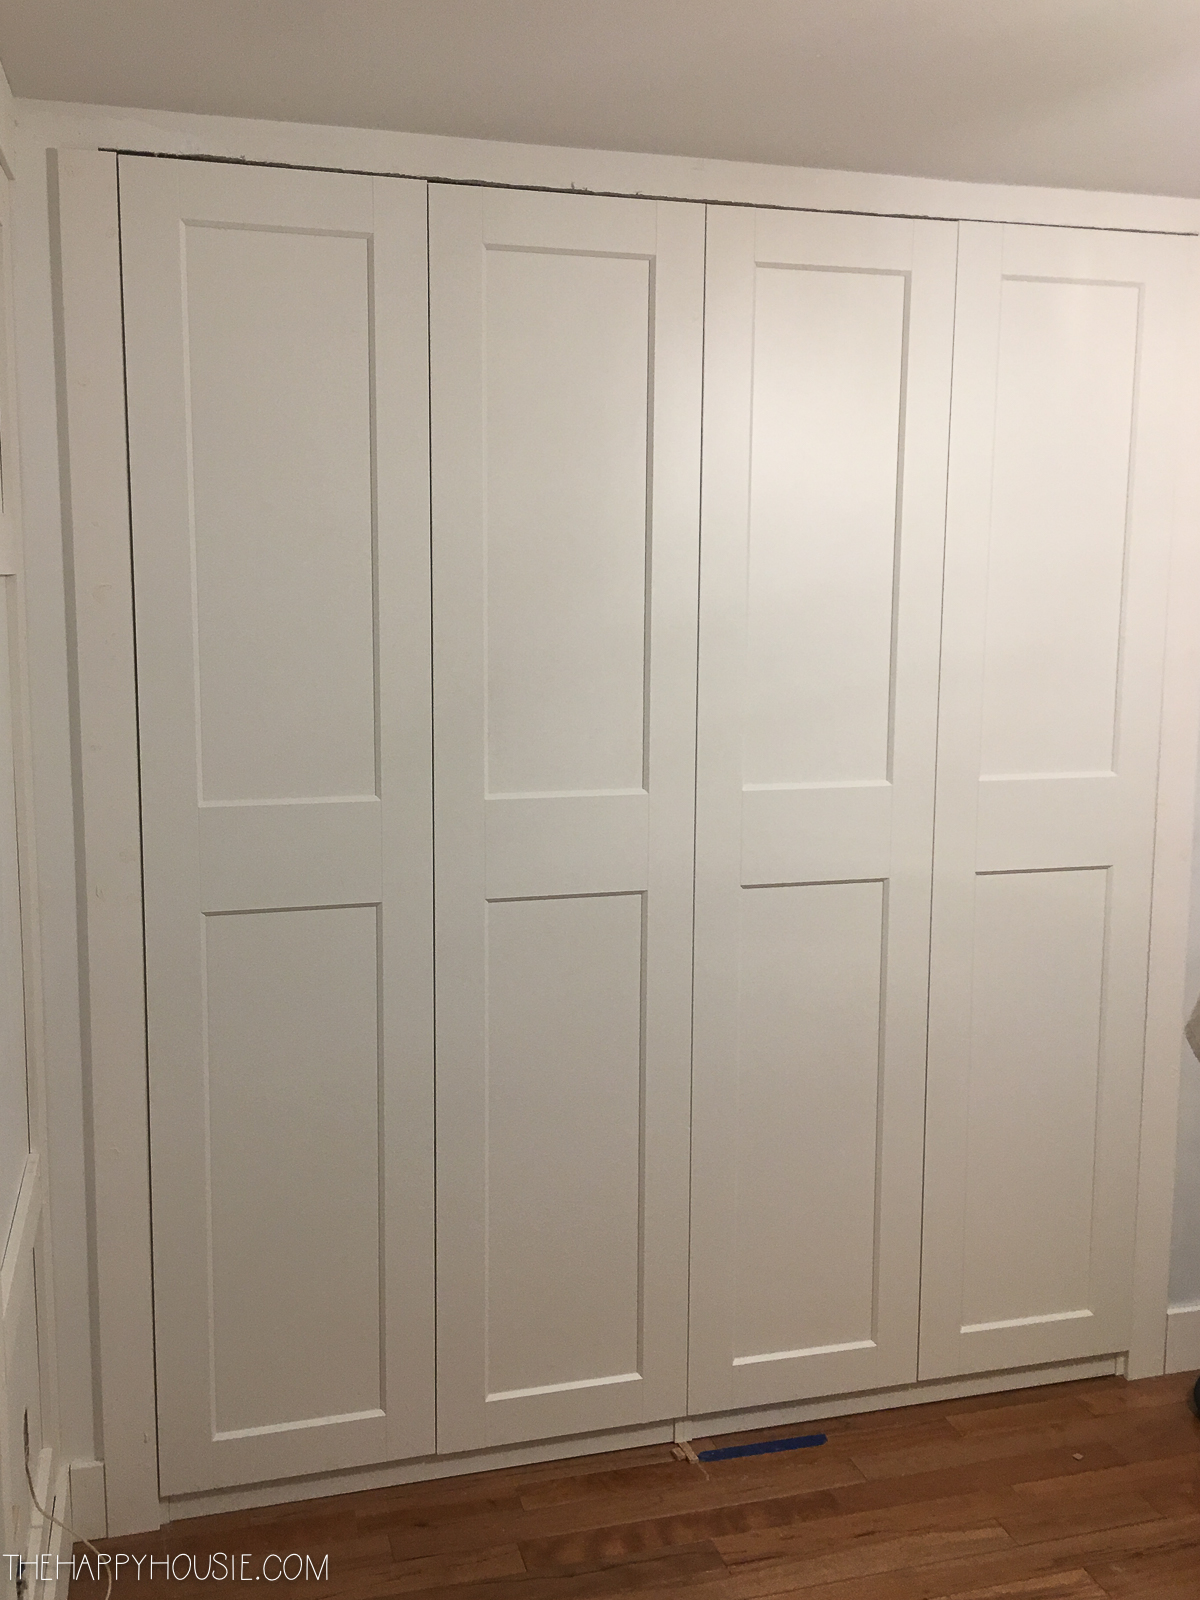
And here, with all of the trim boards attached…
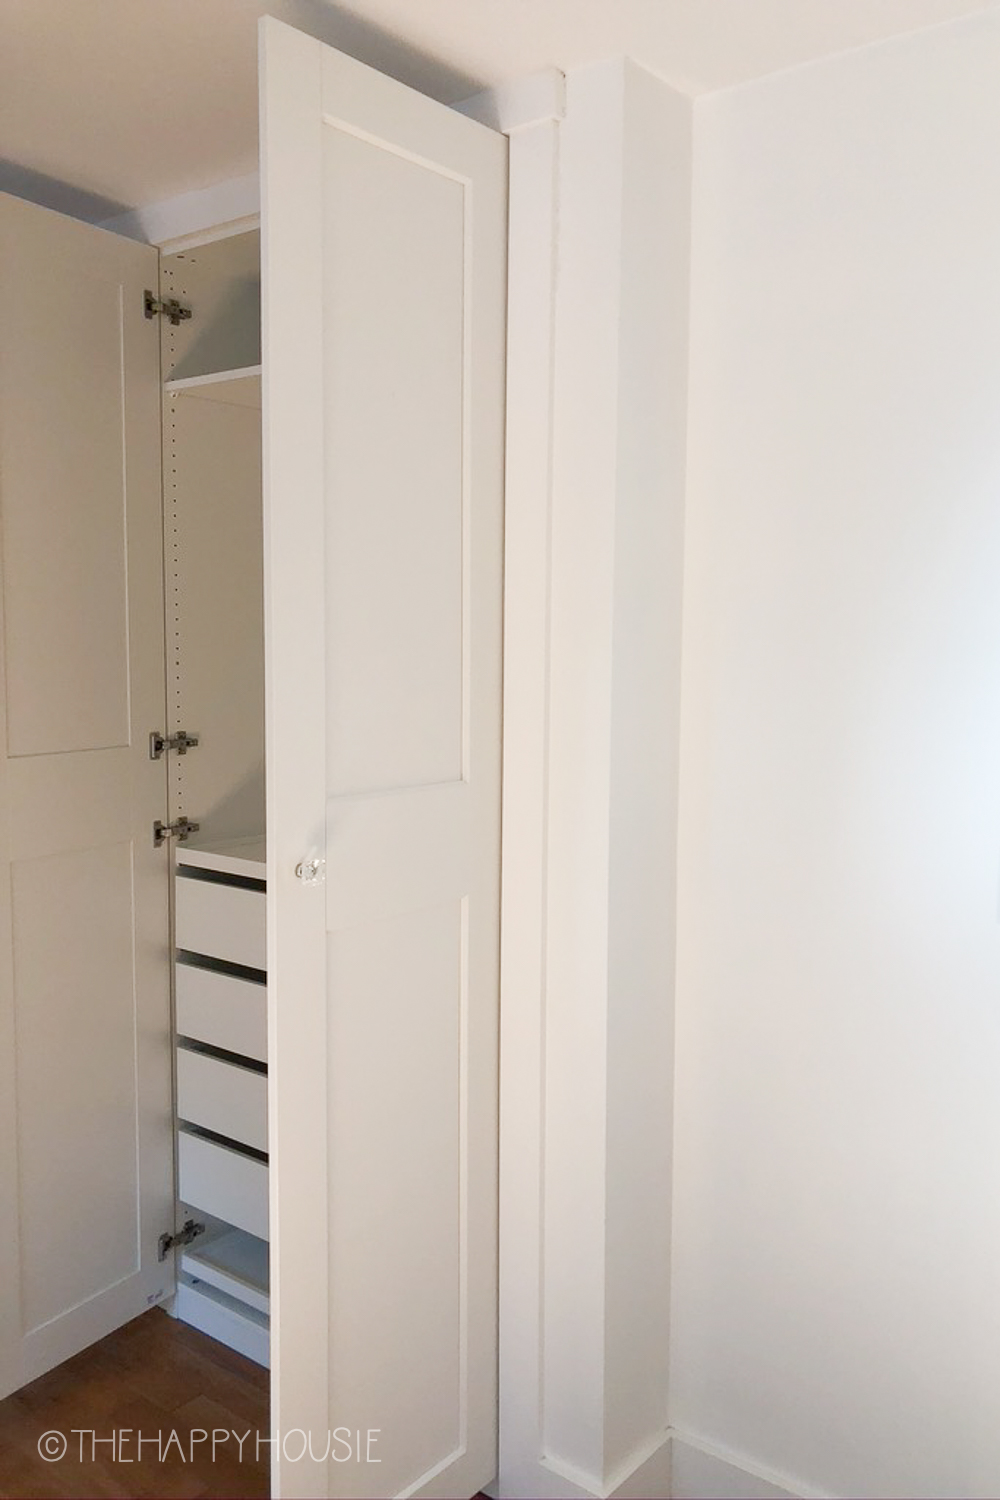
And the trim boards from the side…
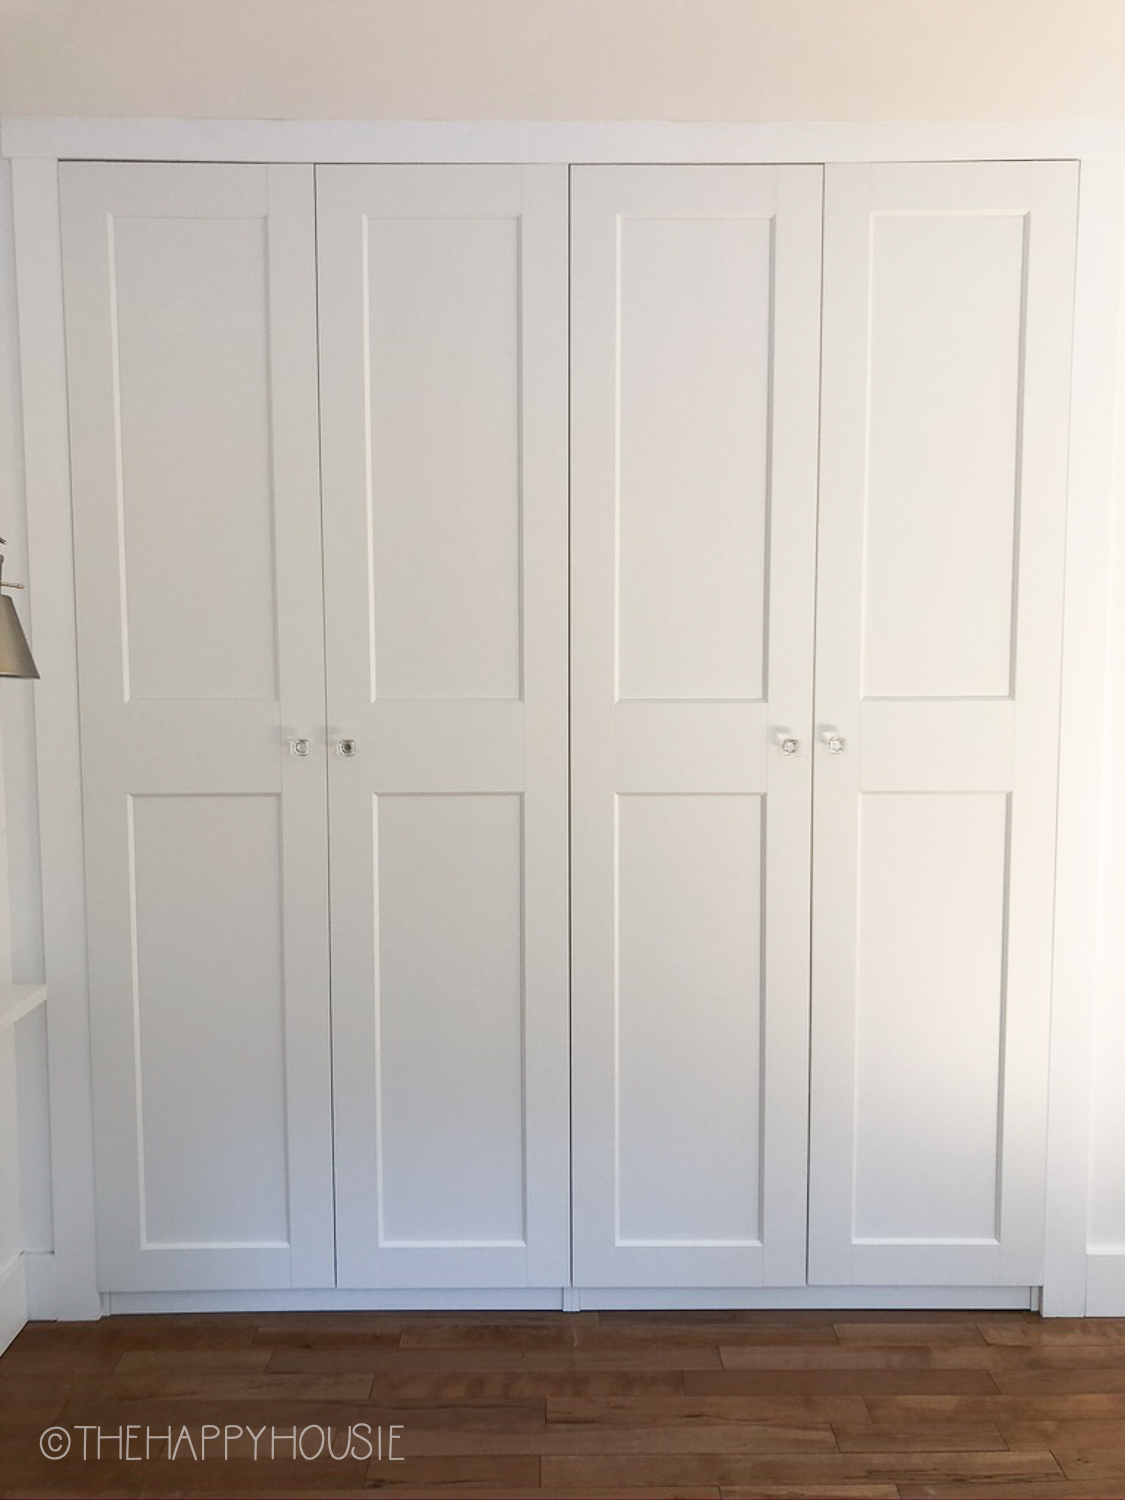
We painted the trim boards out in the same white as the walls and trim (see our paint colours for this house here).
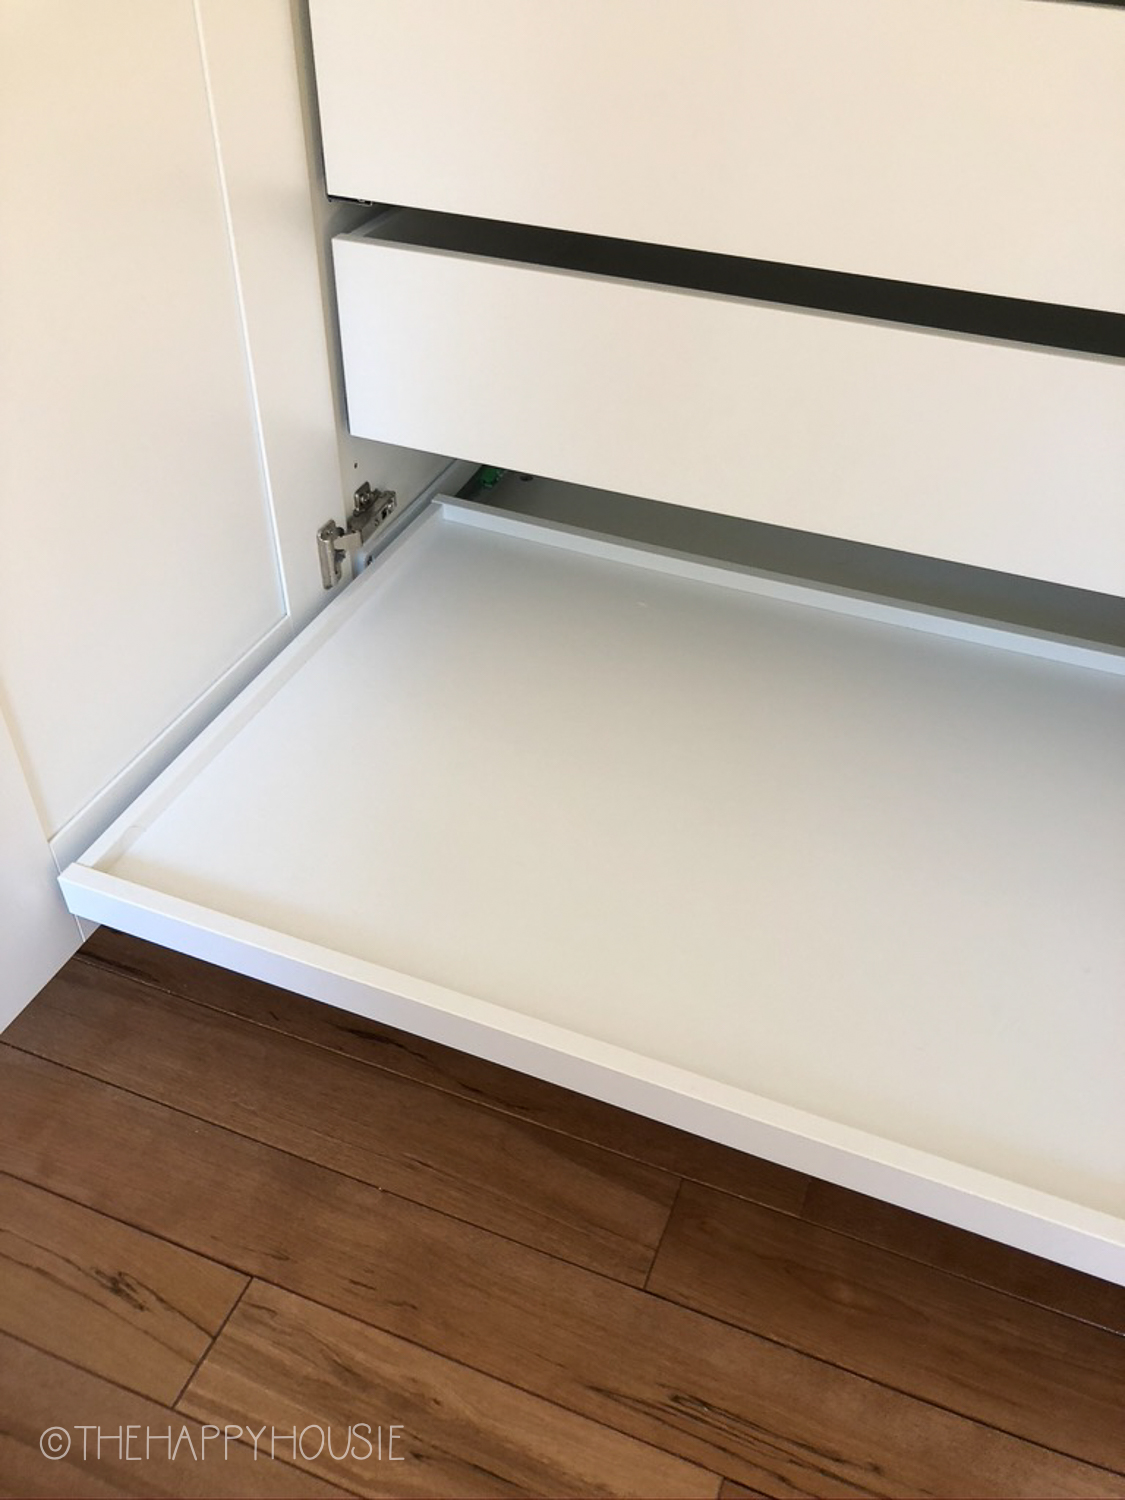
I love the Pax system SO much and it was amazing how much storage it added to our closet in this home. We each had four large drawers, as well as a rod and slide-out trays. When it was all finished, the interior of our Pax wardrobes looked like this…
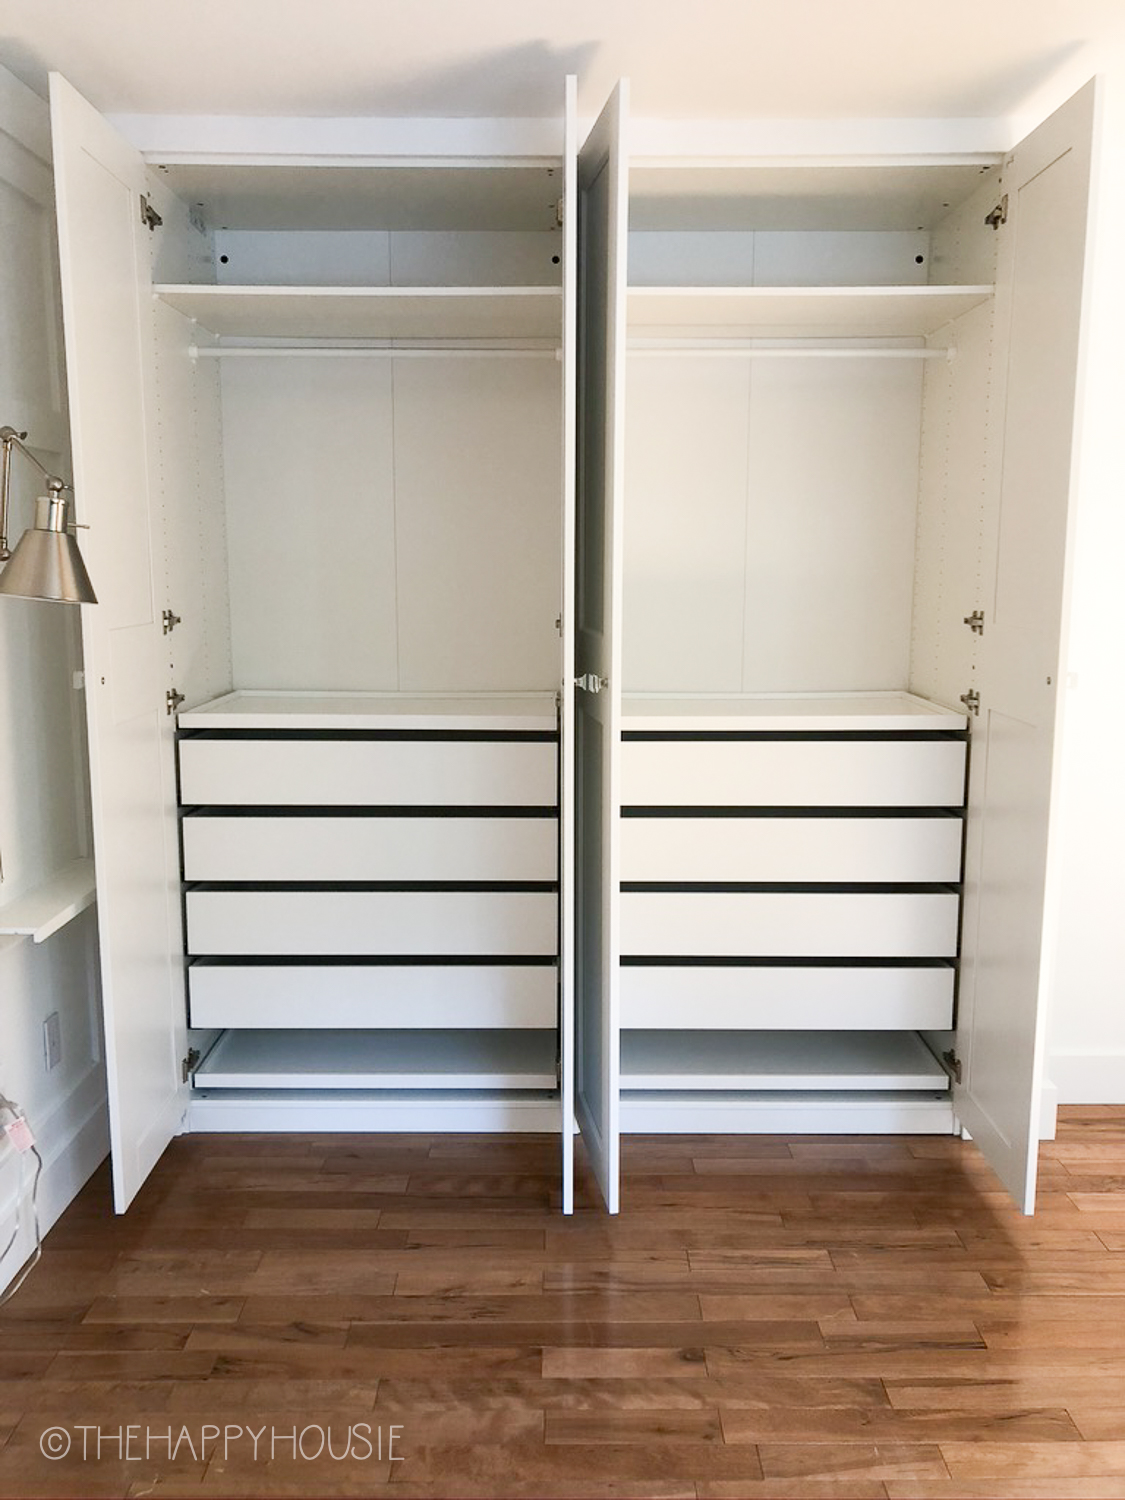
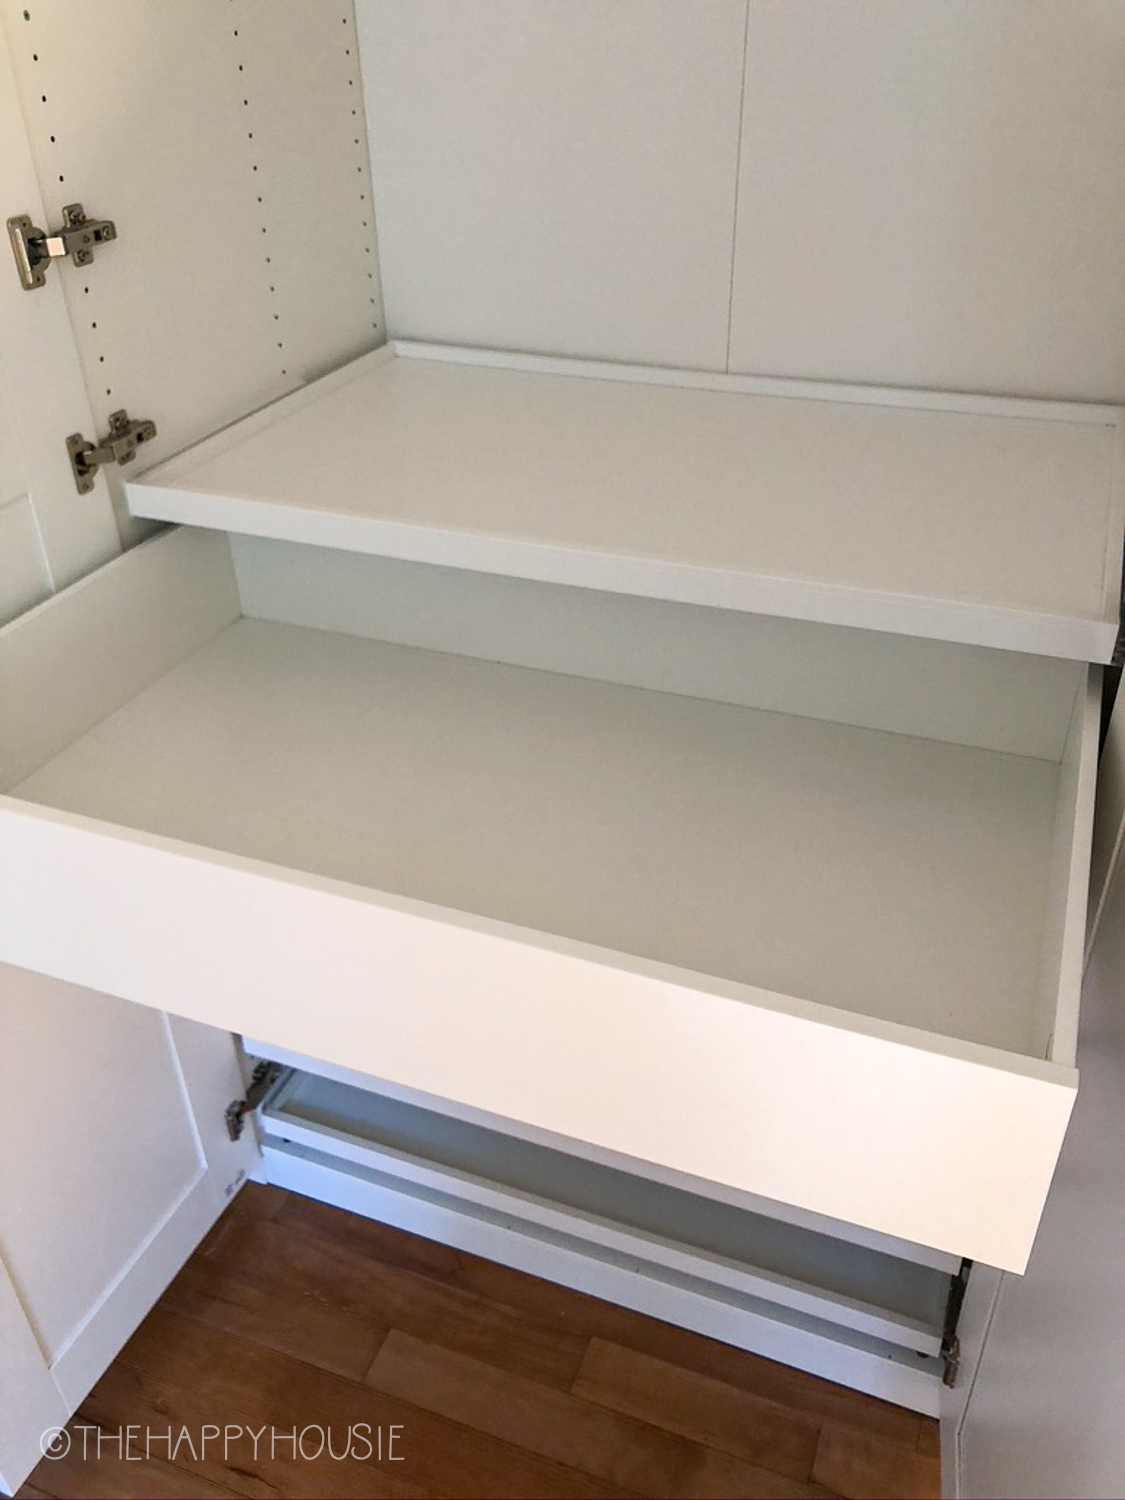
One thing to note about using the hinged doors for the Ikea Pax system is that you can’t place a drawer right at the bottom of the unit because that space is needed for the hinge of the door. Instead, we used a pull-out tray on the bottom of the unit and stored things in smaller boxes and organizers on that tray. It could also be used for shoes.
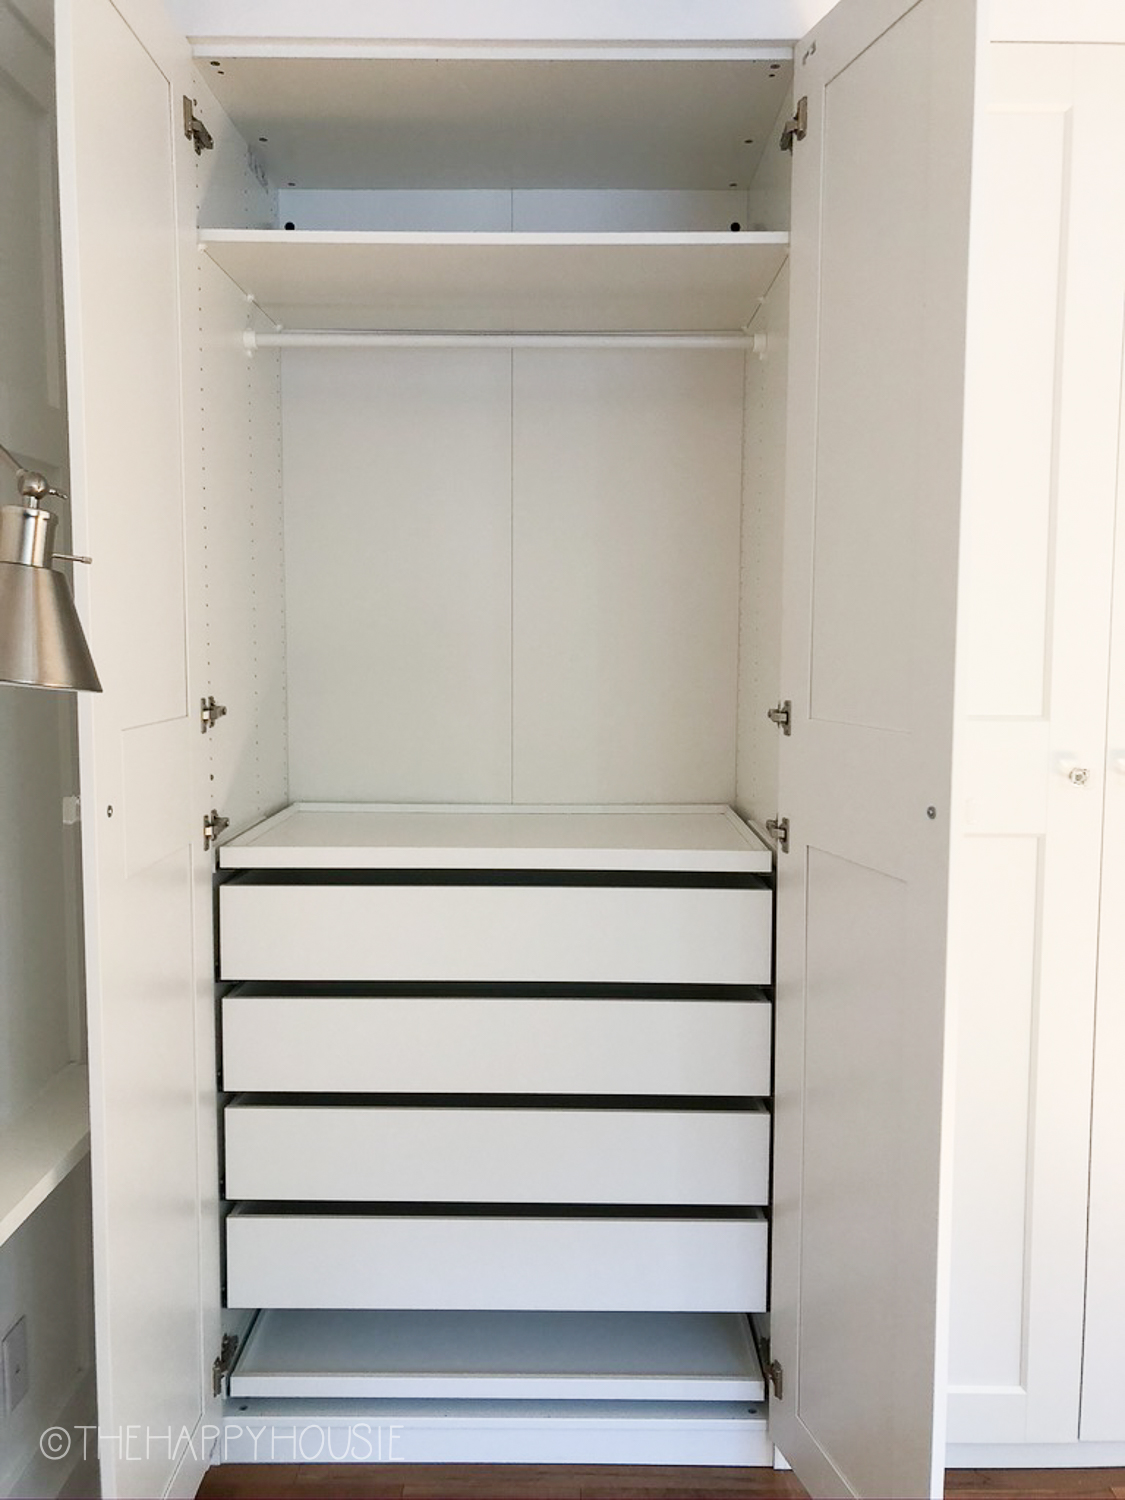
We each had our own side of the closet (one 40″ Pax section each) as well as half of a Hemnes dresser and found the storage was adequate for our needs. Of course, it depends on how much hanging space you need. An Ikea Pax closet can also be configured with double hanging rods, or even with a half-divider so that you have some drawers and some long hanging space (see this post here on choosing the right configuration for your space).
Overall, my best tip if you want to tackle this yourself is make sure that you measure correctly and that you are comfortable with some level of DIY – especially for installing the trim boards around the sides and top. We cut back the drywall and framed out our closet space to perfectly fit the Pax wardrobes we had ordered, so it was easy to attach the trim afterwards to the 2×4 framing either side and above the installed Pax units. We have done the baseboards and trim ourselves in several of our houses now, so we were comfortable with this part of the job. It is pretty straight forward if you have done that kind of trim work before.
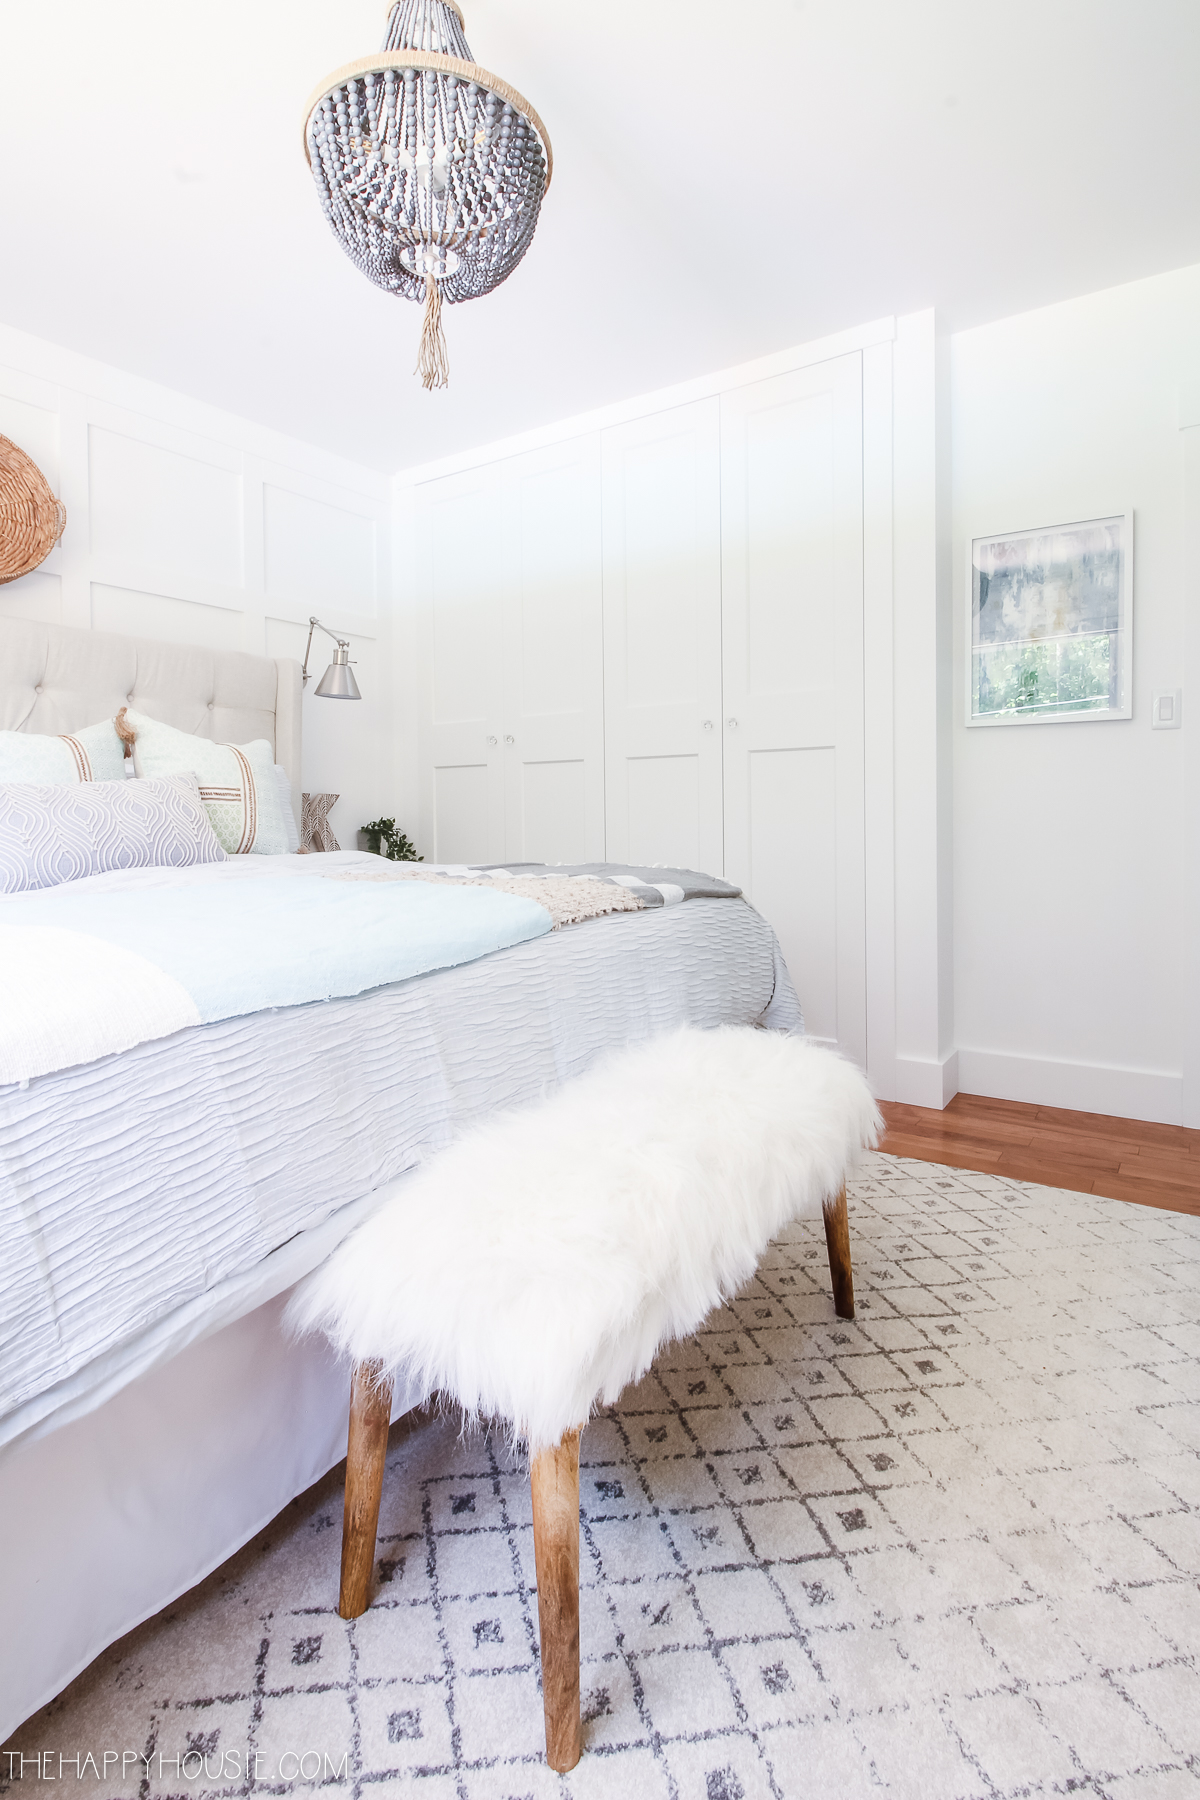
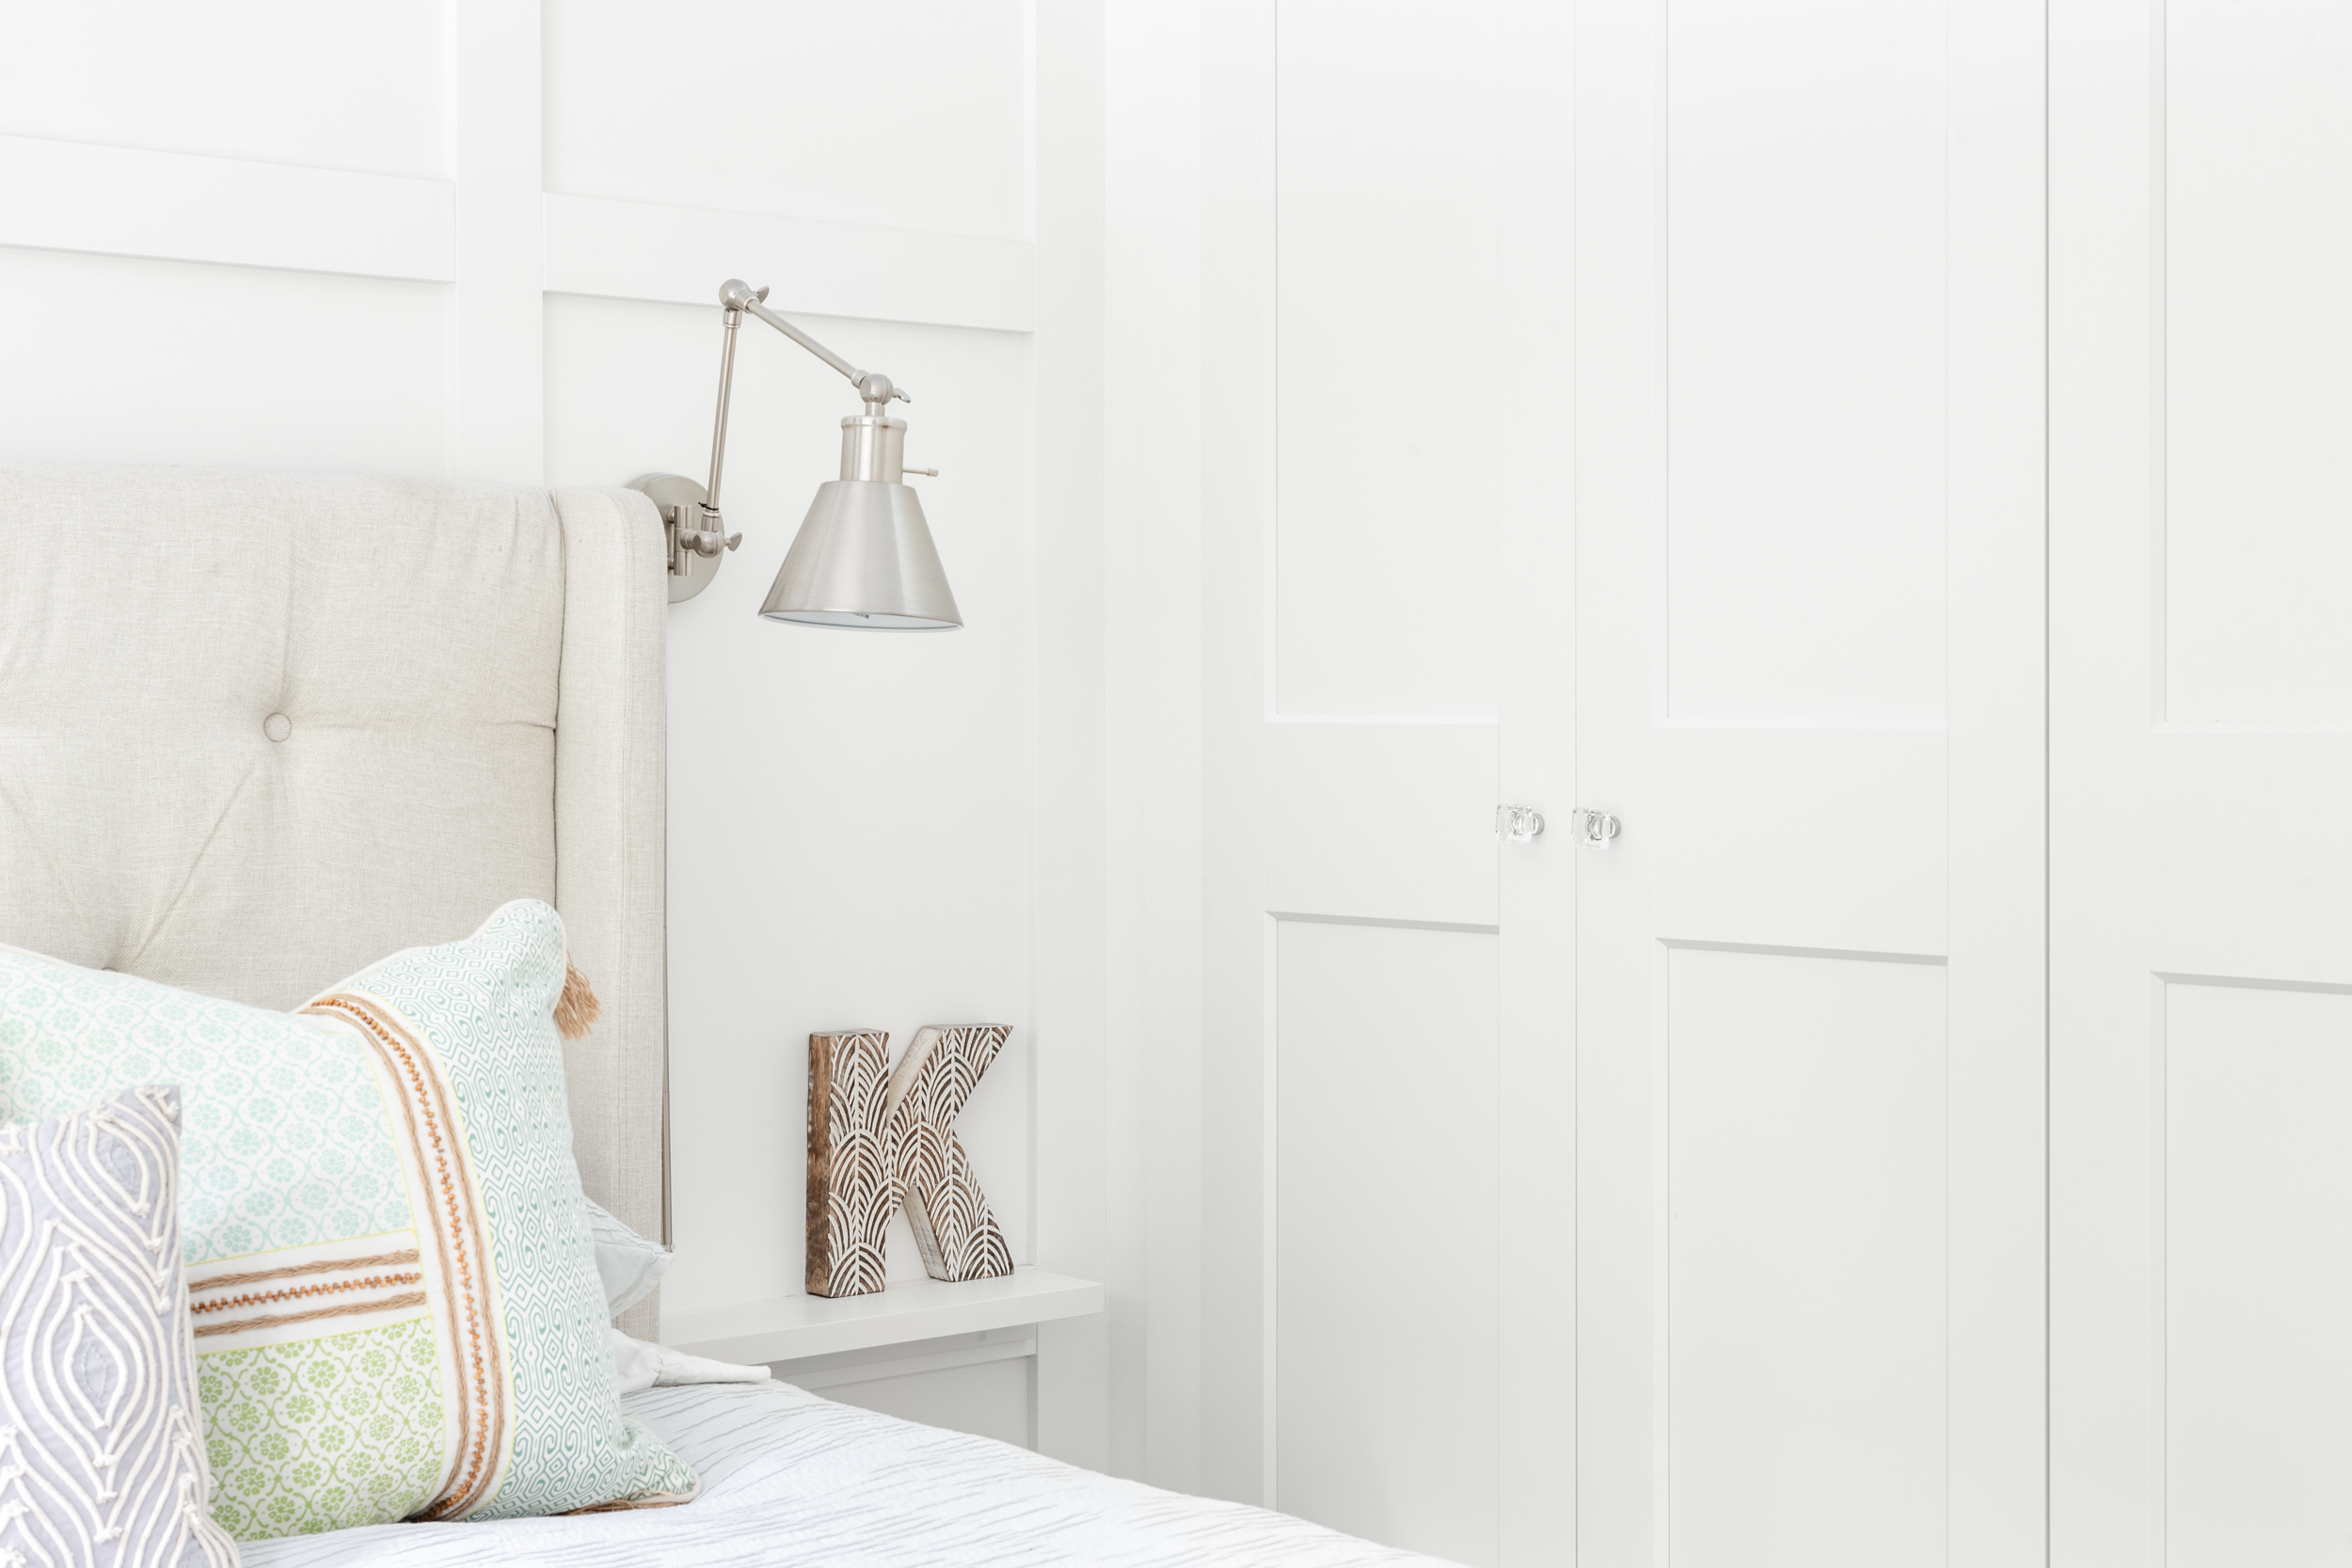
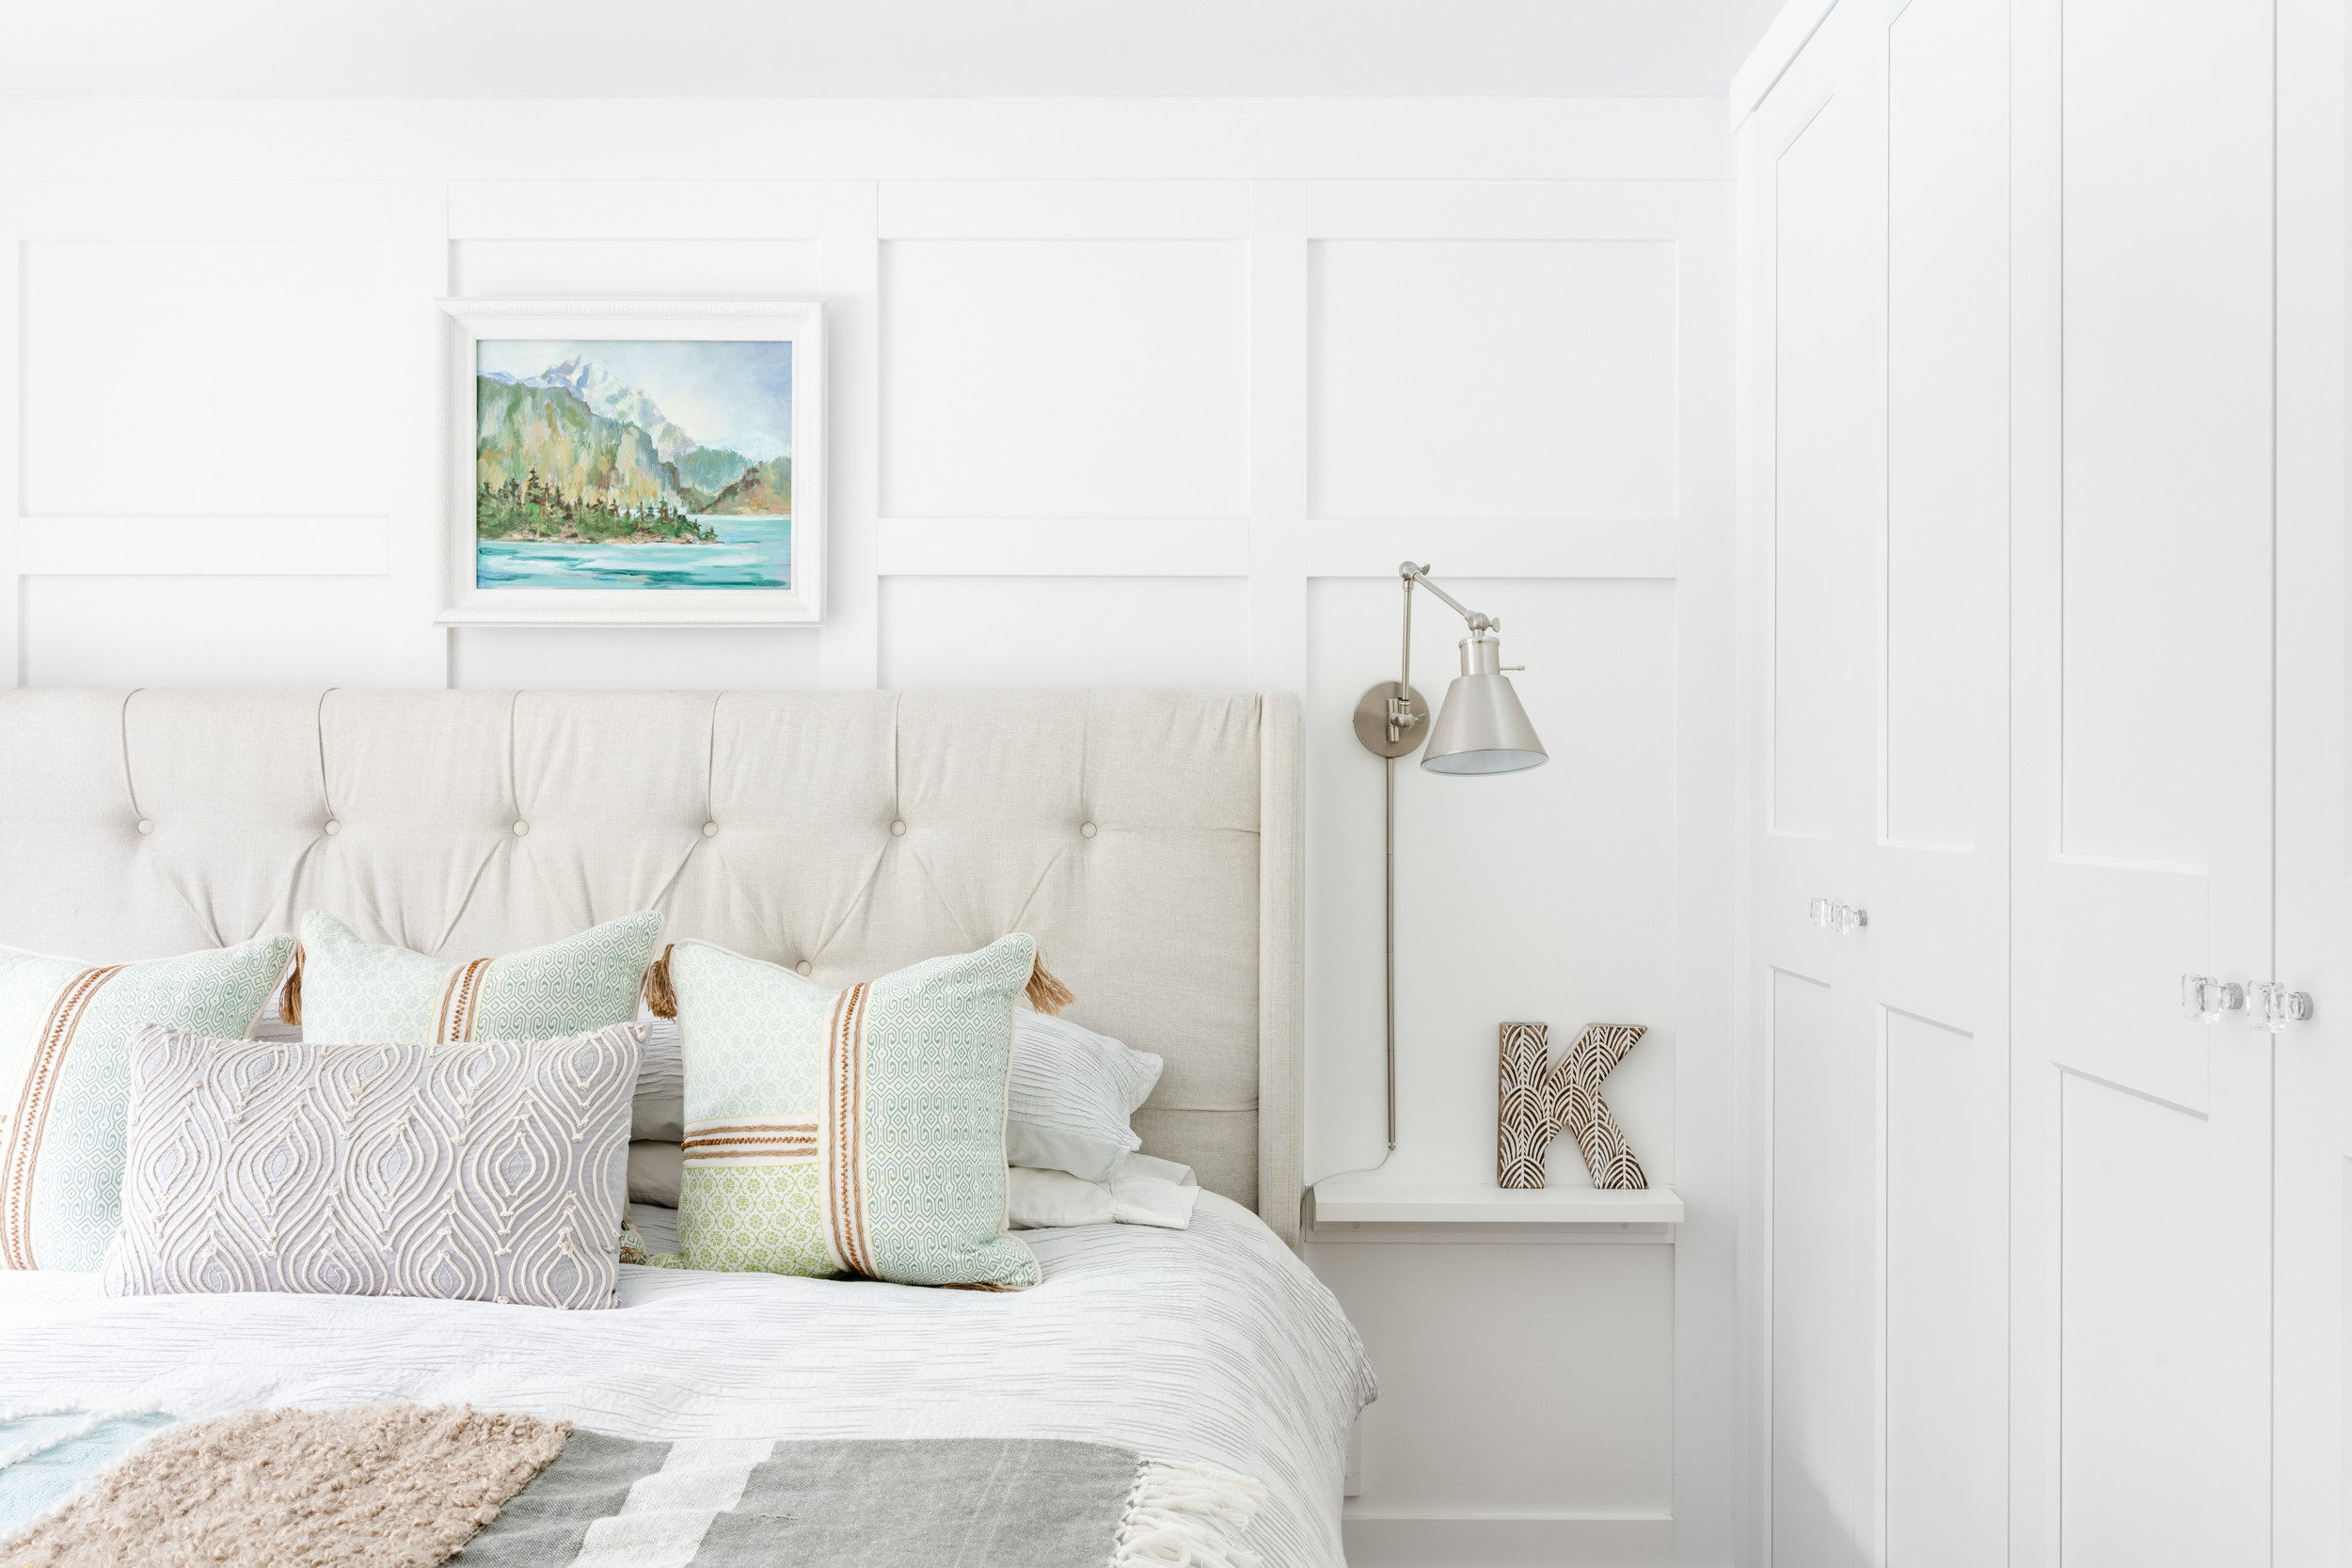
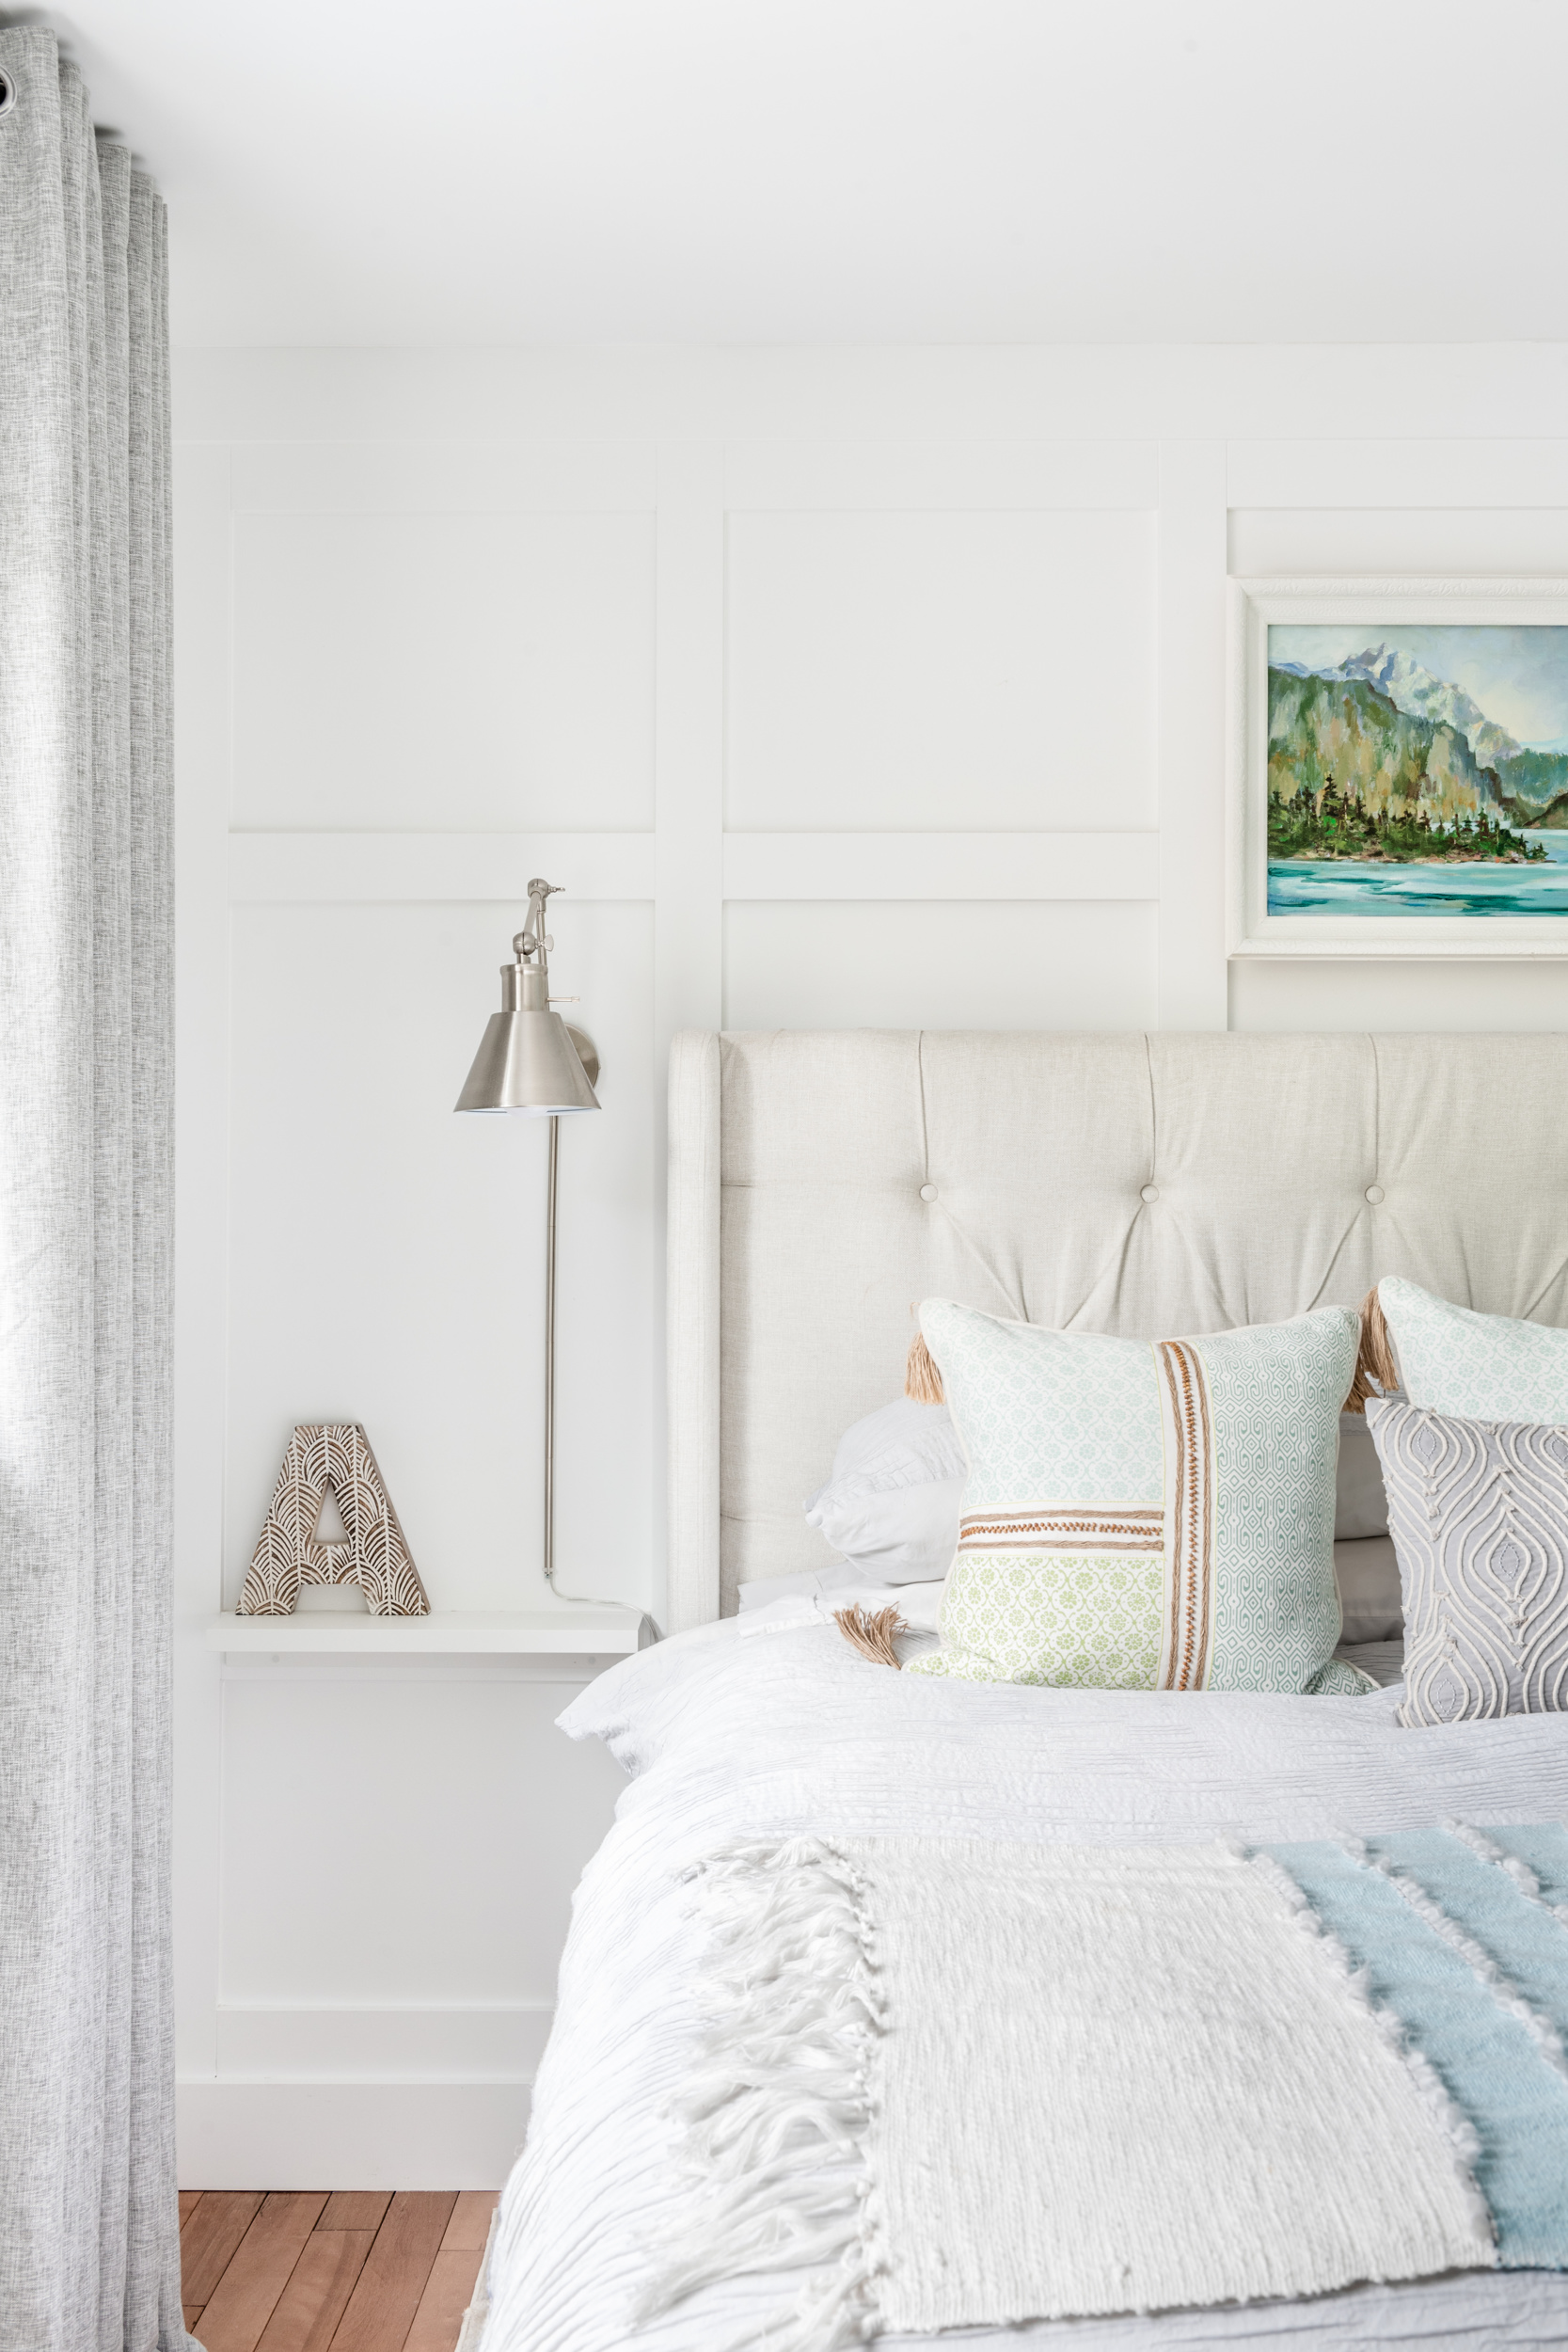
Another thing to note if you plan to do this in your space is that because of the doors swinging open we didn’t have room for regular nightstands. I actually used an Ikea picture rail (hung upside down to create a flat surface) as a mini-ledge for a book, phone, glass of water etc. and then added plug-in sconces to either side of our bed. I picked up some narrow baskets and used those for books and magazines that we wanted to keep nearby for evening reading.
You can read all about this full bedroom makeover here!
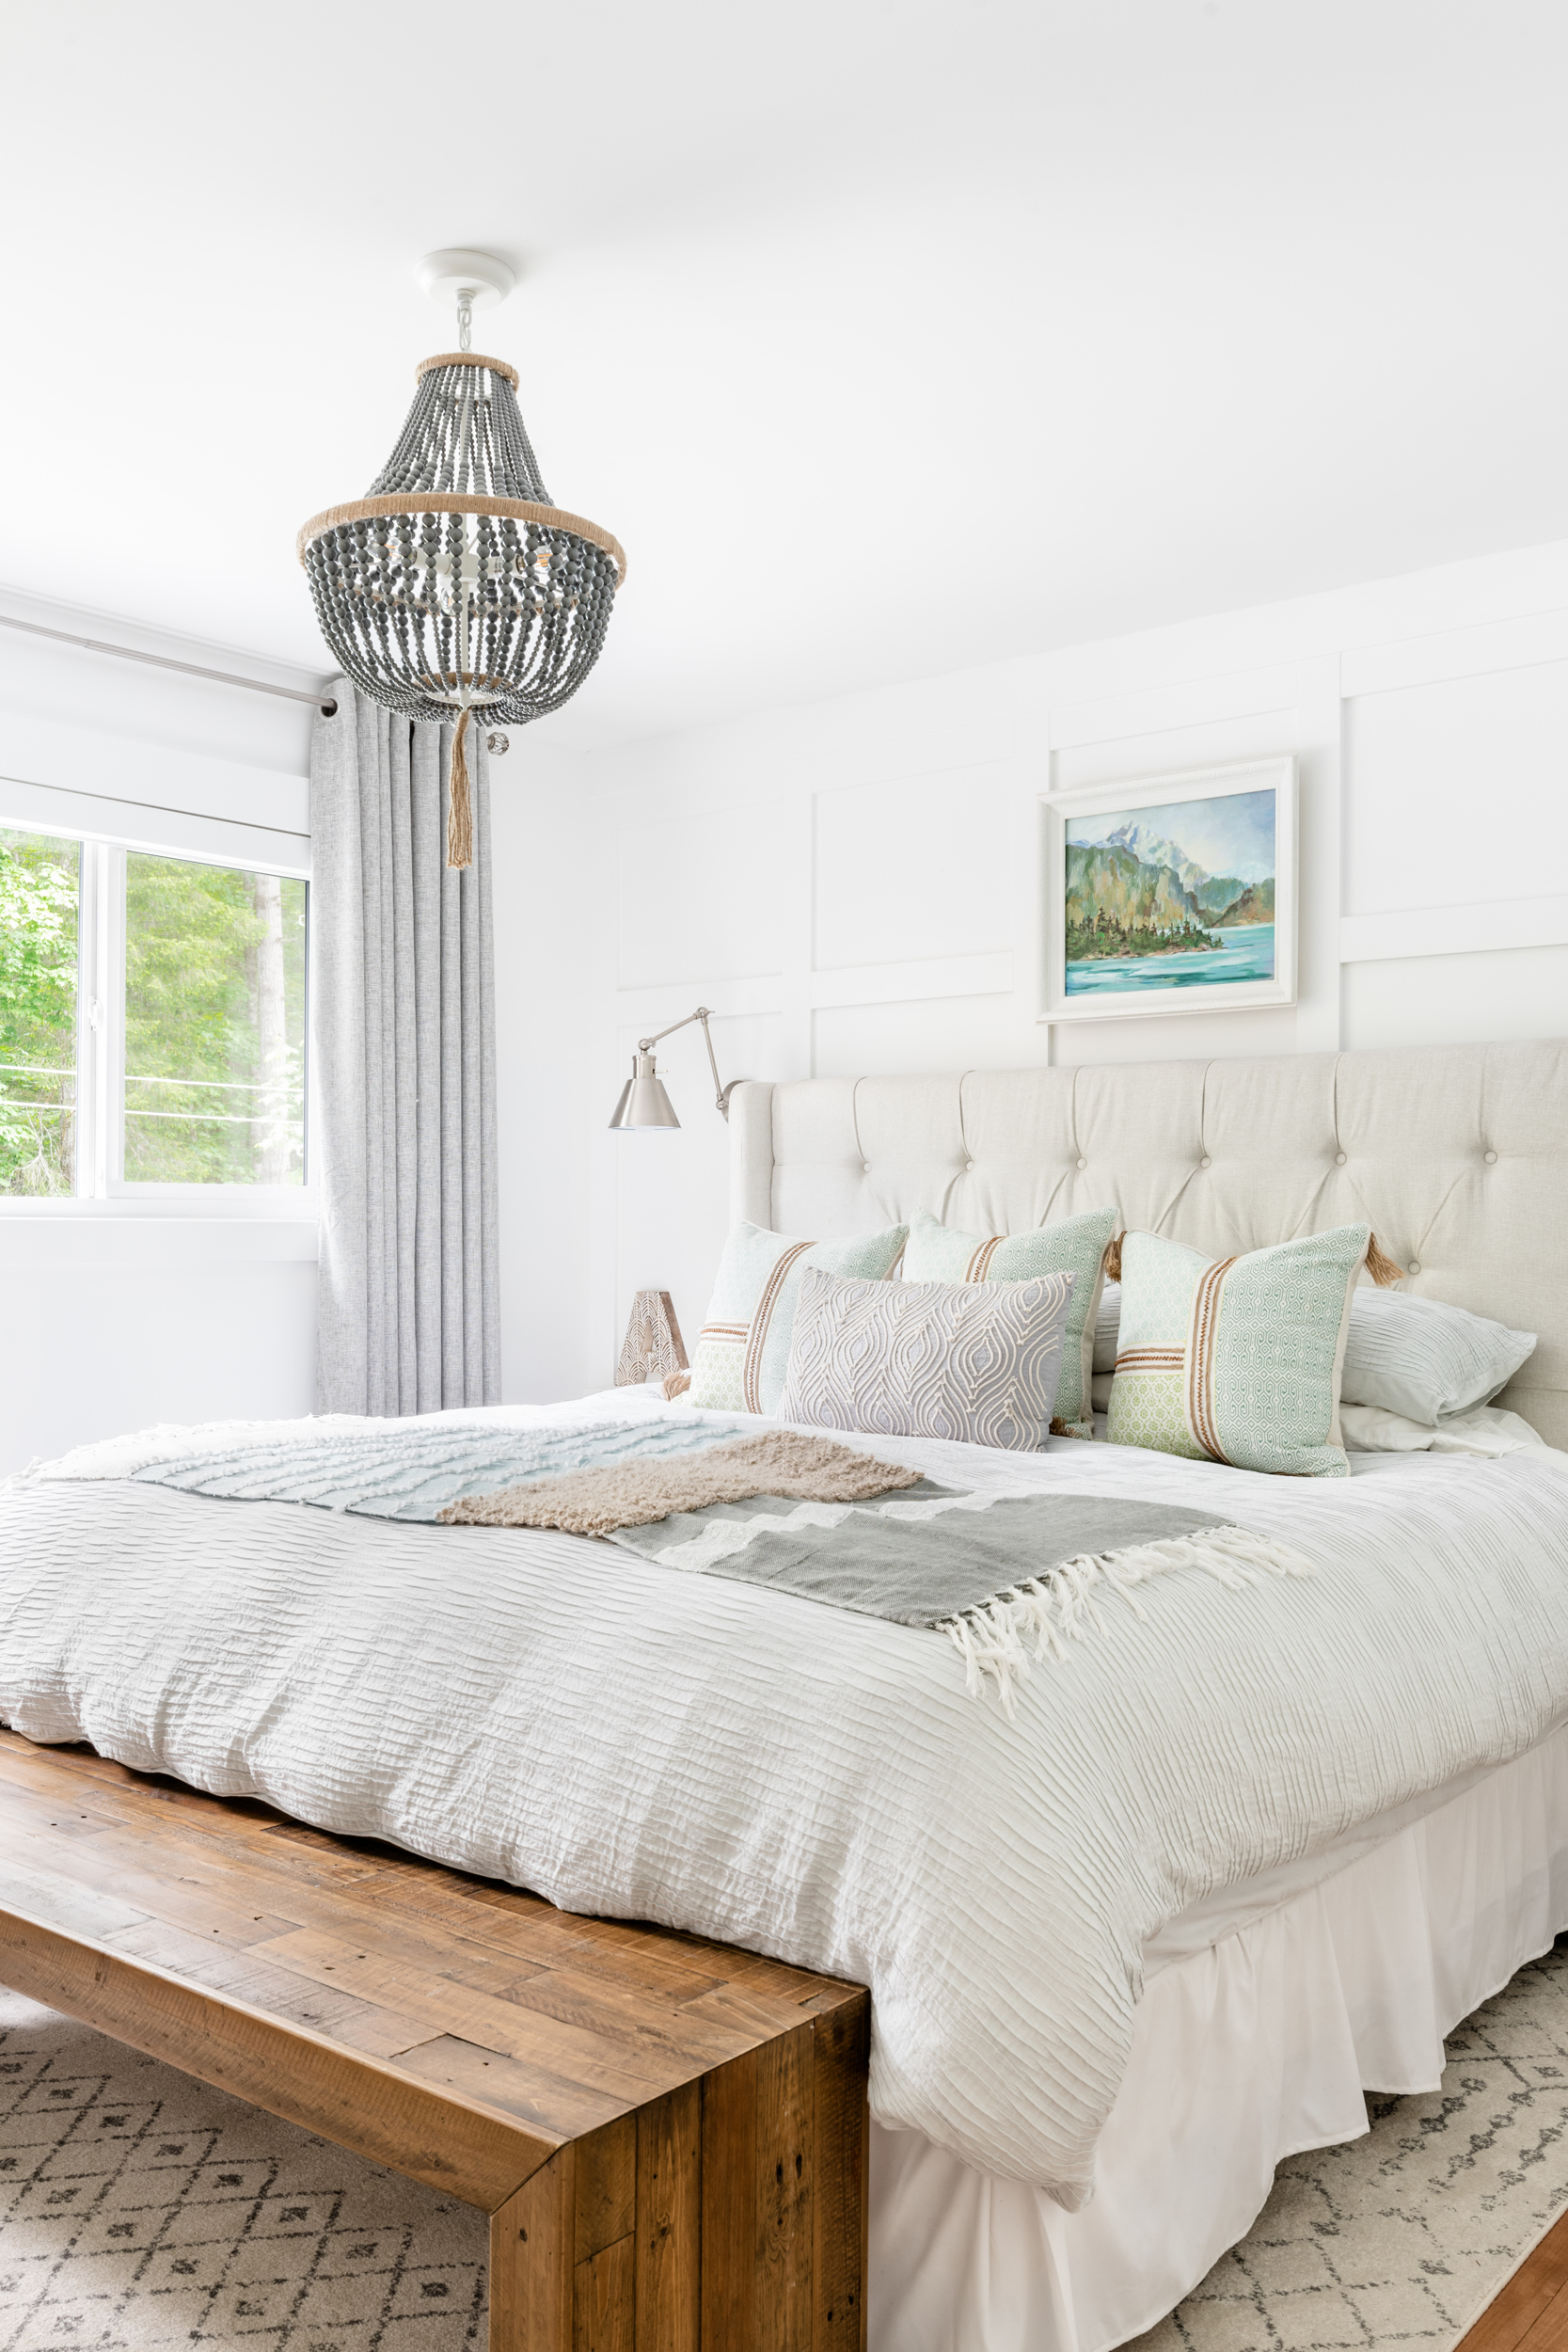
Master Bedroom Makeover Reveal
Want to remember this? Just PIN it!
Interested in learning more about the Ikea PAX system??
I’ve got several posts that you should check out:
Make sure to check out this post all about how to choose the right PAX configuration for your space!
Or this one, so full of ideas about how you can configure your Pax system…

Or this one about how we added an Ikea PAX unit to our son’s small reach-in closet…


Love it! Did you consider using the Sliding doors instead of hinged so you have room for the nightstand?
Did you have to cut out the sides and top of the closet to get a straight edge for the system to sit flush with the walls or do you have empty space there?
Hi! This was an inspiration and I’m doing the same in my reach in closet. One question I have is regarding depth of reach in space, usually 24 inches, vs. PAX (just short of 23in.) did you have to do anything about that so boxes were flush with outer wall but still allow to be secure on back wall? I’m having to build close anew (like you, used old closet in a bath remodel) and wondering if I should use measurements closer to PAX’s boxes. THANK YOU!
Looks great,and very stylish! My only question is, where do you hang longer clothing items, like dresses?
Hi Deb, we did a 40” PAX system like Krista and we put in the divider system where the drawers on the bottom half are only 30” to allow for a 10” gap to hang long sweaters and dresses. She has a link up above about it.
Beautiful! I too love PAX.