
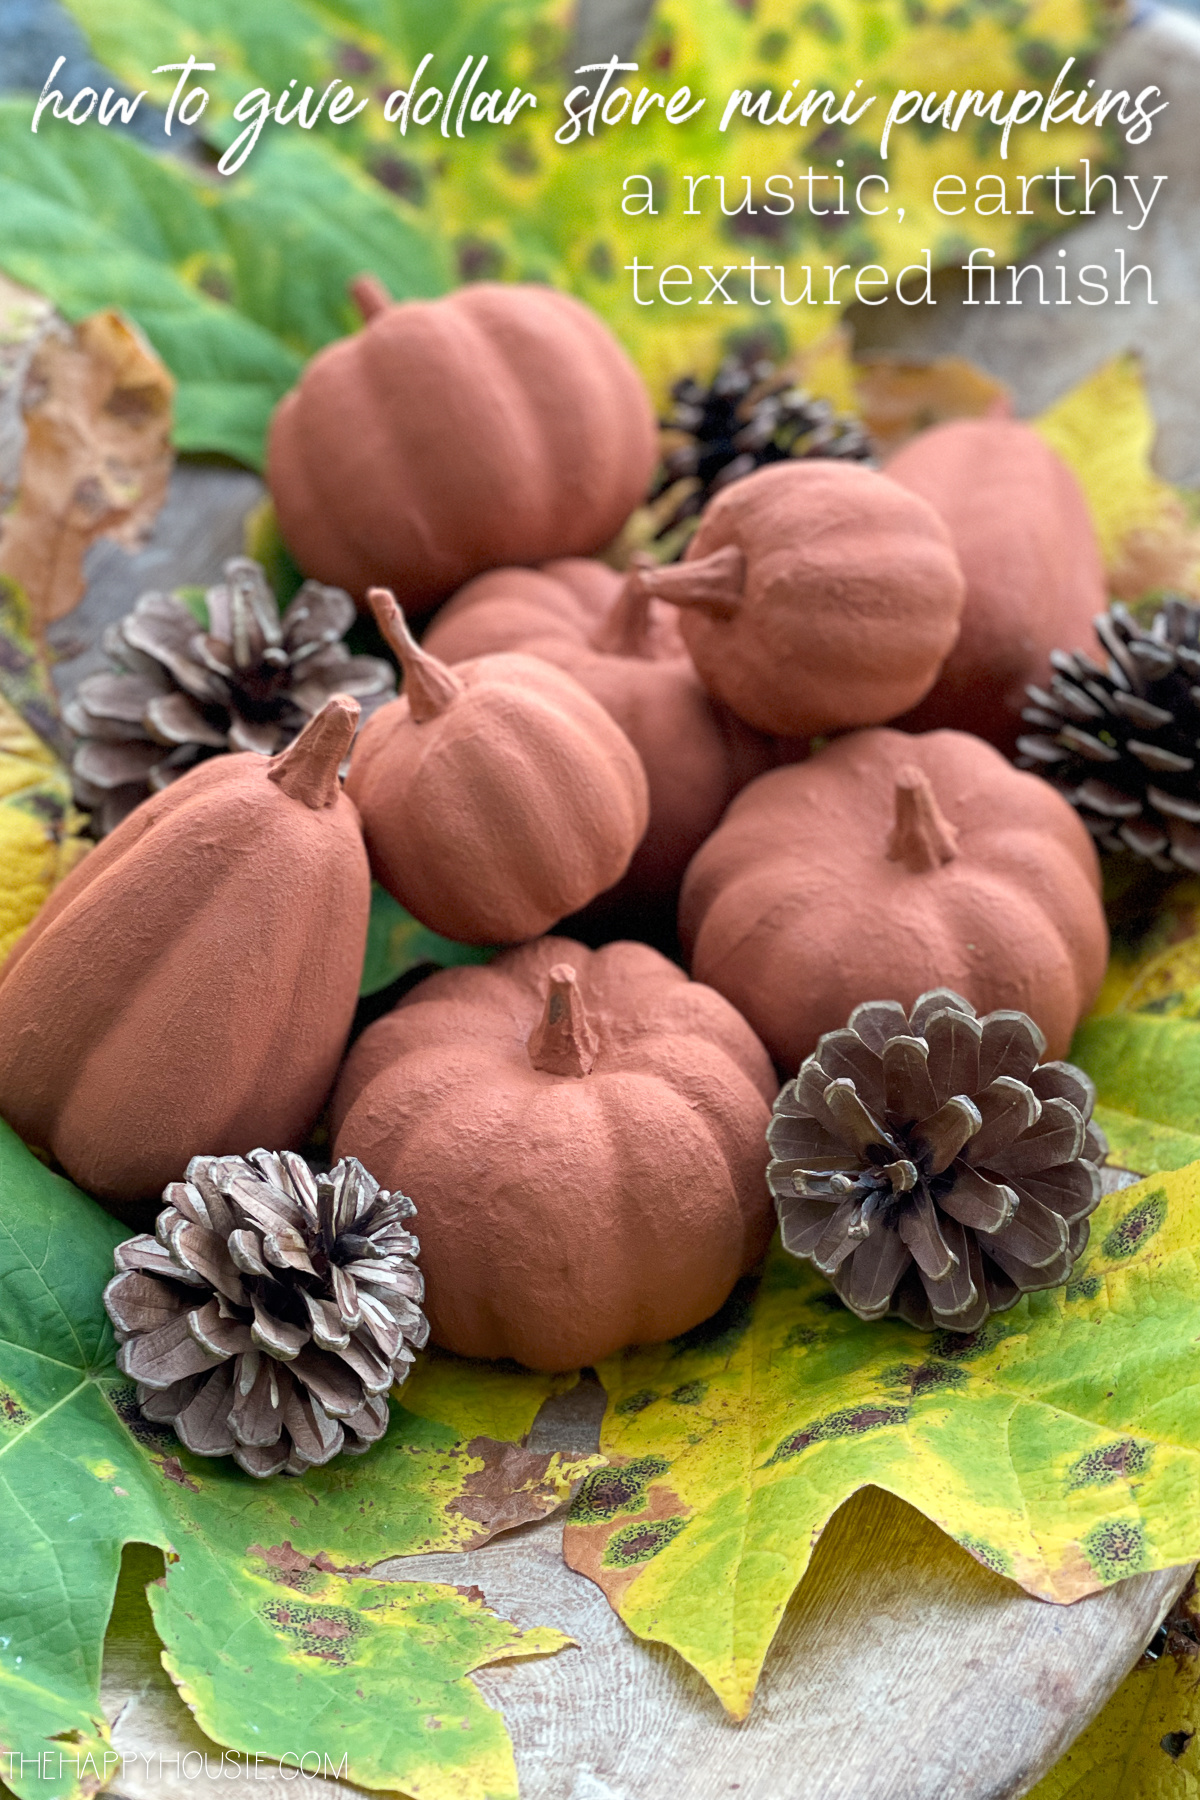
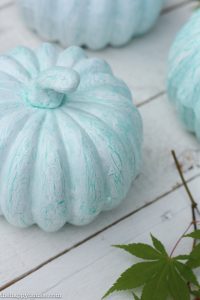
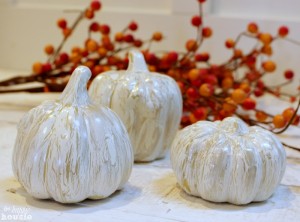
DIY Faux Clay Pumpkins with Textured Terra Cotta Paint
These easy DIY faux clay pumpkins made with textured terra cotta craft paint are a warm and rustic addition to your fall decorating!
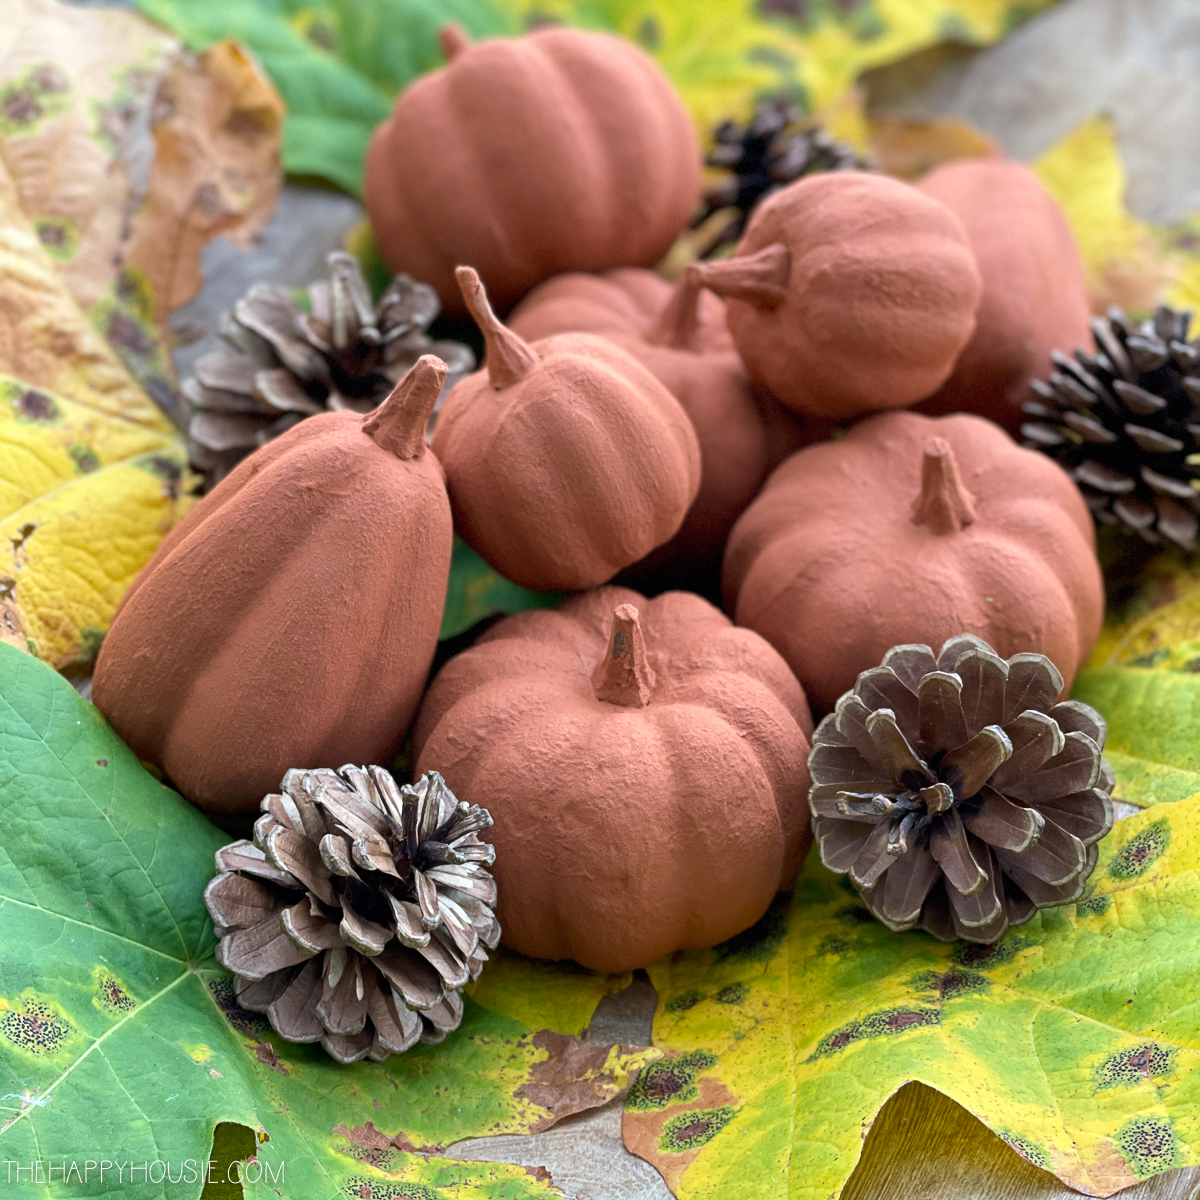
I’m sort of on a textured paint train these days… ever since tackling my DIY textured vases with leftover household paint, I’ve been eyeing up other things around that house that might benefit from a little bit of my special paint and baking soda mix. So far I’ve textured painted an old, faded demi-john and have it displayed in the corner of our kitchen. And this week I tried a little variation on my paint recipe, using craft paint and extra baking soda. The resulting project is these cute little faux clay pumpkins that now no longer resemble their shiny, dollar store roots…
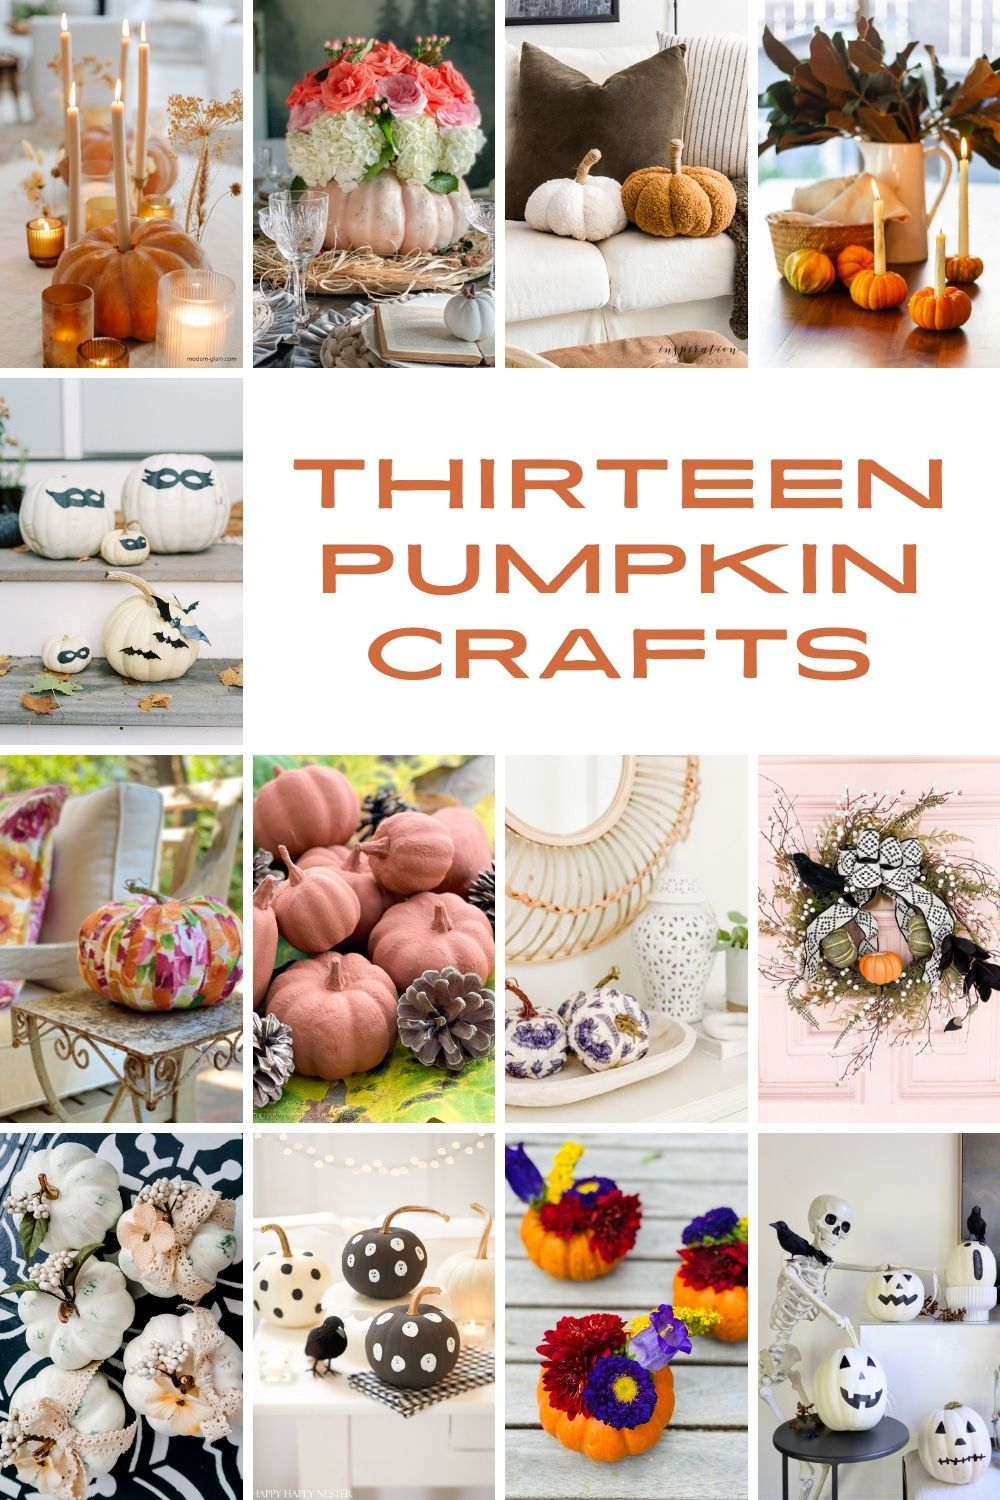
Today I’m joining some friends who are also sharing their DIY pumpkin ideas, and I’ve linked to them at the bottom of today’s post! I am a huge fan of pumpkin crafts in the fall, and have shared quite a few ideas over the years; I’ve gathered all my ideas for you further down this post, as well.
I love how much warmth and rustic character a little textured paint finish adds to things; and these cute little pumpkins are no exception. I feel like they look like something you’d pick up at a higher end home decor store, like Pottery Barn. What do you think?
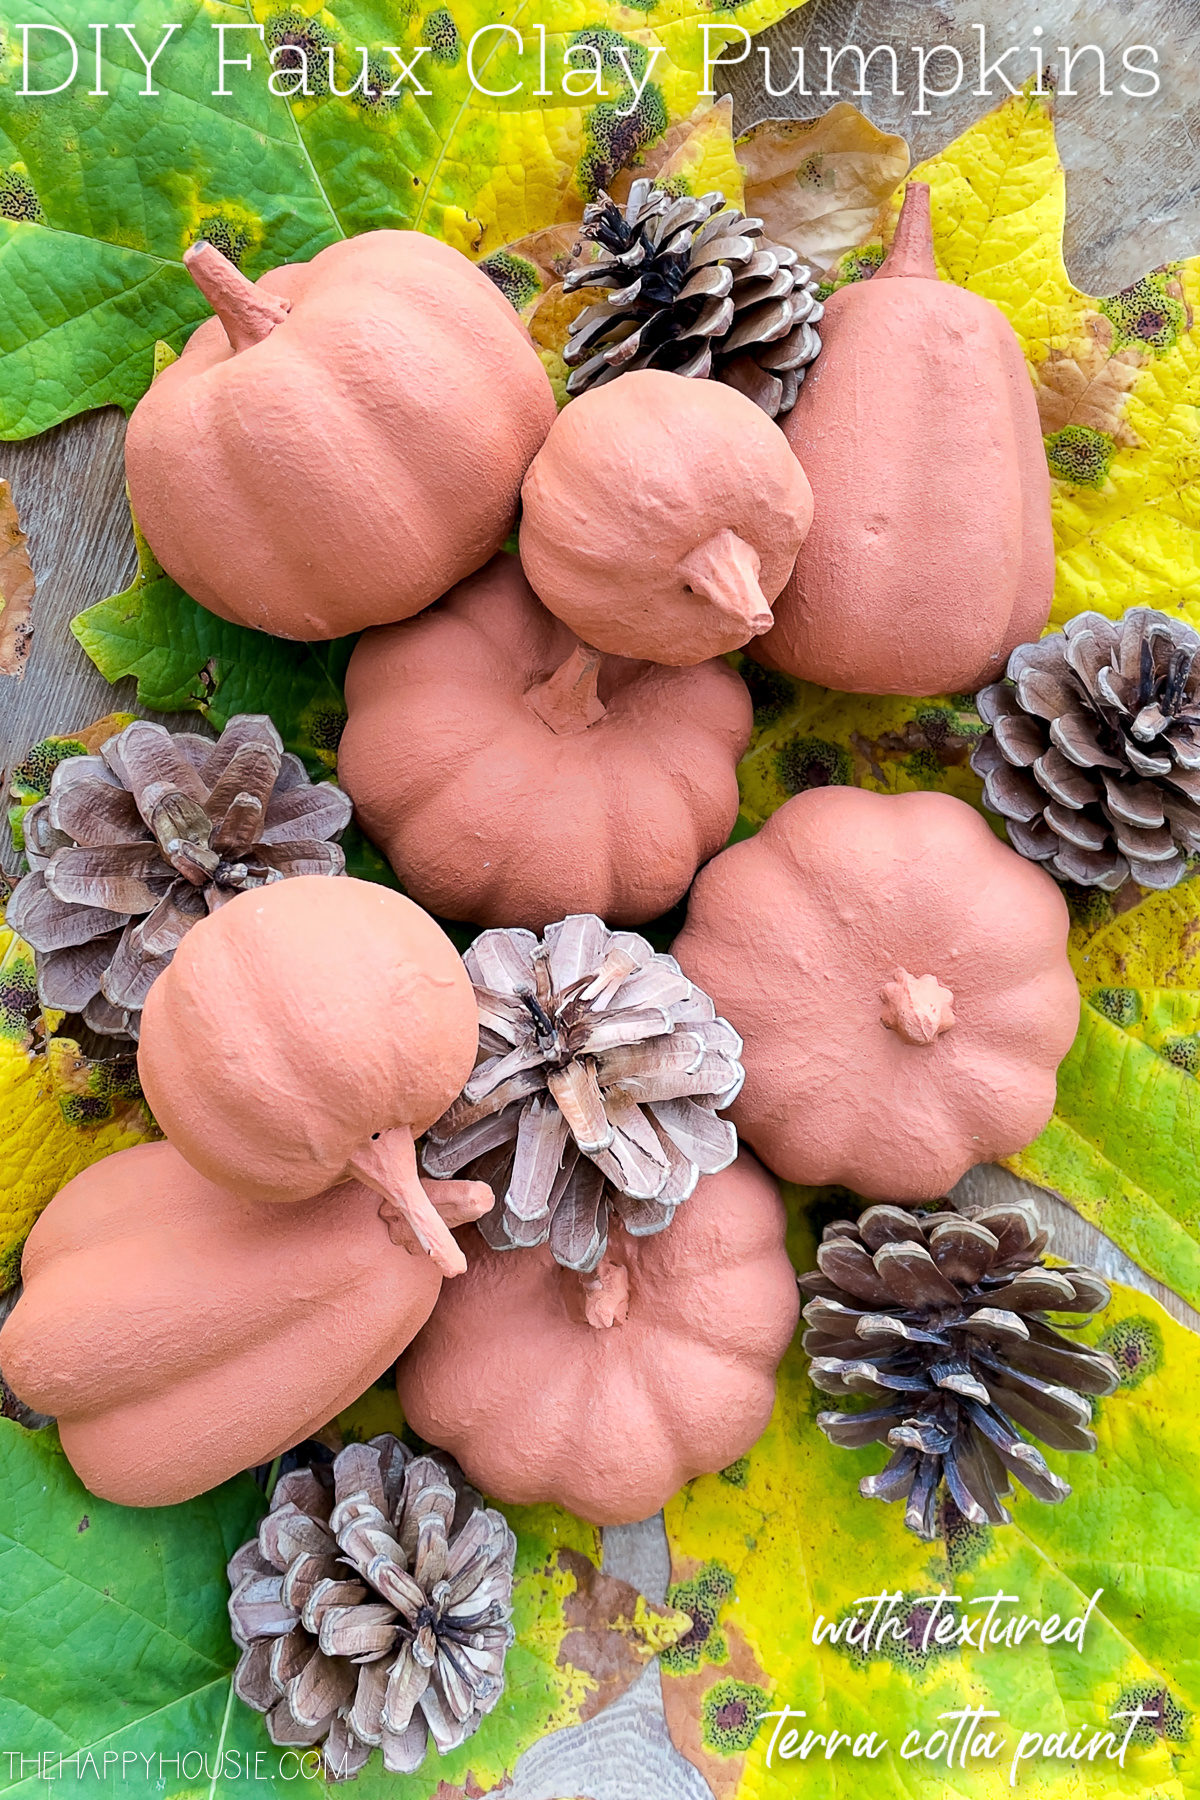
To make these I used some little dollar store pumpkins, a custom mixed terra cotta coloured craft paint (only because I couldn’t find any actual terra cotta coloured craft paint locally), as well as some baking soda.
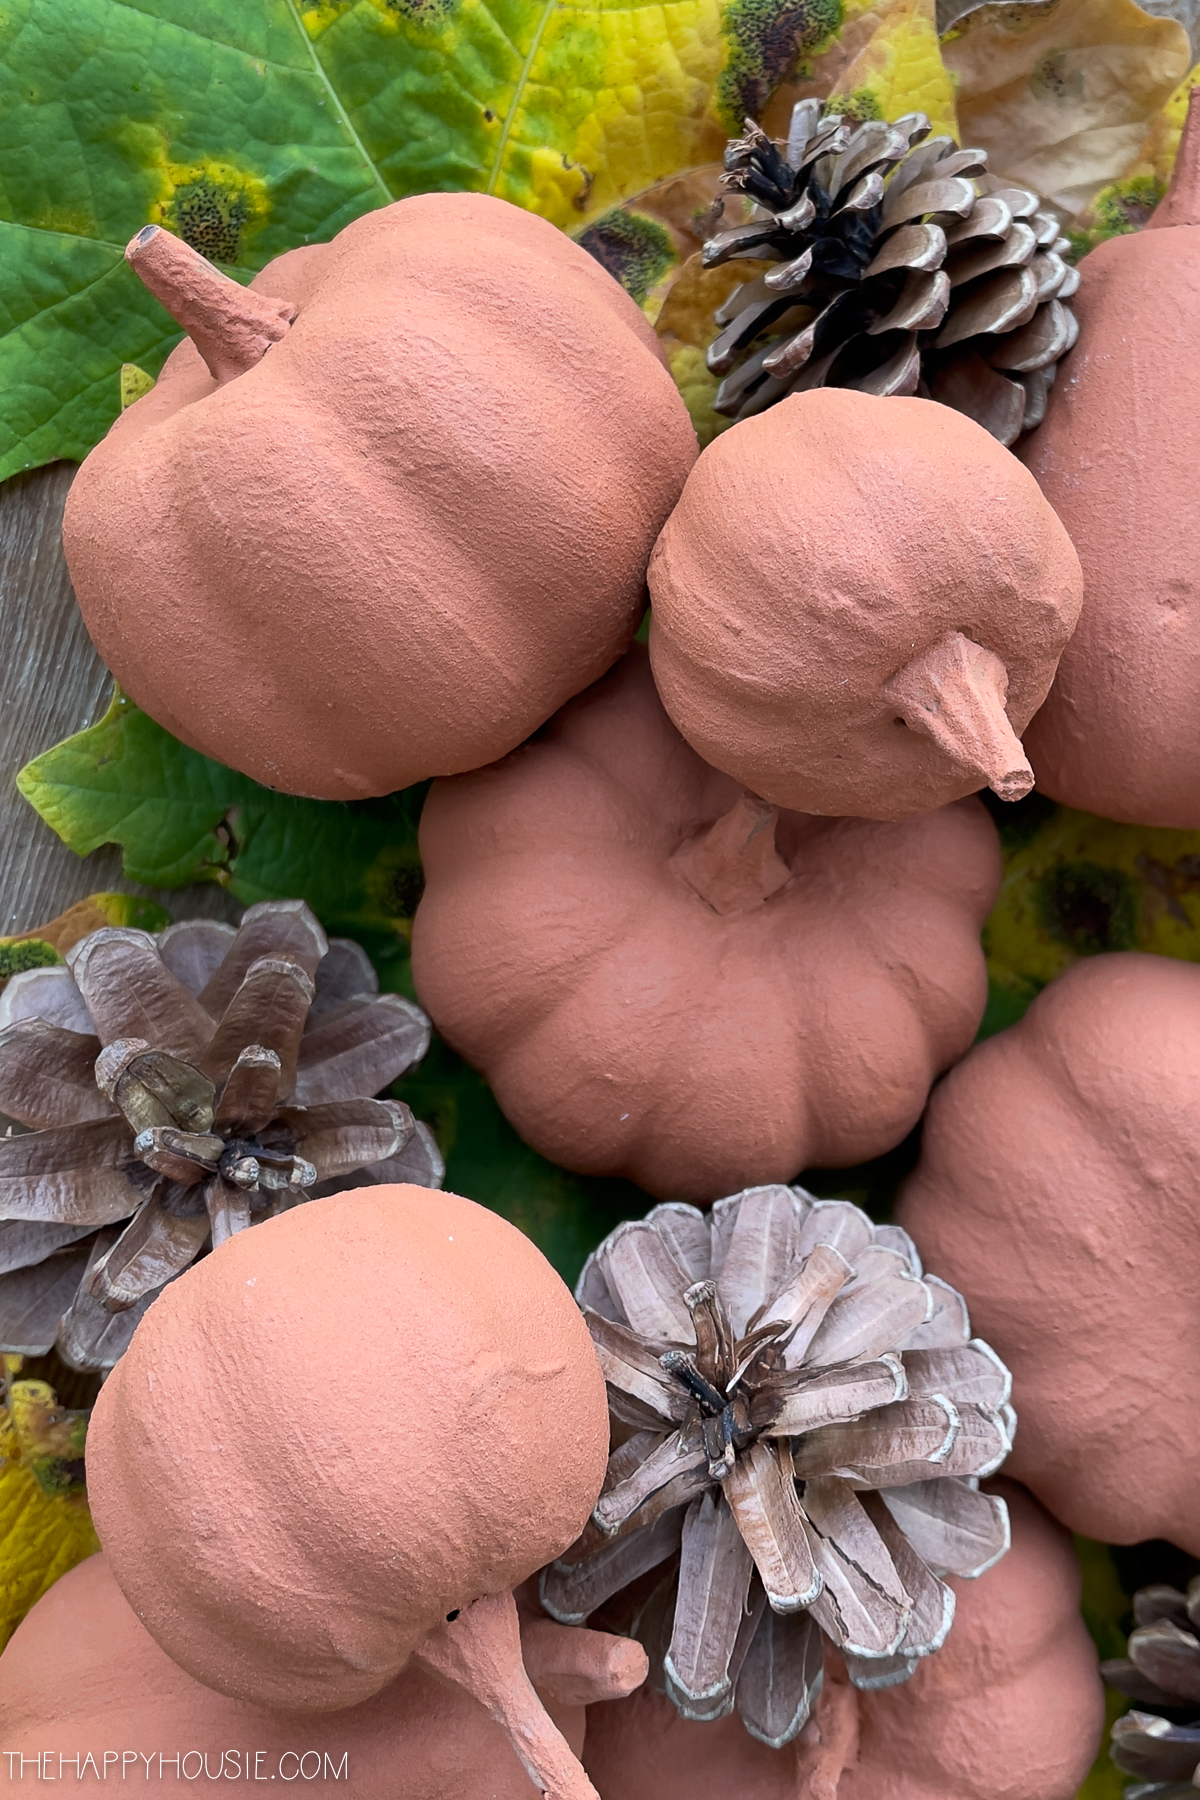
I used a lot more baking soda in this paint recipe than I did in my textured vase recipe. It was a lot thicker, so I didn’t have to do multiple coats to get that thick, textured look to these pumpkins. I just did two coats to create this finish.

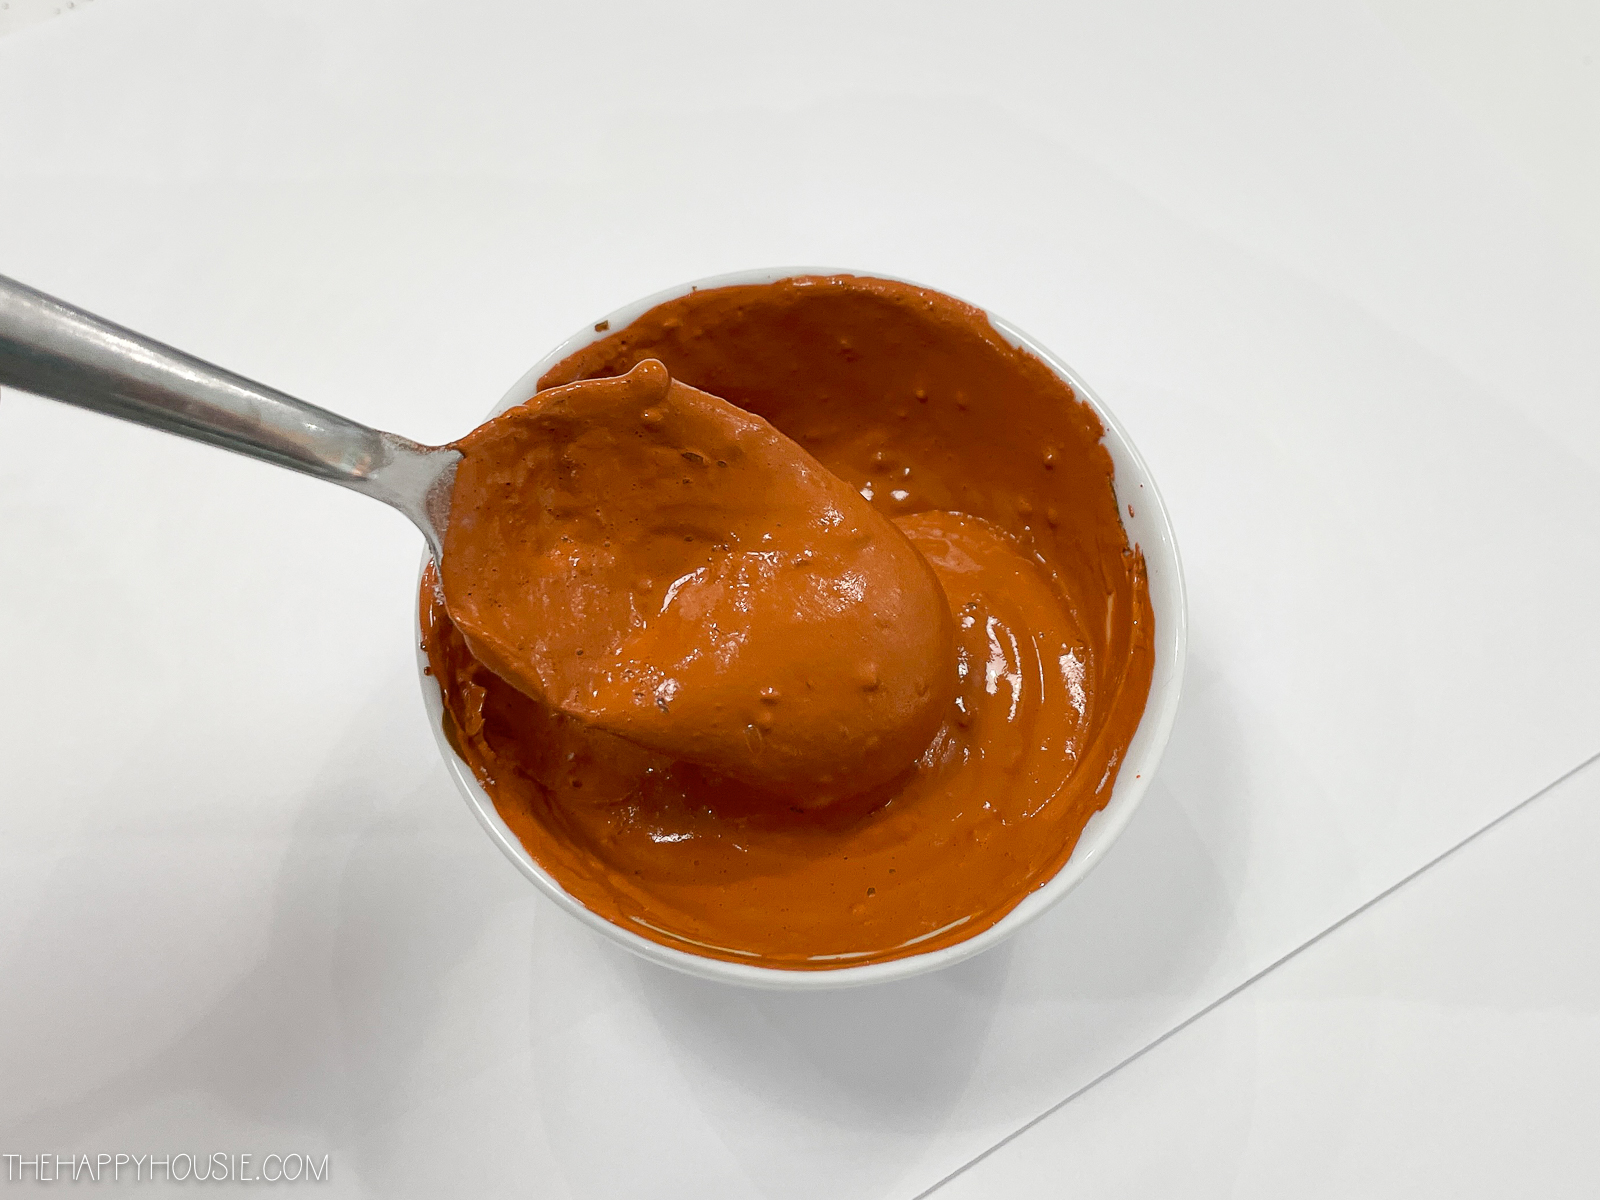
Mix a few spoonfuls of baking soda into your paint until you get a nice, thick, paint texture – basically until it’s the thickness of pudding. Make sure to cover your paint and brush with plastic between coats or it will dry out quickly. I also added in a bit of warm water after the paint had sat for a little while to get it smoothed out and flowing again.
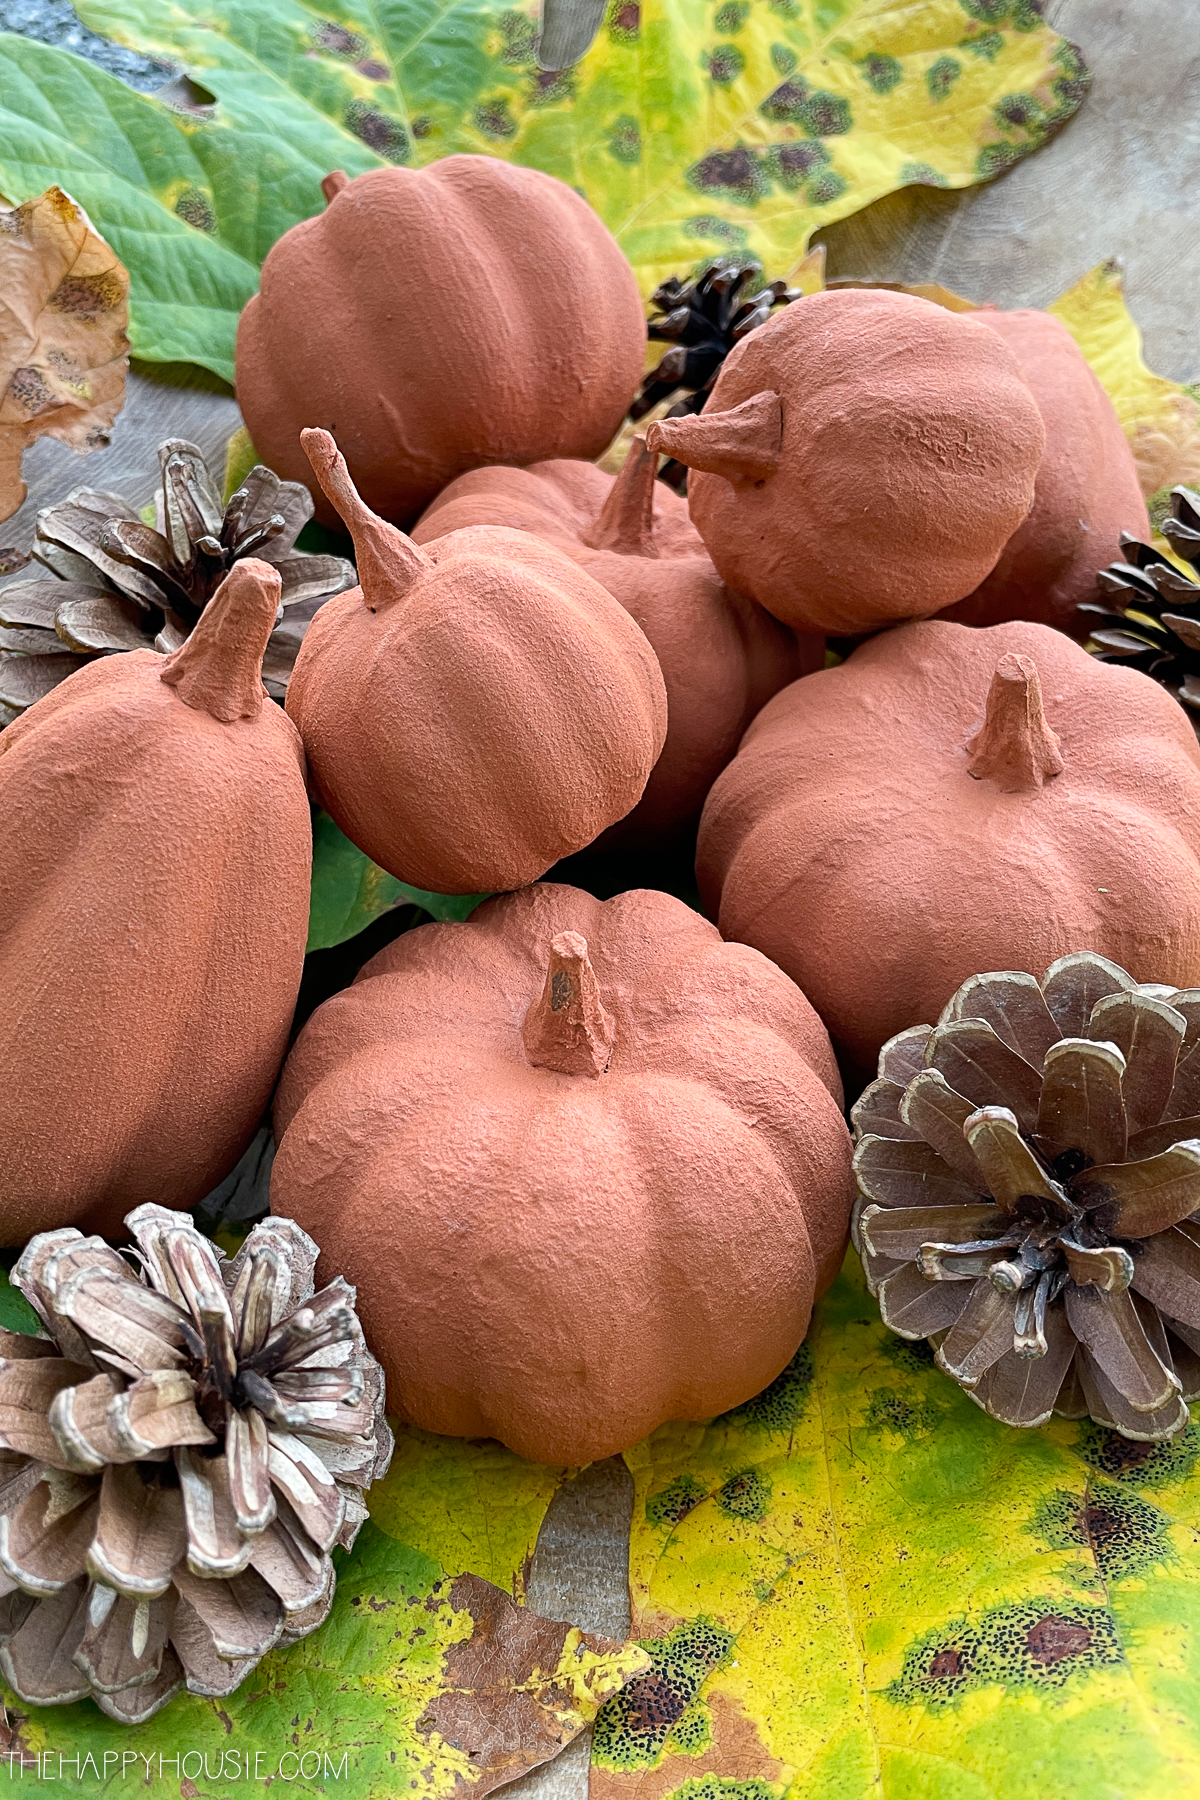
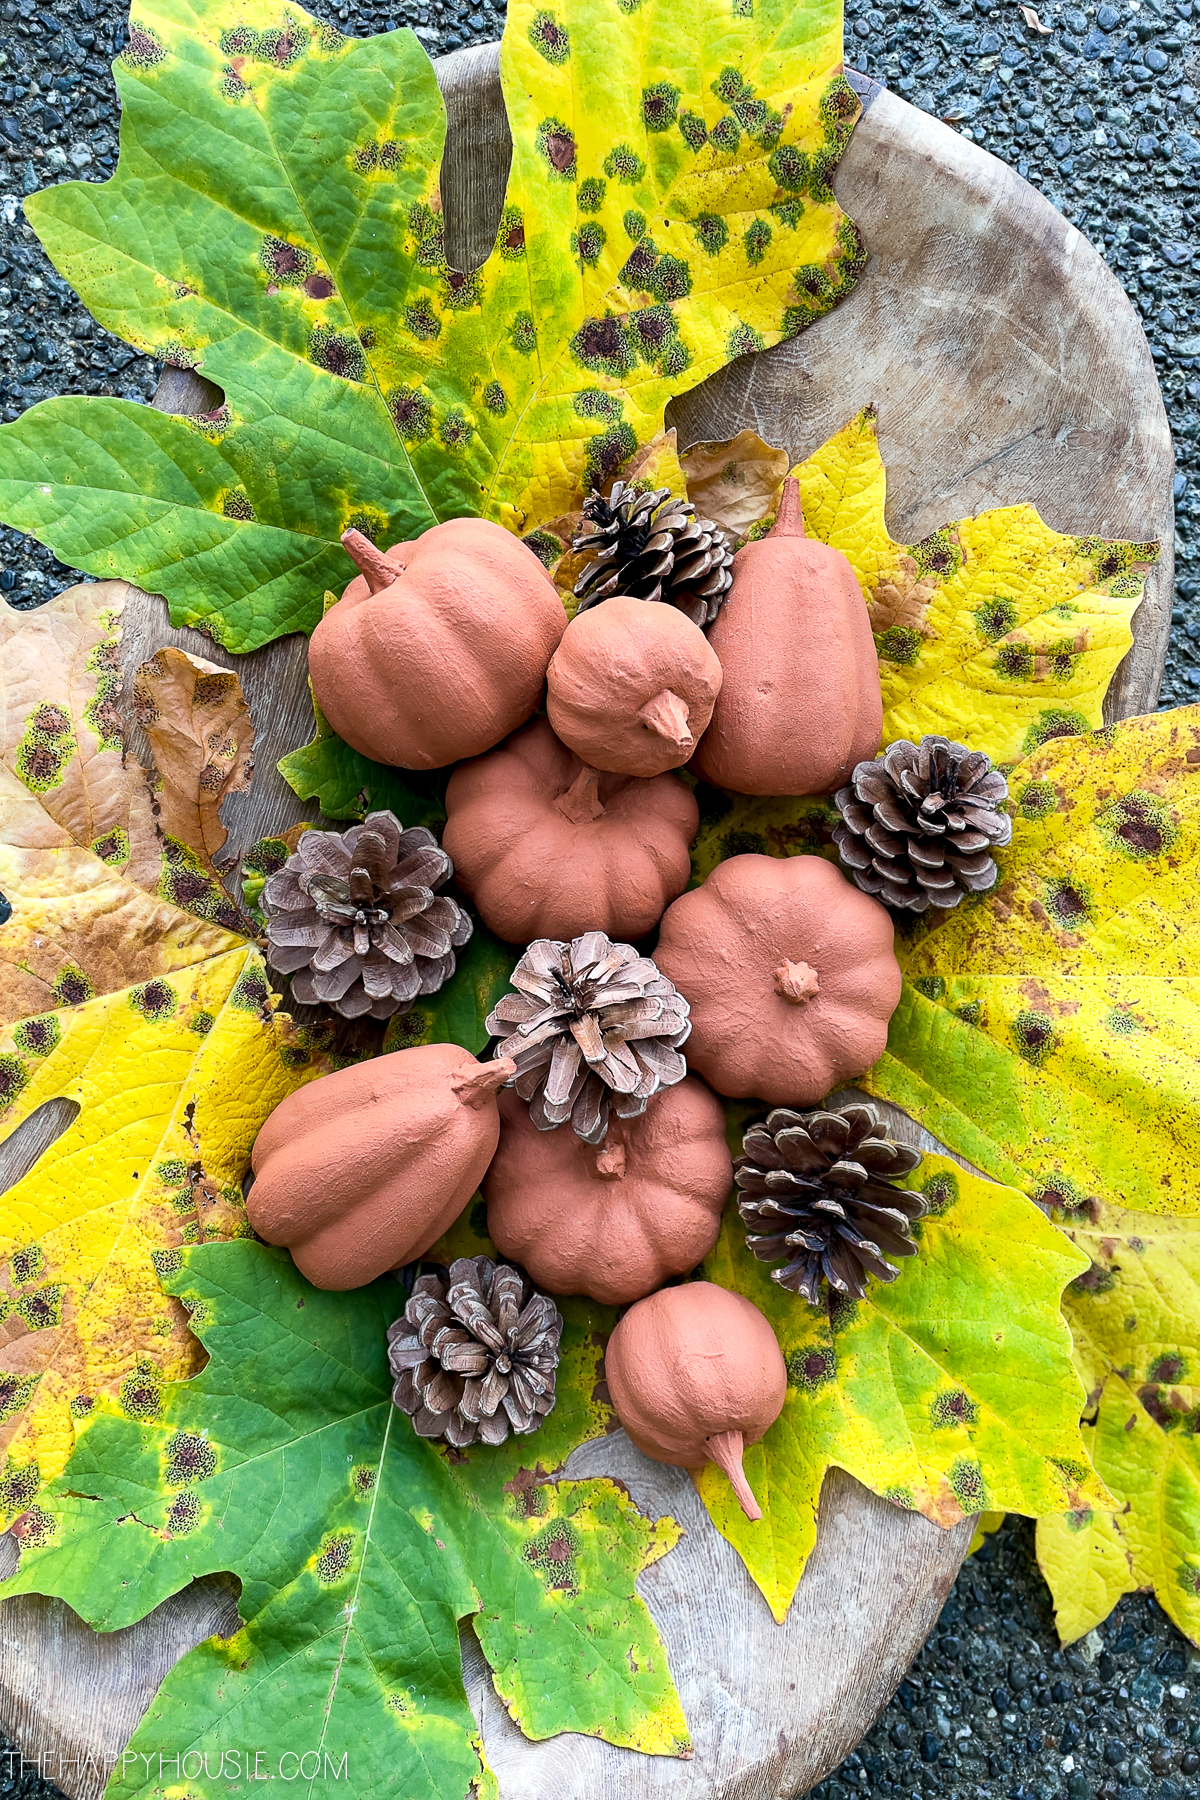
I’ve got these displayed in my old wooden bowl on our kitchen counter for the time being. A few maple leaves that are turning colour add to the cozy, rustic feel of this craft.
Want to remember this? PIN it for later!
As I mentioned, today I’ve been joined by some of my blogging friends who are also sharing their DIY pumpkin ideas with you! I hope you find some more ideas to try this fall season…
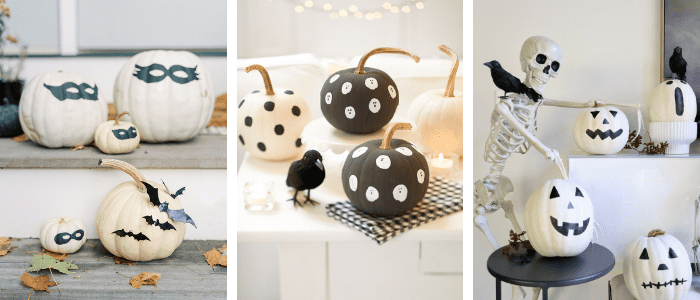
Painted Mask Pumpkins || Finding Lovely
Ghost Painted Pumpkins For Kids || Happy Happy Nester
No-Carve Pumpkin Ideas || My Sweet Savannah
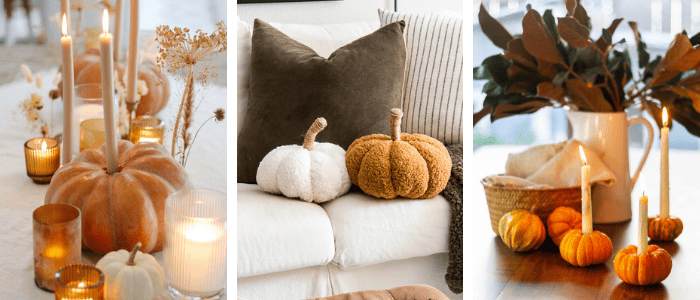
Heirloom Pumpkin Candle Holders || Modern Glam
Cozy Pumpkin Pillows || Inspiration For Moms
DIY Pumpkin Candle Holders || Zevy Joy
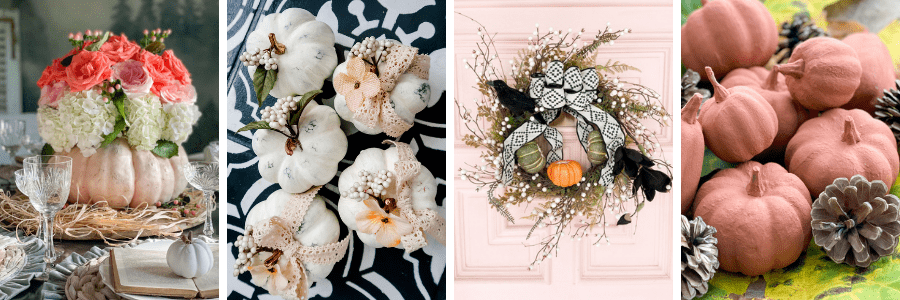
How to Make Easy DIY Floral Pumpkin Vase || The Design Twins
DIY Boho Chic Pumpkin Decor from Dollar Store Pumpkins || The DIY Mommy
Light Up Pumpkin Farmhouse Wreath || Tatertots & Jello
DIY Faux Clay Pumpkins || The Happy Housie
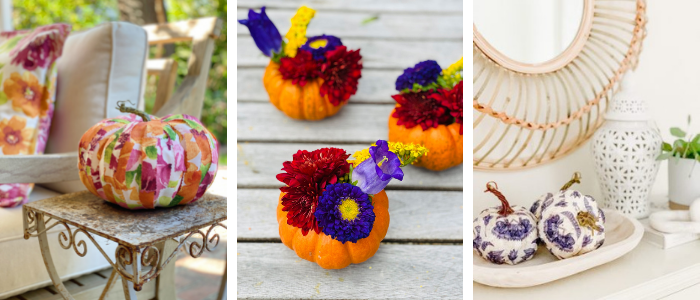
Easy Fall Cinderella Pumpkin Crafts // My 100 Year Old Home
How To Make Pumpkin Planters || Most Lovely Things
Blue and White DIY Pumpkins || Life Is Better At Home
Here are some of my other pumpkin DIYS…
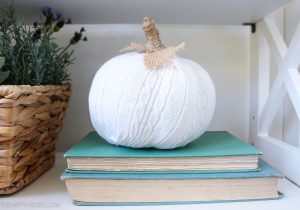
DIY Sweater Pumpkins
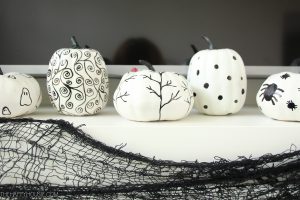
DIY Handsketched Sharpie Pumpkins
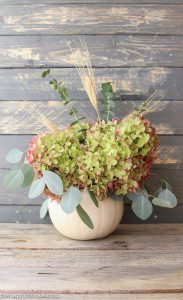
Pumpkin Vase DIY
Blue Crackle Glaze Pumpkins
Gold Crackle $$ Store Pumpkins


One Comment