
How-to Tie Together Your Room With Fabric: Inspiration for Mixing Pattern and Colour in Andrea’s Bedroom
Do you love mixing fabric patterns and colour? Or does the thought terrify you?? Maybe it doesn’t scare you but you just aren’t sure where to go with it?
Well you aren’t alone if you get lost with this! Recently Andrea contacted me through the following comment on my blog:
“Hi Krista, I am amazed with your webpage. I just arrived here and love it…=) I am trying to decorate my house but I get lost. Do you have some advice and tips how to do it? Like steps of the process or something so that you don’t get lost? Thanks for your work here. It’s beautiful!”
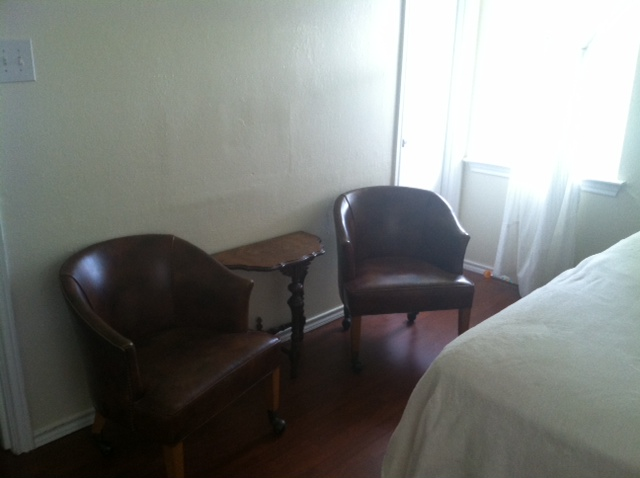
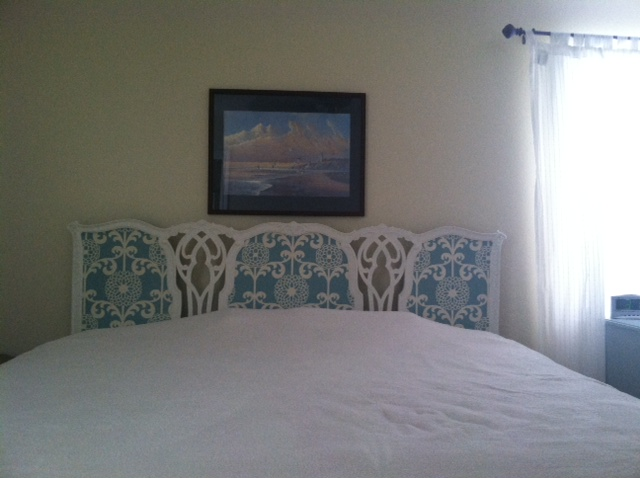
Now, how sweet was that comment? Of course I wanted to help her! So we started email contact and I advised her to begin by setting her priorities for a room to focus on first. She decided upon her master bedroom, I started a joint Pinterest board for it, and she sent me some before pictures:
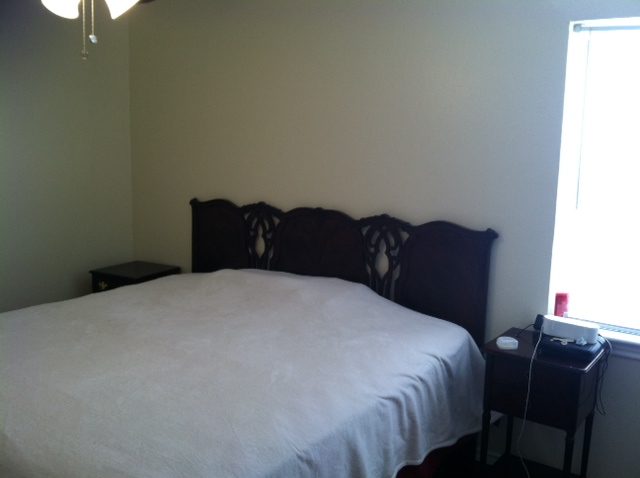
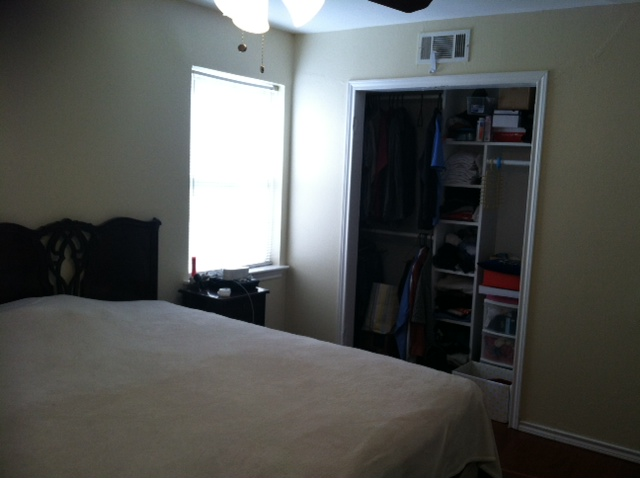
She filled me in with some more information about what she was hoping to achieve
And now for a little further bedroom inspiration and some suggestions
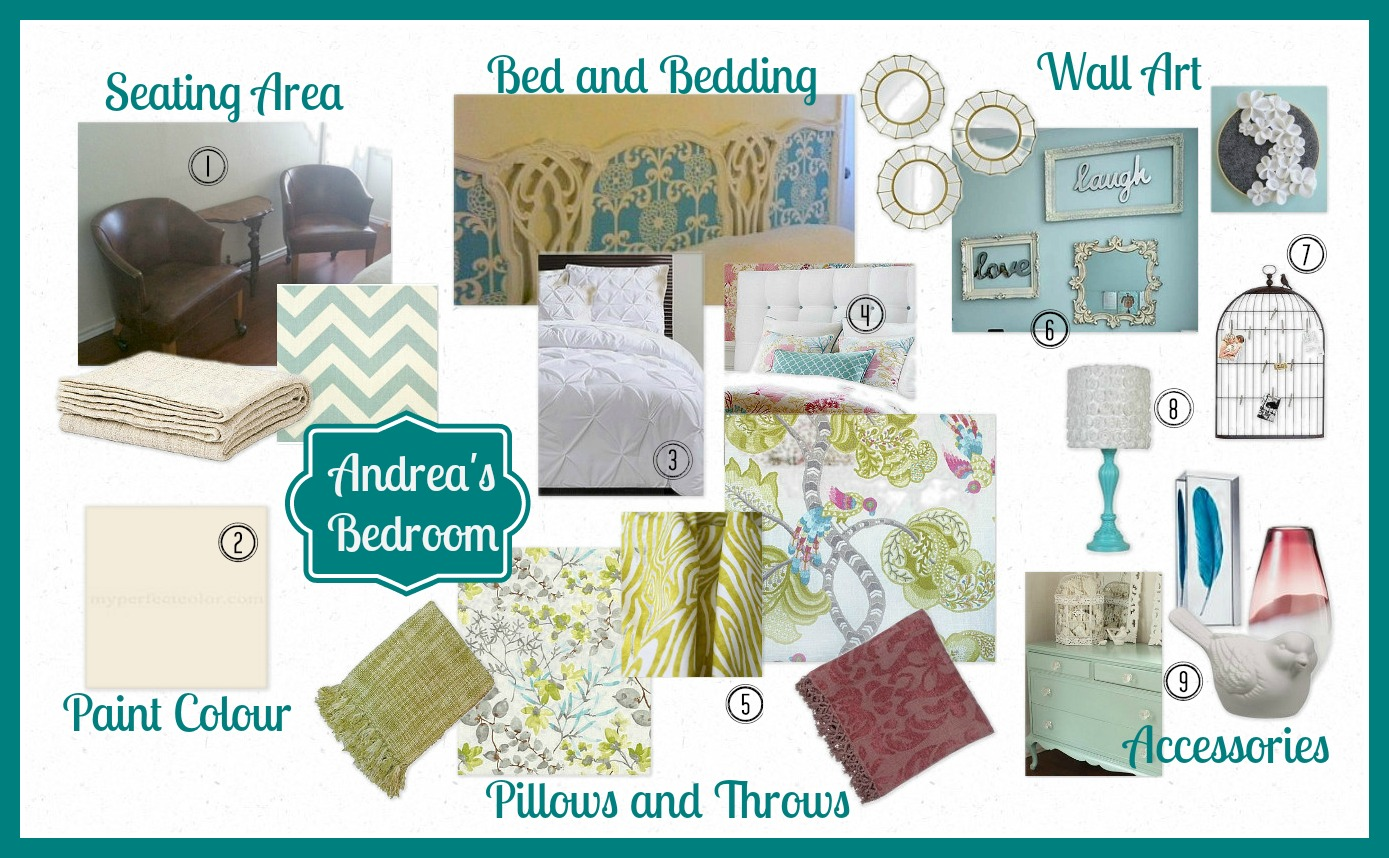
1) Brighten up the seating area by covering each of the chairs with a white throw and a place a pillow on each (made from this blue chevron print). Alternatively, you could paint the chair legs and sew a white cotton slipcover for them and still place a small throw pillow on each chair. The little table in between the two chairs would look fabulous painted in a bright colour (to be selected from your fabric choice).
2) Repaint the walls in Behr’s “Seaside Sand”.
3) Buy a duvet and duvet cover set in white like this white pintuck pattern. There are also several tutorials online for how to DIY this pintuck style.
4) Make pillows to layer in the way displayed in this picture with two larger pillows in your key fabric/print and one longer pillow in front of them in an additional fabric.
5) Choose a colour scheme and fabrics to make pillows for the bed (see further discussion below) as well as a throw blanket with some colour for the end of the bed.
6) Create a gallery wall above the bed by mixing empty vintage frames and mirrors. Consider painting some of the vintage frames in colours from the fabric chosen for the room.
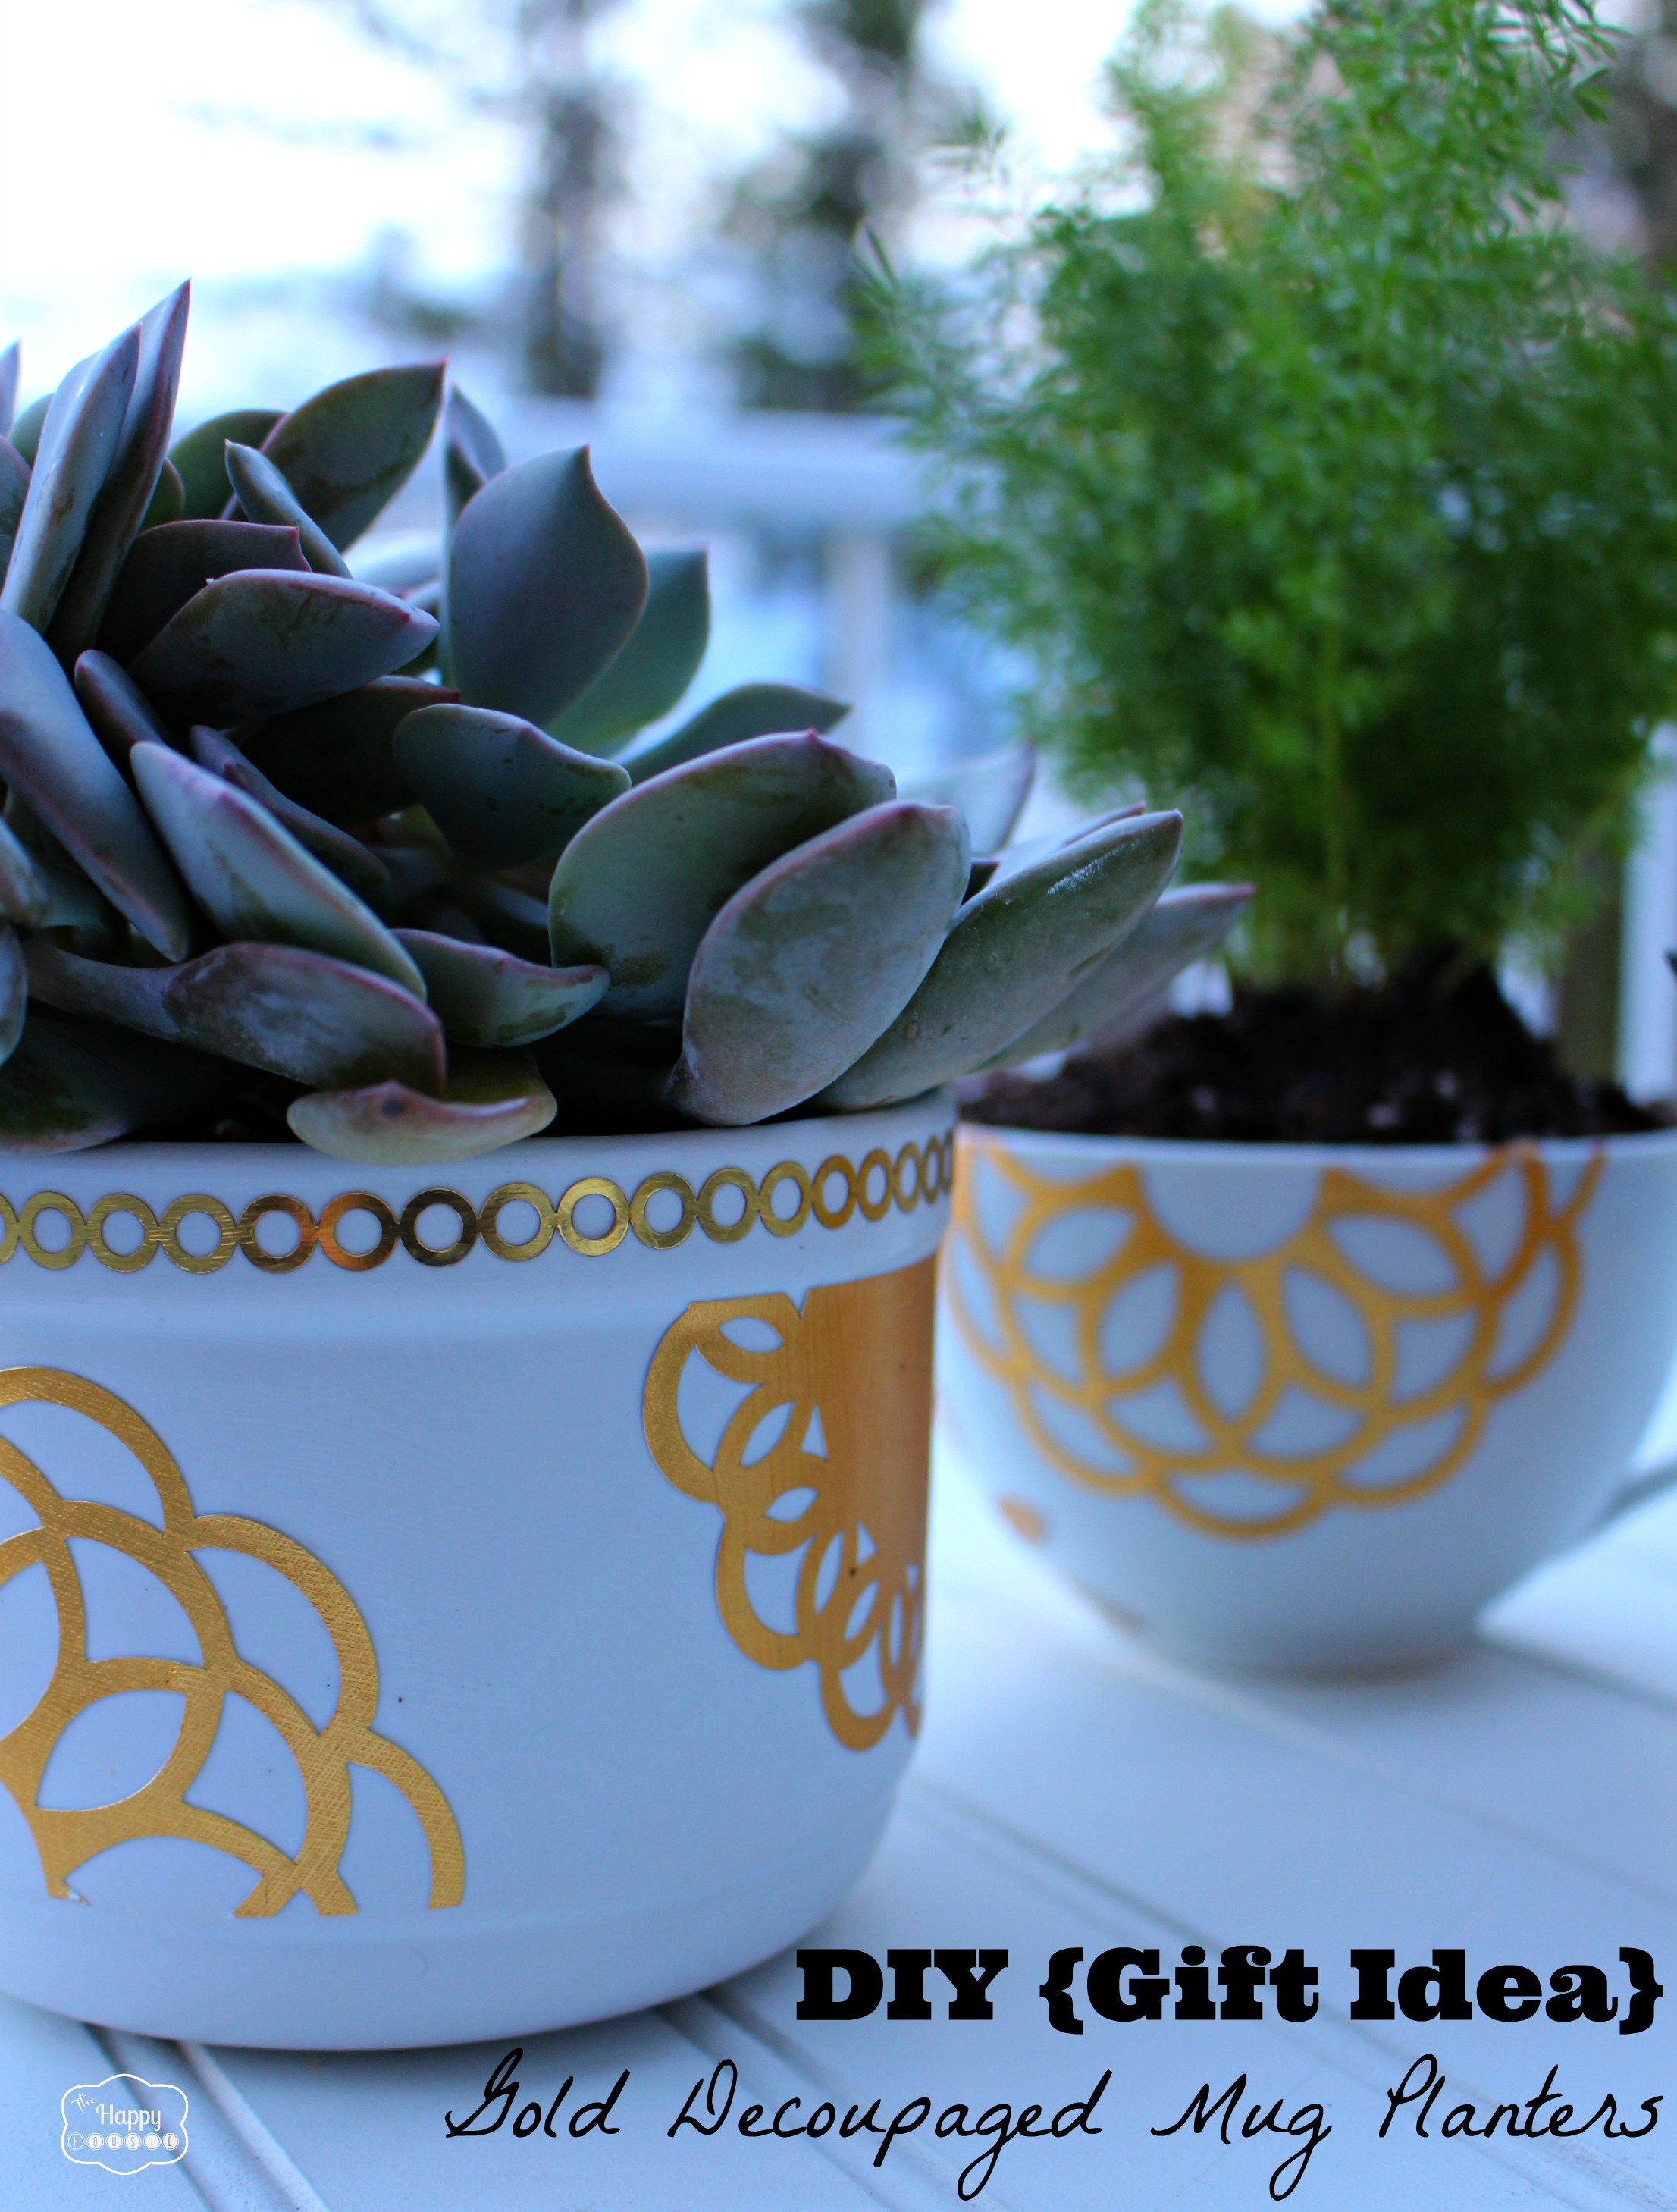
7) Purchase or make some other wall art for the room such as this fabric flower DIY art or the bird cage picture display.
8) Buy or make fun lamps for the bedside tables – these ones are from Target but you could easily DIY something similar by purchasing old lamps, painting the bases in a fun colour and adding fabric flowers to a simple drum shade to dress it up.
9) Once you have chosen your fabric and decided upon the colour scheme to go with, shop for some accessories that you LOVE. They don’t have to be the ones shown here… but should be things that speak to you personally and that love having in your bedroom. Take your fabric with you when you are shopping to help you choose things that go with your colour scheme (they don’t have to ‘match’ the fabric exactly – just ‘go’… or look nice with the fabric colours).
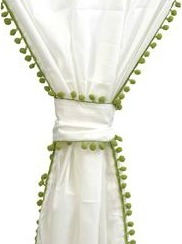
10) One little idea I had after all this was to add some pom-pom edging to Andrea’s current white drapes to give them a little more definition and interest, like these ones. Use the fabric scheme selected dictate the choice of colour for the pom-pom trim.
Please hop over to our joint pinterest board Andrea’s Bedroom for more information about all sources for the above products and website.
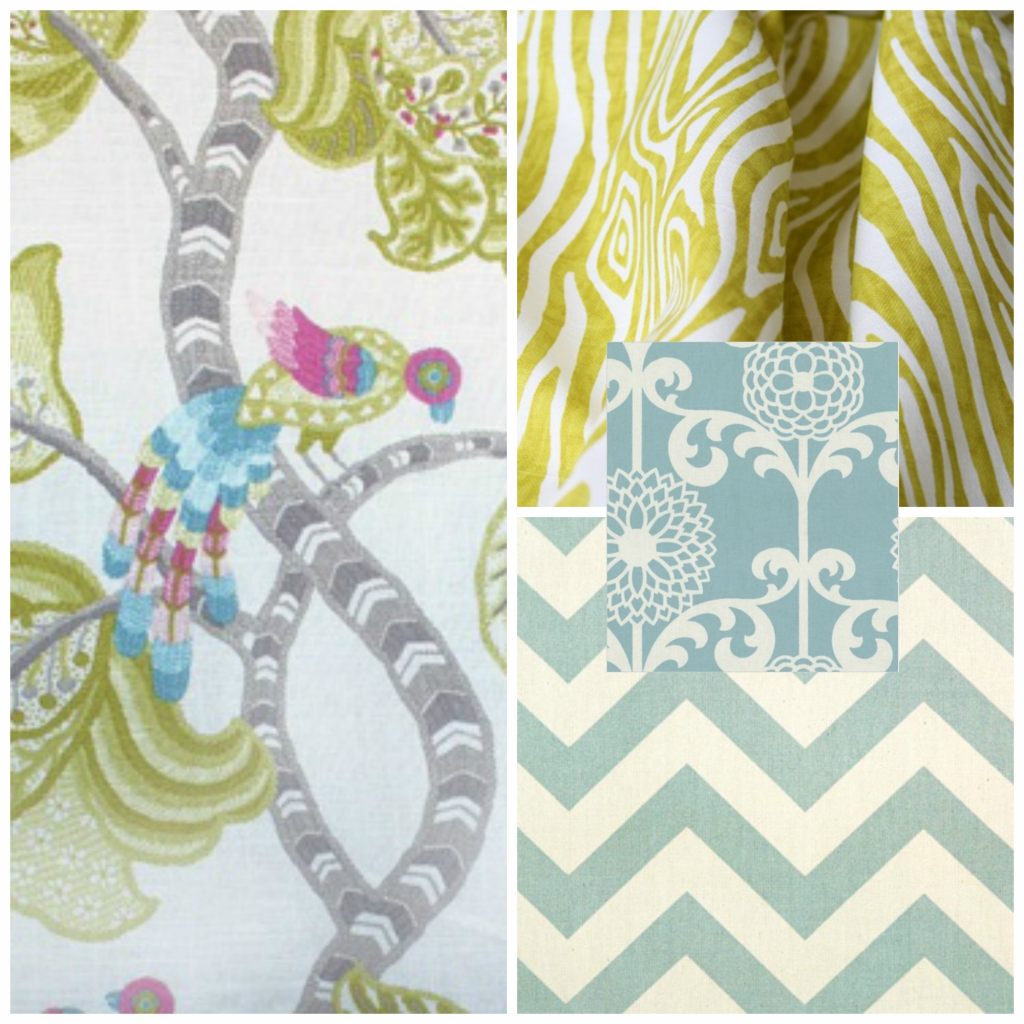
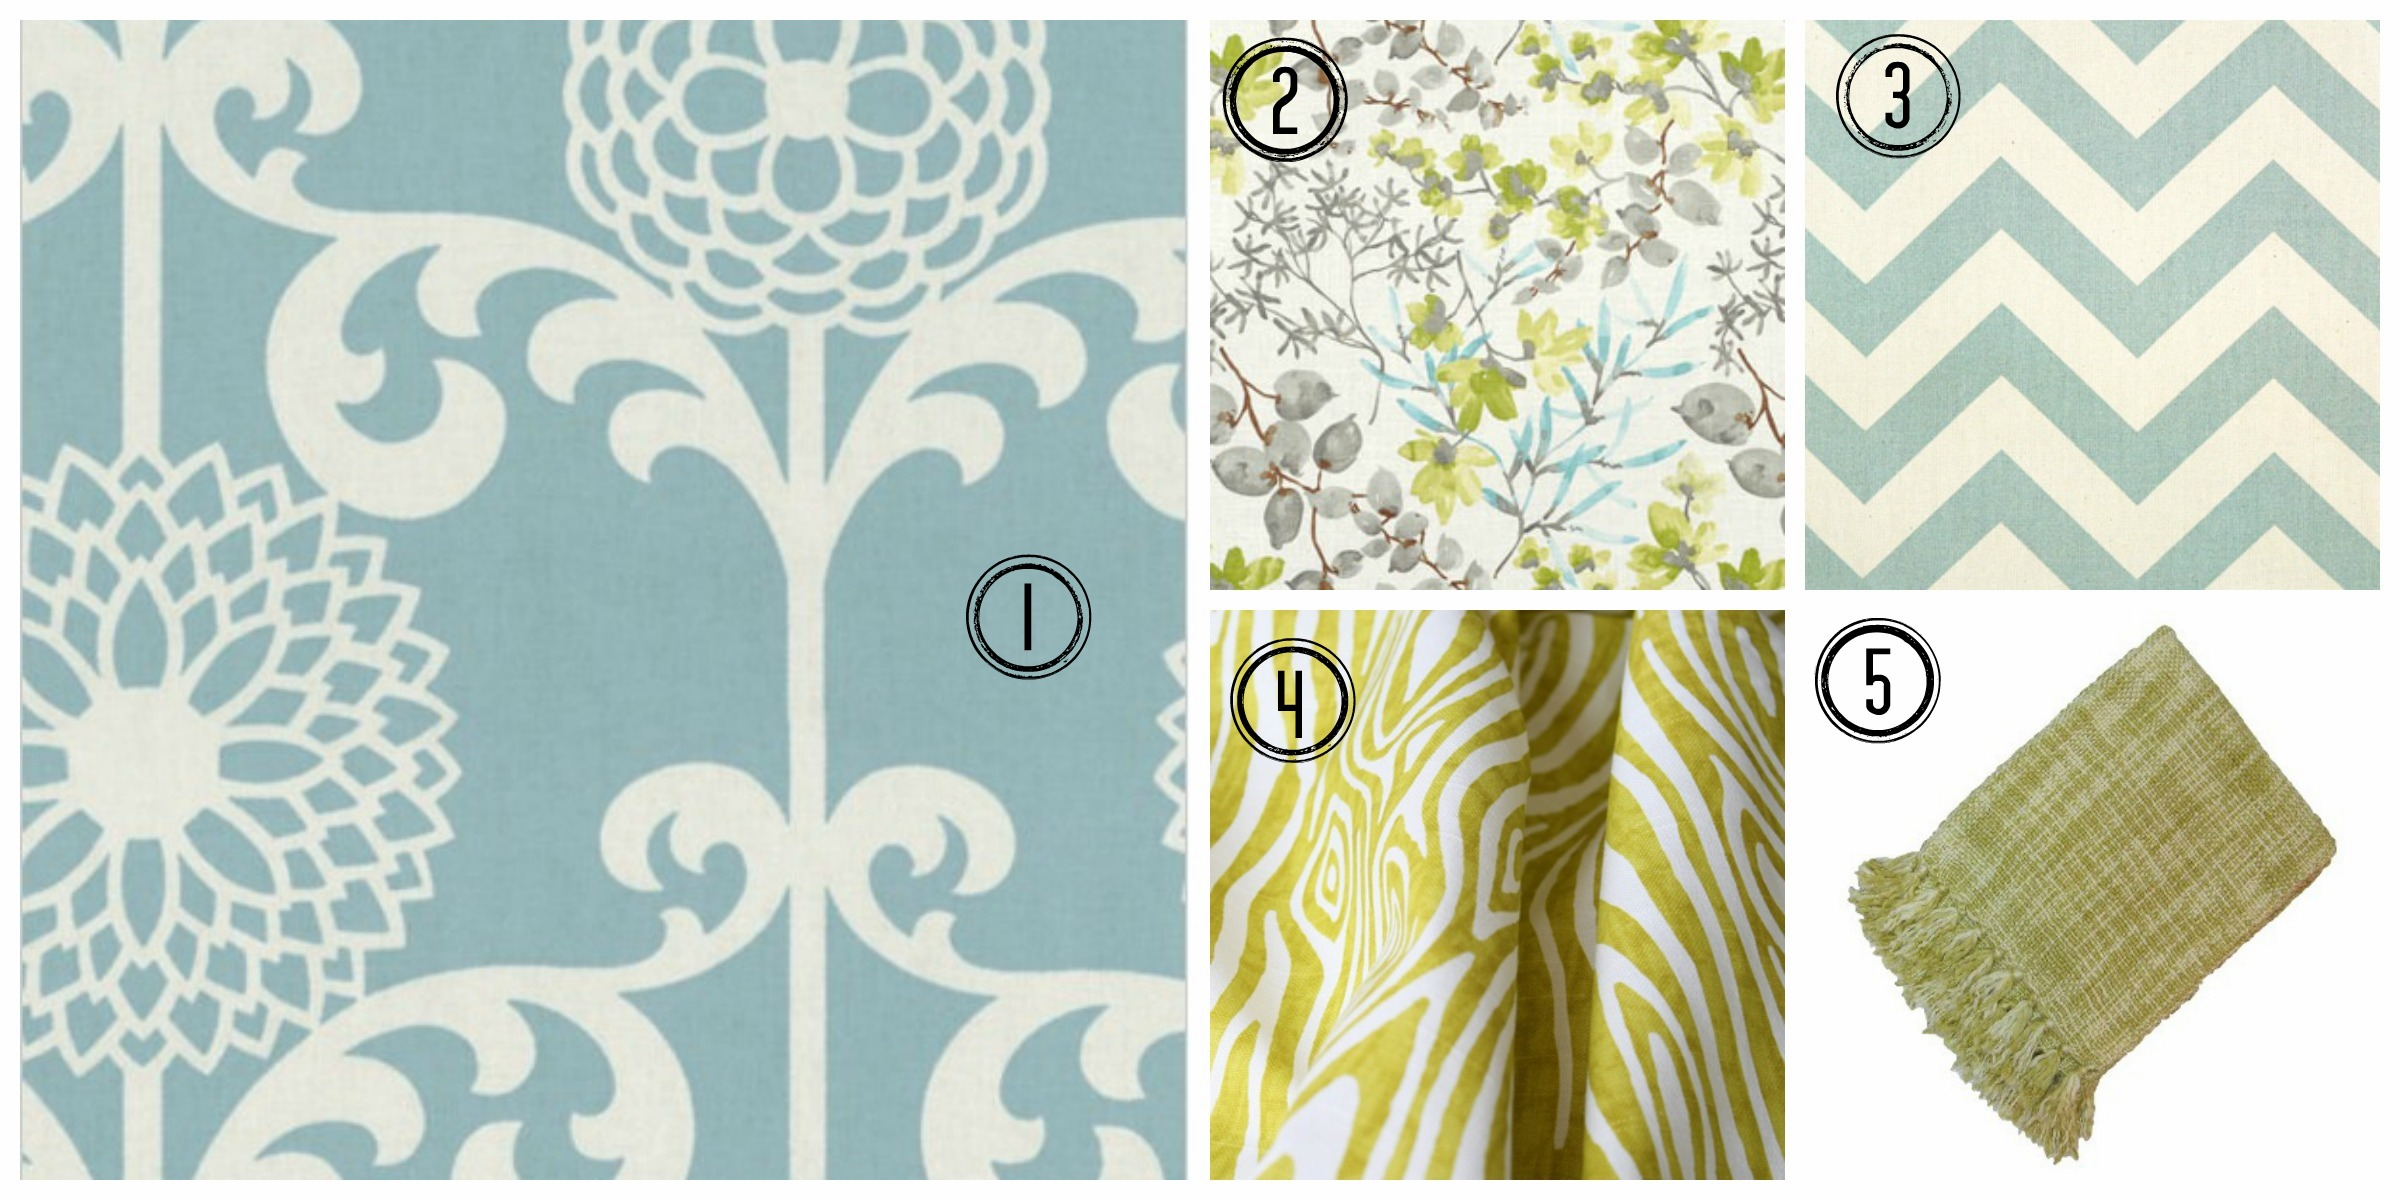
Fabric Scheme Options
Choose a key fabric to create a scheme from.
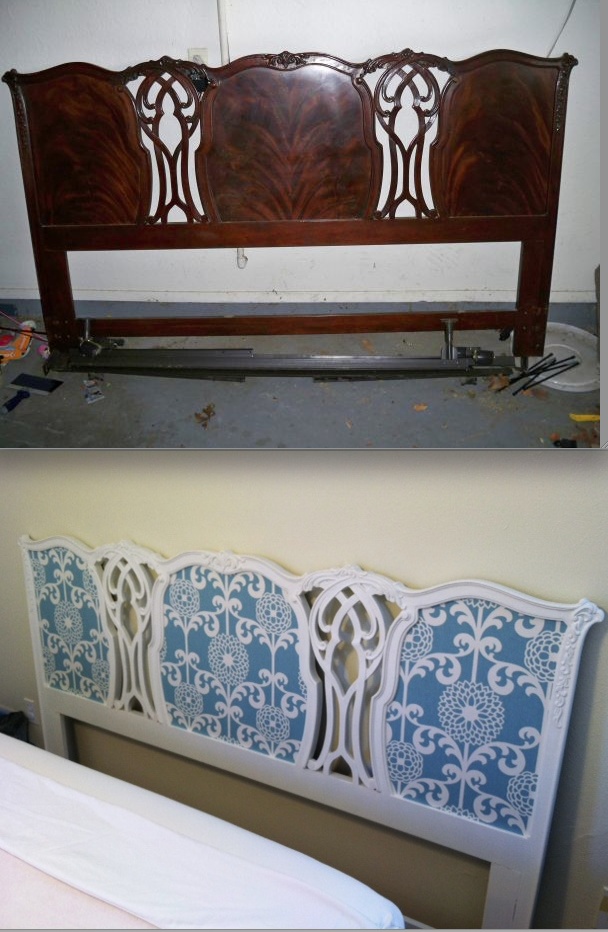
Obviously the main fabric choice for the room (the headboard and bedskirt) has already been made. The secondary fabric choice will be used to bring in additional colour and pattern and to set the colour scheme for decorative touches throughout the rest of the room.
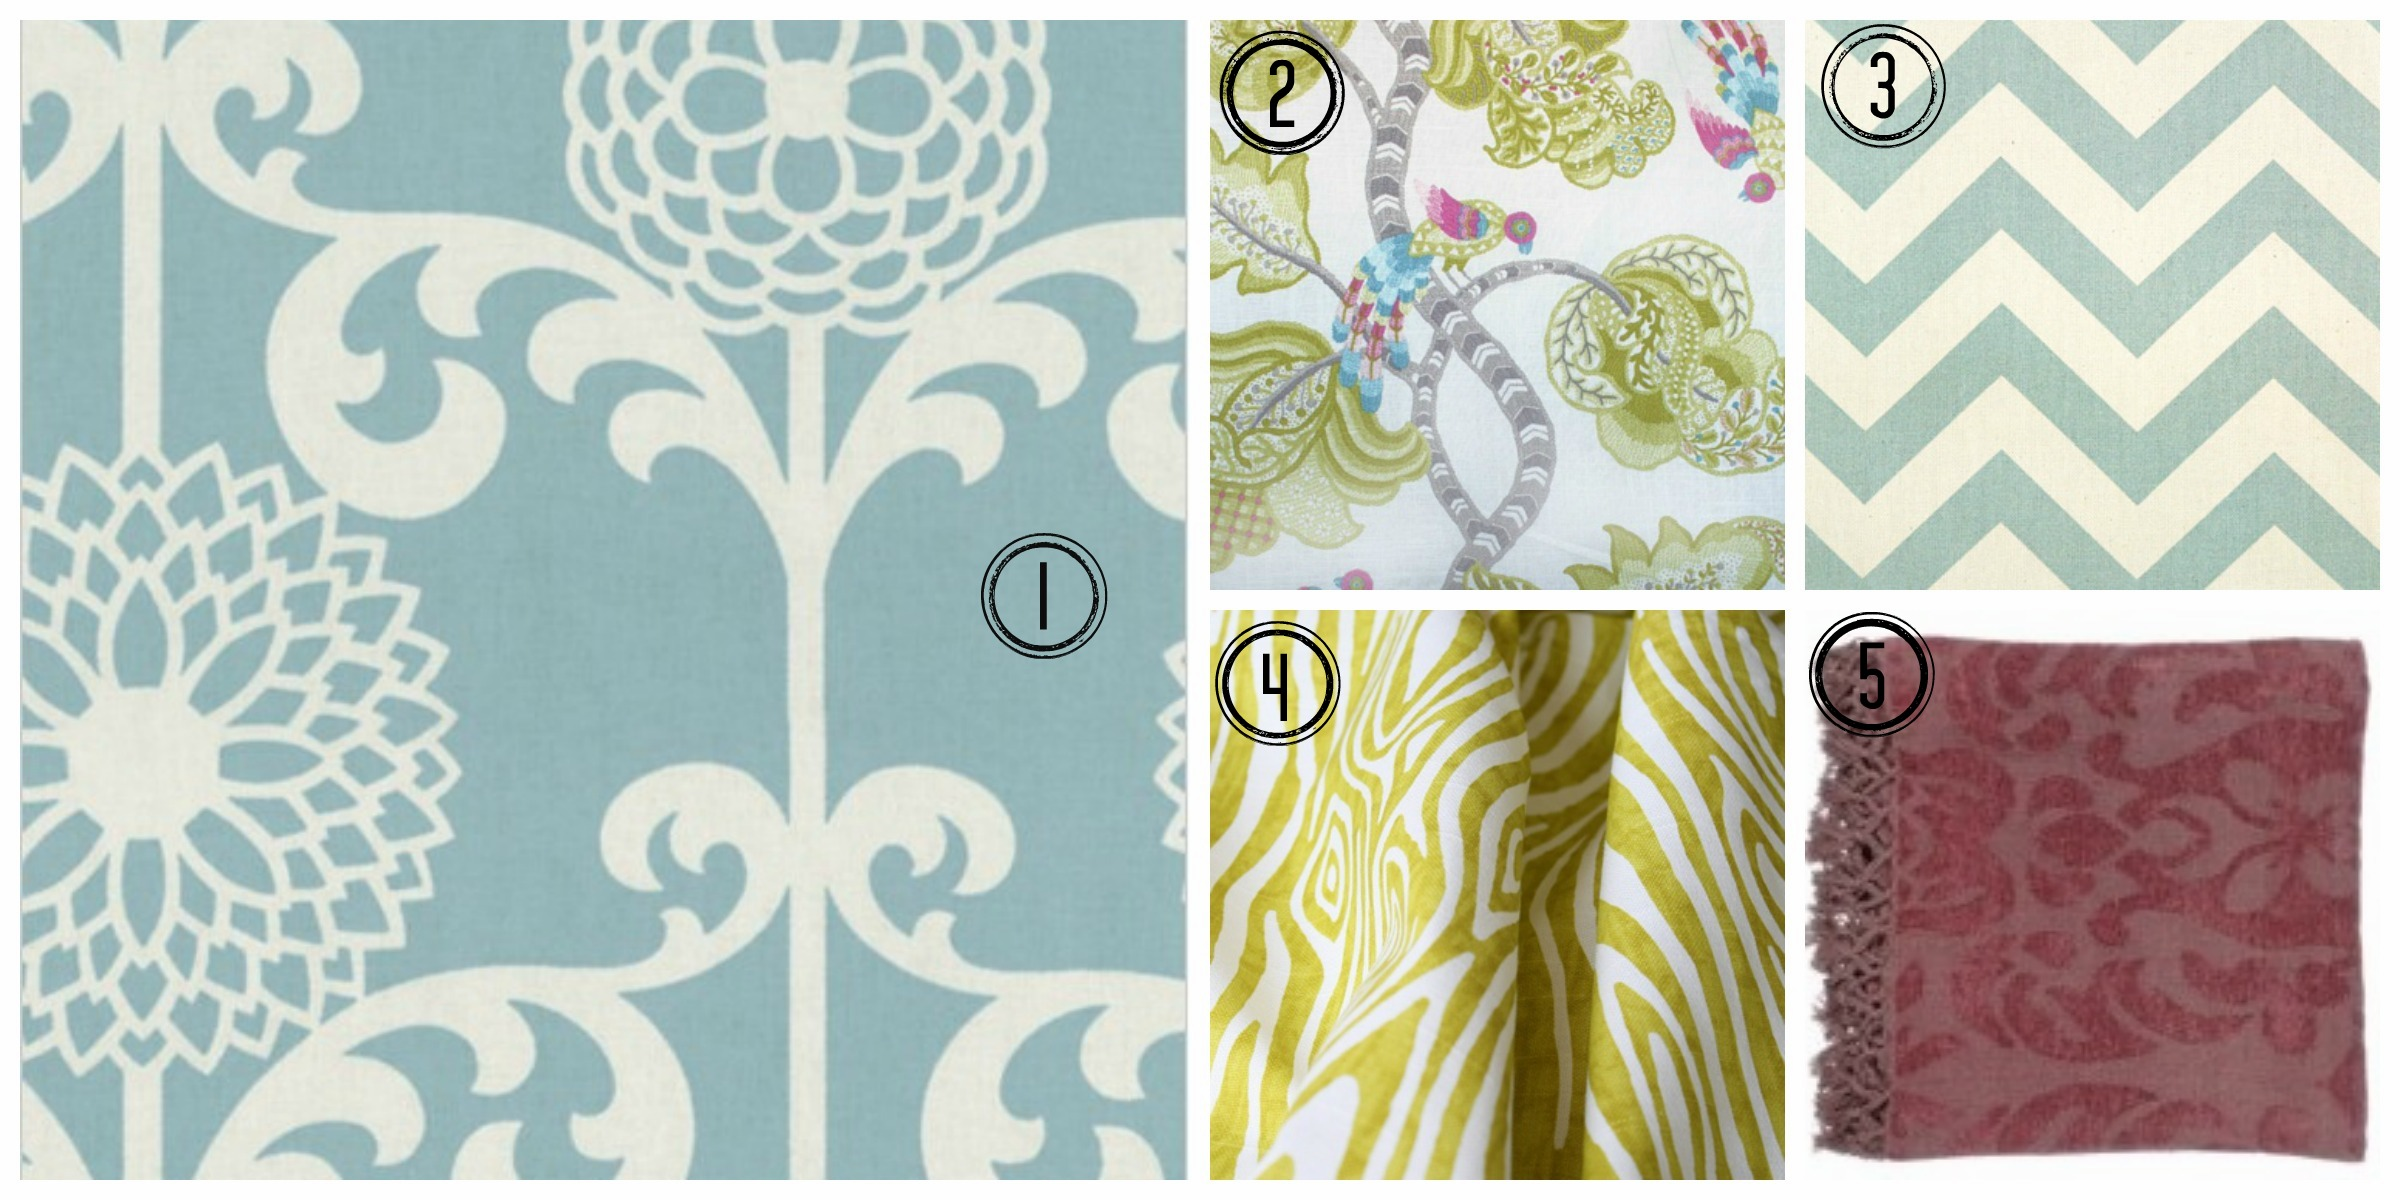
Scheme Two: Gazebo Cloud
Do you ever use fabric to tie your colour scheme together? How do you find your inspiration when designing your rooms??
Thanks for reading! And remember my housie friends, HOME isn’t built in a day. Enjoy the journey!

I may link up at some of these fabulous places below, for more info check out housie parties:
Make the Scene Monday , Monday Funday , Give Me the Goods Monday , Mop It Up Monday , Craft-o-Maniac Monday, Pretty Things, Party in Polka Dots, Project Inspire{d} , Take a Look Tuesday, TCB Get Your Craft On. Tasteful Tuesdays., Share It Link Party, Assets and Efforts, Inspire Me Tuesday, Wow Me Wednesday Whimsy Wednesday , Swing Into Spring Party, From Dream to Reality, The Inspiration Exchange, Fine Craft Guild , , Work it Wednesday, Thursday’s Temptation, Hookin’ Up With House of Hepworth’s, Live Laugh Rowe Live Laugh Linky, Transformation Thursday, Thursdays Are Your Days, Real Family Fun, Pinterest Power Party,, The Weekly Creative , Party Junk, Pinworthy Projects , Weekend Wrap-Up Party, Weekend Bloggy Reading, Strut Your Stuff Saturday, Spotlight Saturday, Get Schooled Saturday, Overflowing With Creativity , Sundae Scoop , Suburbs Mama , That DIY Party

Does the Waverly Fun Floret (main fabric) match the chevron pretty closely? I’m trying to design a bedroom with that fabric as the headboard and having a hard time finding any other blues that are that same color. Thanks.
Hi Bernadette! Sometime if you go to fabric.com or tonicliving.com and pick a fabric they will show you how other fabrics coordinate with it – you may want to give that a go. I am not sure exactly about this fun floret fabric because that is something that Andrea had already purchased. I always recommend ordering samples in to see how things coordinate before ordering a large amount. Good luck with your search!
I love those fabrics you chose to go with her headboard. I’m struggling with mixing patterns in my master bedroom too, definitely not because I’m scared of it but whenever I try, I think it just looks crazy… But scheme 2 is kind of what I’m going for, so I’ll be pinning this and trying again! 🙂
Hi Heidi! I love scheme two as well…. the blues and greens with the grey are so pretty and would give you a very calming and relaxed feel! Good luck!
Love the headboard! I struggle with matching fabric so I tend to pick one colourful fabric and build based on the colours in it.
I think that is a great way to do it Al – doesn’t sound like you struggle – you know exactly where to start!!
very beautiful Krista, I love how the fabrics go very well together! 🙂 they are beautiful! & yes really loved how Andrea transformed her headboard!
Really love the inspiration board for her master bedroom; everything is so pretty!
& #10: adding a pom-pom to the trim; really nice!
Thanks Ingrid – the pom pom trim would be a fun addition!! I would love to try that somewhere!!
What beautiful ideas! I love how the fabrics you picked go together so well.
That headboard is beautiful also! Well done Andrea!
Hi Kelly!
Thanks…the fabrics are pretty with her headboard fabric I think – she did such a fantastic job. I really look forward to seeing it all come together!! Hope she sends lots of ‘afters’:)
Oh! I bet she loves the idea board you put together! That bird fabric is so pretty and interesting. I can see how you can use it as a jump-start for an whole room. She has done such a great job with her headboard- what a transformation! I hope she lets her post her finished room when she is done!
Hi Bronwyn!
I do love that peacock fabric… it certainly is interesting and unique. I think a small dose of it would tie a whole room together because it is such a strong accent. I look forward to seeing her after – I hope she lets me post it too!!
Krista, you are amazing! I just love what you put together out of, seemingly, nothing. You are truly talented and have such a wonderful vision. I just found your blog; I have LOTS to learn from you. Can you continue to post your scheme/idea boards? They make all the difference, you hit all the areas of a room and facilitate a redo. Lots of thankful hugs. Pat.
Hi Pat! Fabric is the place to start!! Or art… thanks for your awesome comments!! I will try to keep doing the inspiration boards… have a few more rooms over here to write about and a few friends and a couple of online friends… maybe more ‘before’ will come my way too:)
I LOVE that headboard! She sure has an eye for what works, even if she doesn’t feel sure about everything! I would never have imagined you could do that to that headboard. Beautiful!
I agree Treva – that headboard redo is amazing! It looks so funky and pretty now… she obviously has good ideas and DIY skills but just wasn’t exactly sure where to start – I think that fabric is always a great jumping off point, unless you have a piece of art you really love.
I LOVE IT !!!!!!
Thanks Krista…=)
I want to start soon!
So glad to hear that Andrea!! Probably no big surprises after the pinterest board…. but glad you are happy with it. I can’t wait to see which scheme you go with and please keep me up to date with your after pictures!!