
Main Bathroom Before & Renovation Plans: Modern Boho Farmhouse Bathroom
Here are my main bathroom renovation plans, with a modern boho farmhouse feel!
Whew! It’s been a hectic few weeks. I’ve planned some pretty big renovations before, but it’s been awhile since we tackled one quite as detailed (and messy!) as this double bathroom renovation.
The drywallers were here for their final day of sanding yesterday (as much as I love DIY I don’t DIY drywall finishing). Which means that the walls and ceiling in both bathrooms (as well as in our bedroom, the hallway, and the kitchen), are now ready for me to seal and paint. Yay!
Plus we have two unbuilt PAX wardrobes in boxes in the basement hallway just waiting for us to put together. Add that to my husband’s birthday, two kid’s birthday parties, hockey, two soccer games, and a dance show this weekend and it seems like we’re going to be pretty busy. I’m hopeful that I can get a lot of the priming and painting done today during my “work at home” day.
Bathroom Renovation
But… the exciting part is that it means we are almost ready to move ahead with tiling. Woot woot! That should happen next week. And this time, it’s not a job I’m going to DIY (you can read my tiling tips from a PRO right here). Today I’m here to share my before pictures of the main bathroom along with our plans and my inspiration board for this bathroom project. I’m pretty excited about the modern boho farmhouse vibe that it’s going to have when it’s all done!
*this post may contain affiliate links – see my disclosure policy here
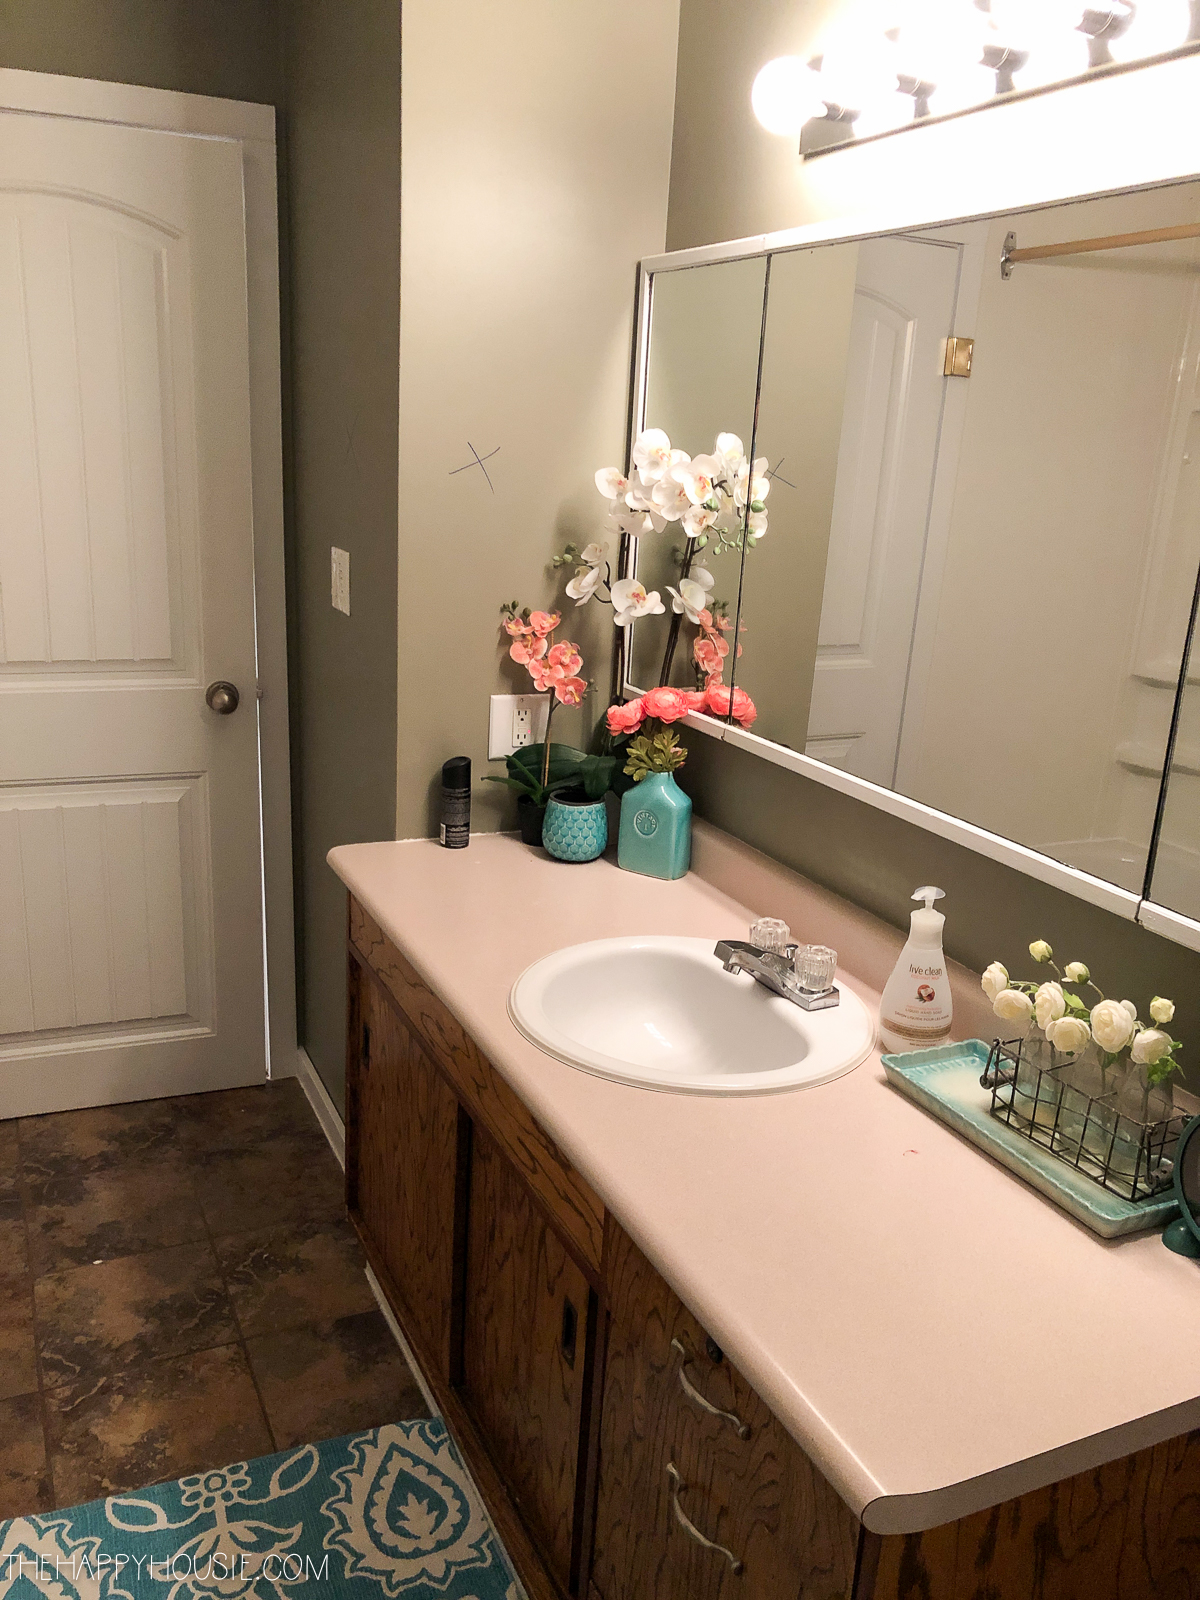
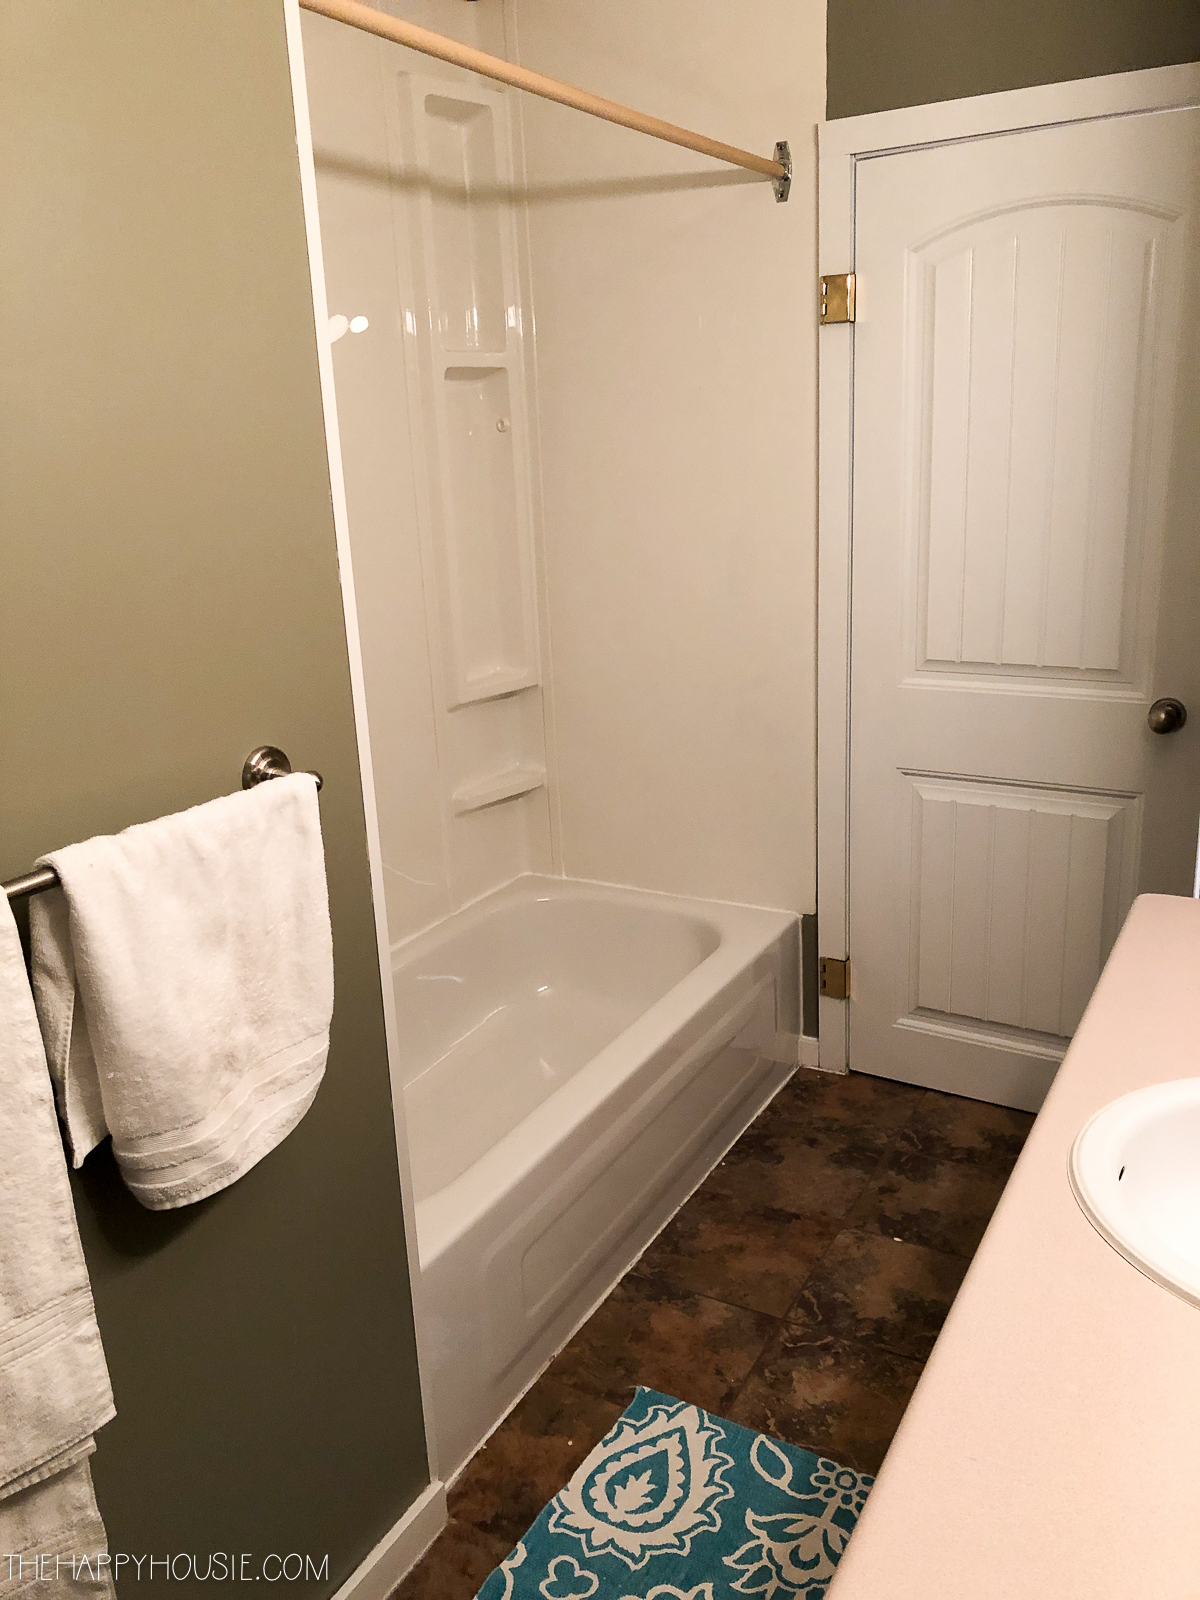
So here is what we started out with…
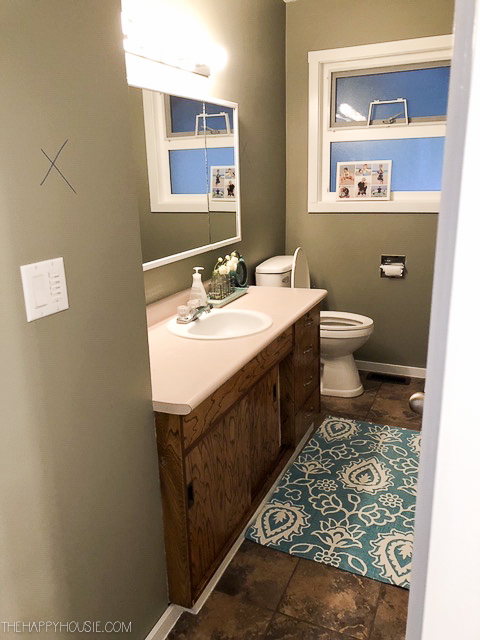
It was a fairly standard 70’s house sized main bathroom with a tub/shower combo – kind of long and narrow and tight feeling. The X on the wall to the left as you enter means that wall was/is going (it’s the wall to a small hall closet at the top of the stairs but we use the garage entrance so we hang all of our coats etc. downstairs). You can see it is marked on the back side as well in this picture looking back towards the door…
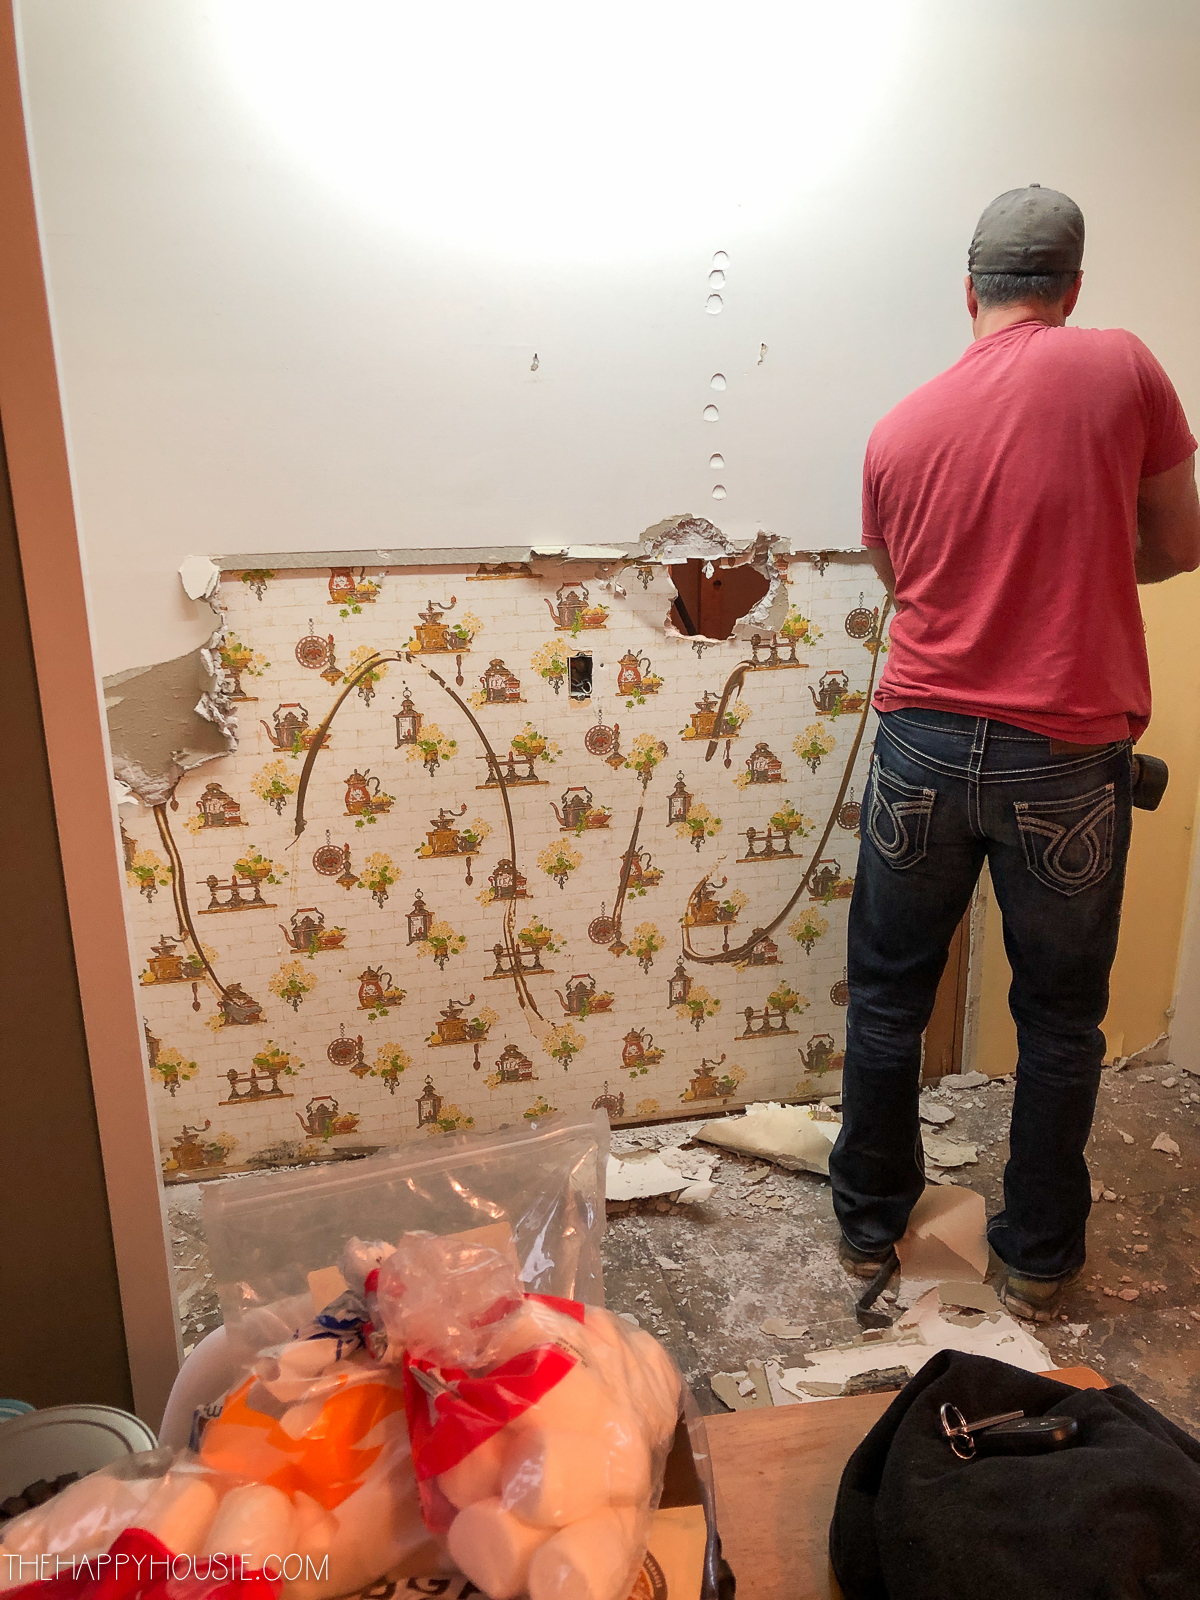
The main bathroom backs directly onto the kitchen eating area wall. Here is a picture of it mid-removal renovation…
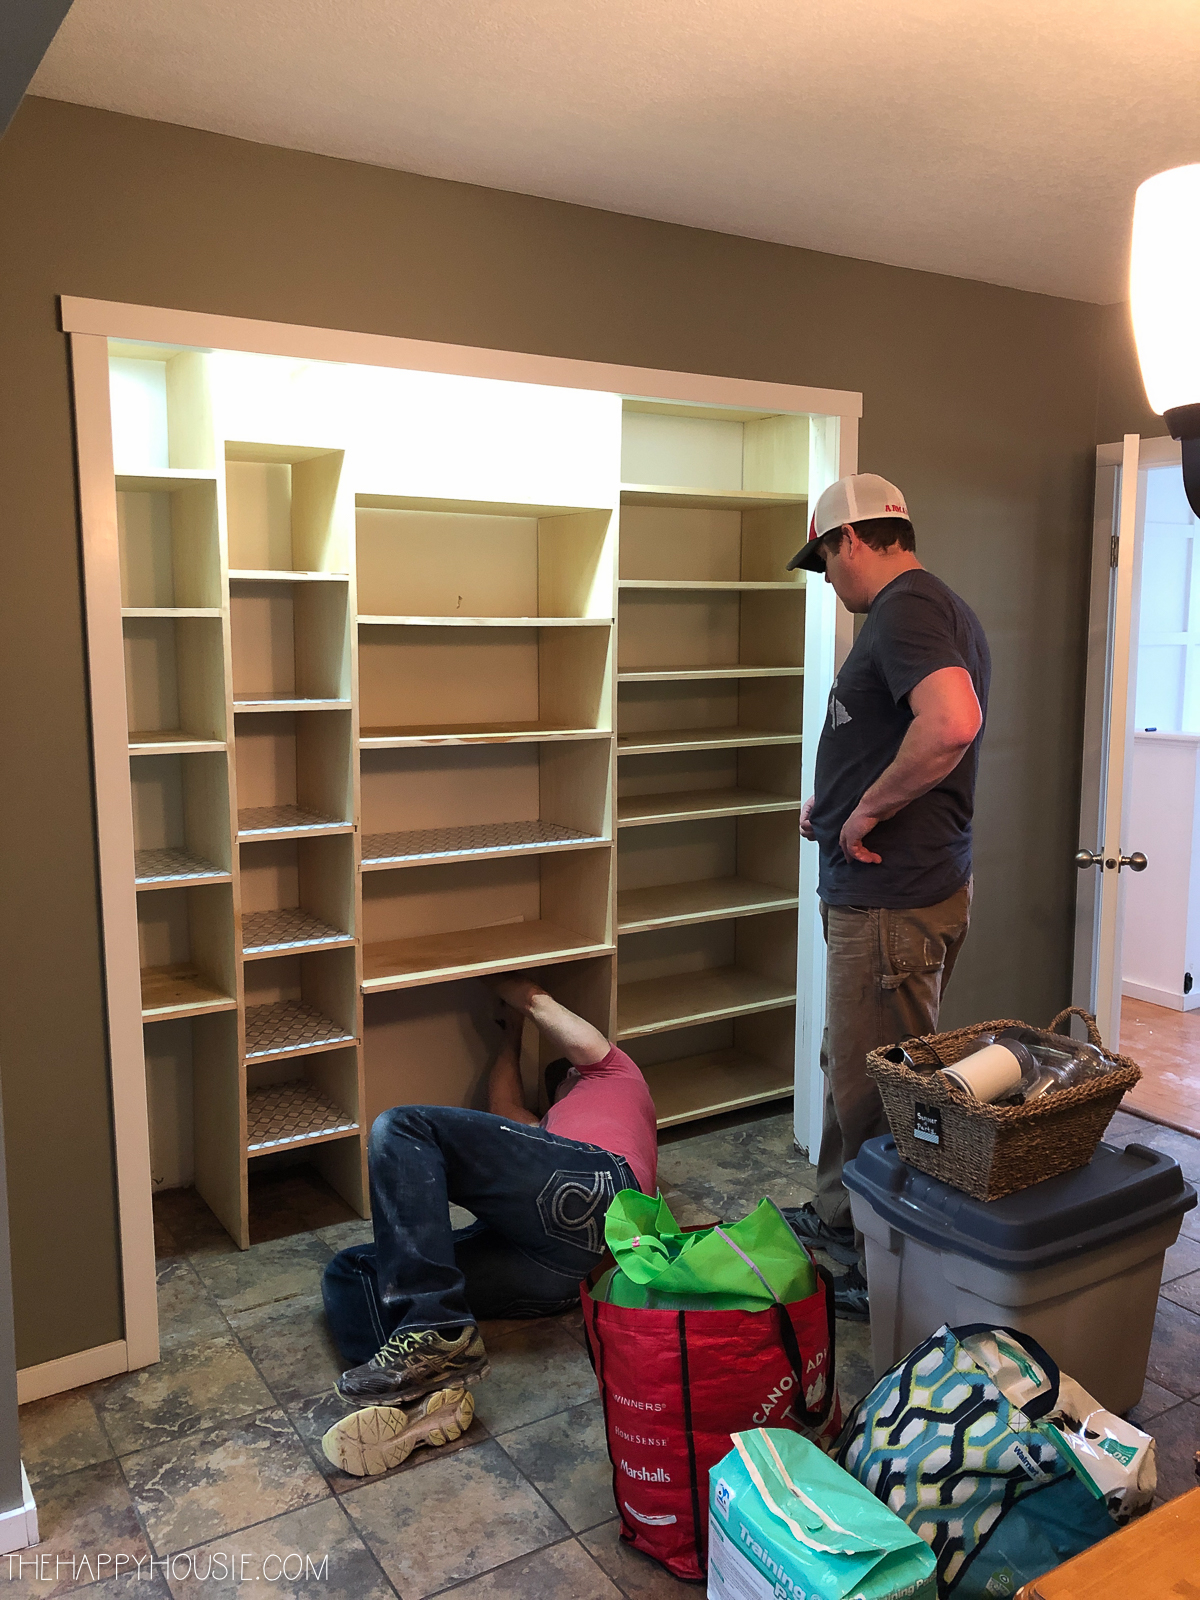
We have temporarily moved the shelving from this closet to the other side of the kitchen until we tackle the kitchen renovation. Where the doors used to be was reframed and taken into the main bathroom, which is directly behind the back wall of that closet.
We discovered more than a few layers of old wallpaper in the closet. I’m not sure that it was always a “closet”…
Here it is opened up to the main bathroom…
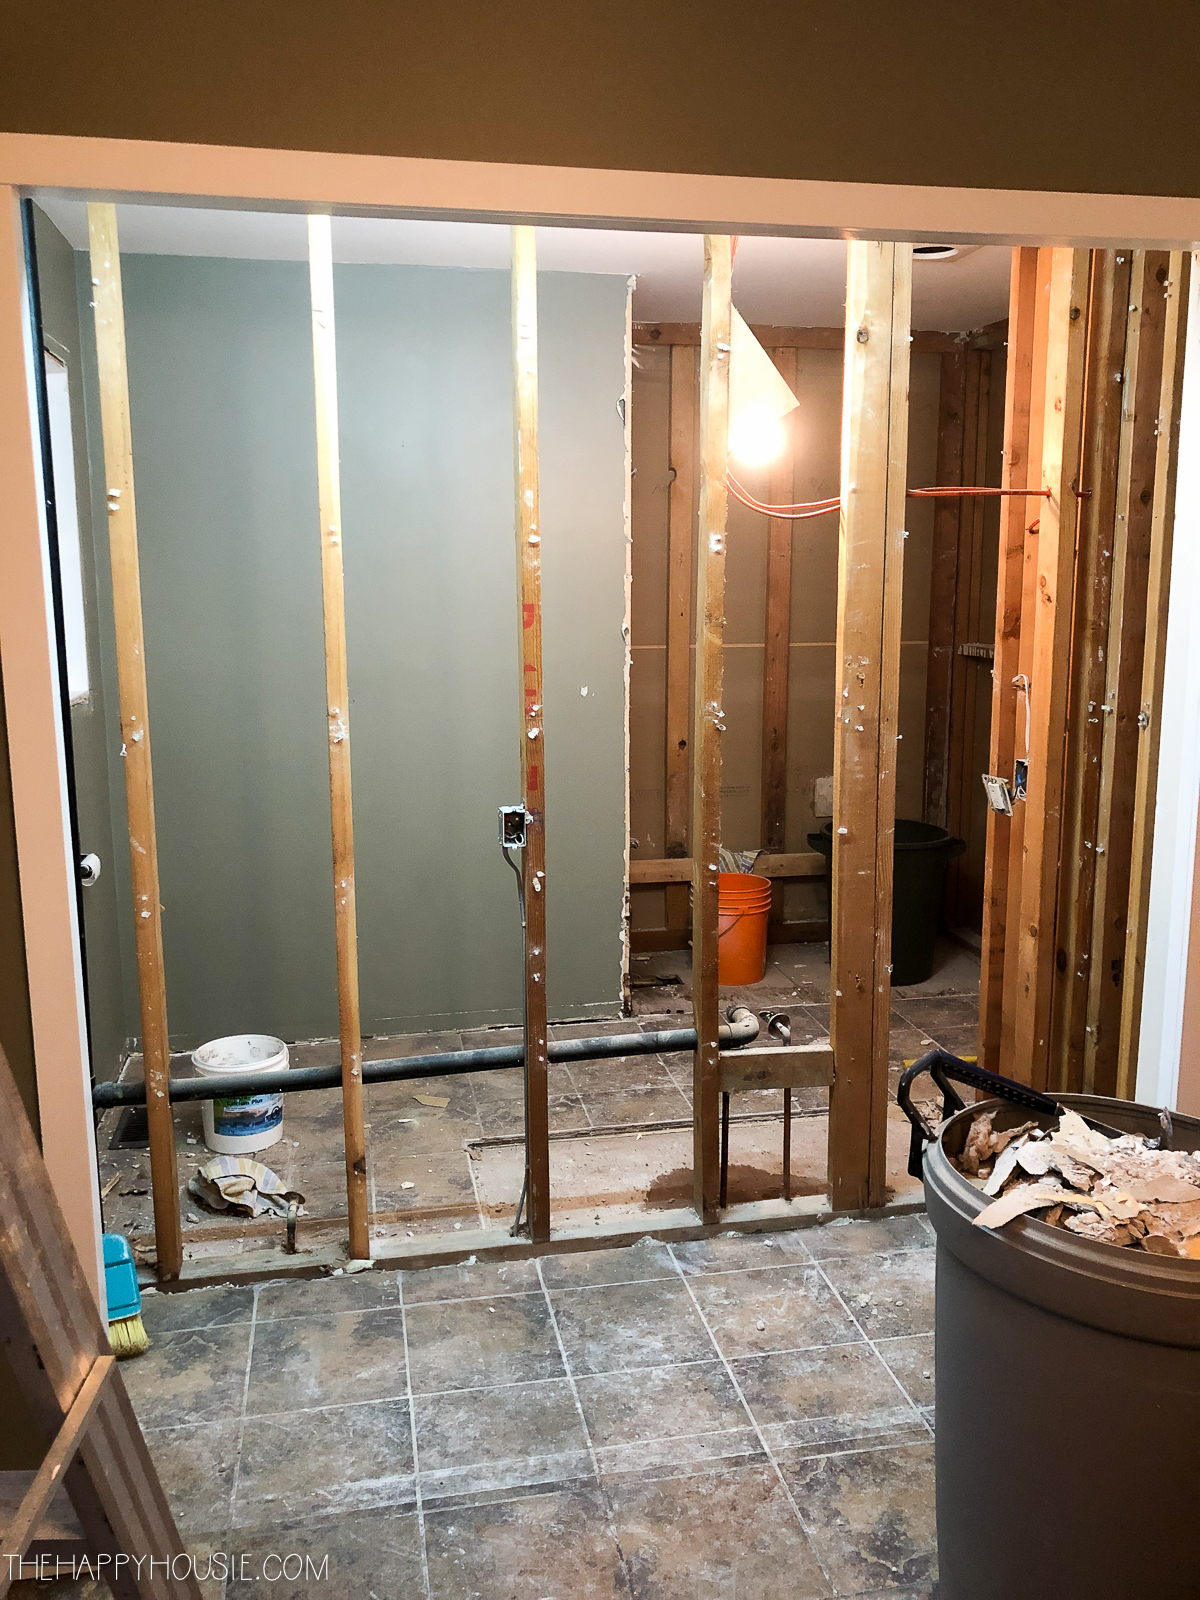
Taking out those two closets gained us a bit more then two feet of width. We also removed the old tub…
Before…
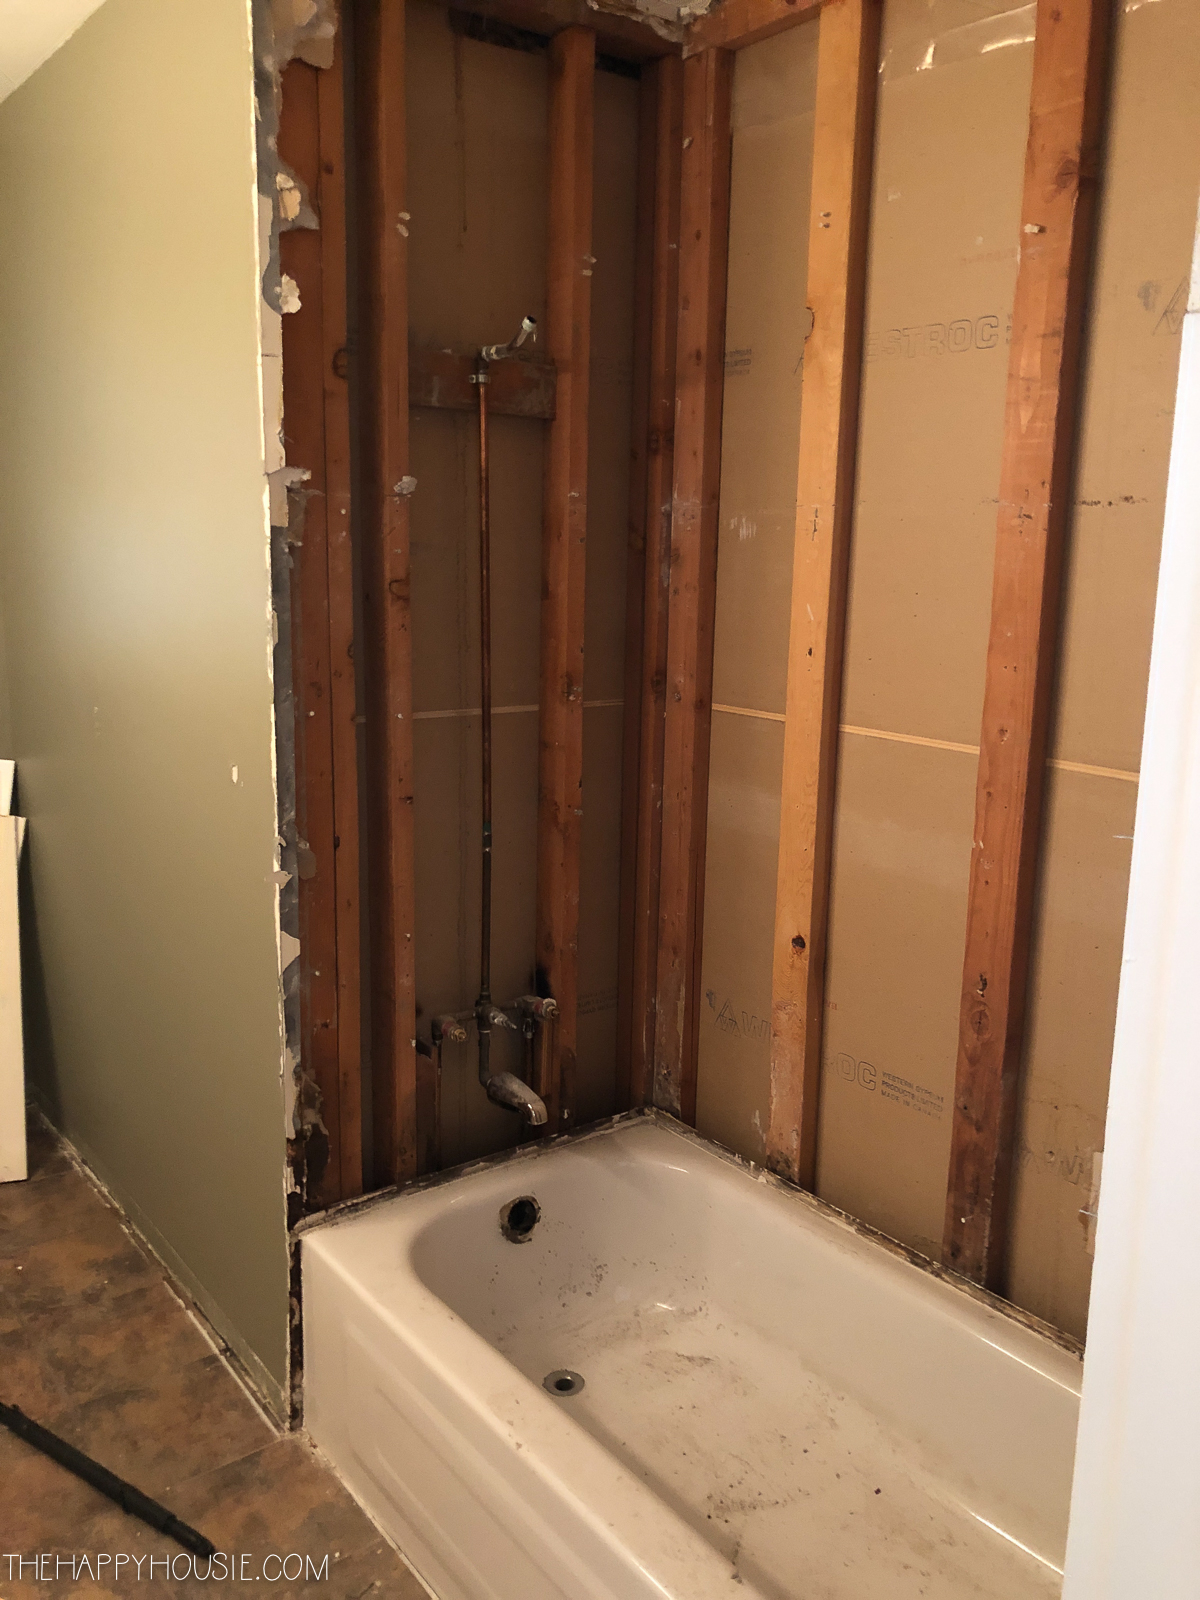
And…
It has gotta got worse before it gets better, right?!
Well, to move around the plumbing and electrical, all the drywall had to come out. And the plywood floor!
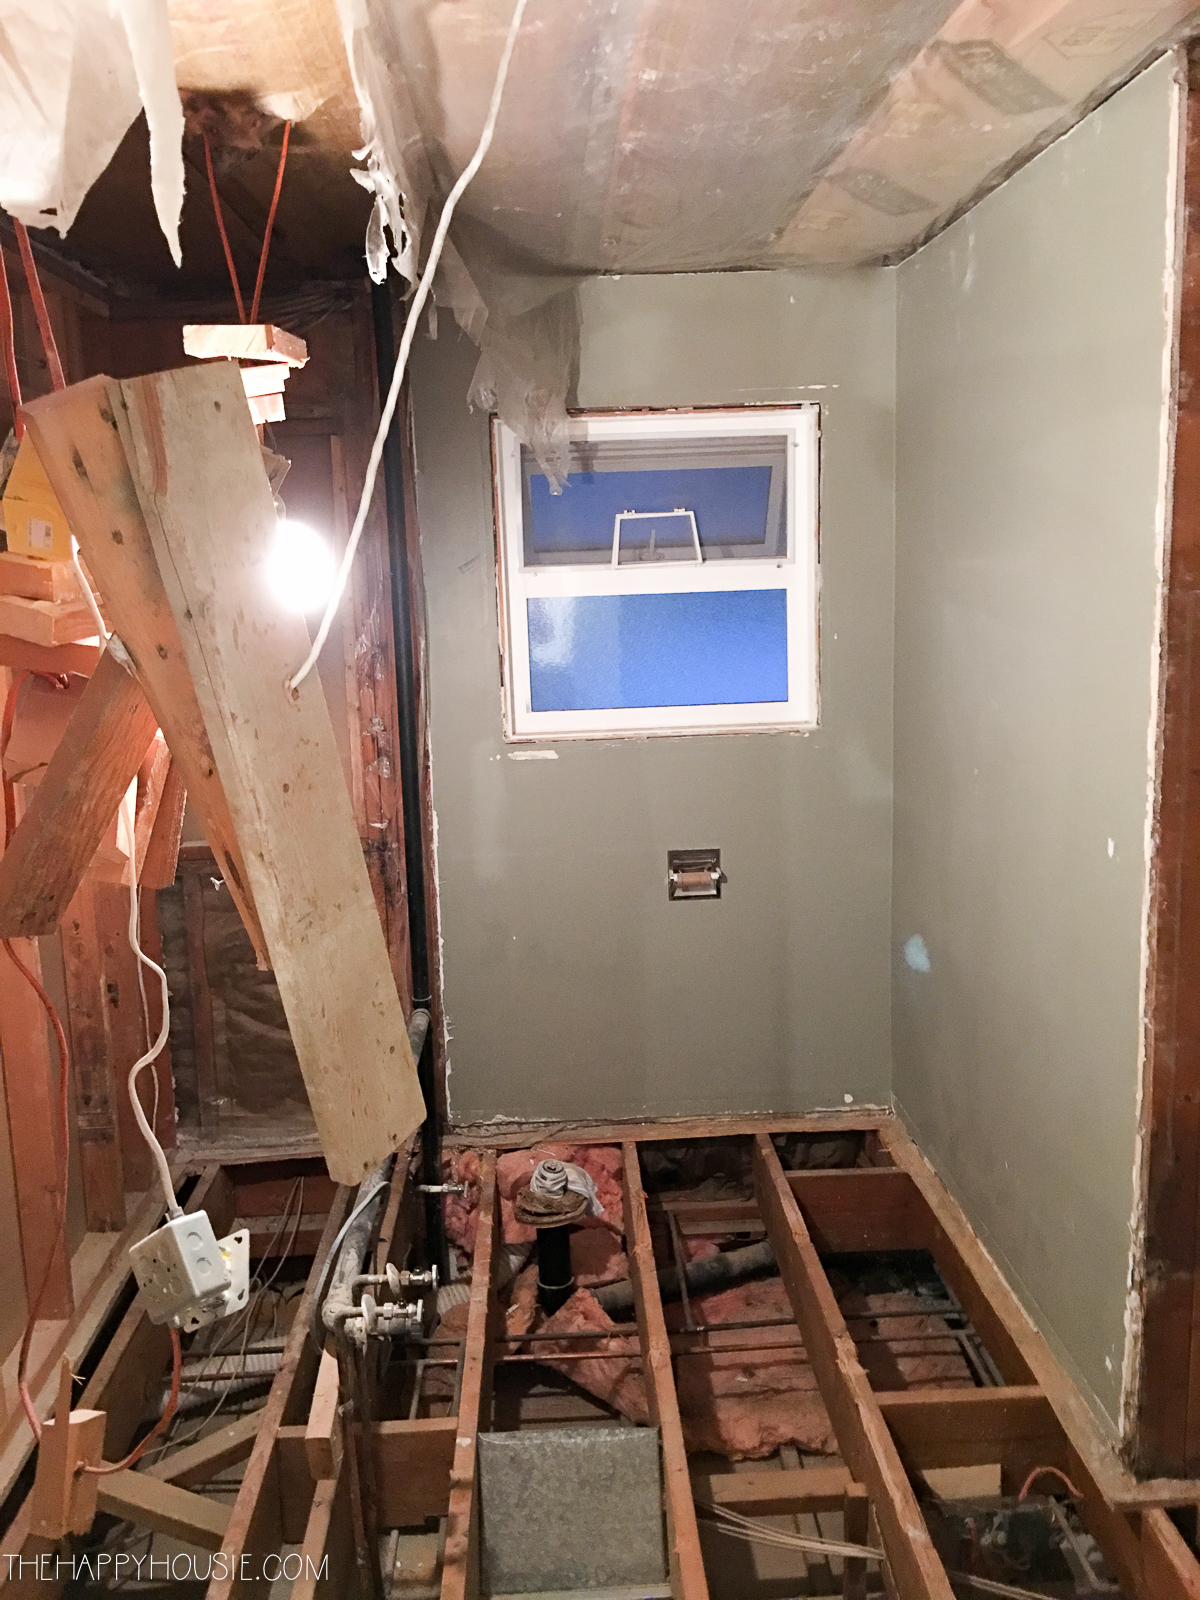
Scared yet?
Ya.
At the same time, we took out a closet in our master bedroom in order to move some walls behind it and create a shower in our ensuite. At one point you could see from the kitchen eating area directly through all the way to our master bedroom!
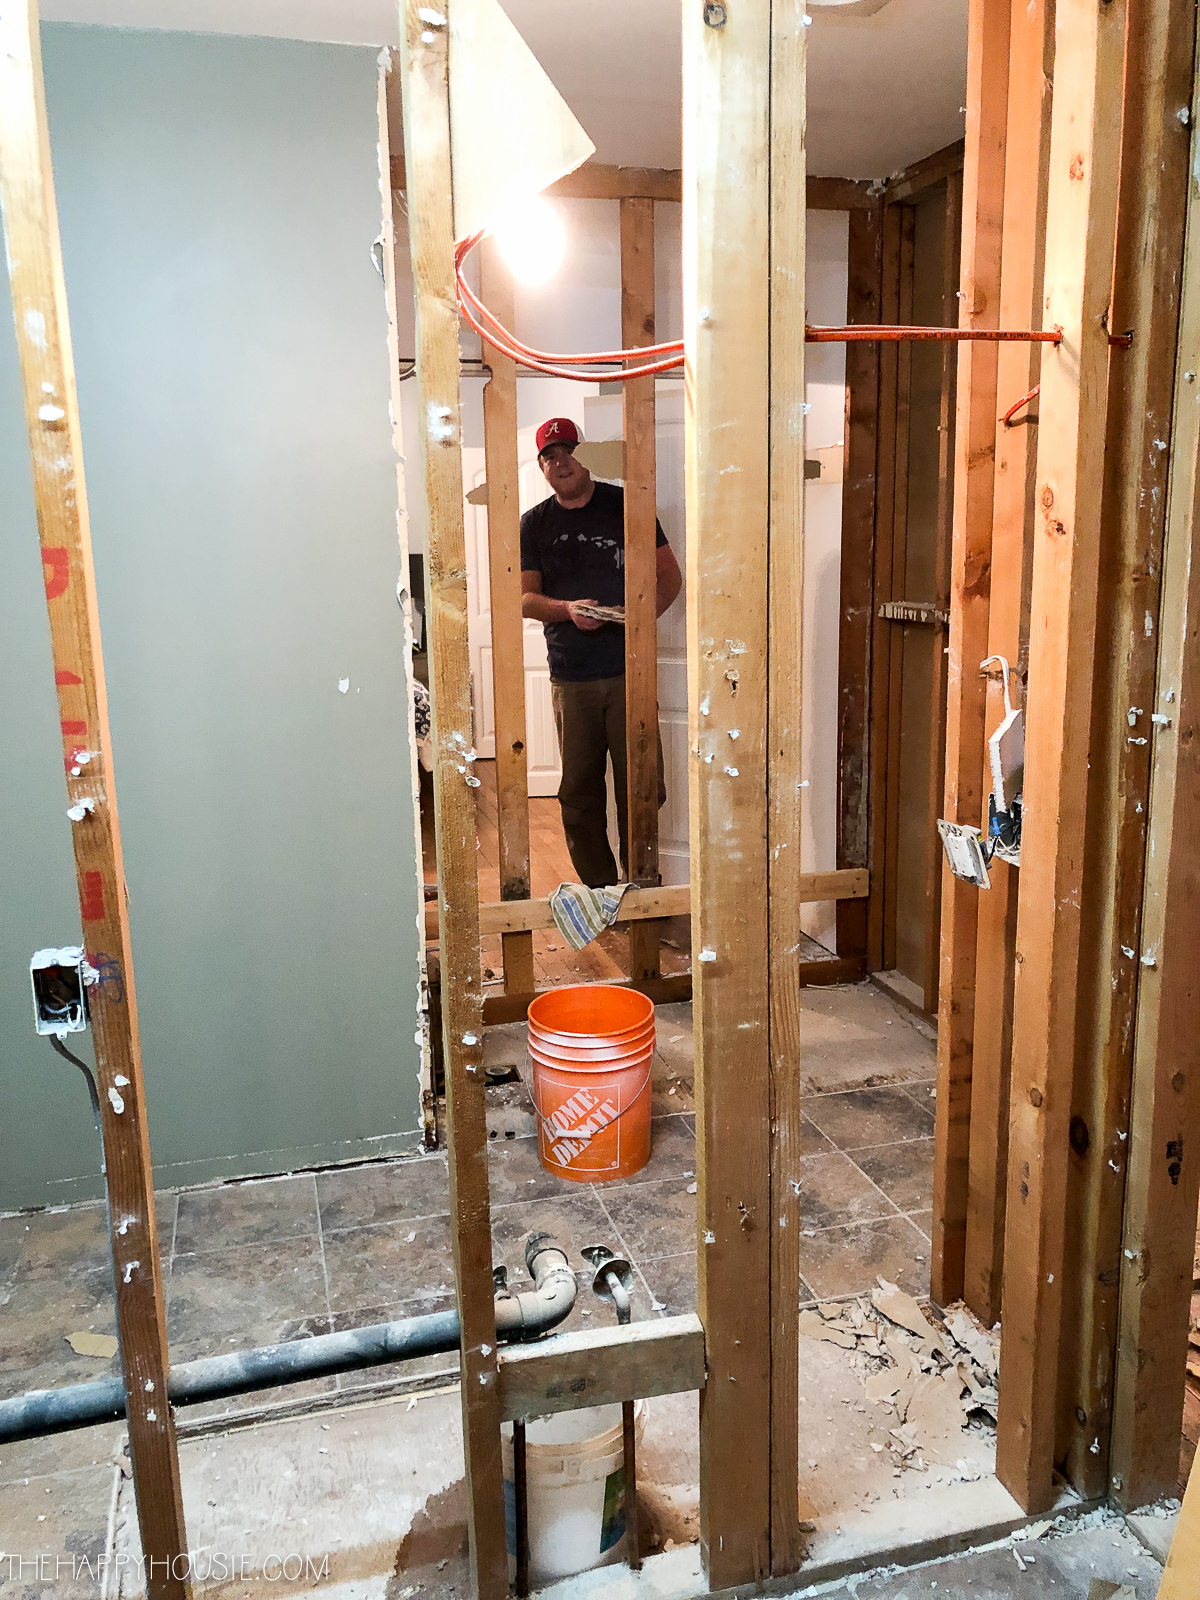
EEK!
So, while we did the demolition ourselves with the help of a very handy friend of ours, we elected to allow professionals to tackle the plumbing, electrical, and drywalling.
So it’s not a total DIY. But still rather messy and disruptive, none-the-less. As you may know, I’m a bit of a fan of being organized and tidy, so that is definitely the hardest part for me. Moving everything around all the time and trying to find homes for things so you can attempt to live a somewhat normal and functional life mid-ren0.
BUT… you just have to keep your eye on the prize, and I can’t wait to see how amazing this beautiful modern boho farmhouse main bath looks once we start putting all these pieces back together.
Want to hear about the plans, now?
Something pretty to focus on after all that mess?!
So! Here we go.
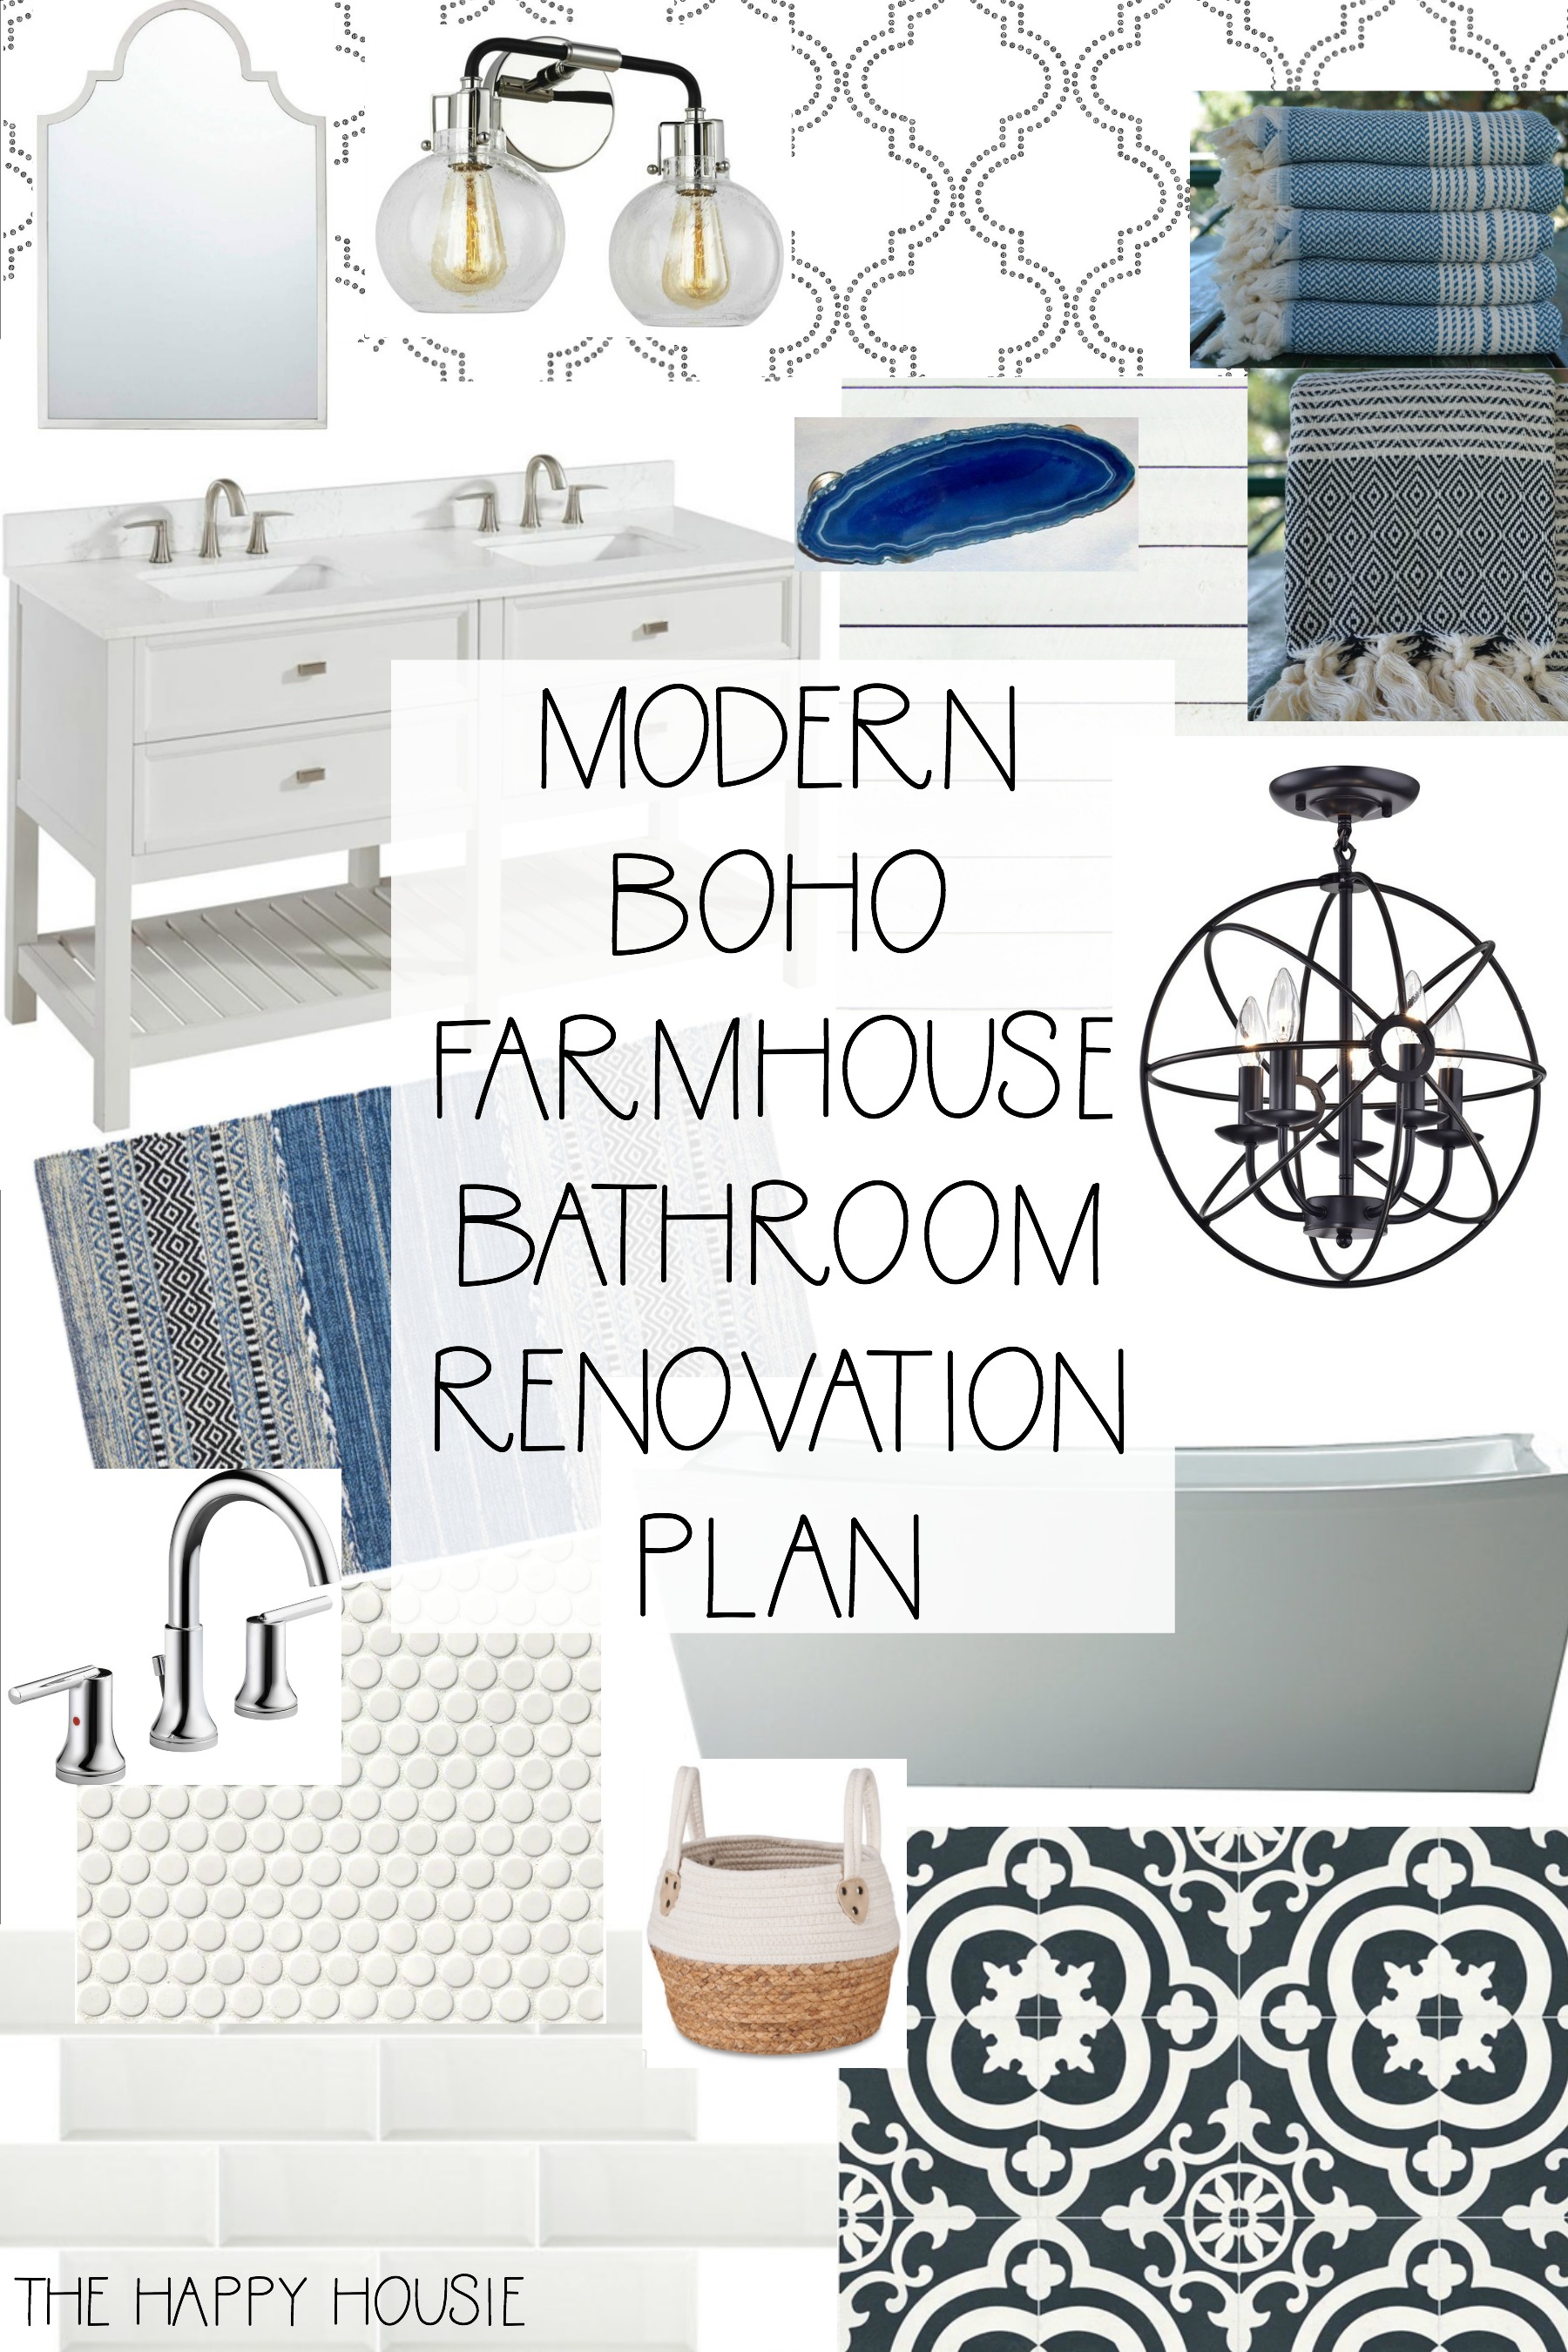
The PLAN:
I’m super excited to be partnering with Wayfair on some of the elements in this bathroom.
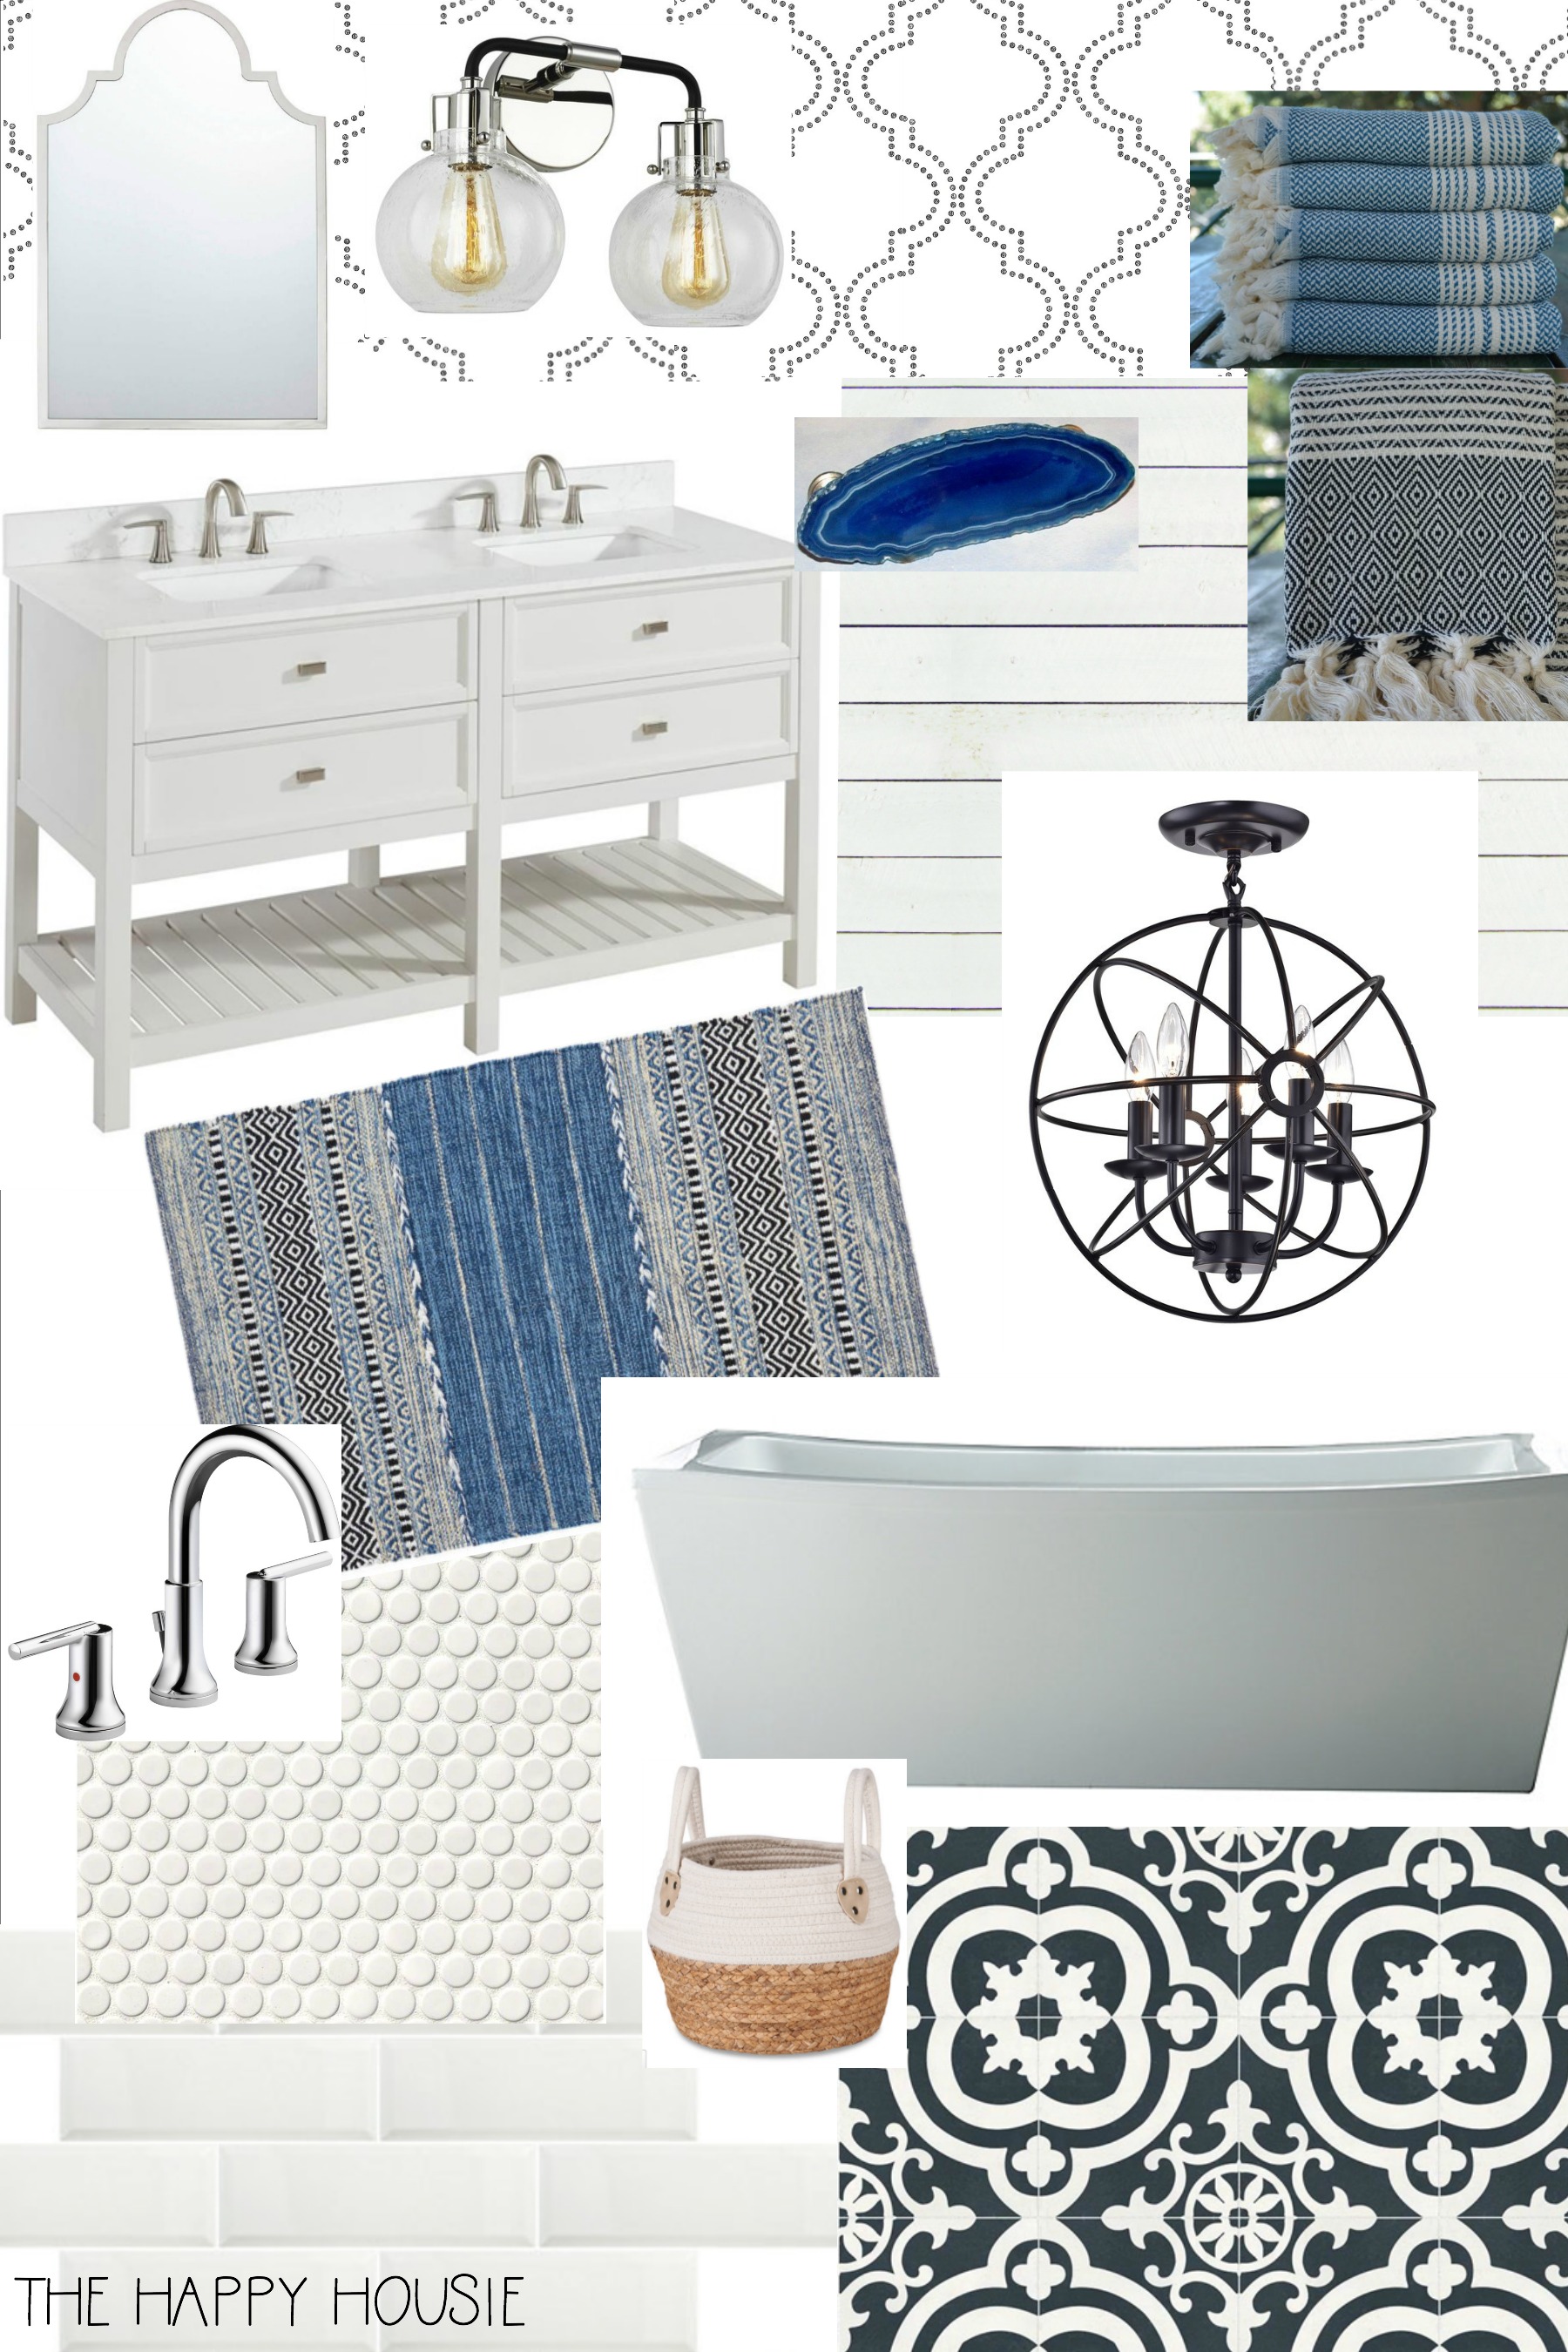
I’ve chosen:
Chrome & Black Two-light Vanity Lights
Cage Globe Fixture for over the tub
Two Deltra Trinsic faucets in chrome
Quatrefoil Dot Wallpaper in black and white (either for a half wall or feature wall)
In addition to these items, I’ve chosen:
Floor Tiles – vintage style black and white tiles (with white grout) from Lowes
Vanity – Scott Living Home vanity also ordered from Lowes
Handles – I’m thinking of updating the standard handles on the vanity with agate pulls
Bathtub – this OVE Eleanor tub 63″ from Home Depot
Shiplap – Metrie Complete Shiplap on either the bottom half of the wall or the wall behind the tub or the wall behind the vanity (I’m waiting until the floor tile has been installed to make the call)
Mirrors for above the vanity in a chrome/silver finish – ordered on clearance from Urban Barn
Blue and Black throw rug – also ordered on clearance from Urban Barn
Turkish Towels – I ordered some pretty blue and black ones to go with throw rug from Etsy
In the Shower:
Subway Tile in a 6×24 size – matte white – we bought ours at a local tile store – this will be the shower walls
White Penny Tile for the floor in the shower and an accent section of the shower walls
Well, what do you think?!
For a bathroom that will be used by the boys but also shared by guests I think it will be fun, crisp, and fresh.
Want to remember this?
Then PIN it!

Hi Kristie, what did you use (software?) to create the board on your bathroom? The bathroom choices are fabulous!
we’ve gutted our hall bath upstairs after finding a substantial leak behind the tile in the shower, then completely re-did our master bathroom so we wouldn’t have a coffin sized shower (literally). It drove me nuts to have all torn down, but the end result was SO worth it. I’m sure your new bathroom will be lovely when it’s done!
You’ve made beautiful choices! Can’t wait to see the end result.
Thank you! I’m excited to see it come together. It’s already been about six weeks of construction and we are JUST starting the tile!
Wow Krista, so much work but it will definitely be worth it. Absolutely love everything you’ve picked for the new bathroom.
Thank you Julie! I can’t wait to have a toilet on the main floor again 🙂 lol
i hear you. We have redone every room in our house. WE took out walls in all the upstairs bedrooms ourselves. It was plaster.We stood in plaster up to our knees!
We are now working on the basement and have had drywallers doing the ceiling. And it is a mess. But at least this jois out of sight and we can take our time.
Like what you’ve picked out.
Thank you Rebecca – it is hard to live through it, but I know in the end I’ll be so much happier then if we hadn’t pushed through to do what we actually wanted to do:)
I cat wait to see the after, and I know you can’t either. Everything you picked out is going to look beautiful together.
Thank you Melanie! I’m super excited to see it come together. After six weeks of construction already, I’m so excited that the tiling is starting today!
I love all of your ideas. It will be beautiful when finished. It is a blessing to have all the skills to undertake such a big project.
Thank you Mary! We are definitely hiring out for several parts of this job – framing, plumbing, drywall, and tiling… but working along side for the construction and cleanup, all the painting and doing the finishing. It’s hard to fit it in, time wise, with two school aged boys who both play competitive sports. We’ll get there… right?! 🙂
What an adventure – thank you for sharing it – hugs
Thanks! Looking forward to having some more progress to share soon (sealing the drywall and painting the ceilings white seems like it would make for a boring blog post!).
It is going to be very nice for the boys and the guests. It is really coming along, but you probably think it is moving slowly. My oh my….all that painting waiting for you. Better you than me. Caln’t wait for the final pics. Great choices you made!
Oh, the painting! Right?! First we had to seal all the drywall, then paint the ceilings two coats (we the ceiling in the master bedroom done, as well)…. now this weekend I’ll be tackling the walls. Can’t wait to share the progress soon! Tiling starts today:)
Krista, your new bath and everything else will be worth, just hang in there! I can see you’ve picked out some wonderful items for the furnishings. Just remember it will get done and be fabulous!
Thank you Laura – I’m trying to keep my eye on the end goal, and at least the messiest part (drywall) is over… for now – until we do the kitchen :)lol