
Making Over an Old Dresser for Craft Room Storage {ORC Week 3}
I took an old dresser and gave it an amazing makeover and now I use it in my craft room!
Welcome back to Week 3 of the One Room Challenge! This week I can’t wait to share the makeover that I gave that old dresser that I first showed you last week during my Week 2 check in.
If you aren’t familiar with the One Room Challenge (ORC), it is a six week blogger challenge that Linda from Calling it Home hosts a couple of times each year. Each week all the challenge and linking participants share the progress on their space, and are trying to get the whole thing wrapped up within a six week time frame. I am trying to tackle my Craft Room space and have so far shared the horrendously messy BEFORE (and plan) as well as the Gift Wrapping Station that I completed in week 2 of the challenge.

We are half way there! But now that I realize we are on week three of the ORC I realize that I have about a zillion DIY projects left to go. At least I was able to tackle one major project this week- I revamped that old dresser for craft room storage and I am pretty thrilled with the results!
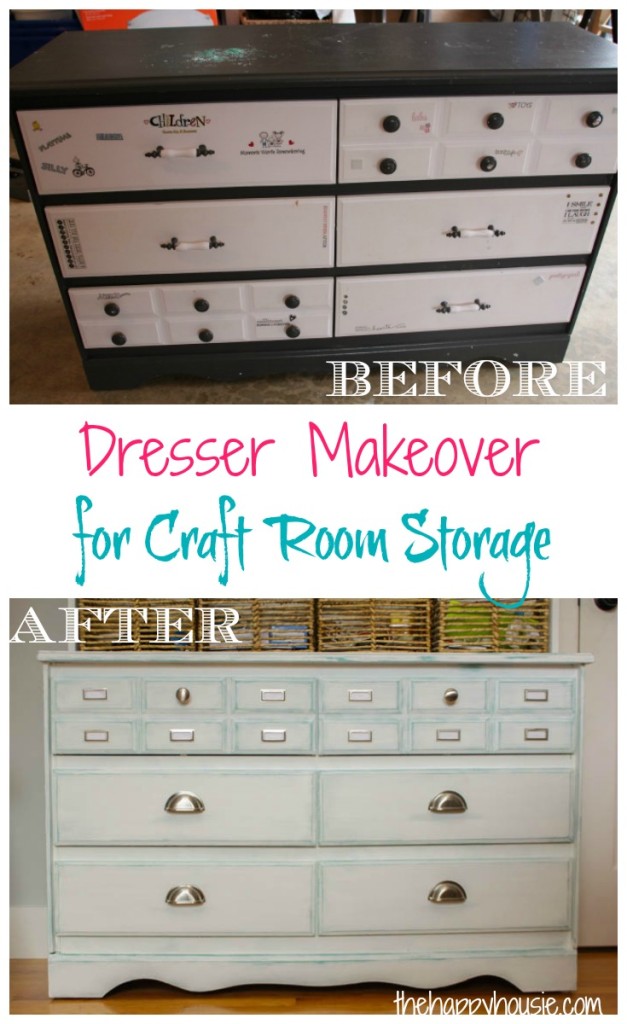
I had been keeping my eye out for a buffet or dresser piece for months now. Maybe even more then a year. I wanted one to replace this eyesore:
Maybe you saw this when I shared my horrendously messy craft room in Week One of the ORC? Well, this table was an old freebie, and the bookshelf piece on top was something that I picked up at a garage sale for 5 bucks and freshened up with some white chalk paint.
I liked the bookshelf/hutch piece, but the table was useless. I never sat at it. Perhaps that was because it was constantly piled with JUNK. If one surface in our household was a magnet for cluttery crap, this was it. When I say, I never sat at it, I mean that I NEVER sat at it. I just plunked stuff down on it. And again. And again. And again. Until it was piled so high that I started to wonder if it might fall apart from the weight.
Eventually things would slide off and cover the floor before the table itself actually collapsed. But it remained a junk-collector. And in a small space like this craft room, you need FUNCTION.
Enter the dresser story. I searched for a LOOONG time for the perfect sized dresser or buffet for this space. And then, one day, this guy miraculously appeared at my local Sally Ann:
 But it was SOLD! NOOOOOOOOOO!!!!???!?!!!??
Then I looked a little bit closer. I noticed on the tag that it had been sold for a while. A long while. Like several weeks.
So when I inquired with the workers at the Sally Ann, they dropped a quick line to the purchaser and gave them a deadline for pickup.
Of course, come the deadline date, I was waiting with baited breath at 9am for the Sally Ann to open up. And it was still there!! Bwahahaha…. such joy over this old wreck. Sometimes I truly wonder about my mental sanity.
But I knew a couple of coats of chalky paint and it would be good-as-knew. Better, really. Don’t you think?
To make this:
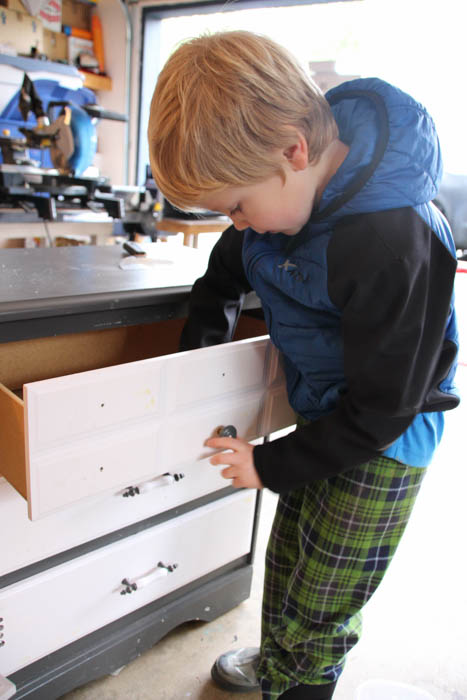
We started by removing all the old handles. My big helper took care of that in no time…
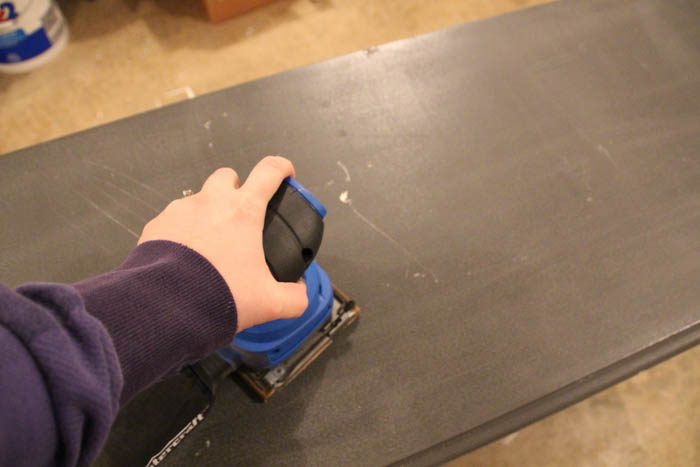
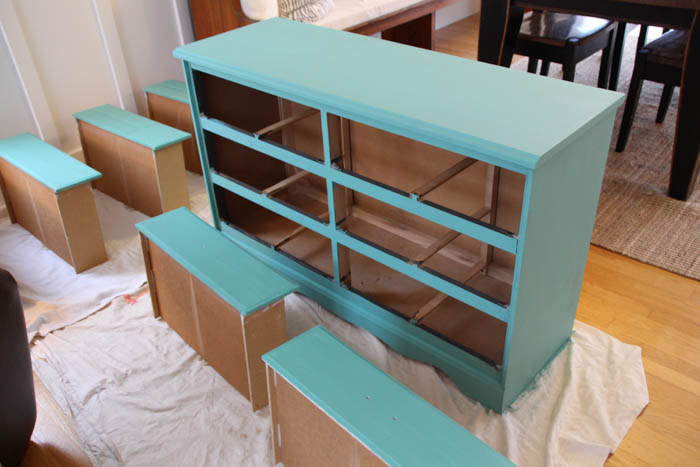
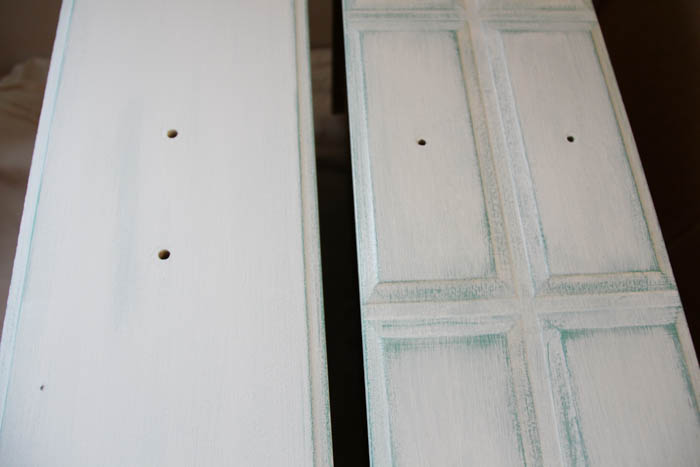
Then I sanded it down with my palm sander because I wasn’t sure if it was latex or oil paint…
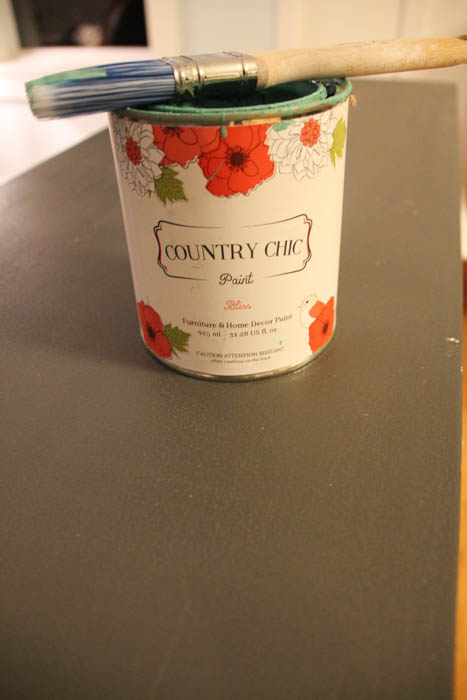
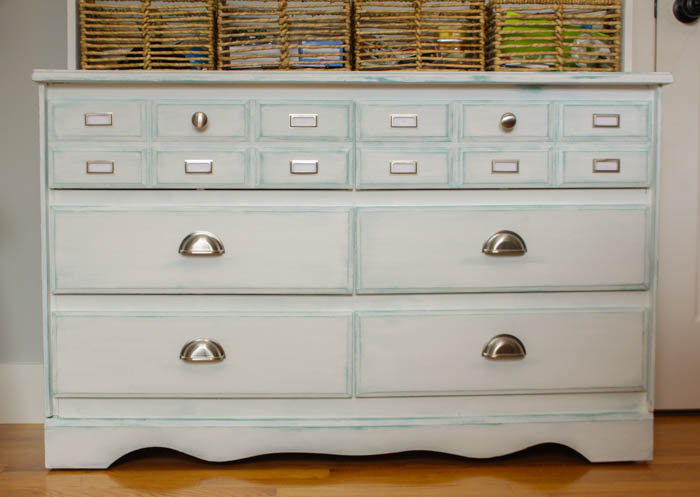
I followed that with a coat of my favourite Country Chic chalky paint colour: Bliss.
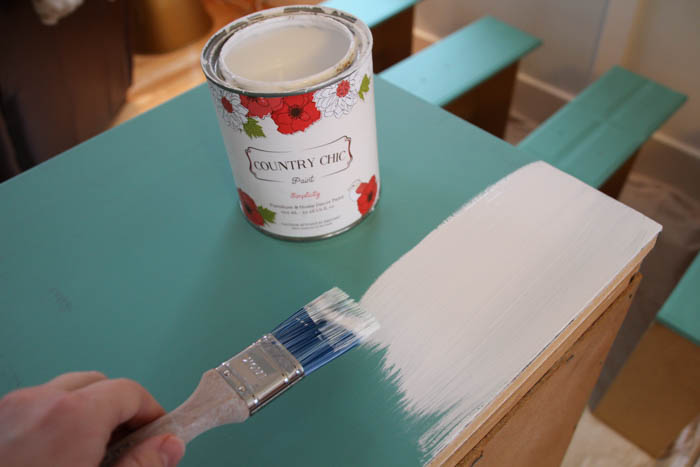
Once it was dry, I gave it a top coat in Country Chic’s Simplicity paint. This is about the prettiest white furniture colour I have seen. I just love it on everything!
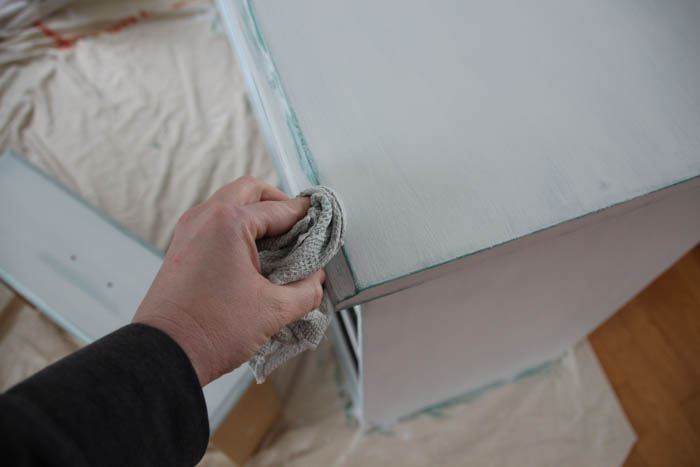
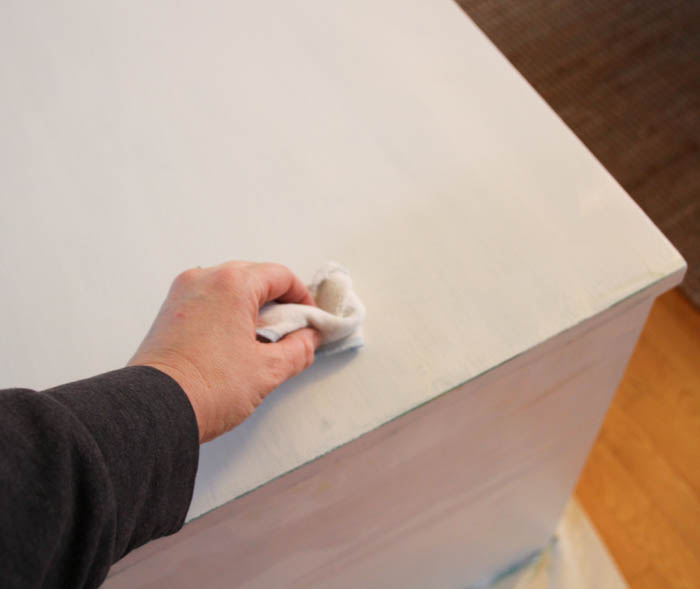
I let it dry for only a few minutes (it took a while to work my way through the whole piece)… and then I started distressing the edges on the top and drawer fronts to reveal some of the Bliss colour. I used a lightly damp rag to distress it before it was dry, rather then waiting until it was fully dry and sanding it. I love this wet-distress technique and have used it on several other pieces of furniture before.
After it was completely dry, I wiped on some Country Chic natural wax and then buffed it off with a clean, dry rag. It just gave the piece a nice smooth finish and added a little bit of protection to the paint coat.
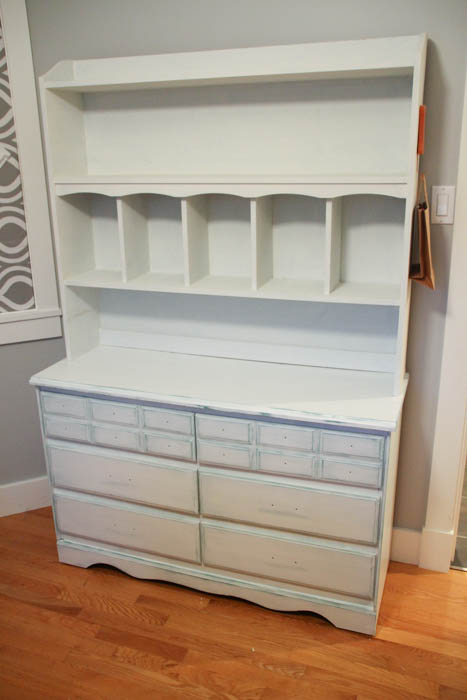
As I mentioned, I have had the top piece for a couple of years, and I had originally painted it with some white chalky paint, so it was ready to go right on top of my newly painted dresser piece.
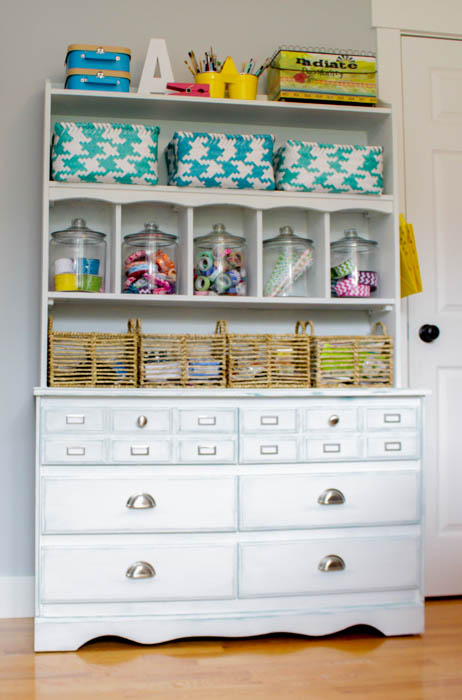
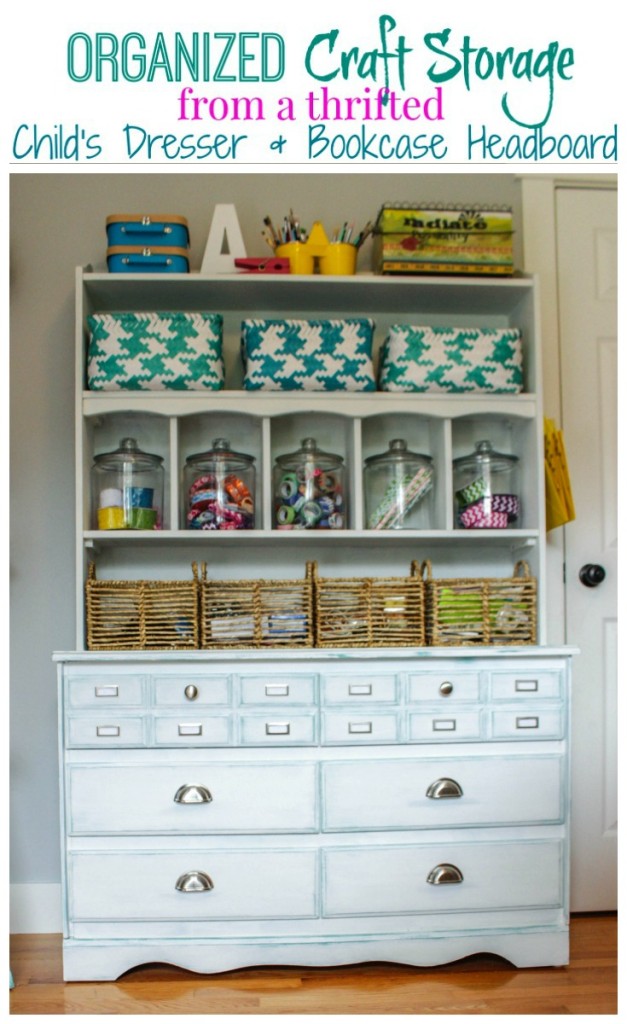
Doesn’t the combo make a great looking pair? They are both thrifted pieces that would have been in a child’s room at one point – the top was likely the top piece of a bookshelf style headboard, while the dresser is definitely a child’s size dresser. I certainly couldn’t fit my wardrobe in it.
I added some satin nickel cup pulls that I happened to have in my stash as leftovers, and then one satin nickel knob on each of the apothecary fronted drawers. I then added some Martha Stewart book plate labels to play up the vintage feel.
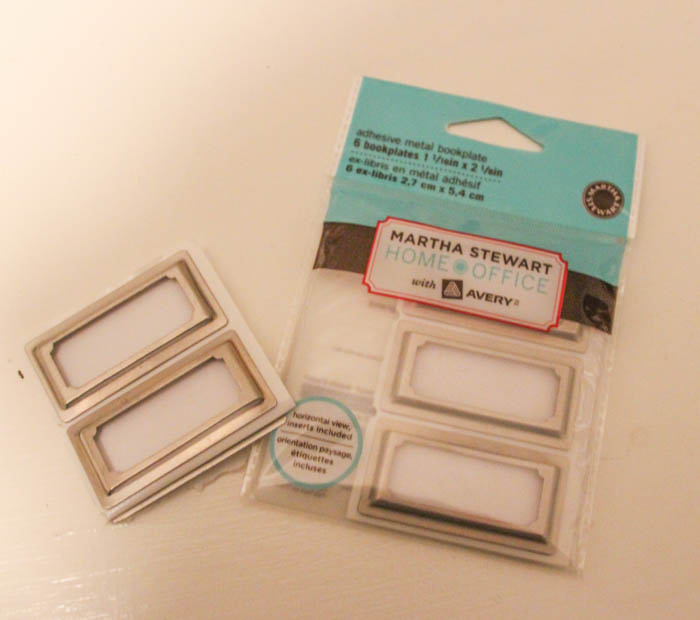
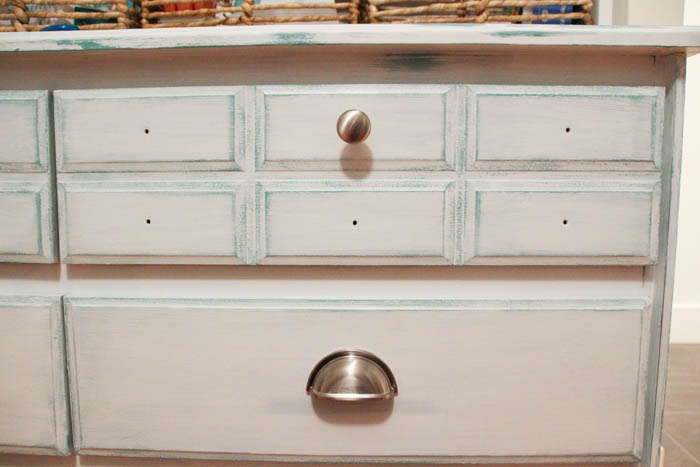
I think that six knobs would have been absolute overkill on these cute little top drawers- but love it with the book plate labels. Don’t you? I do actually plan to use them to label what is in the drawers, but I haven’t quite finished organizing the craft room yet so that job will have to wait.

Done!
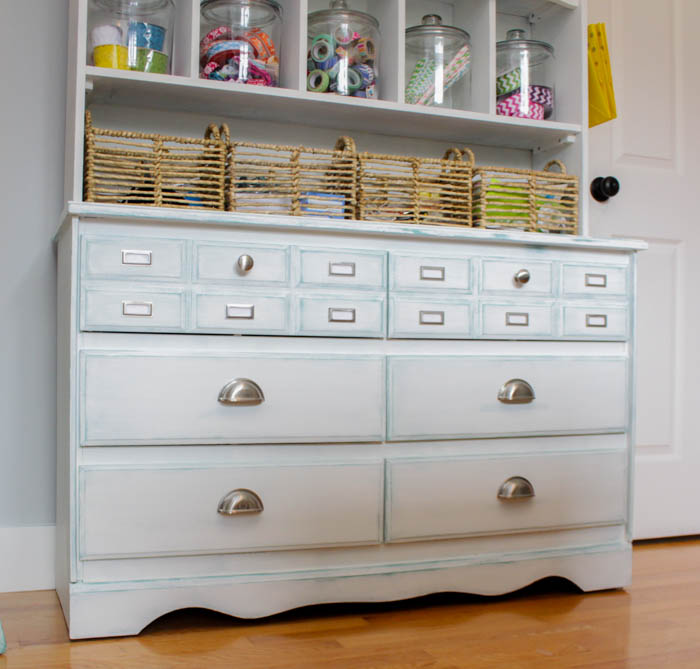

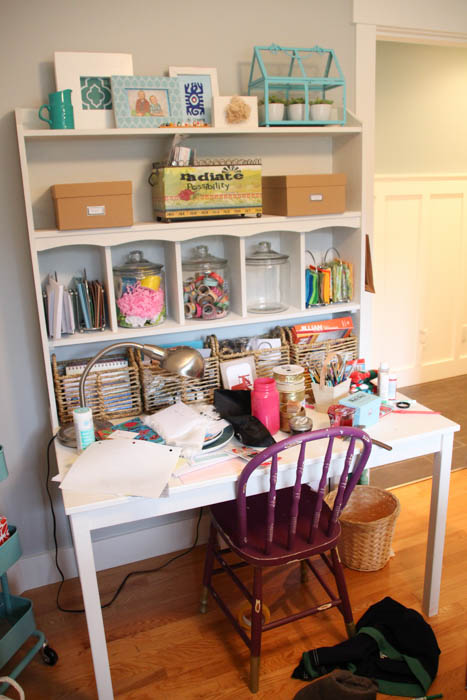
This craft room storage dresser sits on the wall right beside the entry door, and immediately to the left of it sits the new gift wrapping station that I shared about last week. So now one little section of the room is done – except, of course, I need to pull everything away from the walls this weekend so I can paint them! I am not looking forward to that job…

And just because I LOVE Before and Afters…


![]()
![]()
![]()
![]()
![]()
![]()
![]()


That is truly stunning! You did a great job! Your craft room is looking beautiful. I can only imagine the fabulous end result!
LOOKS FAB!
Wow! This is adorable! What a great way to up-cycle. The paint treatment, the drawer details, the containers and everything are just perfect.
What are the chances of the hutch piece fitting that dresser so perfectly! Was that a fluke or did you measure it up at the thrift store? Your craft room is coming along beautifully Krista – I’m so jealous.
This turned out fabulous! Love it!
I love it, Krista! Sooo organized and perfect! (I have to tell you, that would be me too waiting at the store before it opened just to see if it was sold!) What we don’t do for the sake of a great piece of furniture! Lol Good luck this week!
Fabulous makeover! That dresser will really help keep your crafting supplies organized. The room is coming along really well.
Best,
Michelle from simplysantabarbara.blogspot.com
Love Love Love the dresser redo!!! Love the drawers and the pulls/book plates you added.
Thanks for sharing how you distressed while still damp. Going to have to try that on a project 🙂
The room is going to awesome and so colorful when you get it finished. Can’t wait till is is done and you share it with us. Fantastic job so far!!!!
OH MY GOODNESS IT IS BEAUTIFULL
Love, love this. Great job and inspiration!!
Fabulous, fabulous, fabulous makeover. This room will be pretty darn amazing, my friend!
LOVE how this turned out Krista! The colours are gorgeous and I had no idea you could distress while wet! Absolutely brilliant!!!