
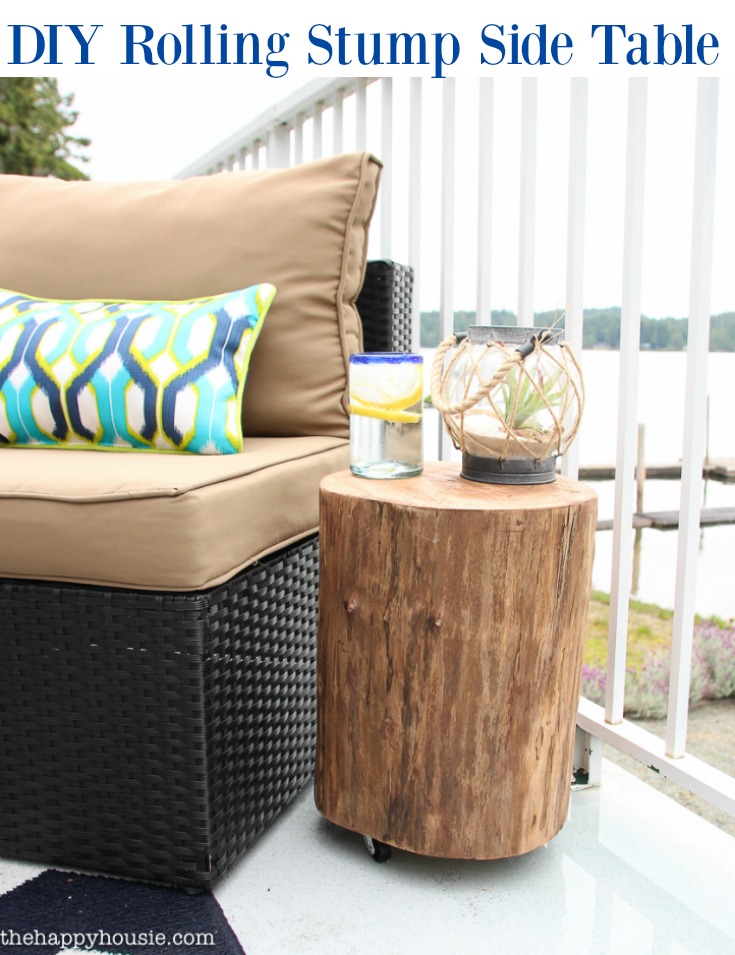
DIY Outdoor Rolling Stump Side Table
Create the perfect outdoor rolling side table using a tree stump!
You guys!
I am so exciting that I finally tackled this outdoor project.
It’s been on my mental “to do” list for a few years now.
And I have to credit a friend of mine for finally getting the ball rolling. She messaged me the other day that she had some nice tree stumps I might like – and sent me a picture of hers all nicely sanded and smooth.
I was sold.
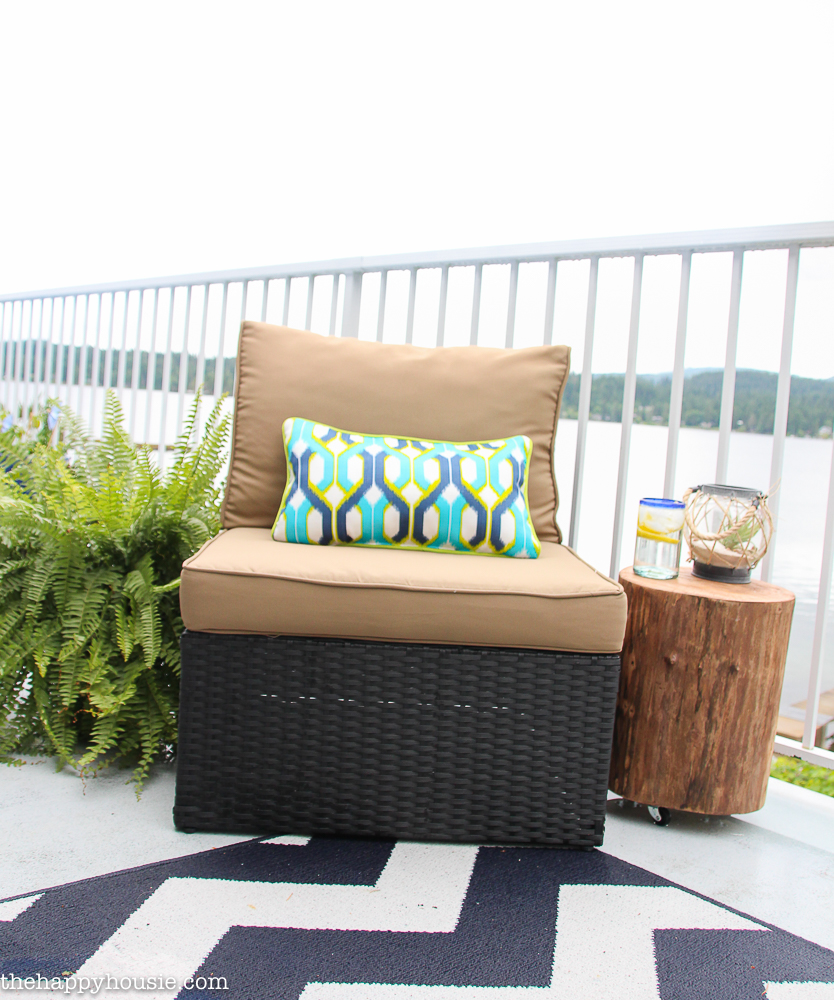
I knew it would be the perfect little side table on our deck this year… we are switching a few things around and it works really well with a new addition that I plan to share with you soon!
So here is how you can make your own simple & thrifty DIY outdoor rolling stump side table…
And add a little rustic chic feel to your deck or patio this summer.
I toyed around with how I wanted to finish this guy off.
I knew I wanted to stain the stump and give it a protective coat of outdoor varathane.
But I thought I might want to paint it? Maybe a “dipped” looking finish on the bottom?
In the end, life won out and I didn’t have time to tackle anything extravagant. I figure I can always add some paint down the road, but once it’s painted it’s hard to go back.
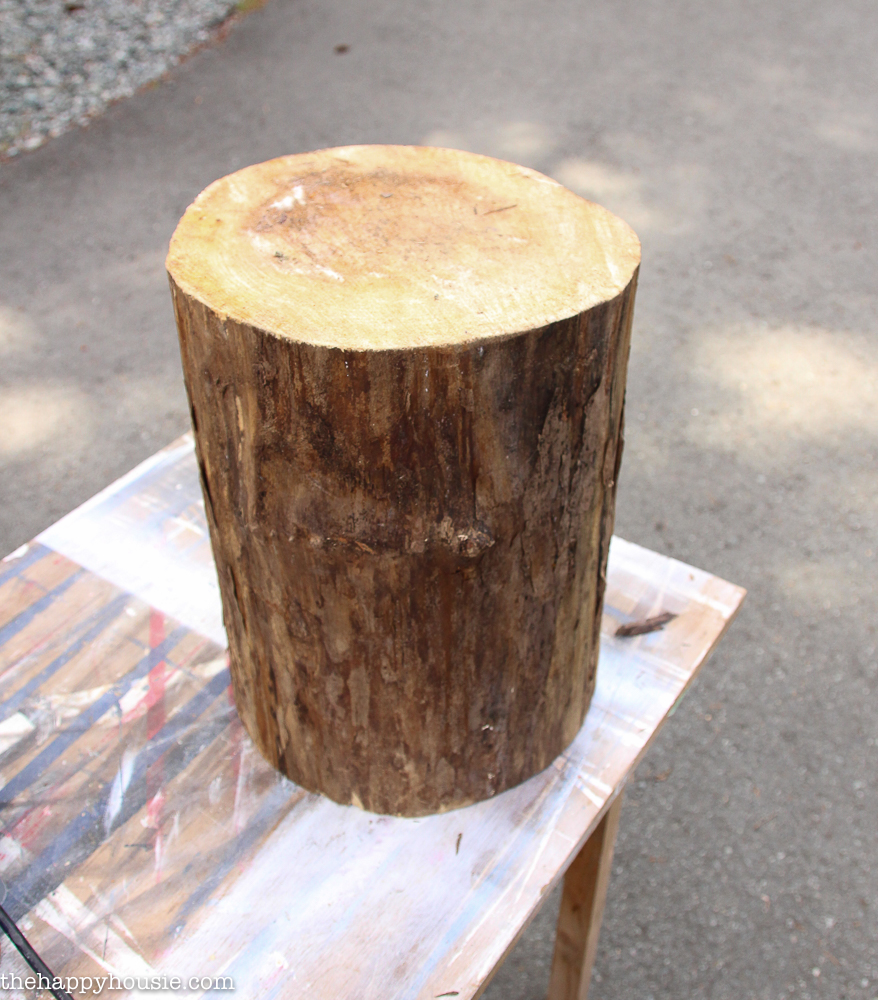
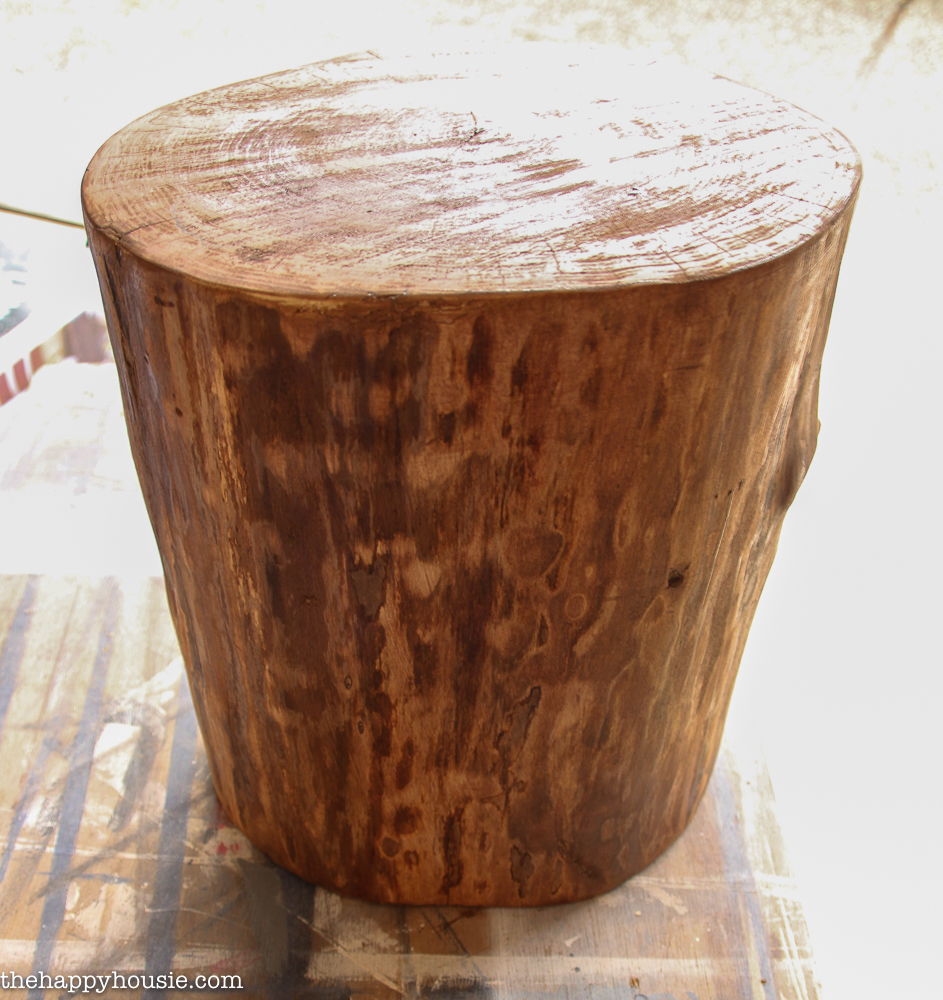
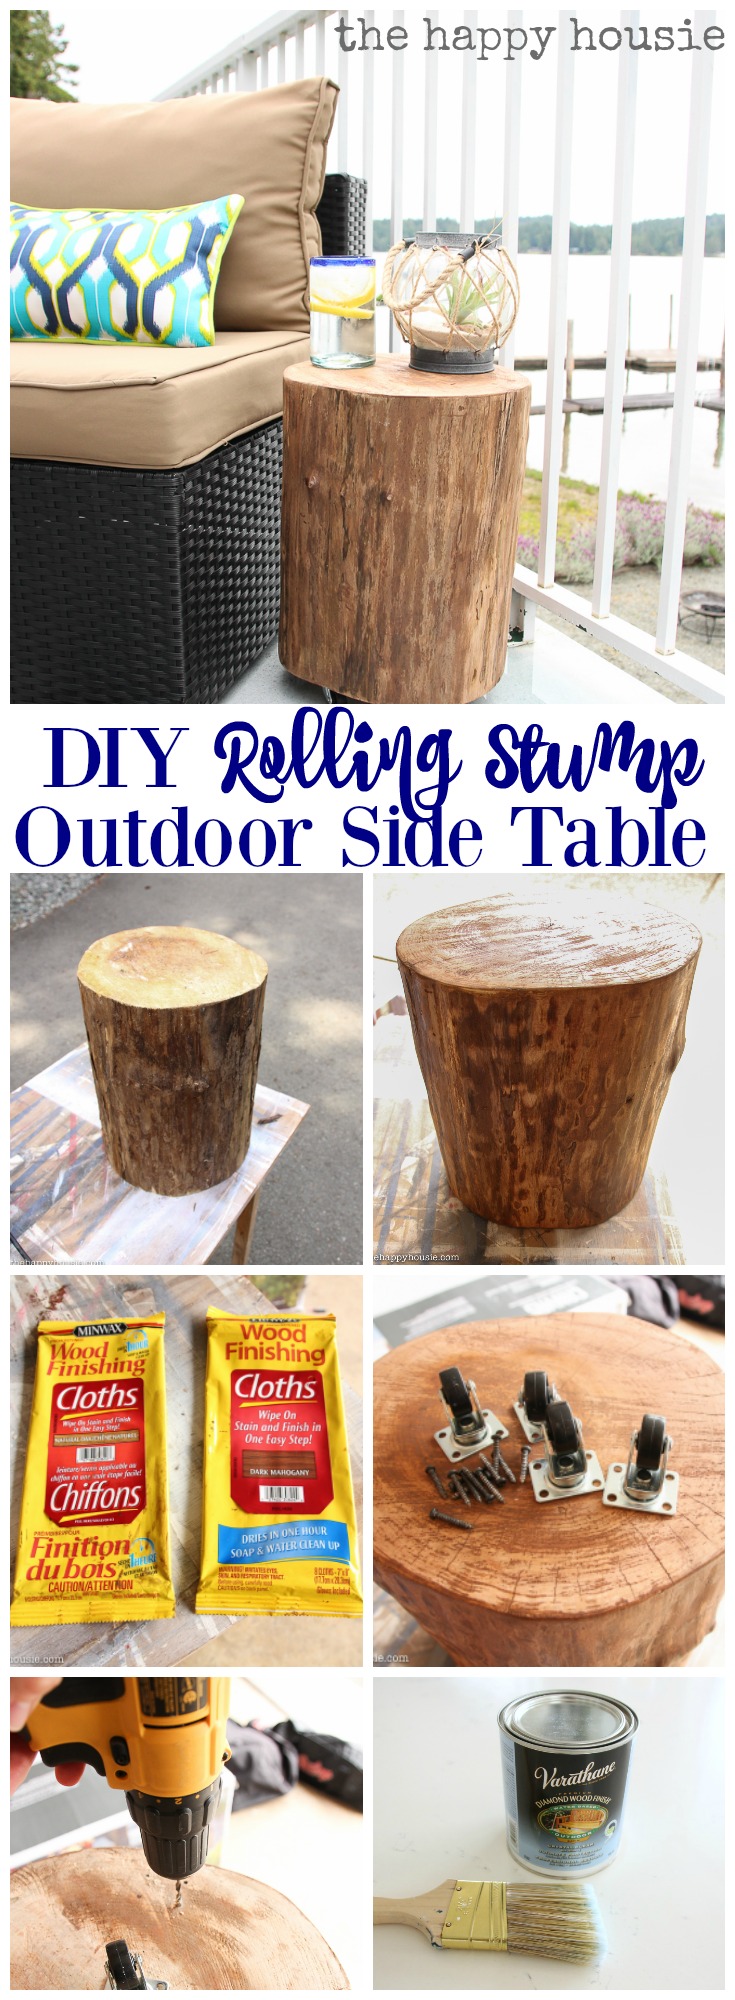
Here is what the chunk of log or stump looked like before I started…
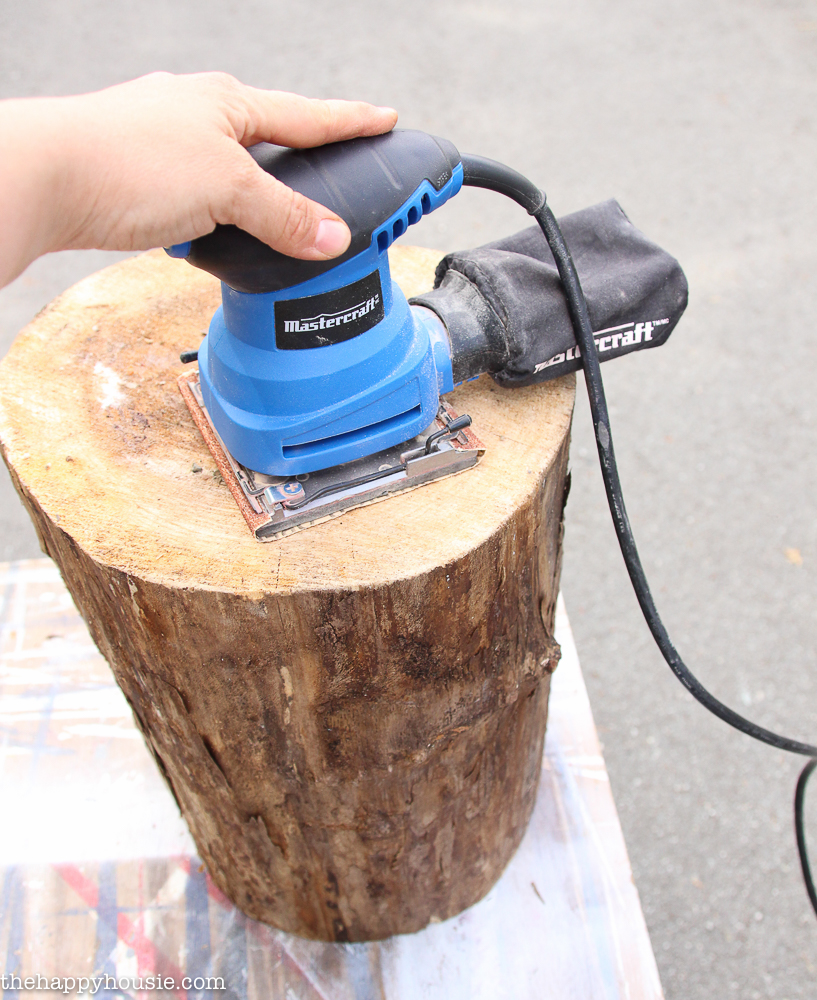
We did some serious sanding work on this guy.
And I mean, serious.
It took a while with this simple little palm sander. We put in a fair bit of elbow grease to supplement it’s measly power.
But in the end it finally started to smooth out beautifully…
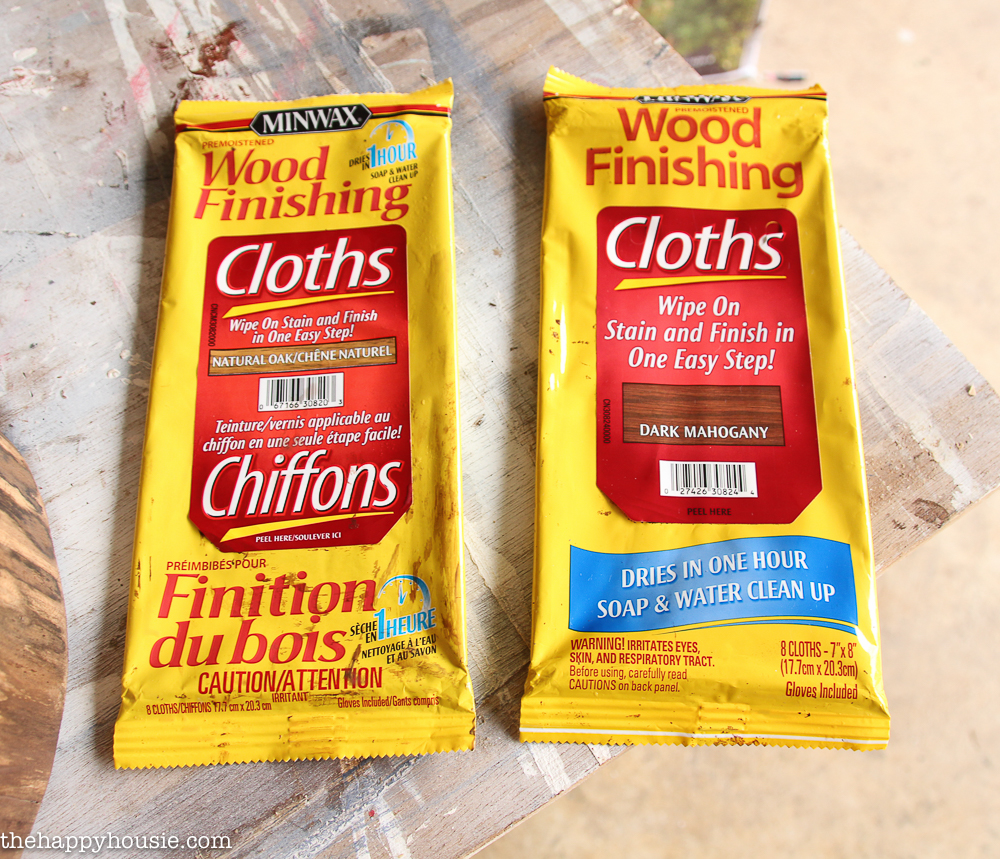
I used both of these stains to create the colour I wanted, I started by going over it with the Natural Oak and then added some of the Dark Mahogany to make the finish at little darker, saturated and more rich. I’m big on the convenience of these wipe-on stain cloths and have used them on quite a few projects.
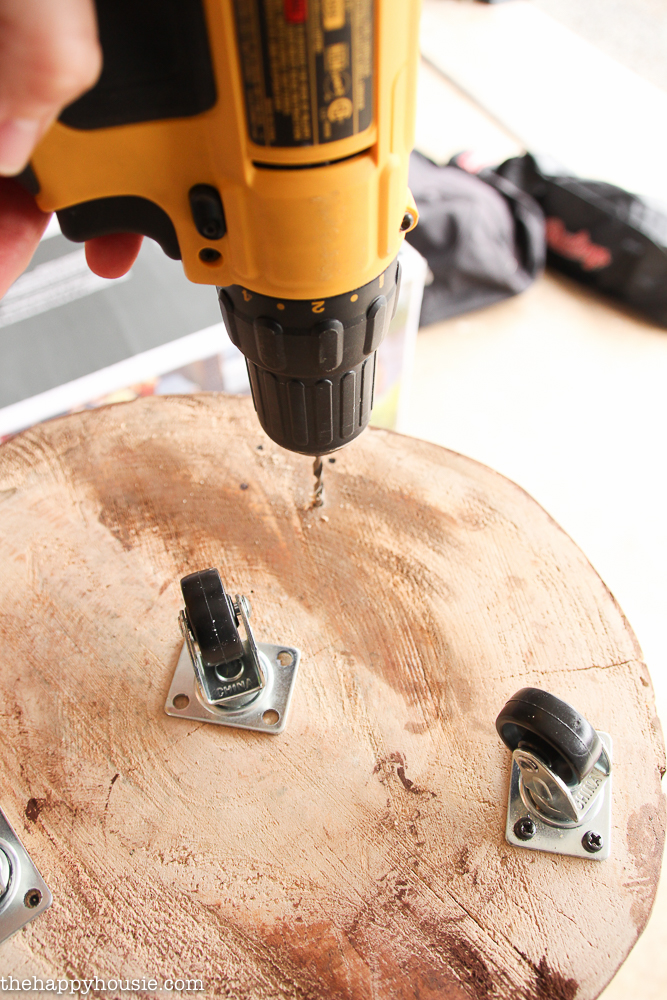
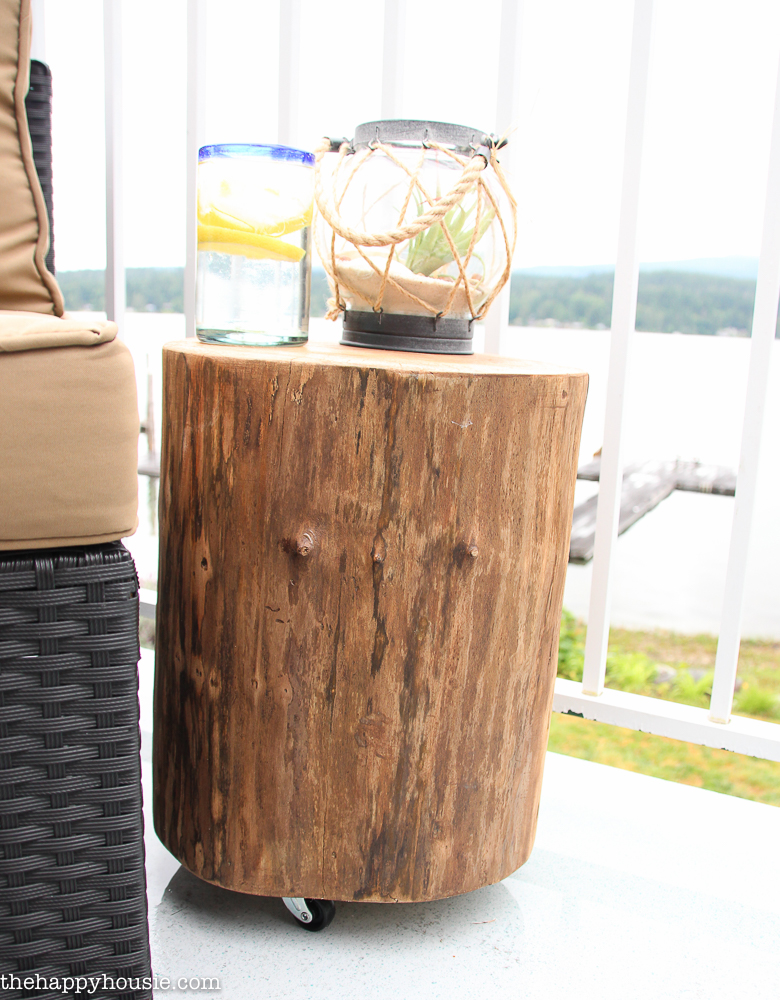
I wanted to make this a cute and handy little rolling table, so I added some inexpensive castors.
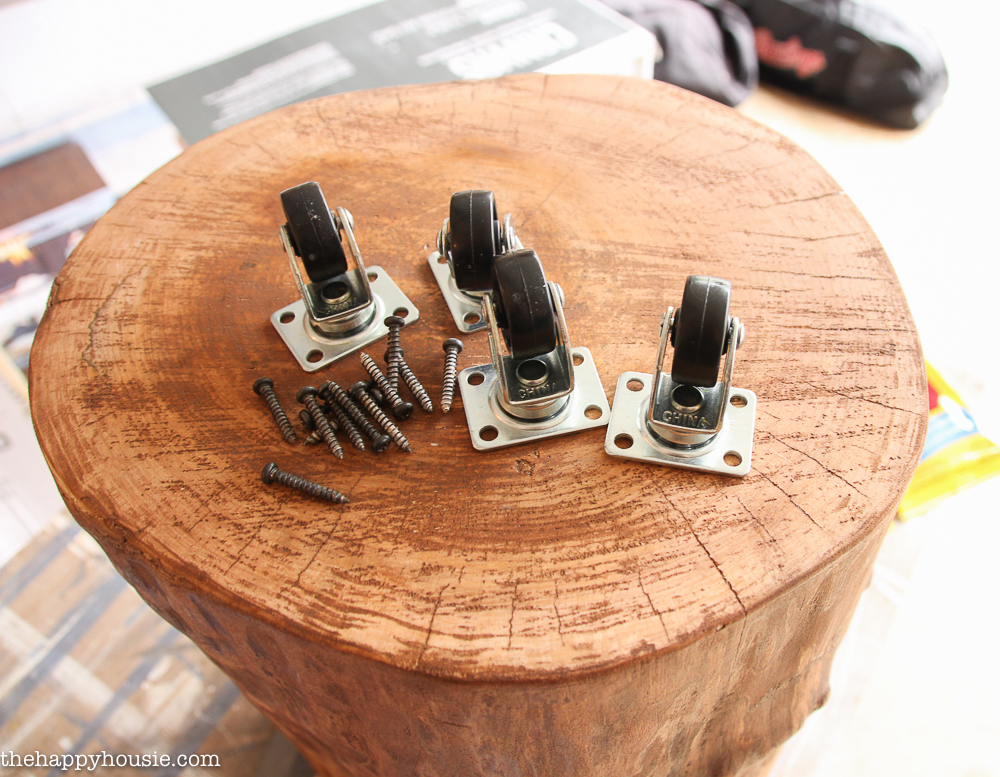
To add the castors I spaced them out evenly, marked the wholes, and then predrilled the holes…
Done!
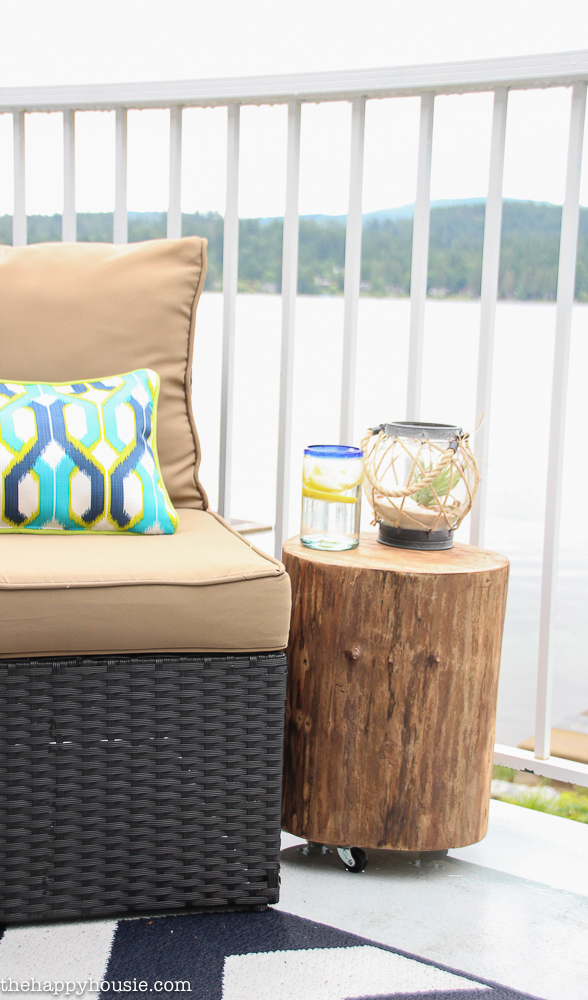
Fun, right?
I love it! And I can’t wait to add a couple of other new woodsy additions to our deck and share it all with you again:)
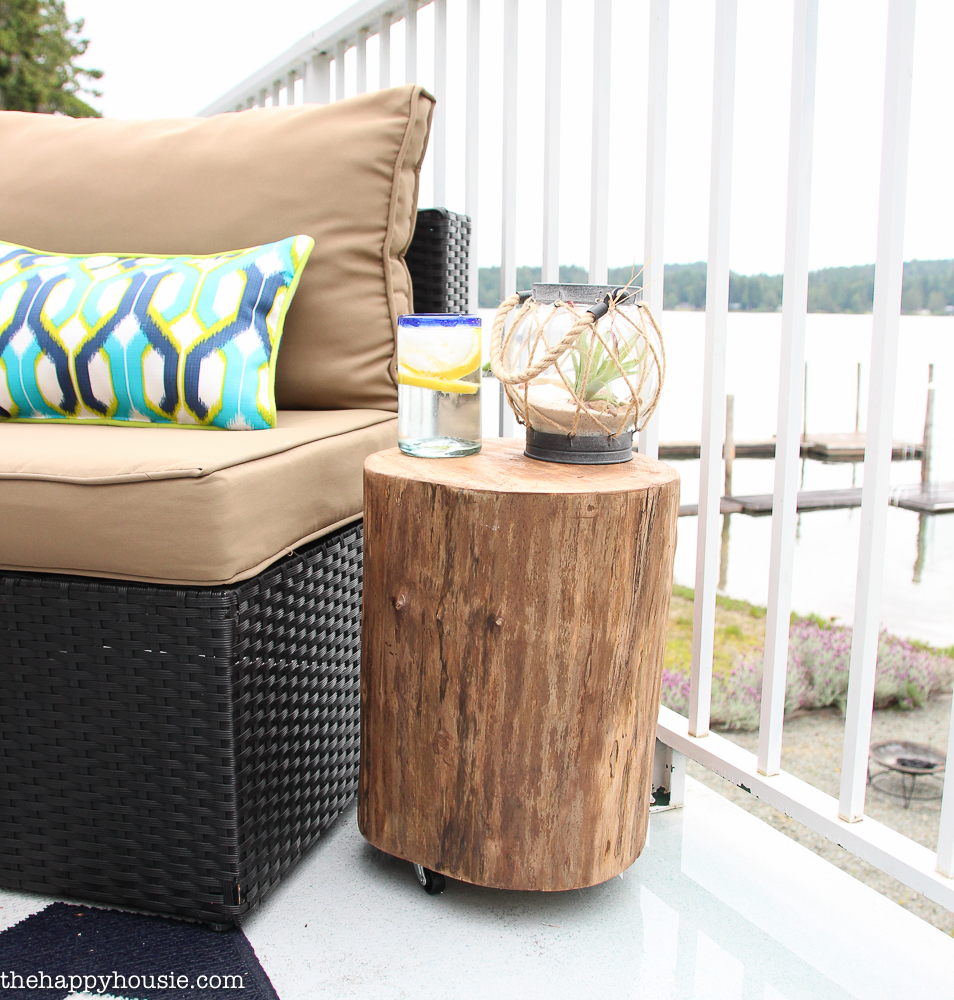
Think you might want to try this woodland outdoor table?
It’s a great and inexpensive way to add a little cute rustic touch to your outdoor decor – or you could even make this for indoors as well!

This week my friends from the DIY Challenge are sharing their own awesome Outdoor DIY projects in anticipation of this Sunday’s link up – the theme is {wait for it….} “Outdoor Projects”.

Here is what my amazing cohosts have come up with for this challenge:
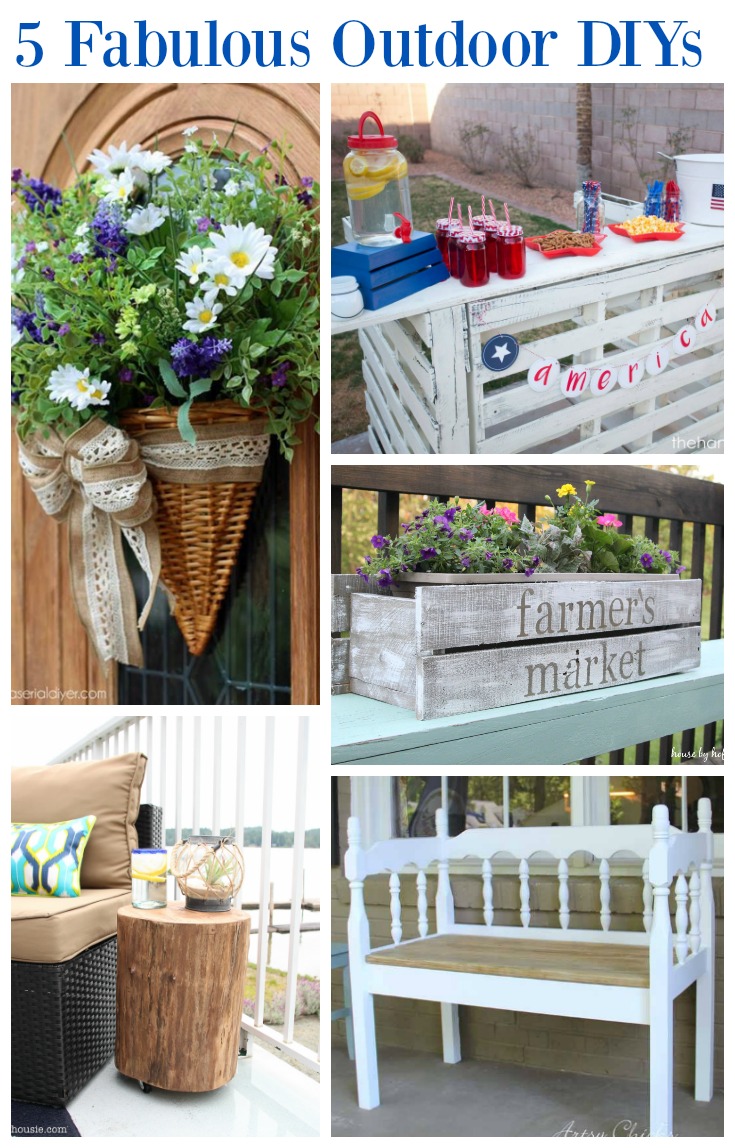
Summer Wildflower Door Basket at Confessions of a Serial Do It Yourselfer
Backyard Pallet Bar at The Hankful House
5 DIY Summer Planter Ideas at House by Hoff
DIY Rolling Stump Outdoor Side Table at The Happy Housie (you are here!)
DIY Headboard Bench at Artsy Chicks Rule

If you are a fellow blogger, I hope to see you back here on Sunday to share your projects with us!

![]()
![]()
![]()
![]()
![]()
![]()
![]()
I may link up at some of these fabulous places below, for more info check out housie parties: Monday Funday , Inspiration Monday, Nifty Thrifty Tuesday, Project Inspire{d} , Inspire Me Tuesday, The Scoop, Hit Me With Your Best Shot, Wow Me Wednesday, Whimsy Wednesday , From Dream to Reality, The Inspiration Exchange, Wow Us Wednesday, Live Laugh Rowe Live Laugh Linky, Thursdays Are Your Days, Inspire Me Please, Catch as Catch Can, Fabulously Creative Friday, Party Junk, Pinworthy Projects , Link Party Palooza,, Weekend Bloggy Reading, Strut Your Stuff Saturday, Spotlight Saturday, Suburbs Mama , That DIY Party


This is an older post & I would love to know how the table has been withstanding the elements outdoors.
Did it have bark on it before you started? I have two stumps that I rolled home last summer, still with bark. Any suggestions?
Hi Ginger,
If you want to keep them more natural looking, then you could just sand and seal the top and bottom and leave the bark on. Our stump had sat to dry for a while so the bark peeled off (as it often will as the log dried out). So it is possible that the bark will start chipping off. In that case, you might want to help it along and chip the rest of the bark off before sanding and then sealing it.
Hope that helps,
Krista
Oh wow, I’m going to have to get my son in law to saw me some wood to make one of these. I love that it has rolling legs. Easy to clean under and around by moving it.
Love, love it! Thanks, and happy 2017
Super organic design (yes, the log) and to me, a log side table looks fab, especially when so well done.
I had no idea those wipes existed. I’ll look for them!
Love it!! I need a stump of wood now!! 🙂
I love this creative DIY Krista!! I think I need one too….now to find an old stump! 😉
xo
Nancy
This is such a cool addition to your outdoor space, Krista! I think staining over paint was a good decision, it makes it even more rustic and charming! Wish you weren’t a bazillion miles away so I could come hang out in person! XO