
Front Yard & Exterior Makeover Reveal: Before & After
Today I’m sharing the before and after makeover reveal of our front yard and front house exterior and talking about how we updated the exterior of our split entry / cathedral entrance 70s style home.
For the past few months our large front yard and front exterior has been slowly morphing into a new being.
It’s been a much more public makeover than most.
Not many before and after projects are as public as a home exterior makeover. We’ve updated and renovated the main bathroom, master bedroom and ensuite, and even the kitchen, but unless you are a personal friend or family member and have actually had the chance to come inside and check it out (keeping in mind that we’ve had very little time for socializing lately), then you’d have no idea what kind of transformations are happening behind the closed doors of our home. Unless you read this blog, of course.
Exterior House Renovation
But every day, as neighbours drive or walk by on their way to walk their pups in the nearby trail system, they’ve been treated to the gradually evolving exterior of our house. We are just about done now… we still need a new mailbox, door bell, and some house numbers, but we’re at that 99% point, anyhow. The house painting was one of the last steps, and I’ll be sharing exactly how we tackled that job much more easily than we anticipated in a post coming up very soon. But today is all about the before and after reveal of our 70’s split home exterior update.
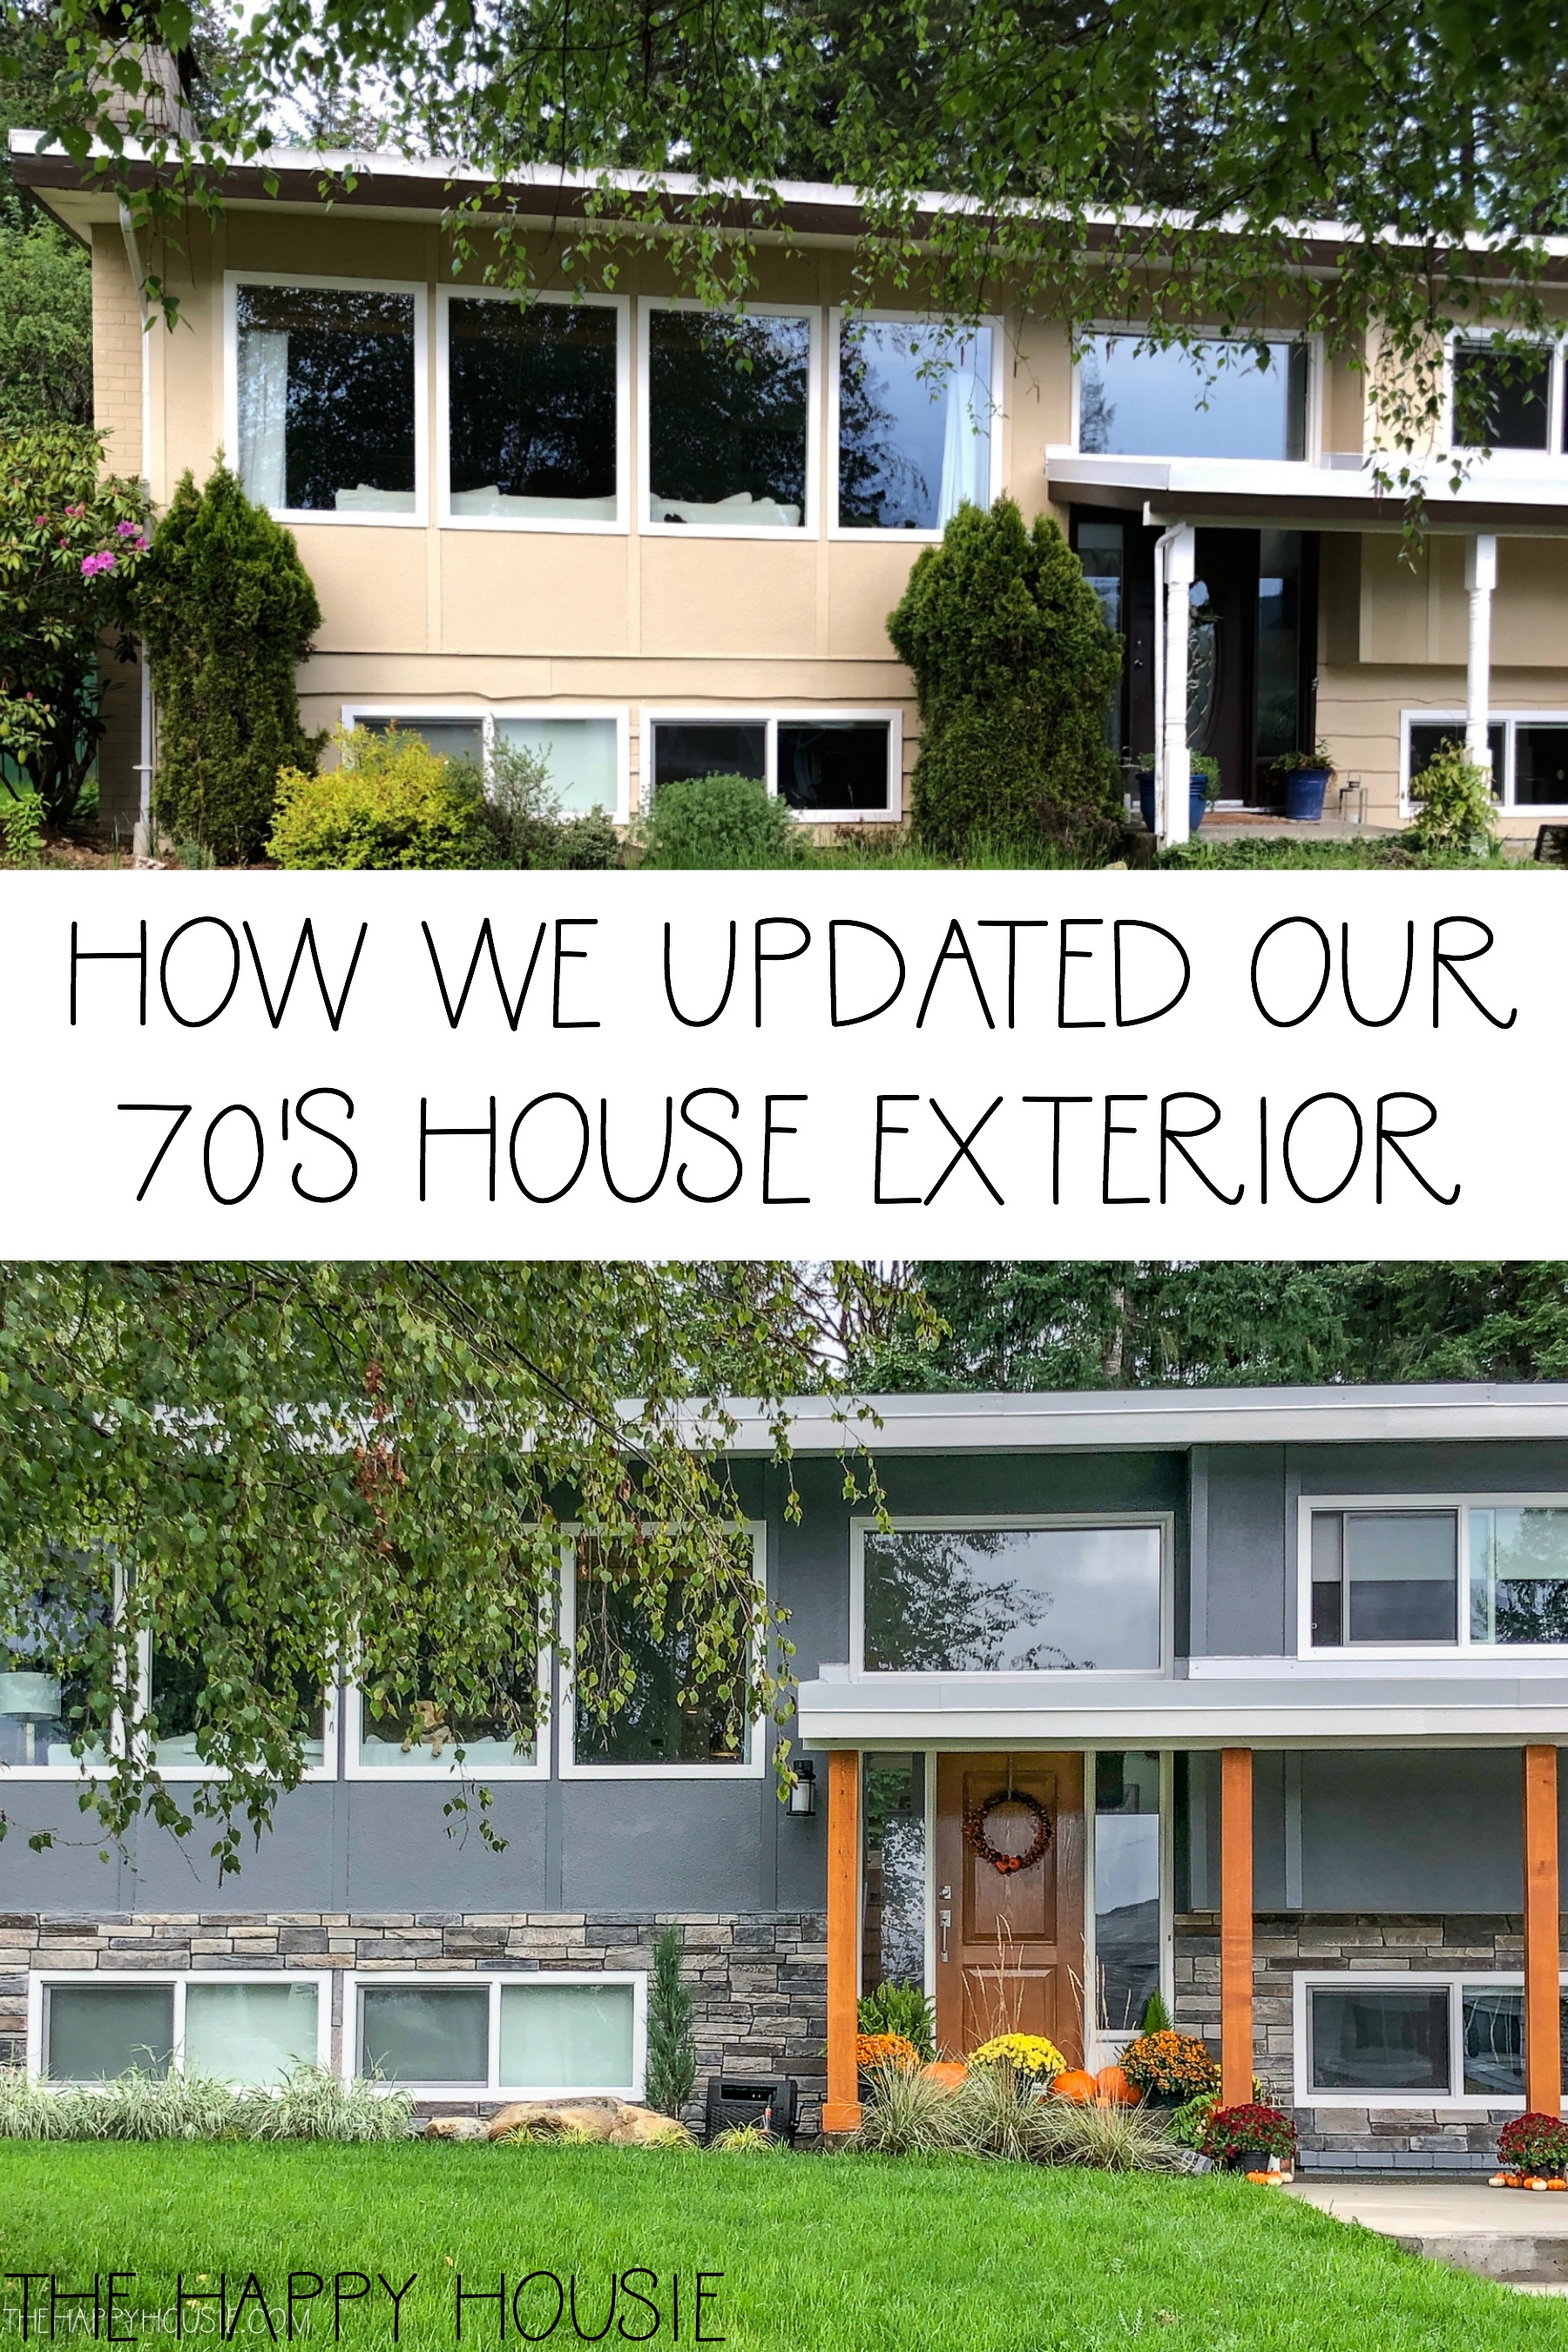
This is an exciting post to share because we are super thrilled with how this project came out. If you’ve been following for a while then maybe you remember me sharing the “before” of our front yard along with all the plans we had for fixing things up? You can see the full details in this post here, along with the “Story” about why our yard was completely torn up the day before we took possession of this house.
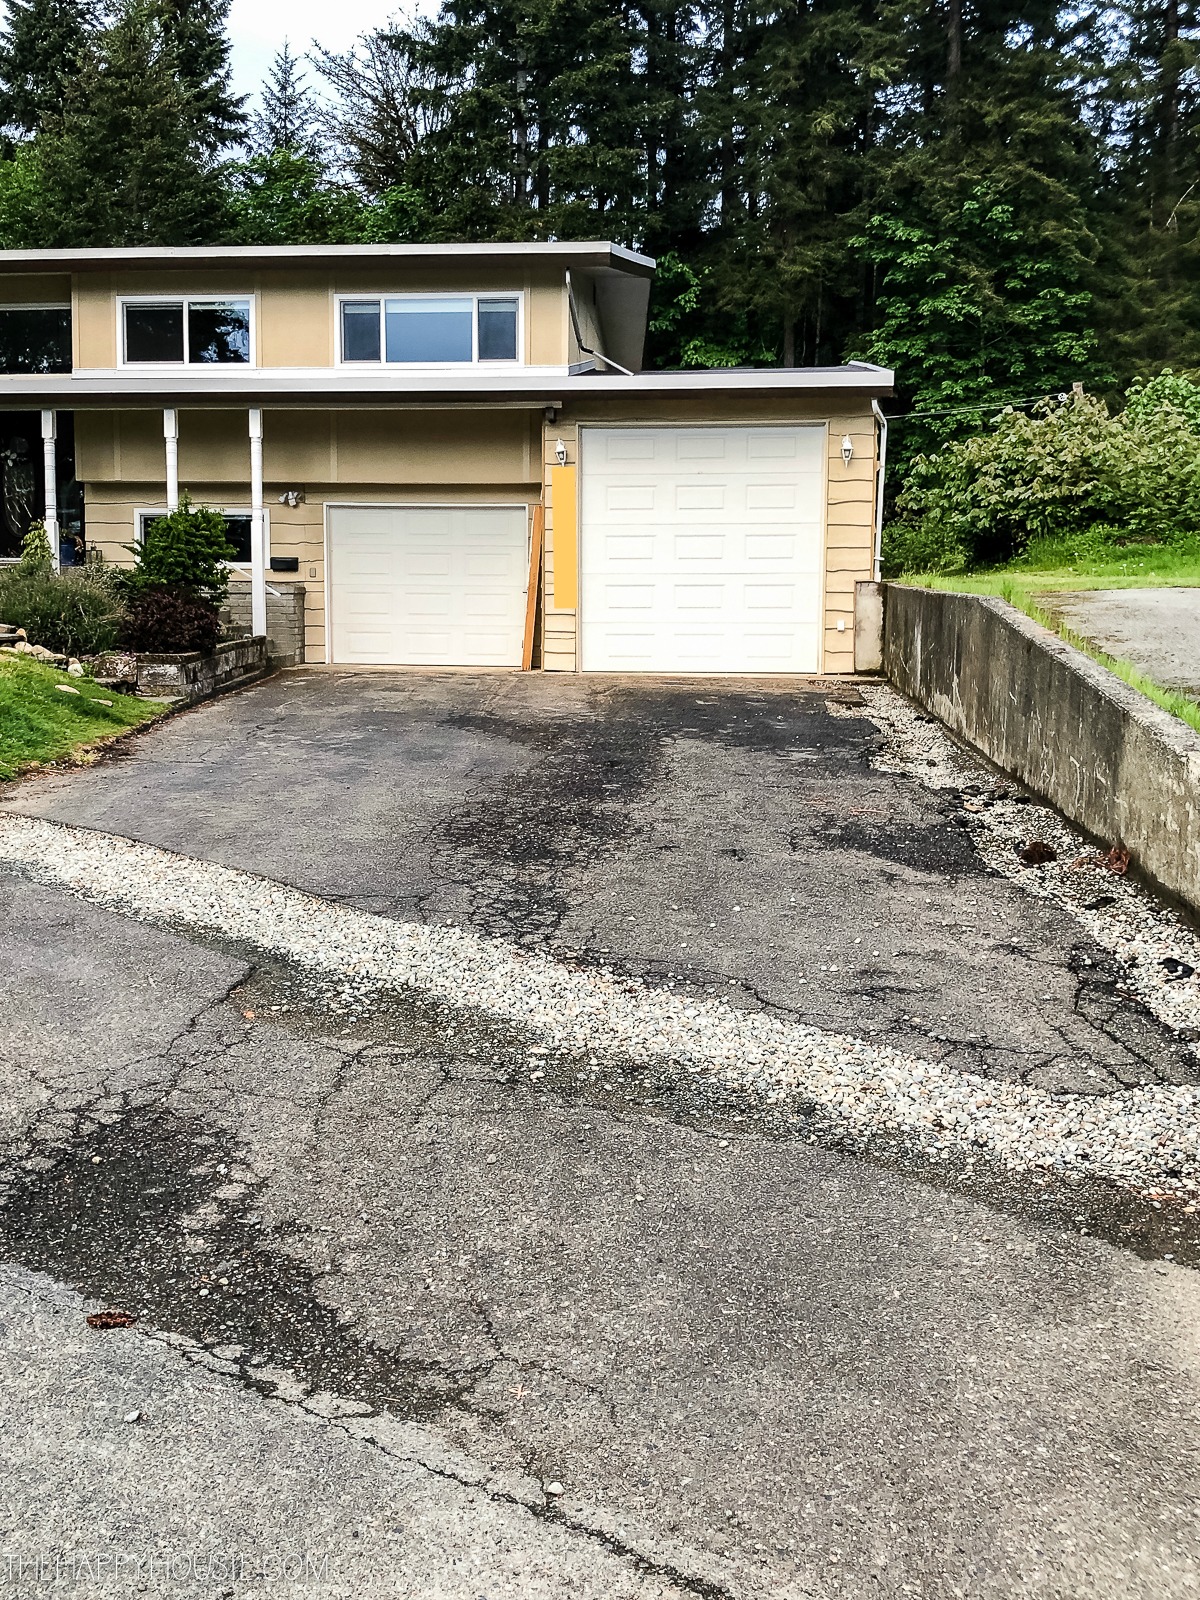
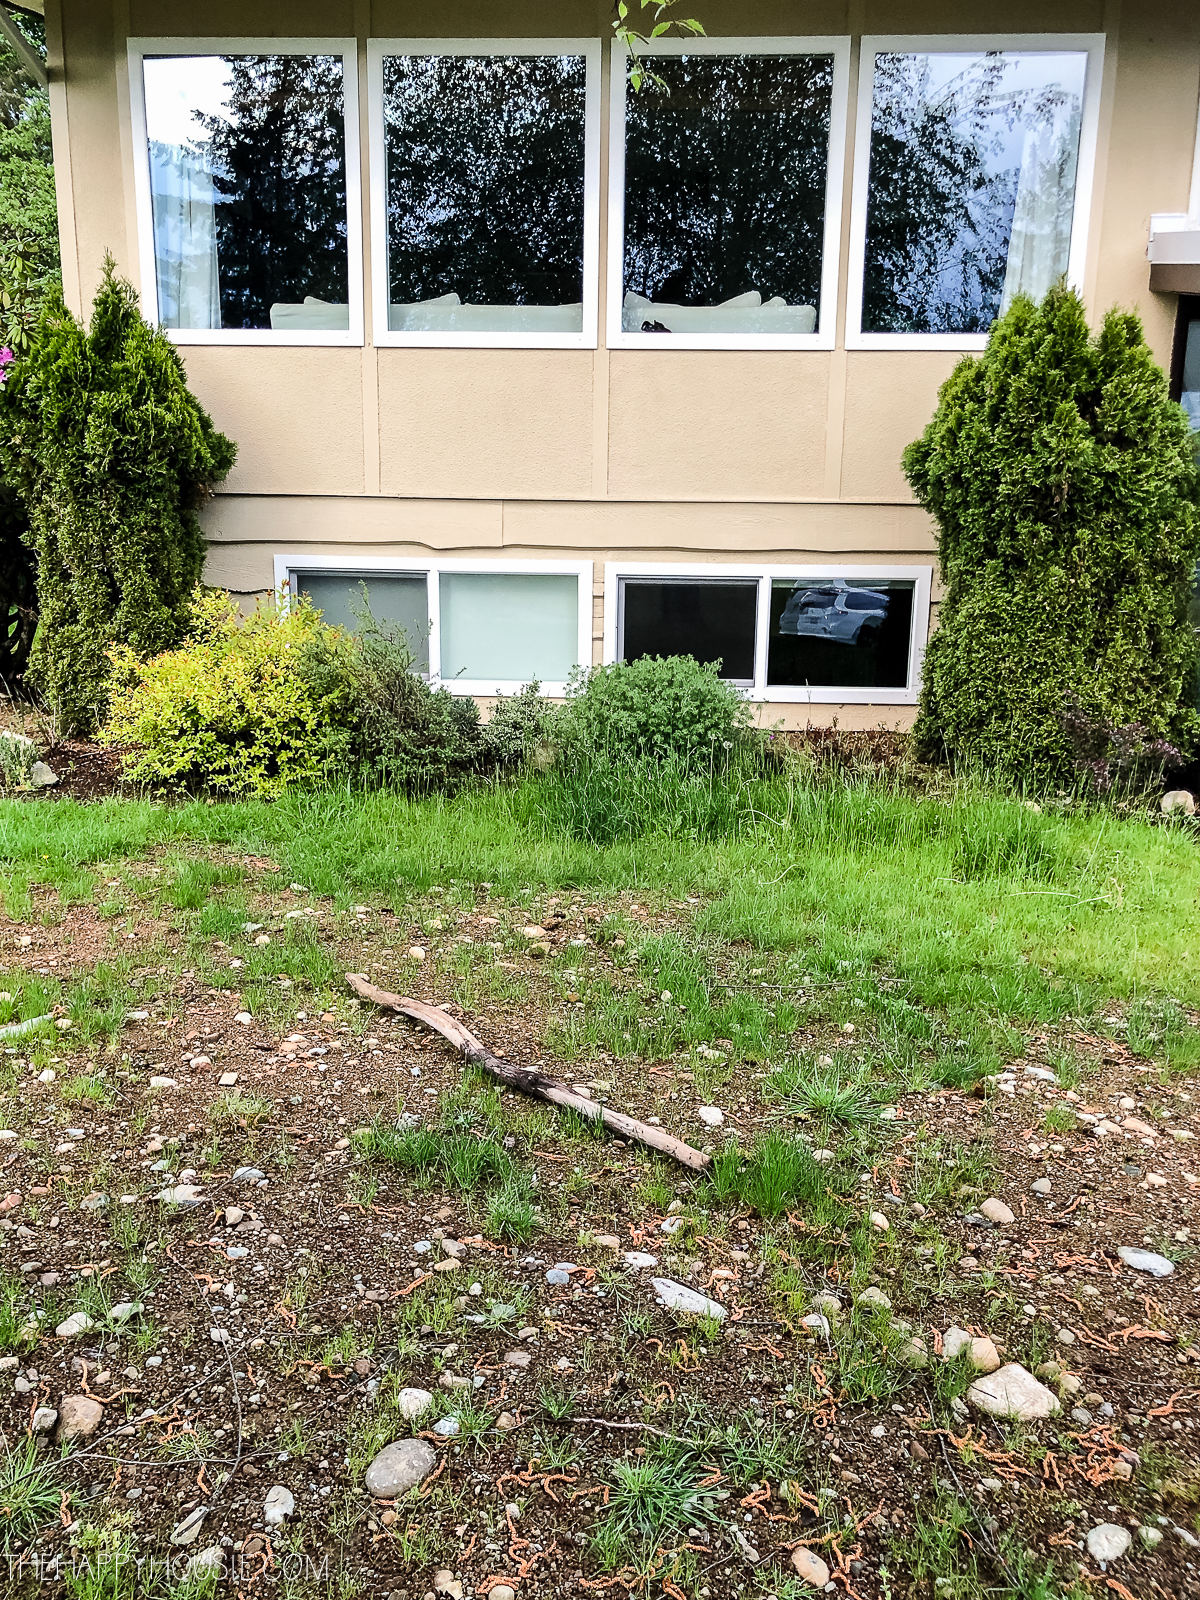
This spring, we started out with our house exterior looking like this…
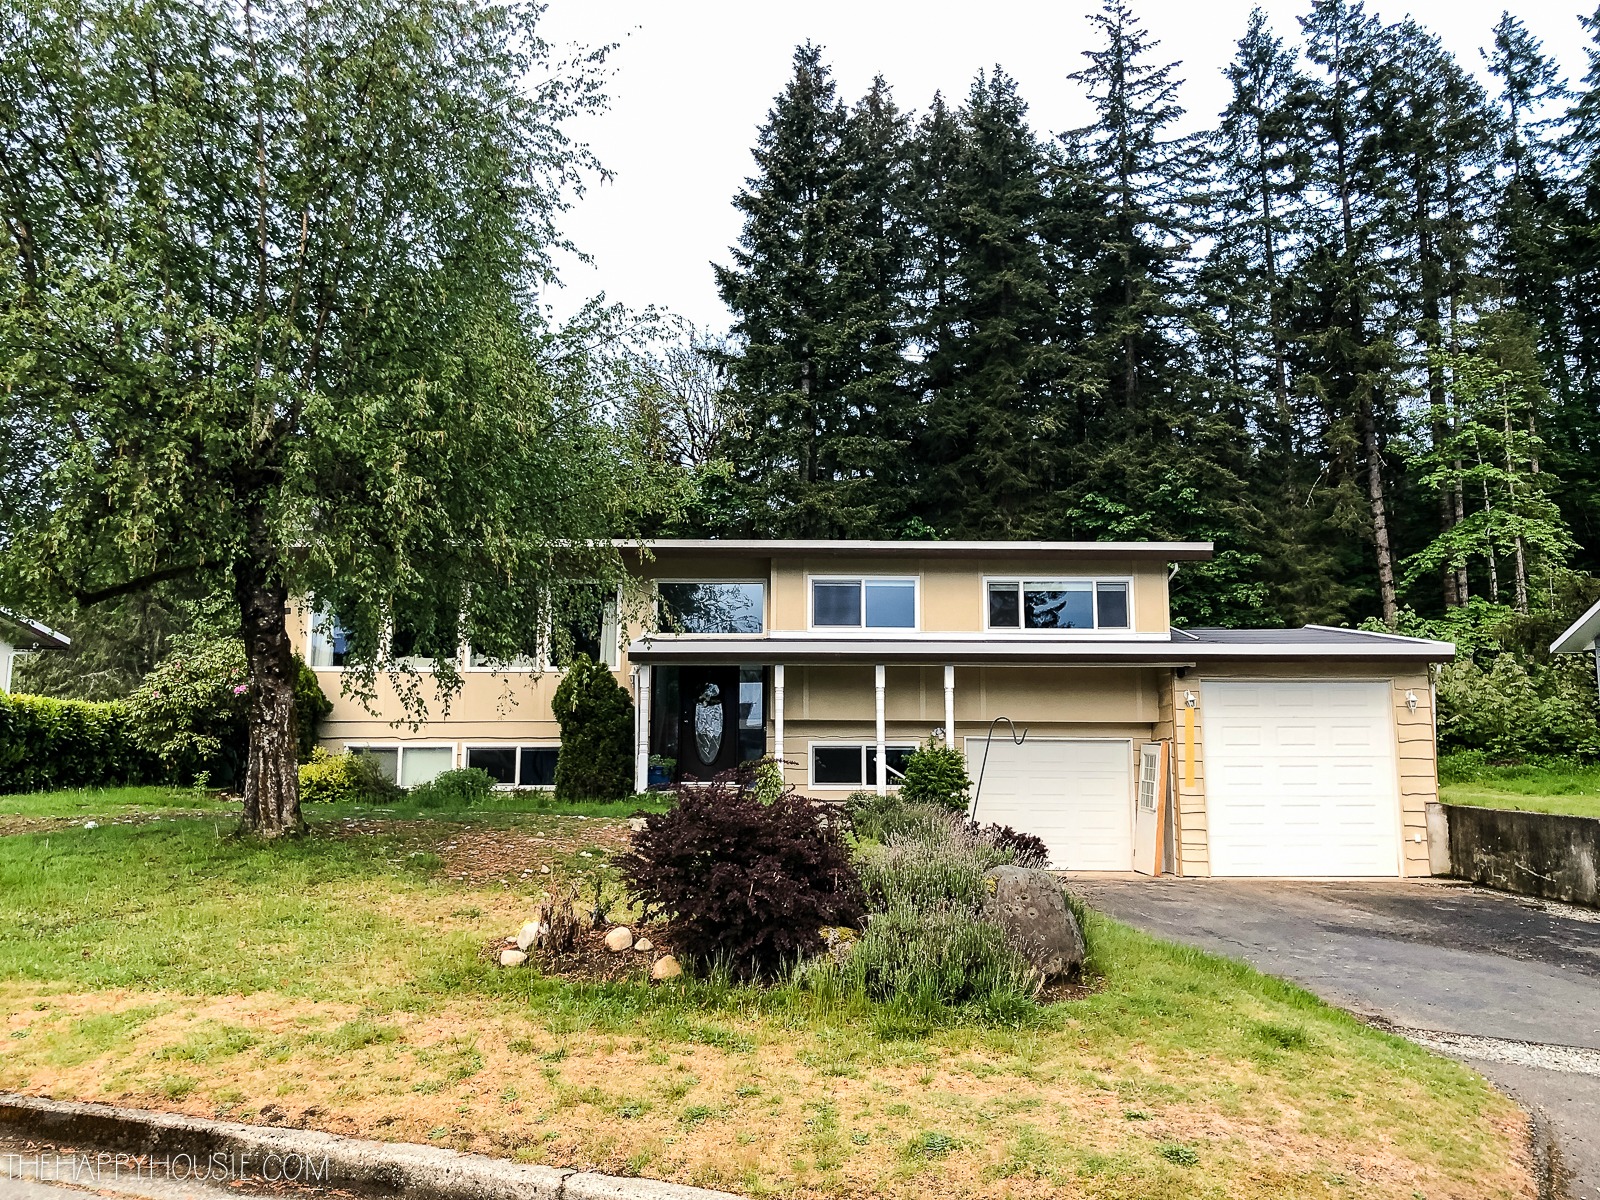
It was in need of a new driveway and retaining wall. The sidewalk was made of broken patio stones and rocks. The wavy cedar siding was cracked and broken in several places. And the front yard and gardens were looking rather rough.
But now, it’s a totally different story…
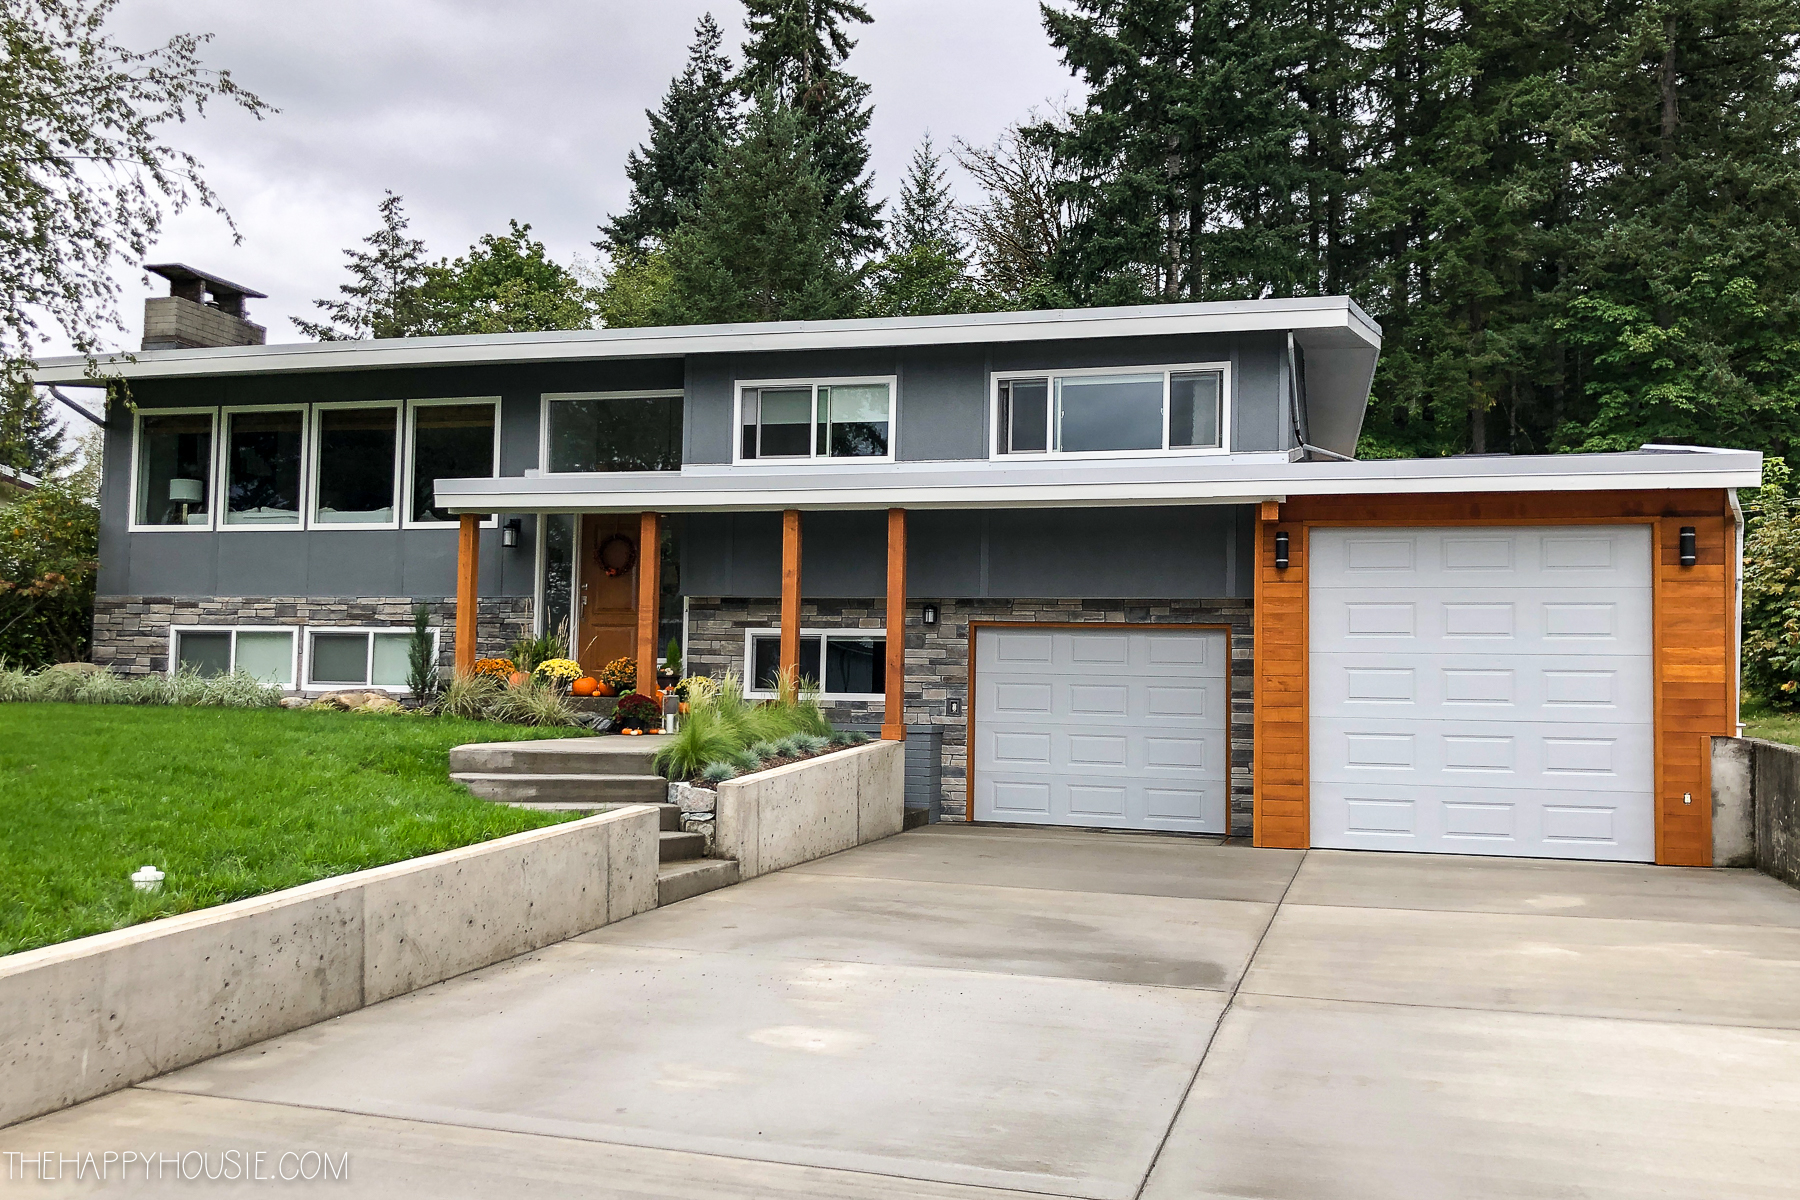
You can read all about how we painted our exterior quickly and easily in this post. As for the rest of the yard…
The driveway had been basically destroyed because of some excavating work that had been done to correct some drainage issues (prior to use taking possession).
This was not a simple or thrifty project. We hired a local company that we know well and completely trust, and they did a beautiful job. But concrete on this scale is not cheap nor an easy DIY. Best left to the experts.
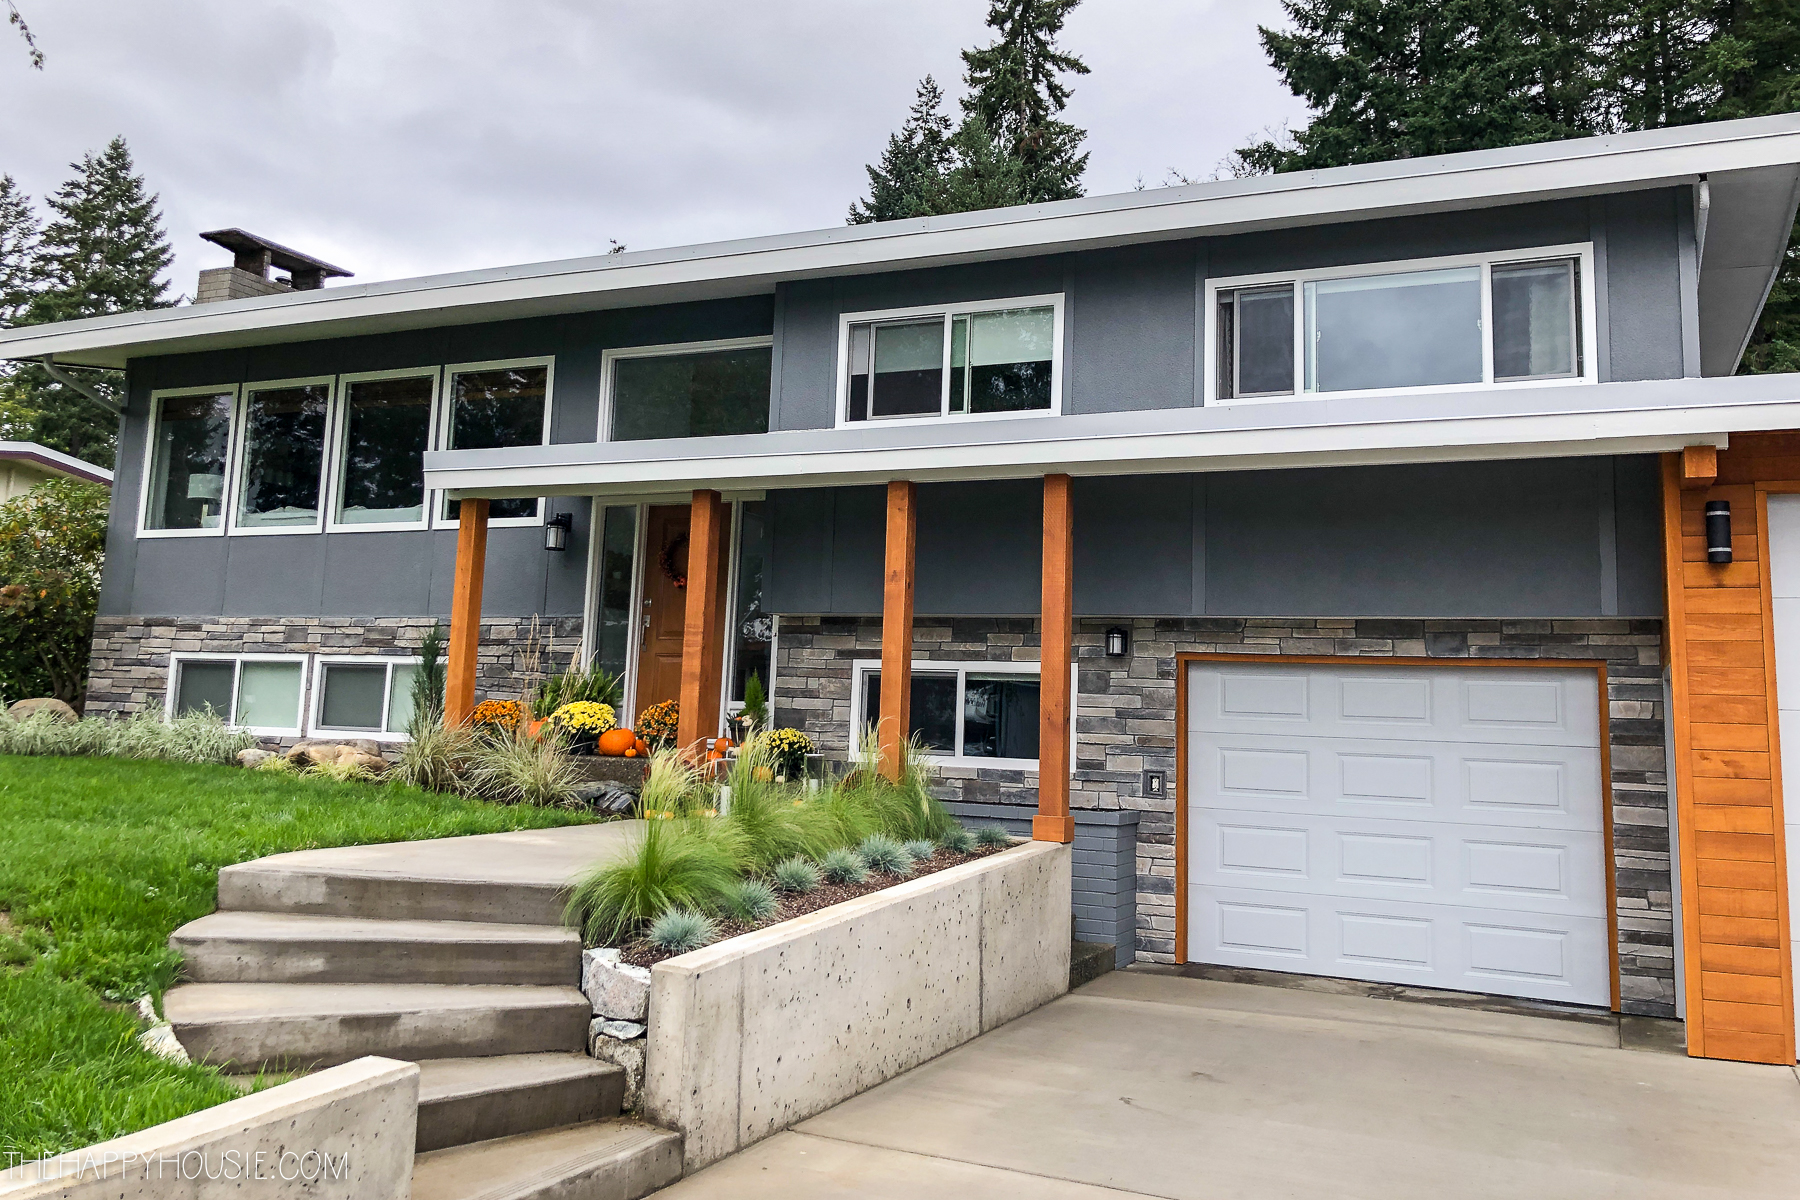
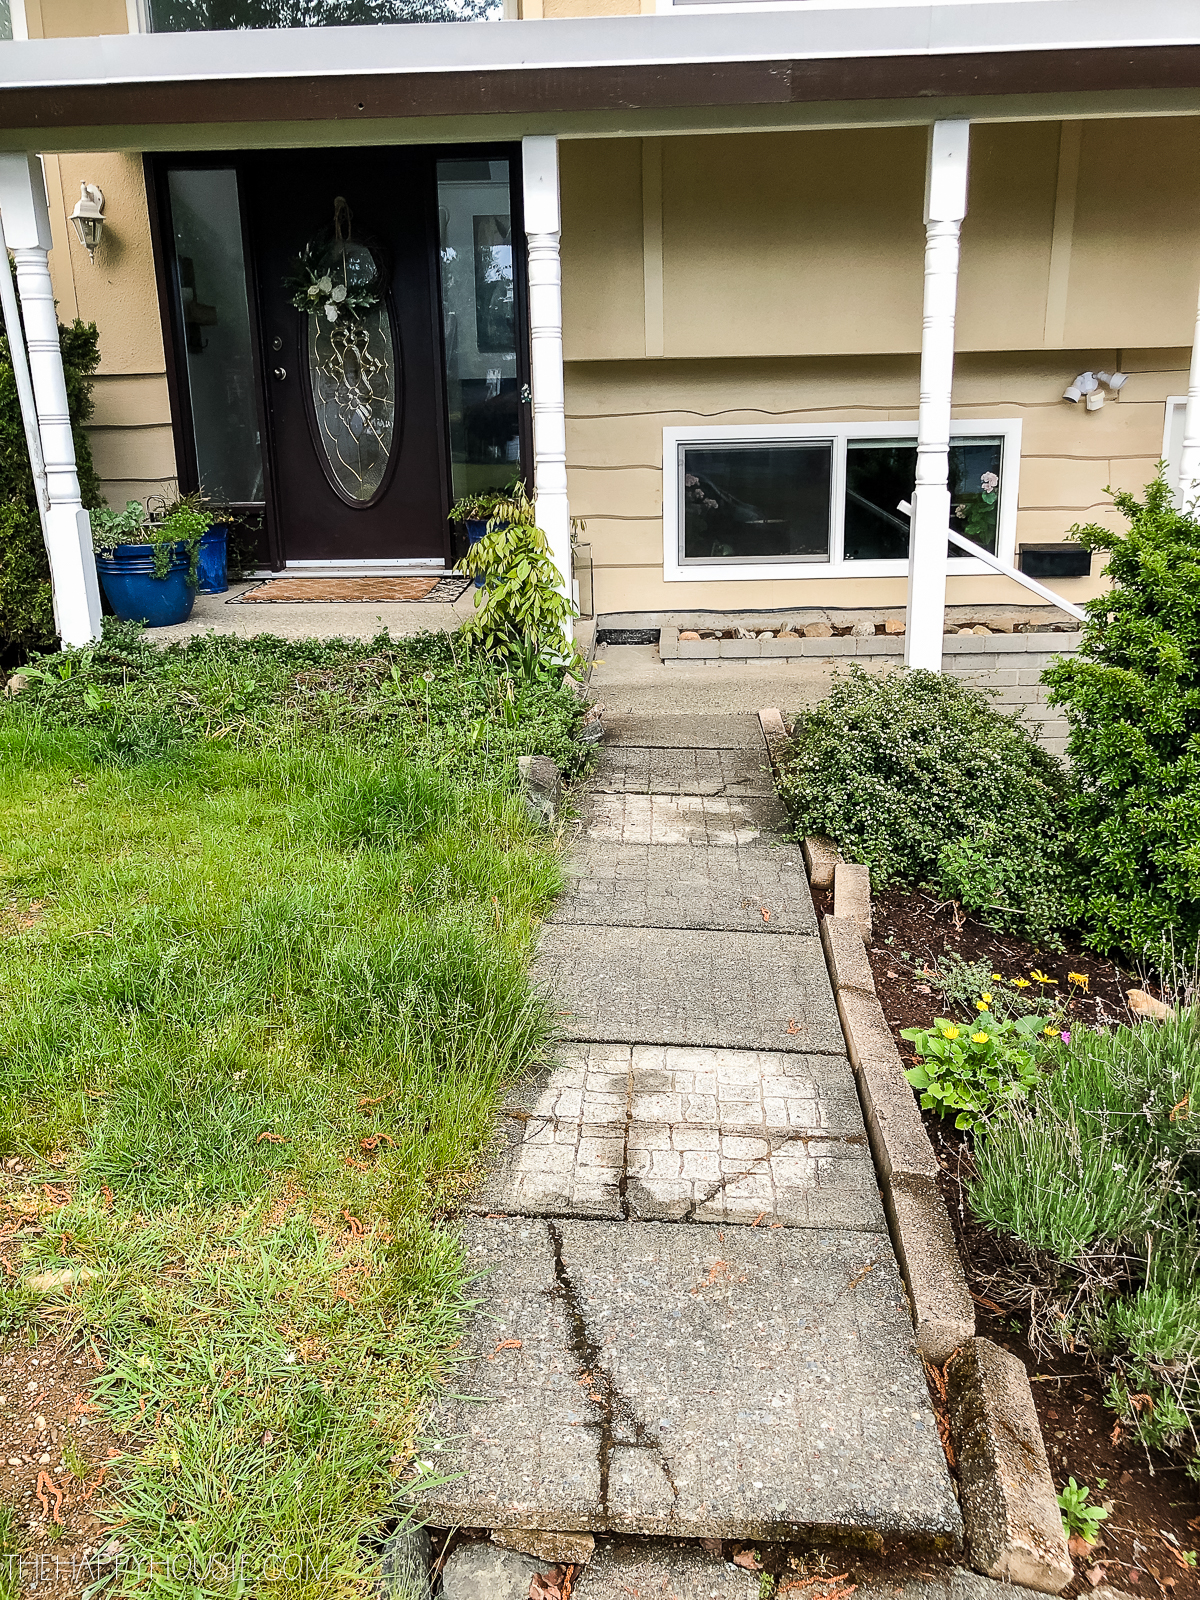
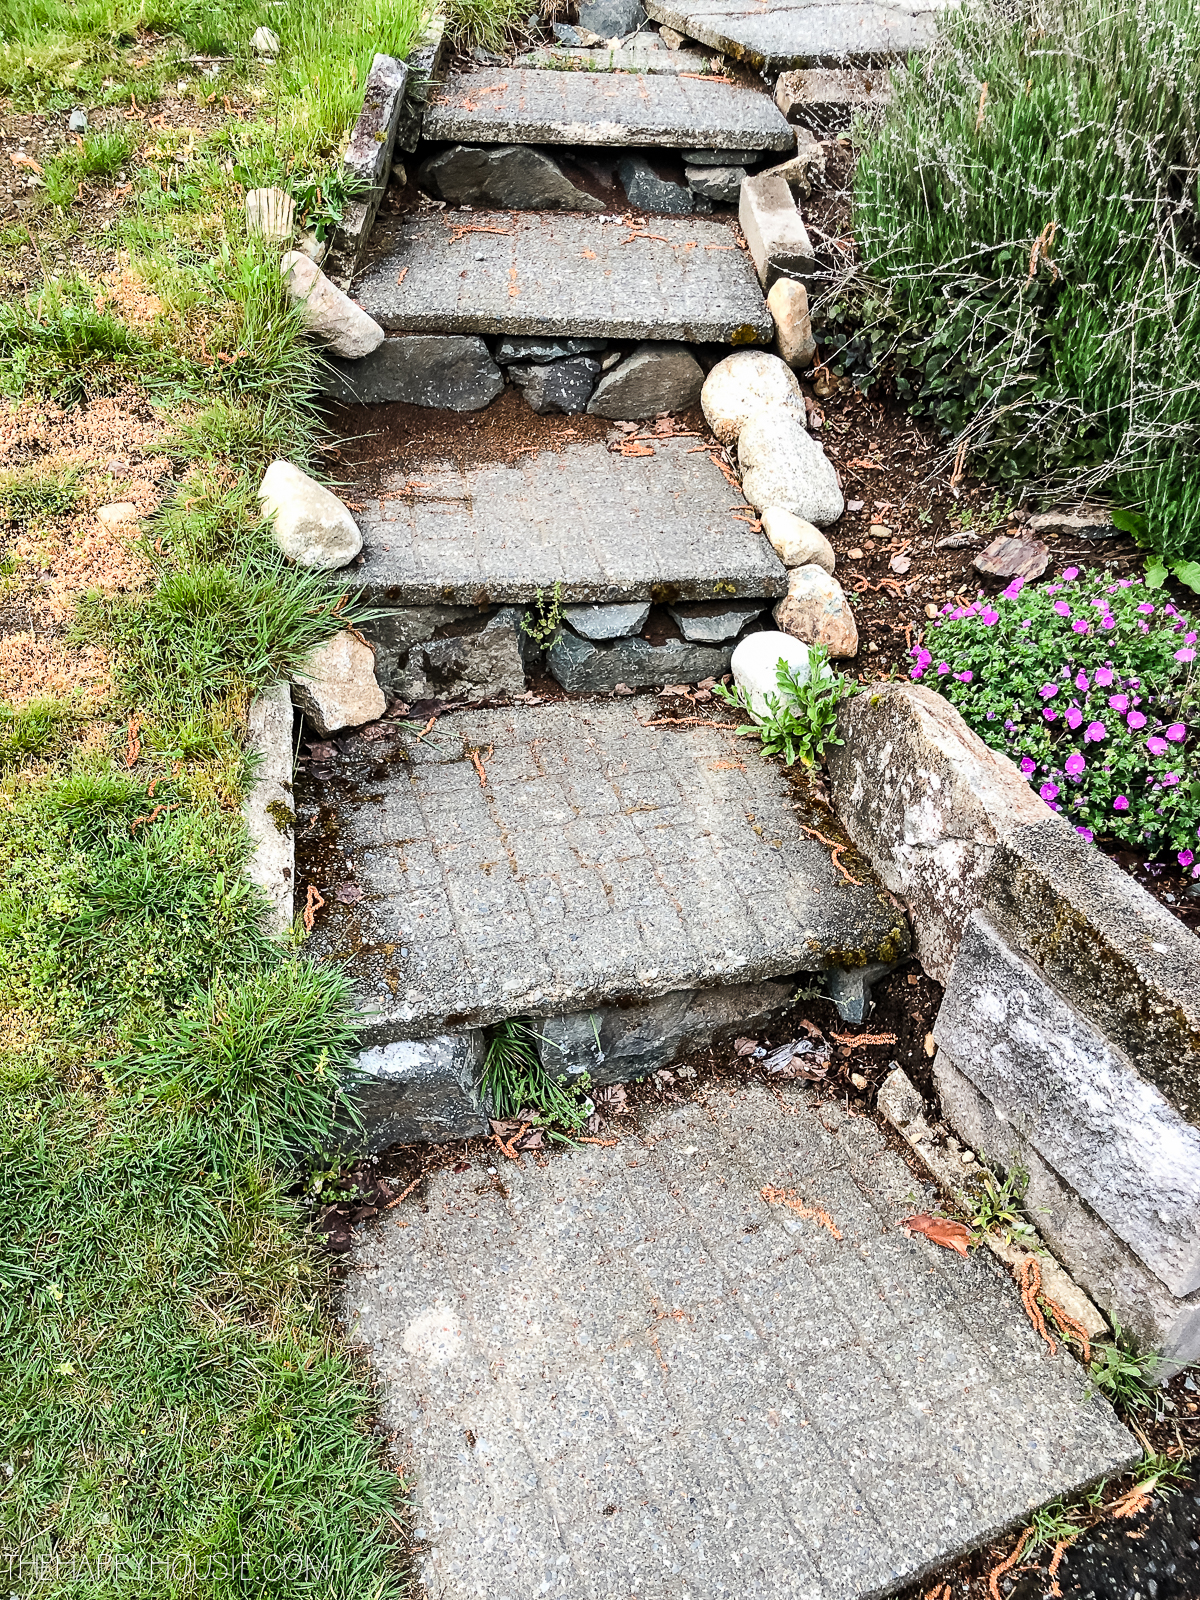
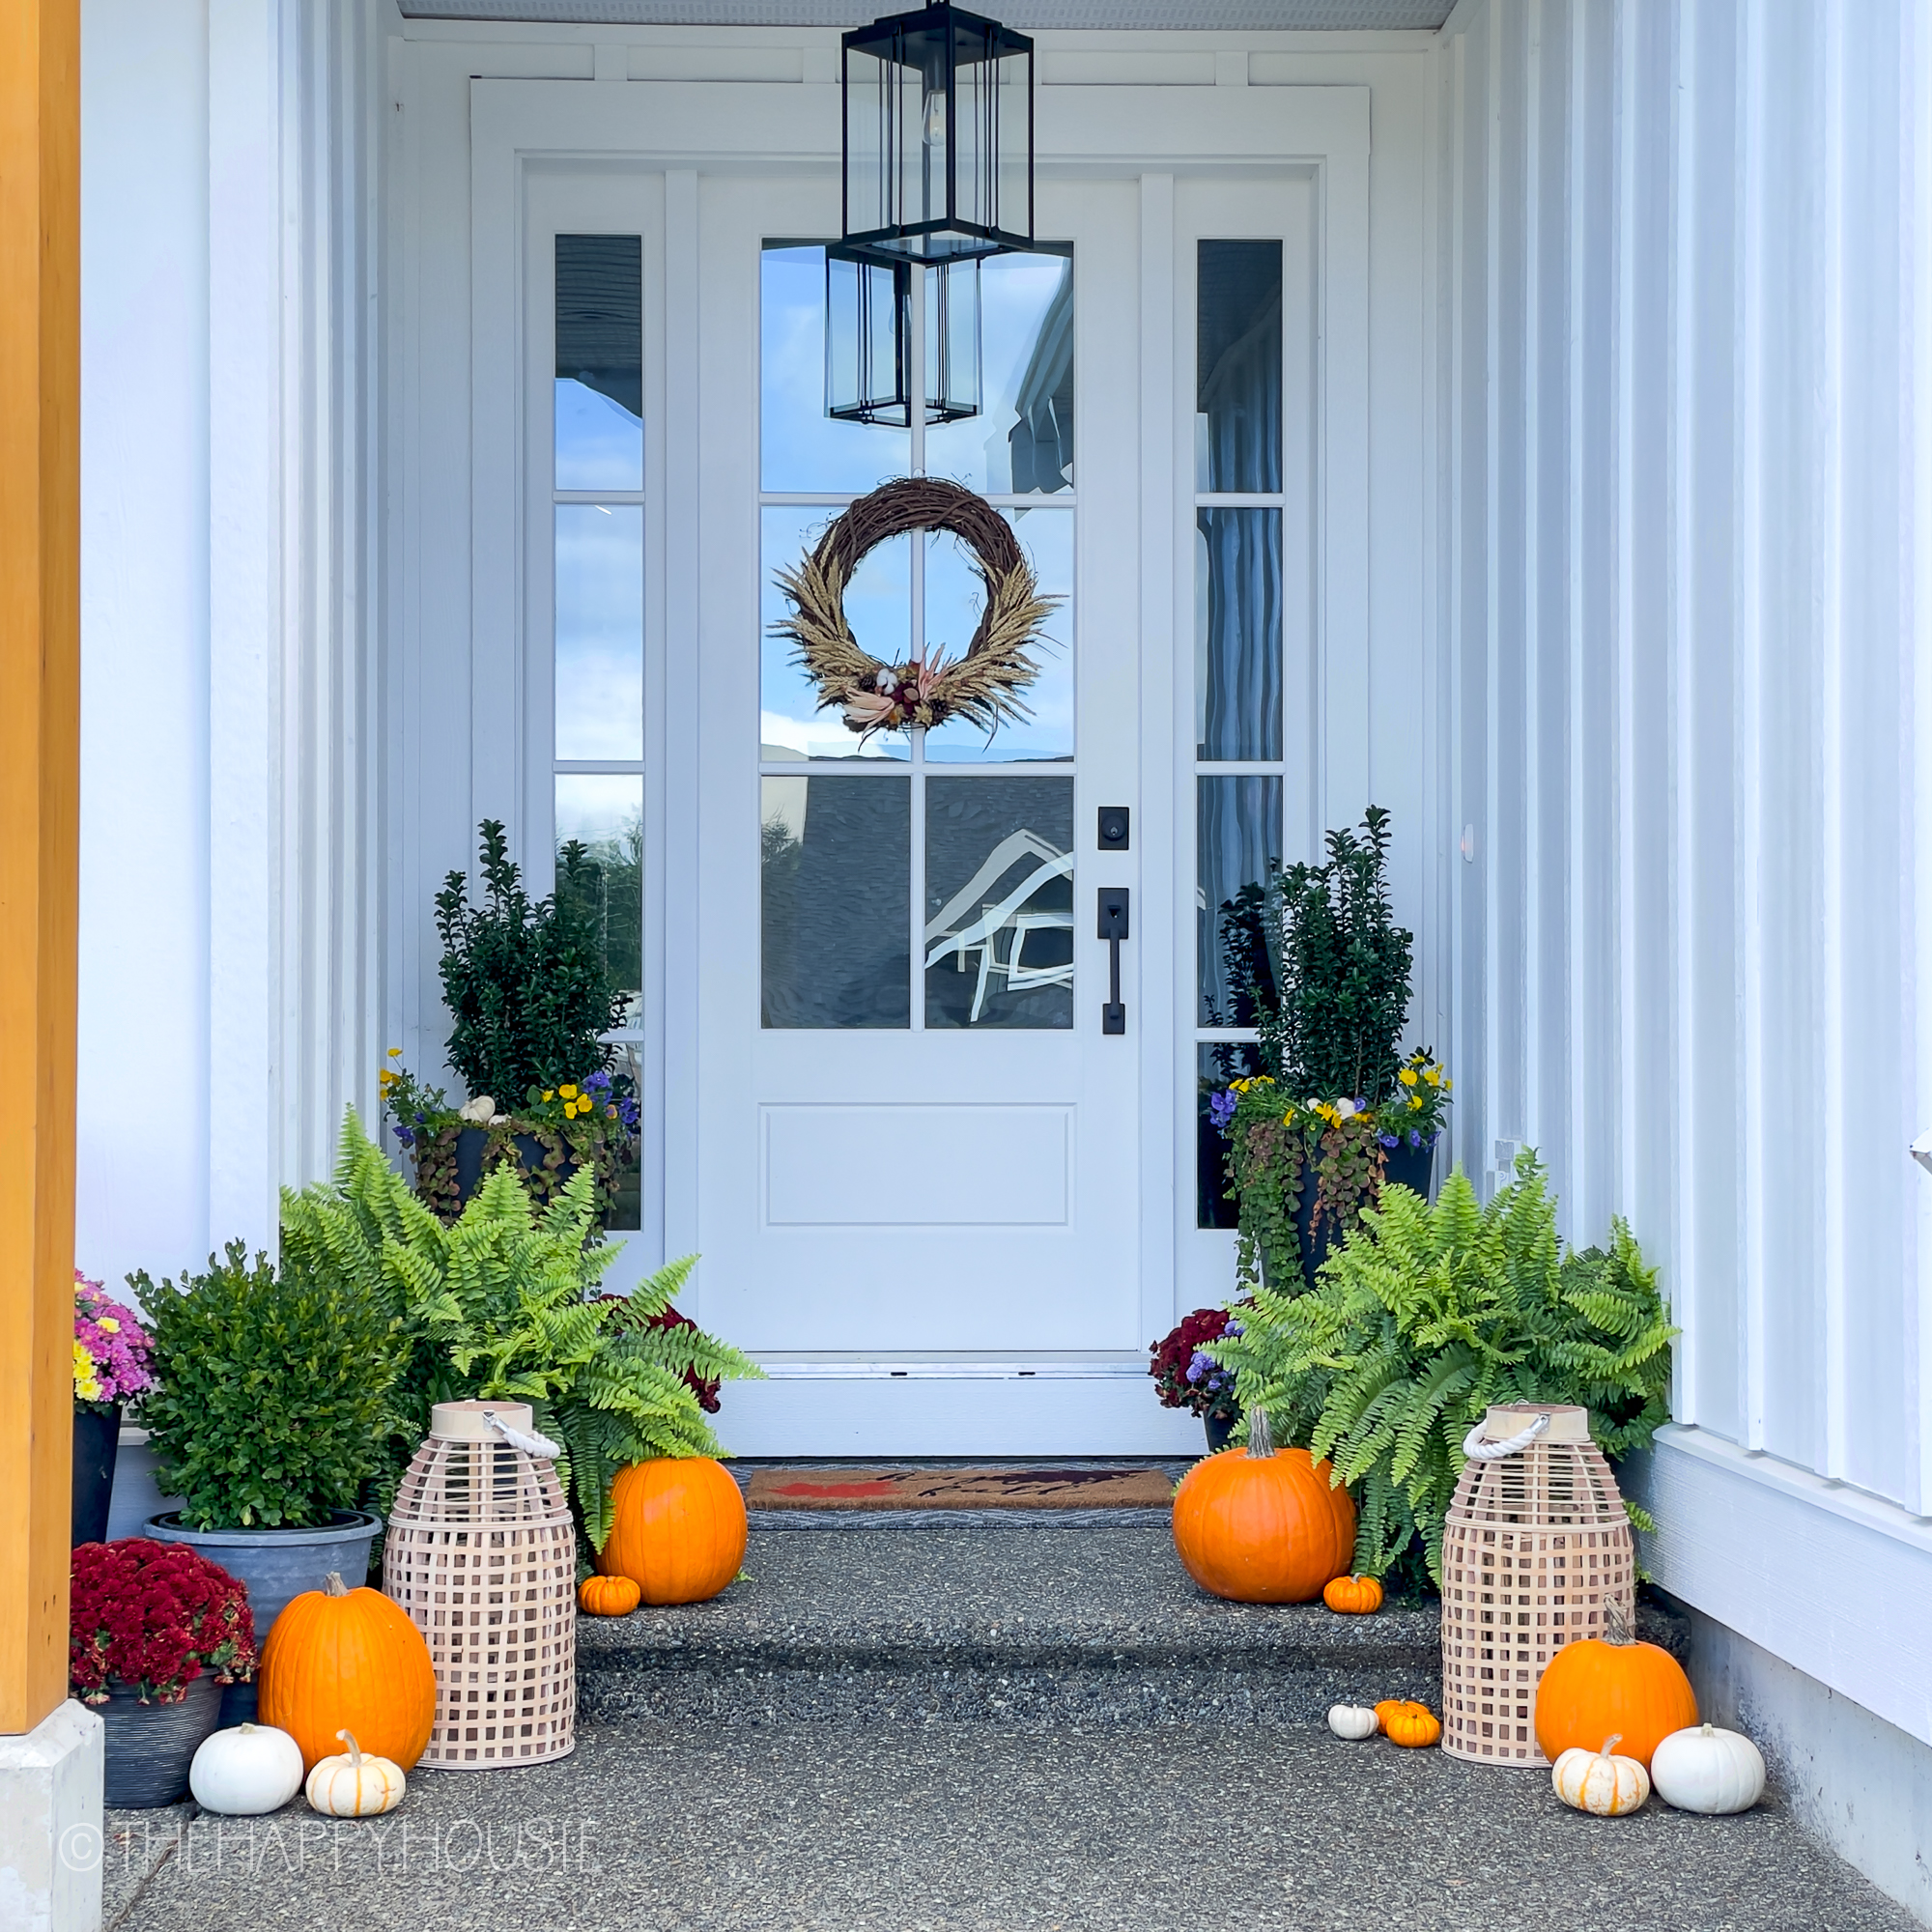
Our concrete contractor referred some framing contractors to us whom we hired to frame up the new retaining wall (to replace the small and rickety Allan block style wall that was there before). They also framed up the beautiful new stairs and revamped walkway that leads up to the front door. It was a bit of a hazard before…
But now it feels safe to walk on and I love how wide it is.

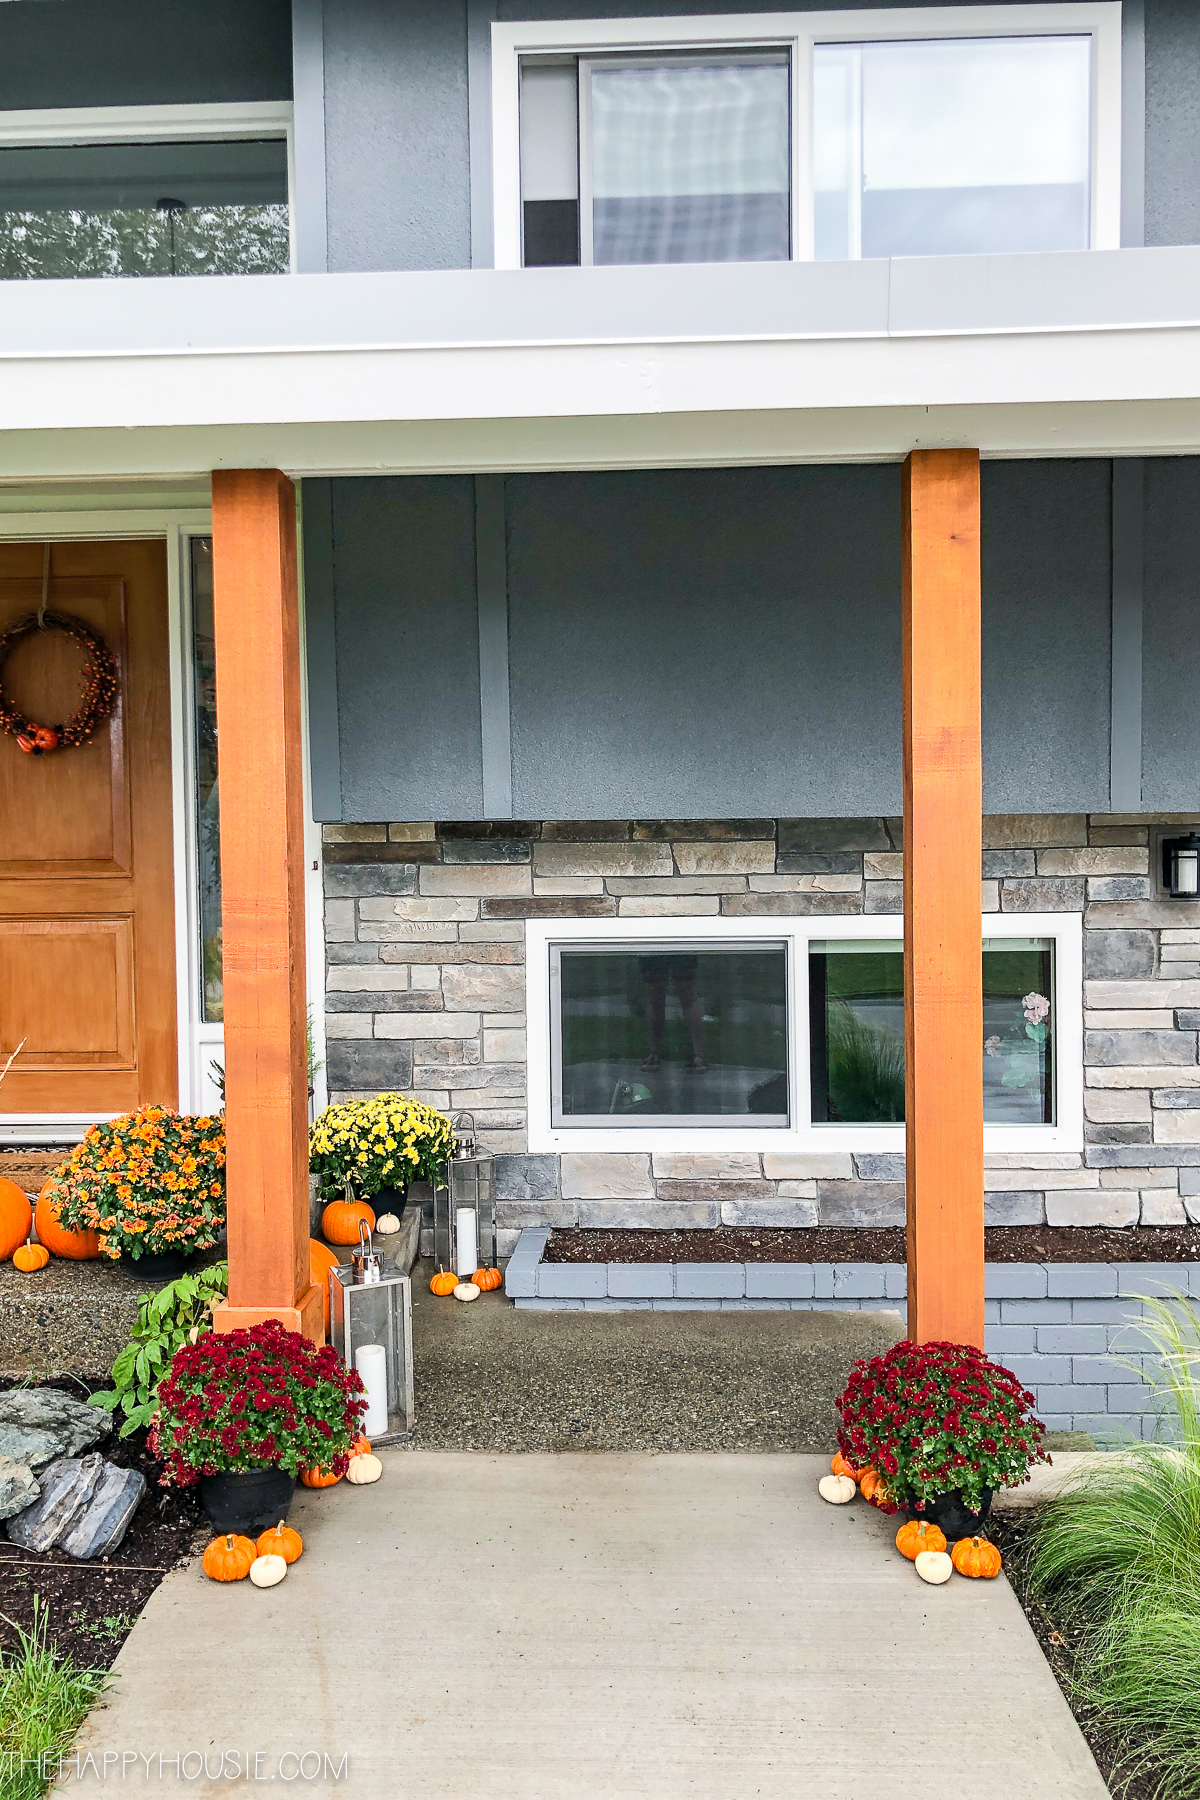
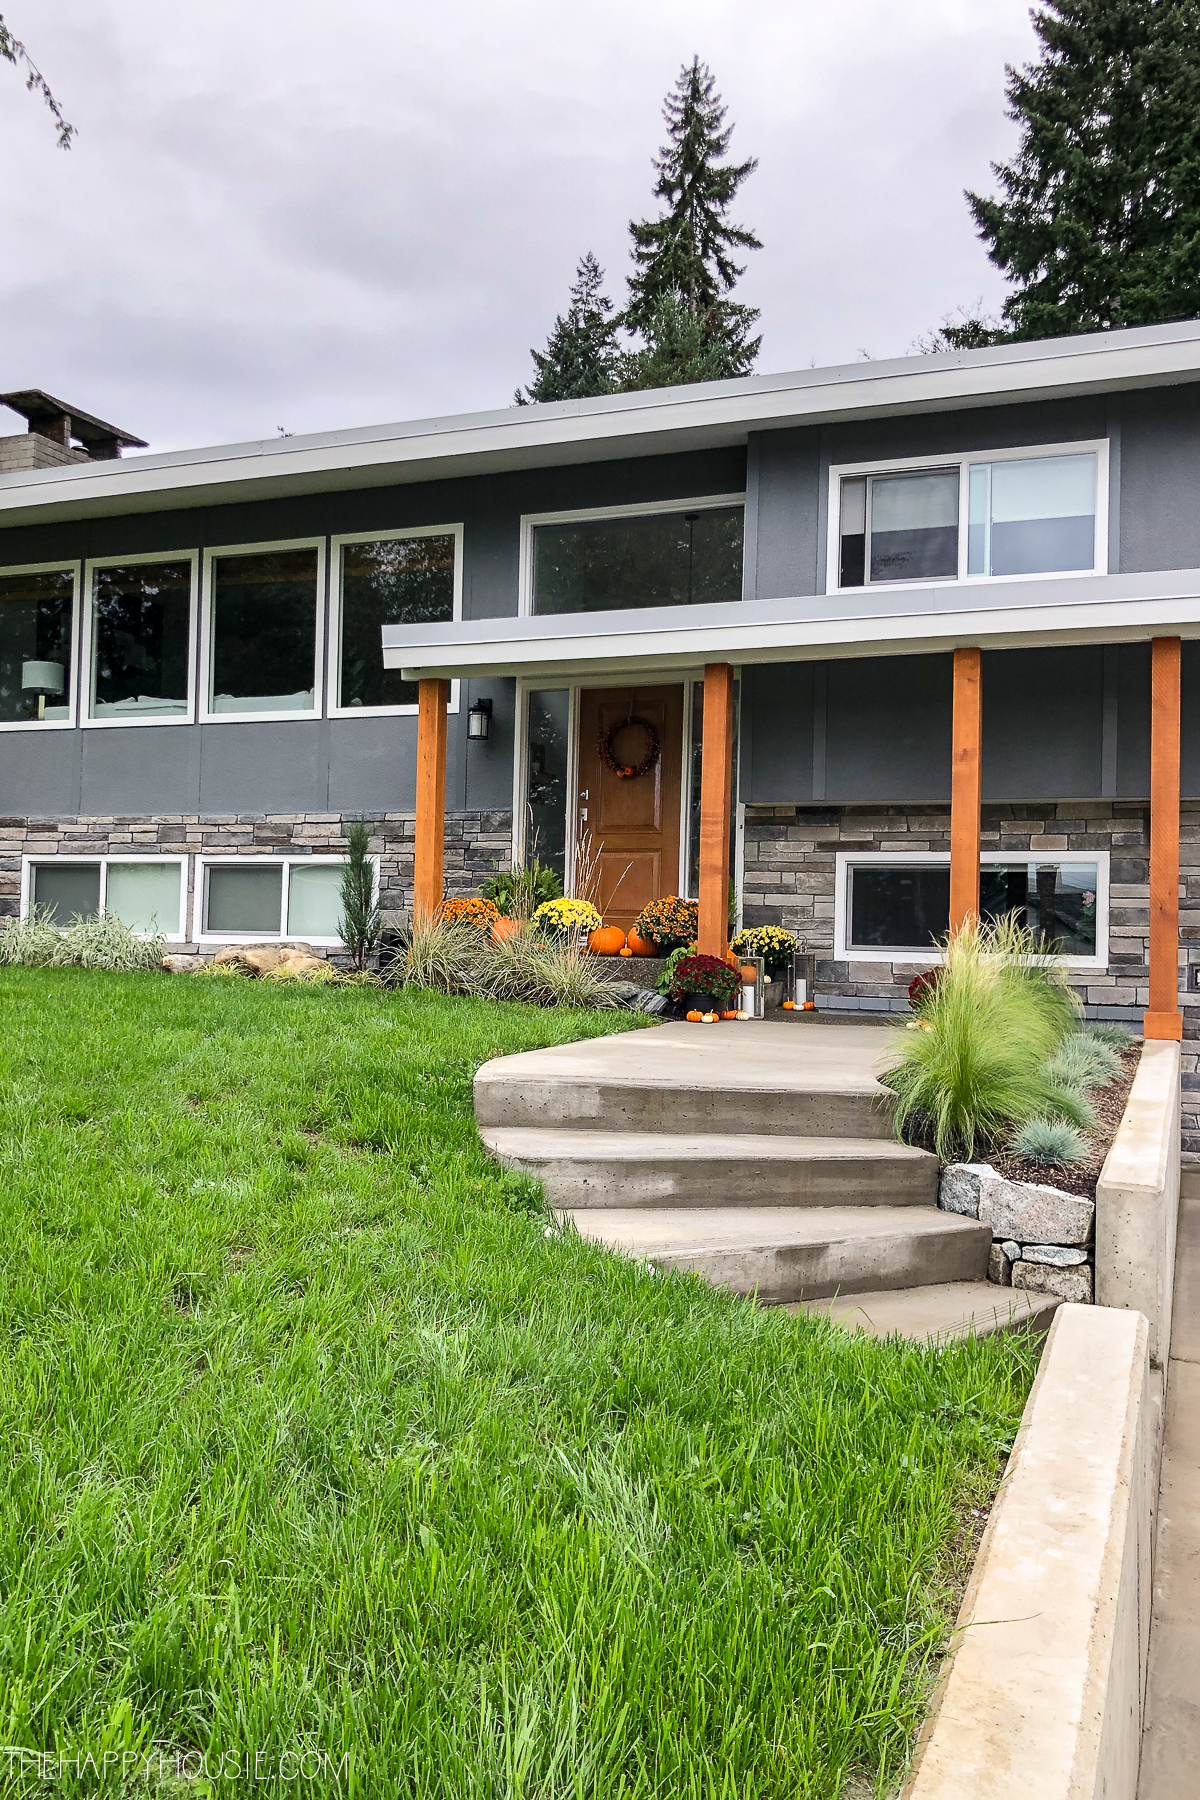
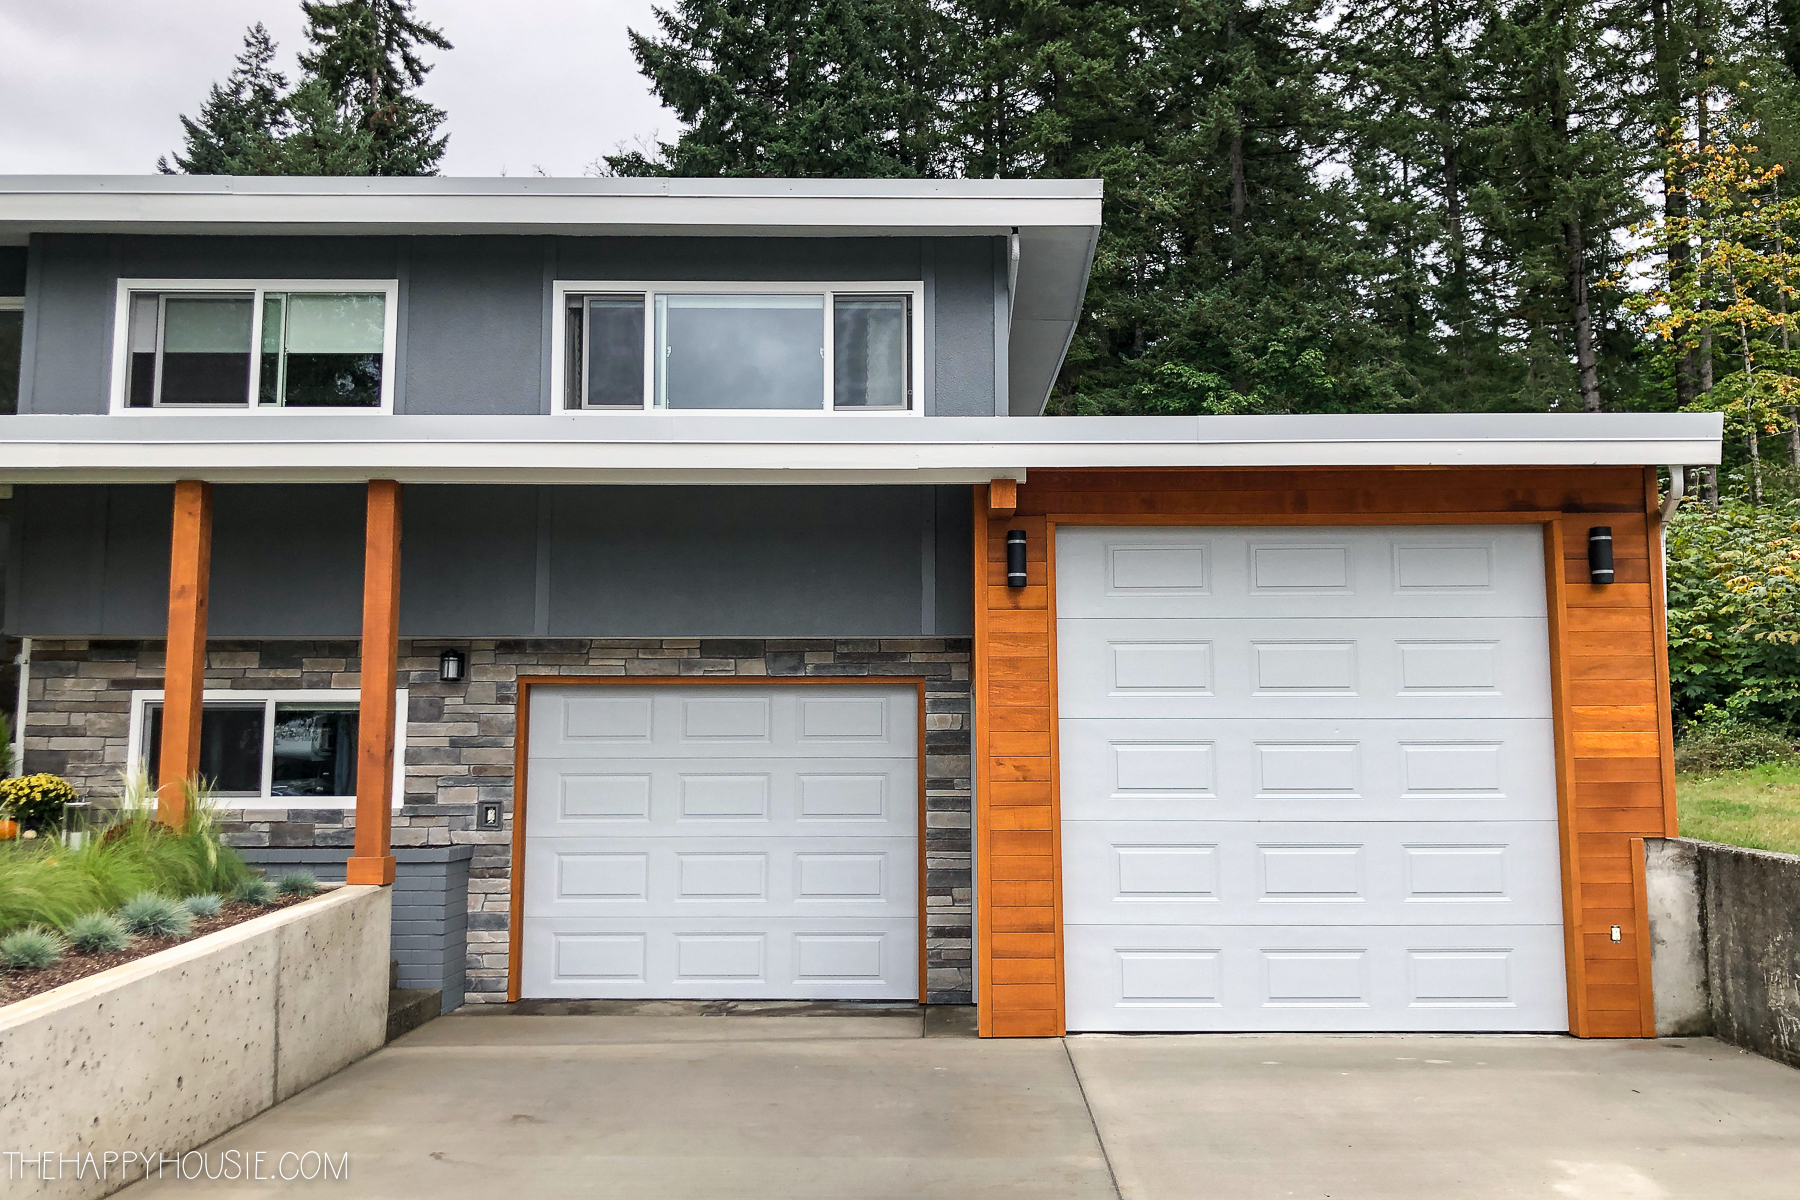
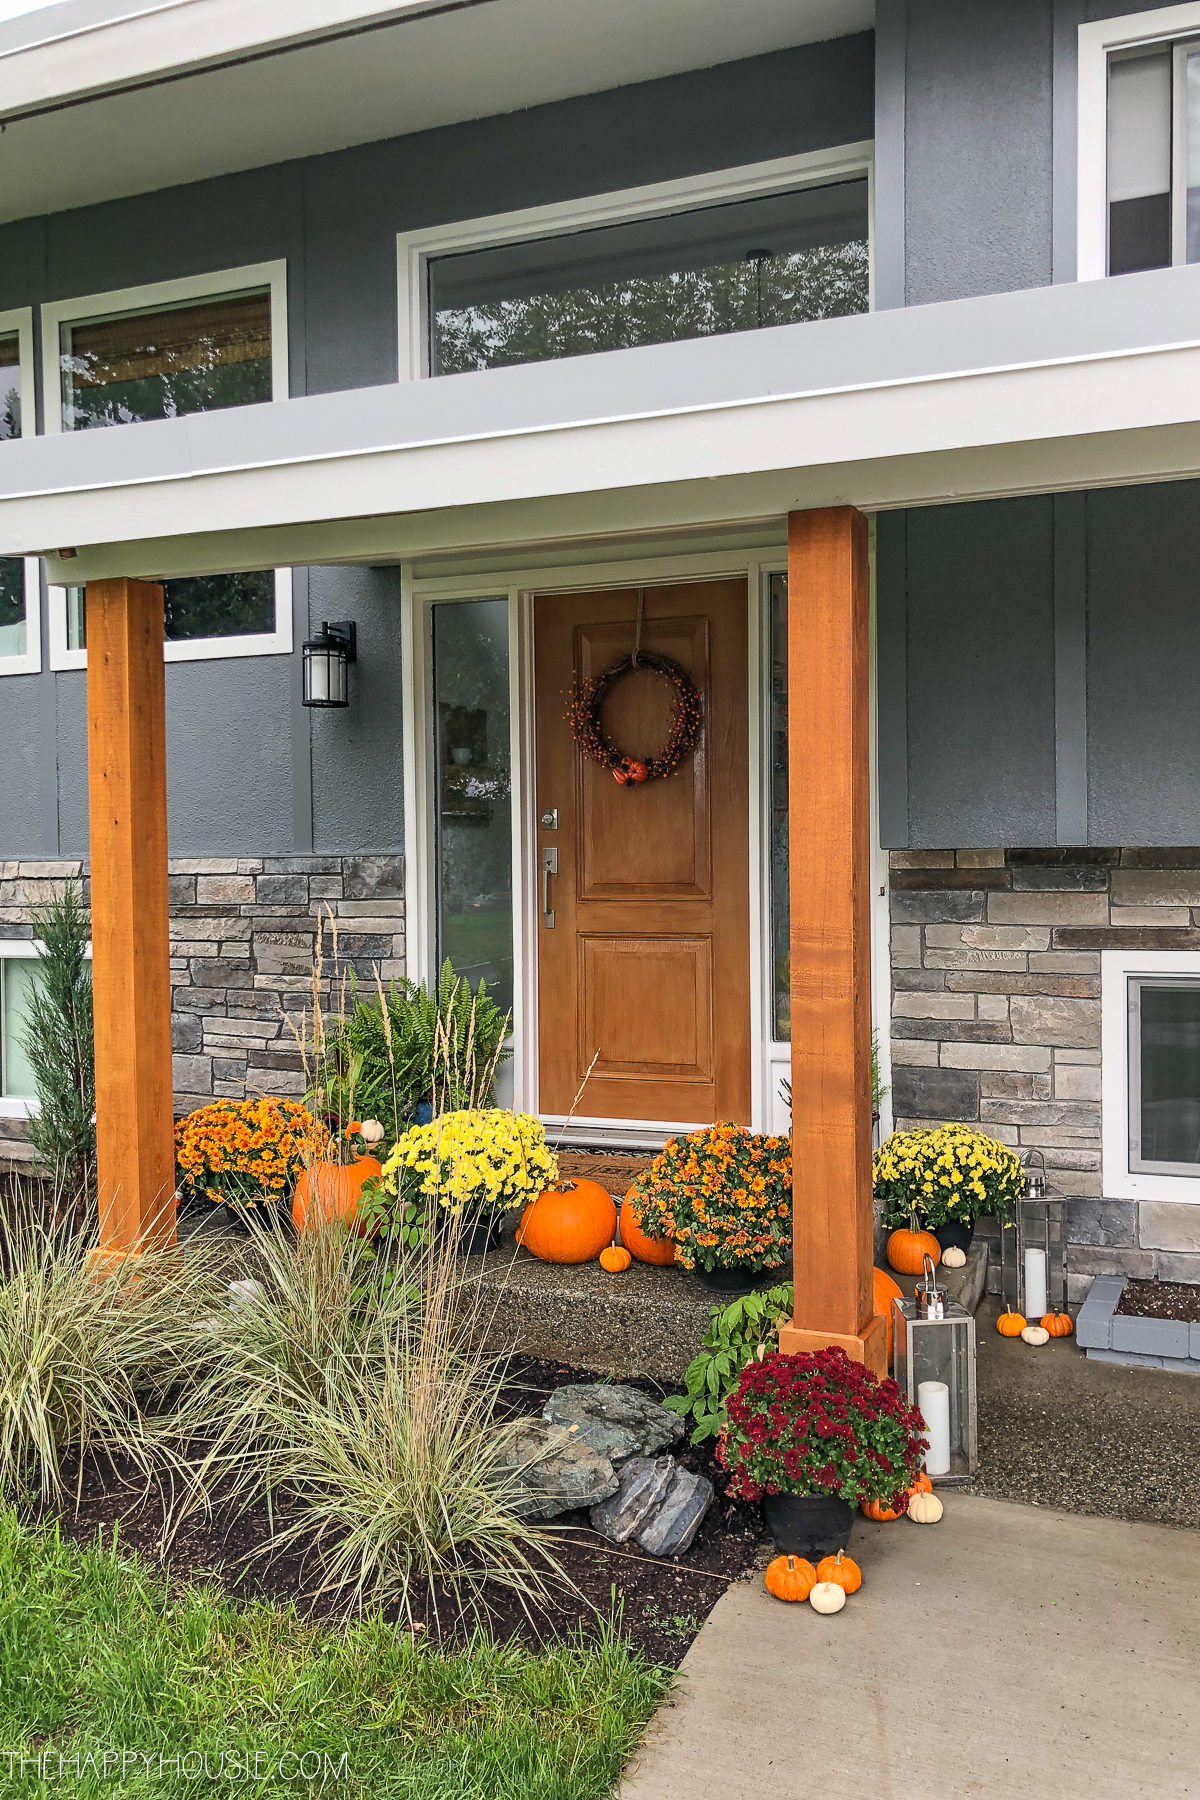
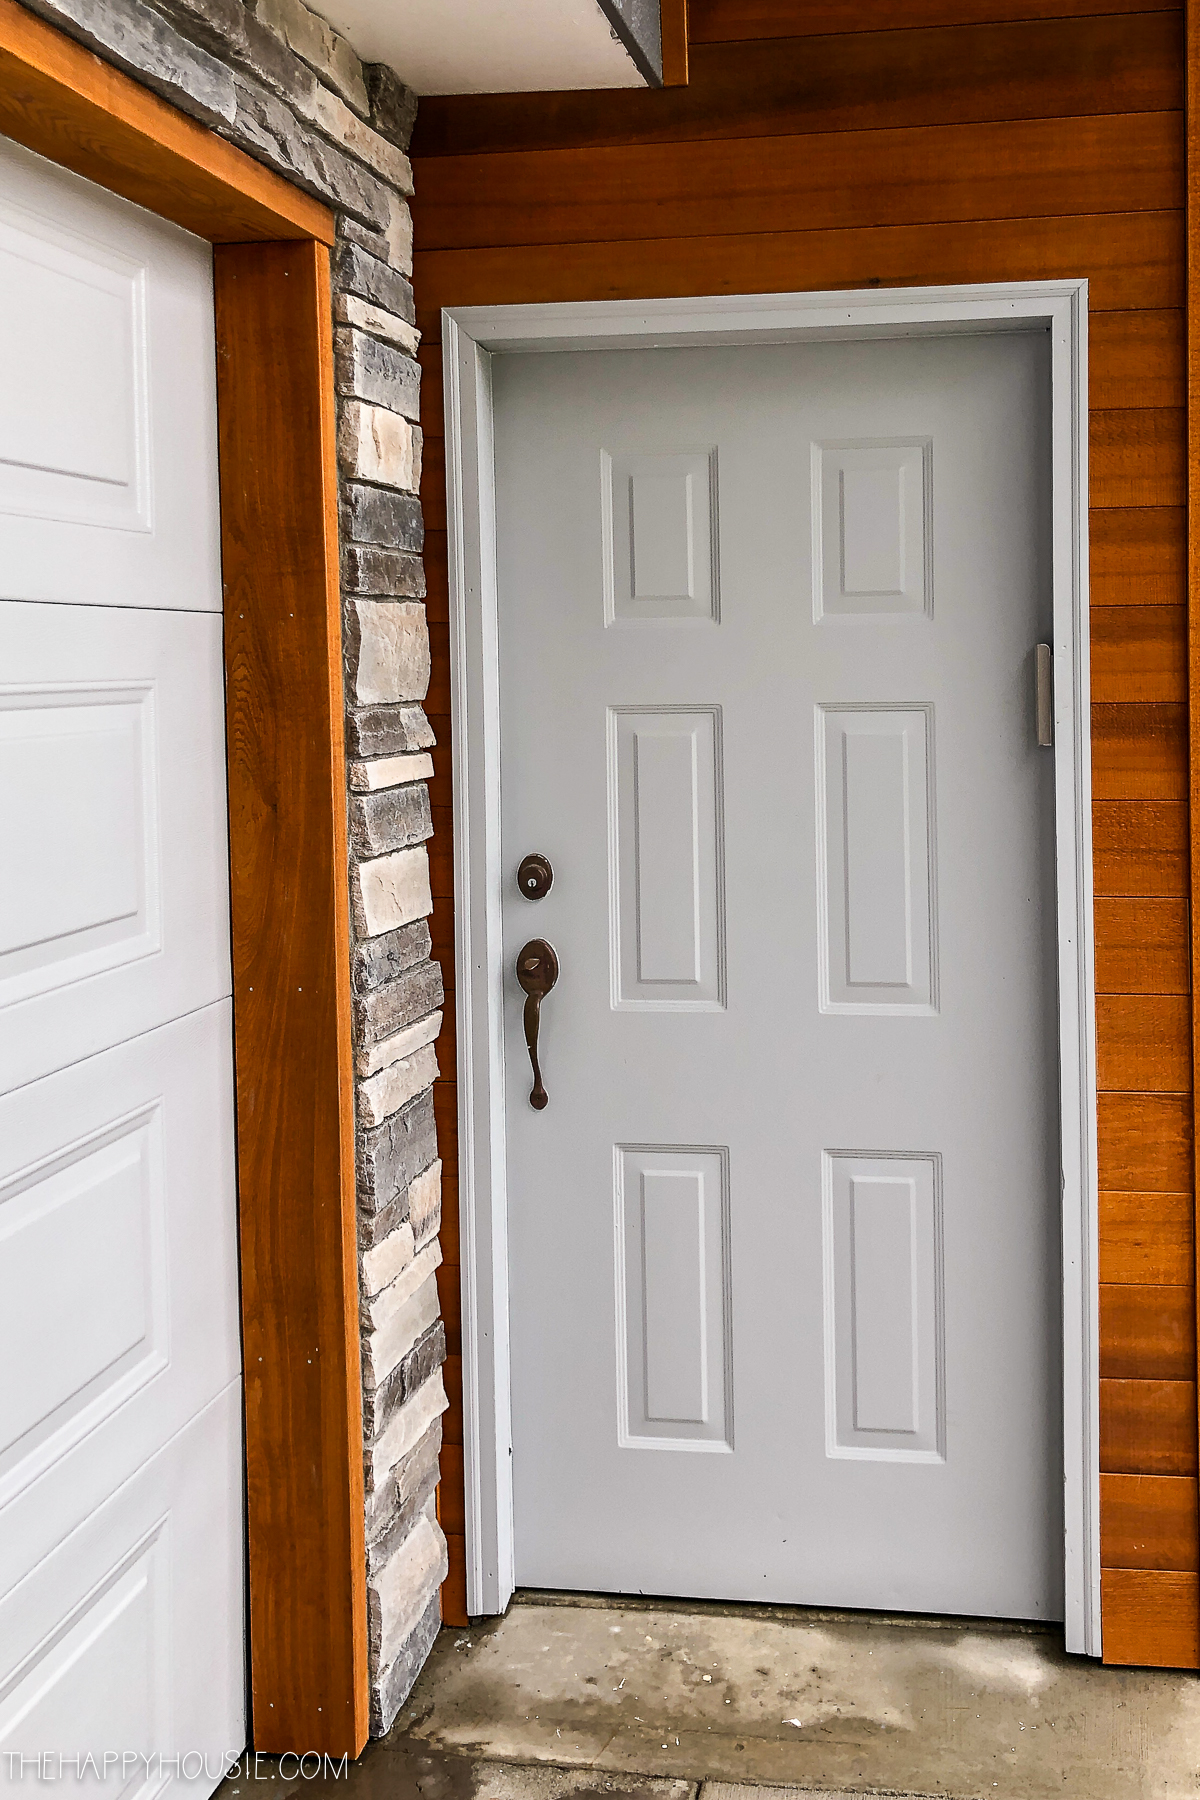
We also replaced all the front of the house posts with solid cedar posts and trimmed out the bottom of them to finish off the look. The door is actually made of fibreglass, but I stained it to match the cedar posts and the cedar that we added around the garage. Western red cedar is very popular around here as it is natural to our area, and I love the west coast feel and rich colour that using natural cedar has added to our basic 70s split home exterior.
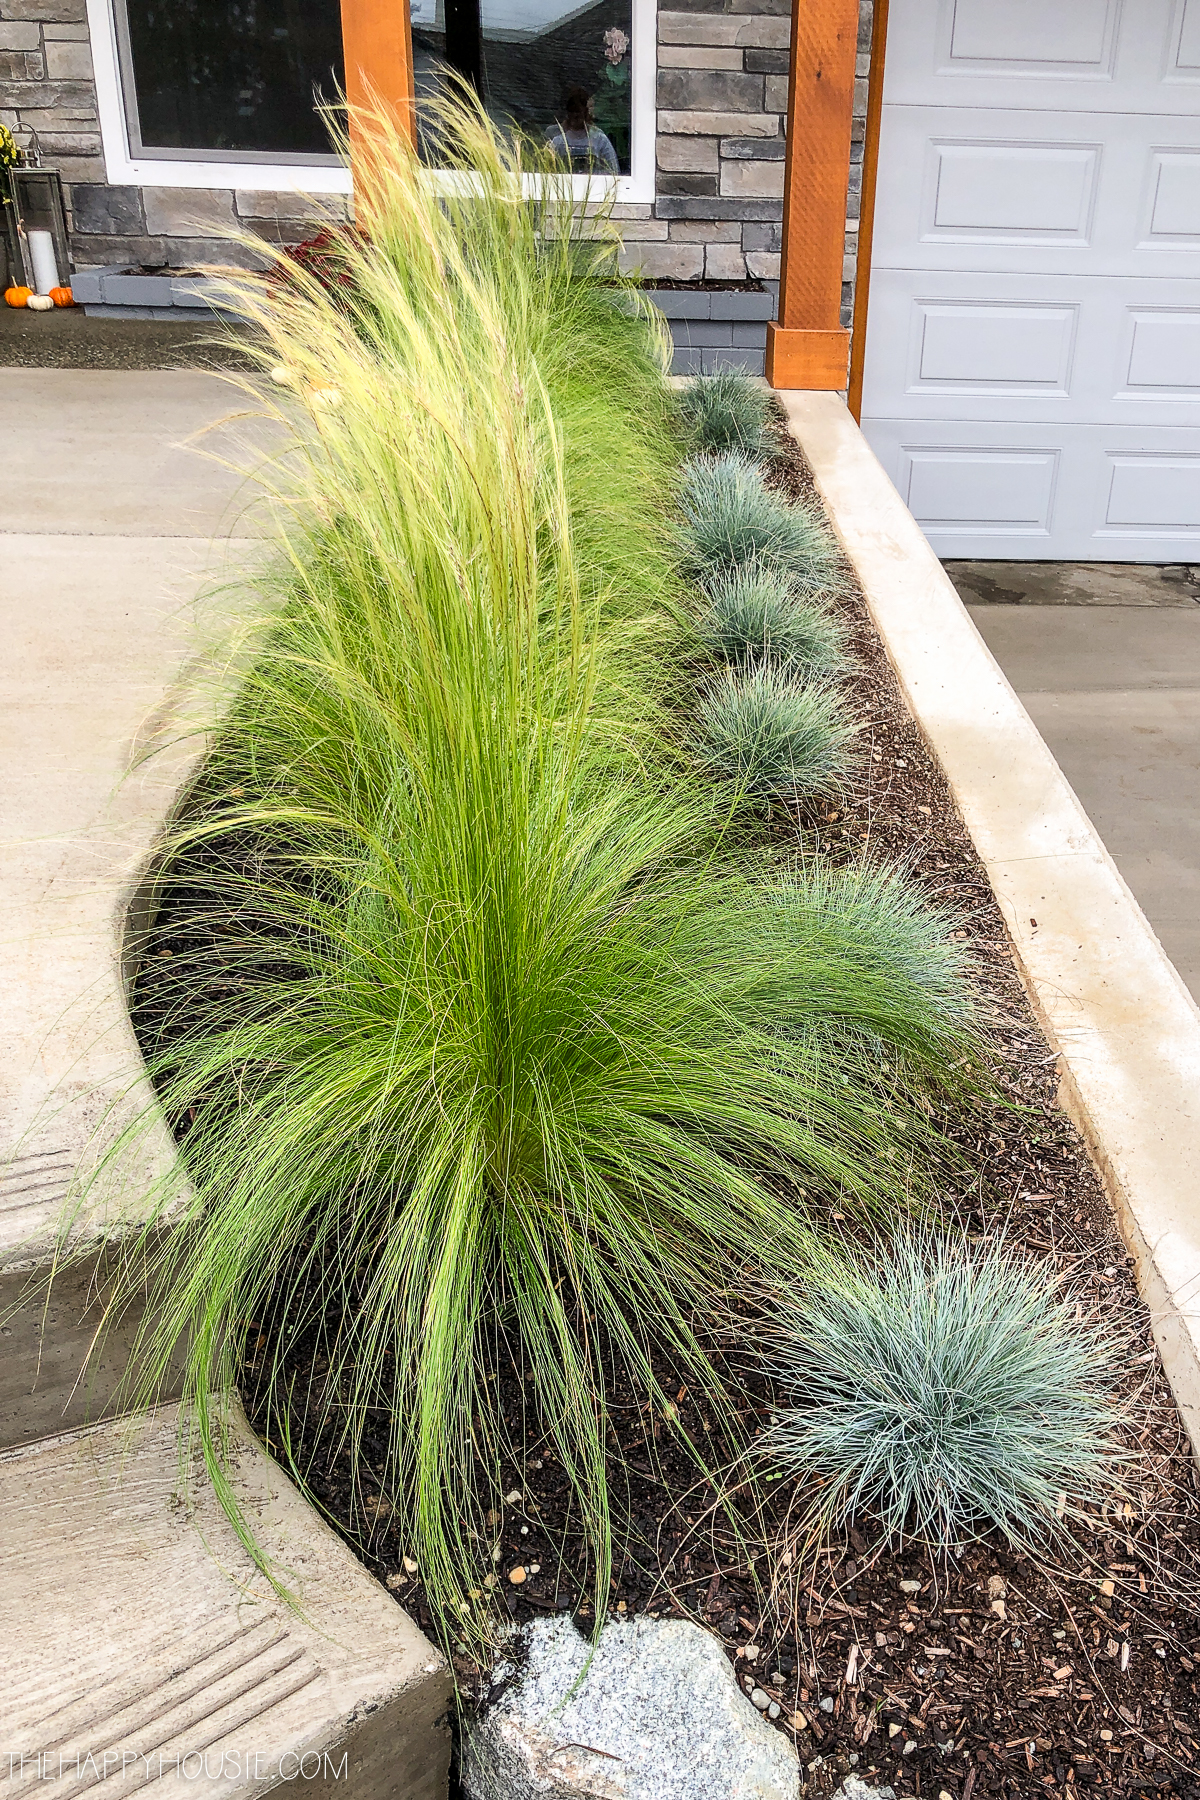
The gardens consisted of some deer-eaten columnar cedar hedging trees along with a variety of smaller green shrubs. I had no attachment to any of them. We had a machine working to prep the driveway and then clean up the mess in the front yard left over from the drainage work that was completed just before we moved in. So while it was working here, I had the operators tear out and remove most of the old garden, making way for a simple new front bed full of vibrant ornamental grasses and some large rocks. We also added a couple of smaller trees on the ends for interest.
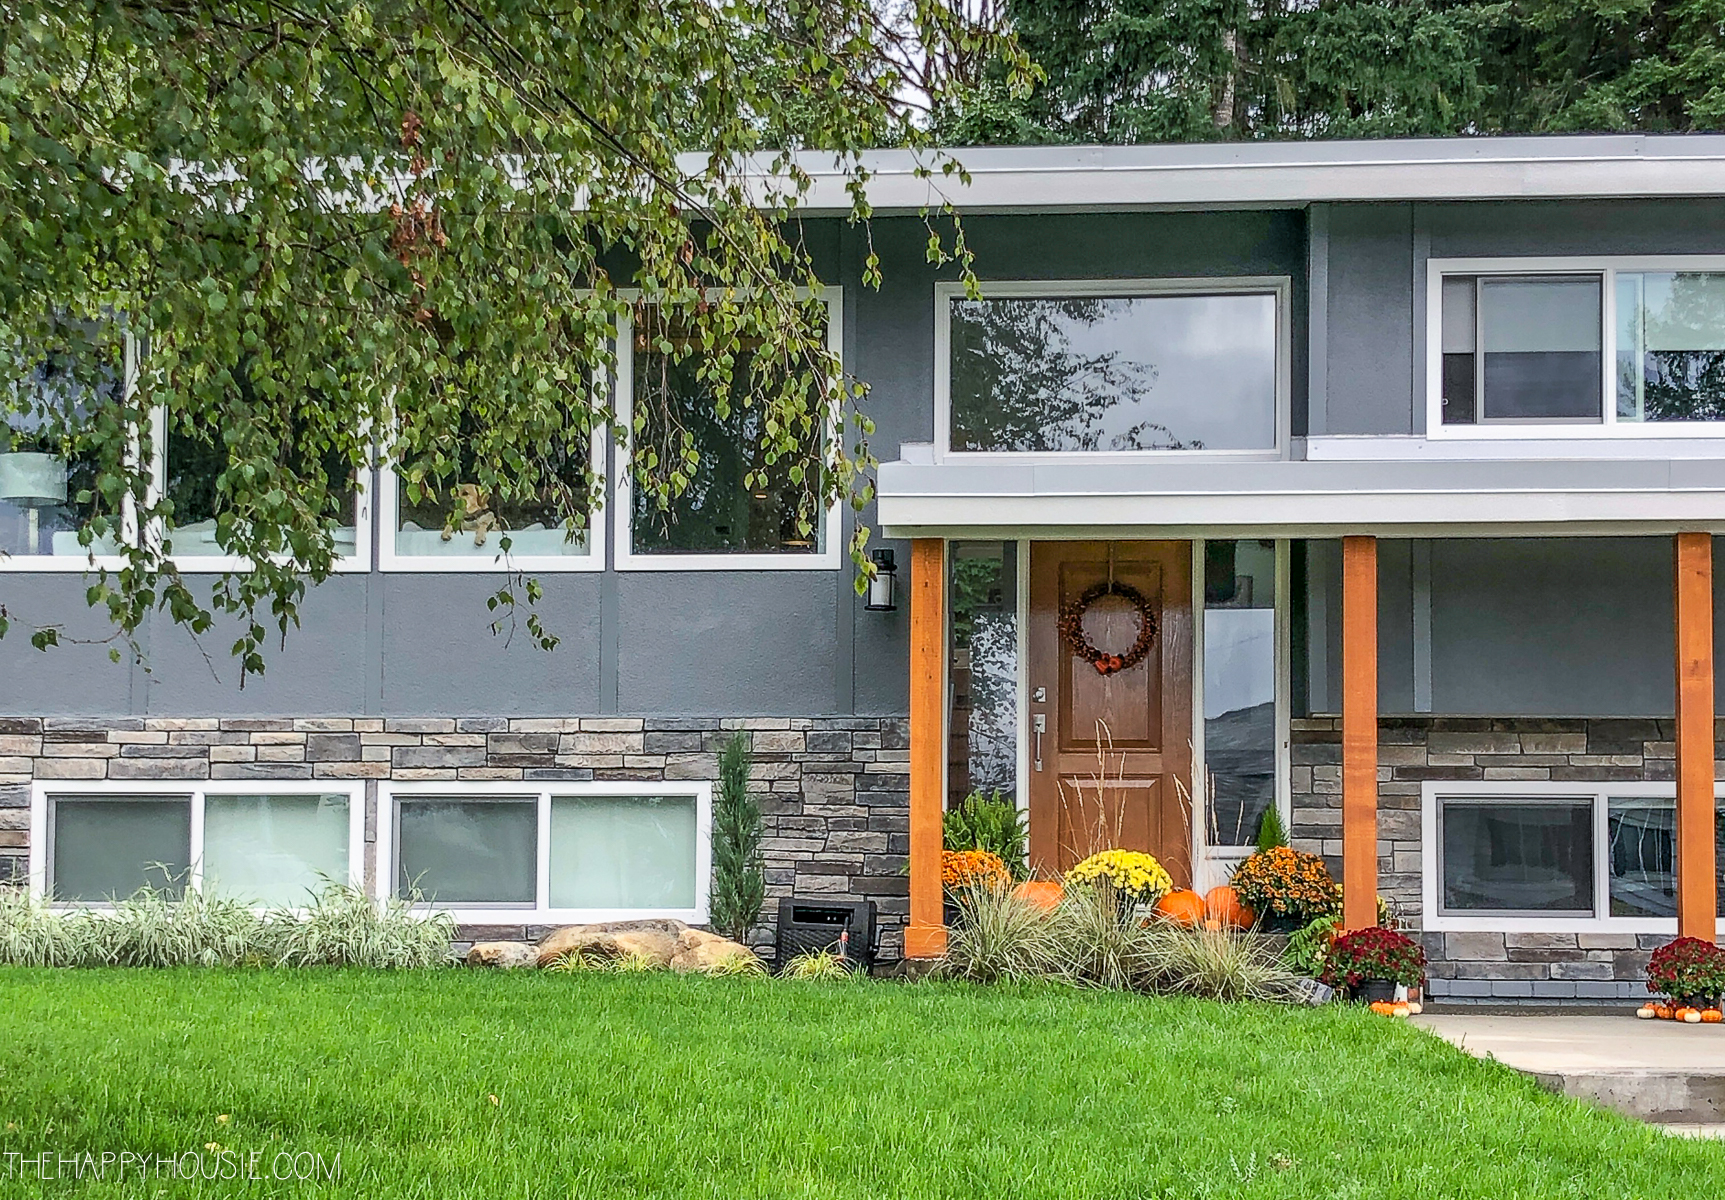
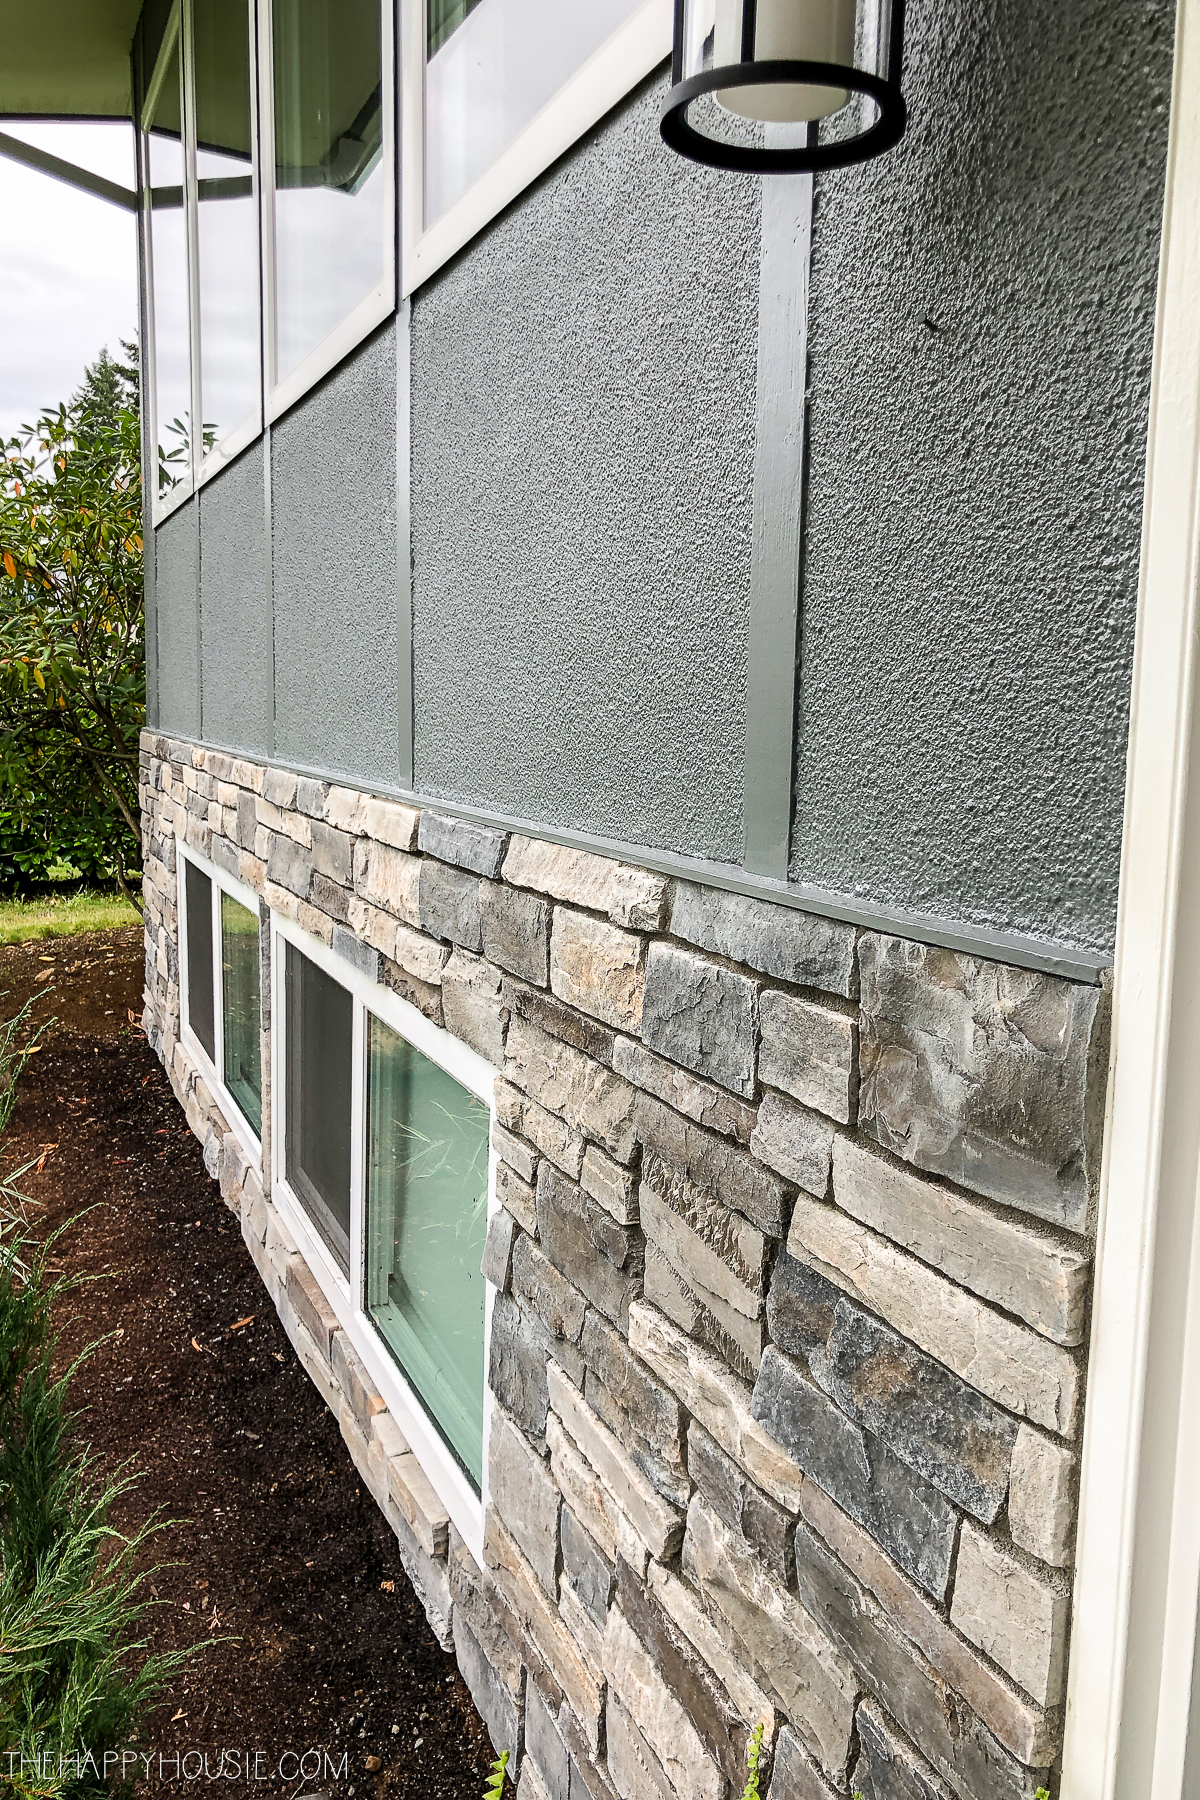
As I mentioned, the old wavy cedar siding that was on the lower part of the house and around both garages was damaged and split in several spots. So we decided to replace it with a mix of rock work along the base of the house and the smaller garage, and then add horizontal tongue and groove cedar siding to the large garage. We are lucky to have a talented clever friend who literally had the cedar milled exactly for our purposes and completed all the work himself – it turned out beautifully and is one of my favourite parts of the house makeover!
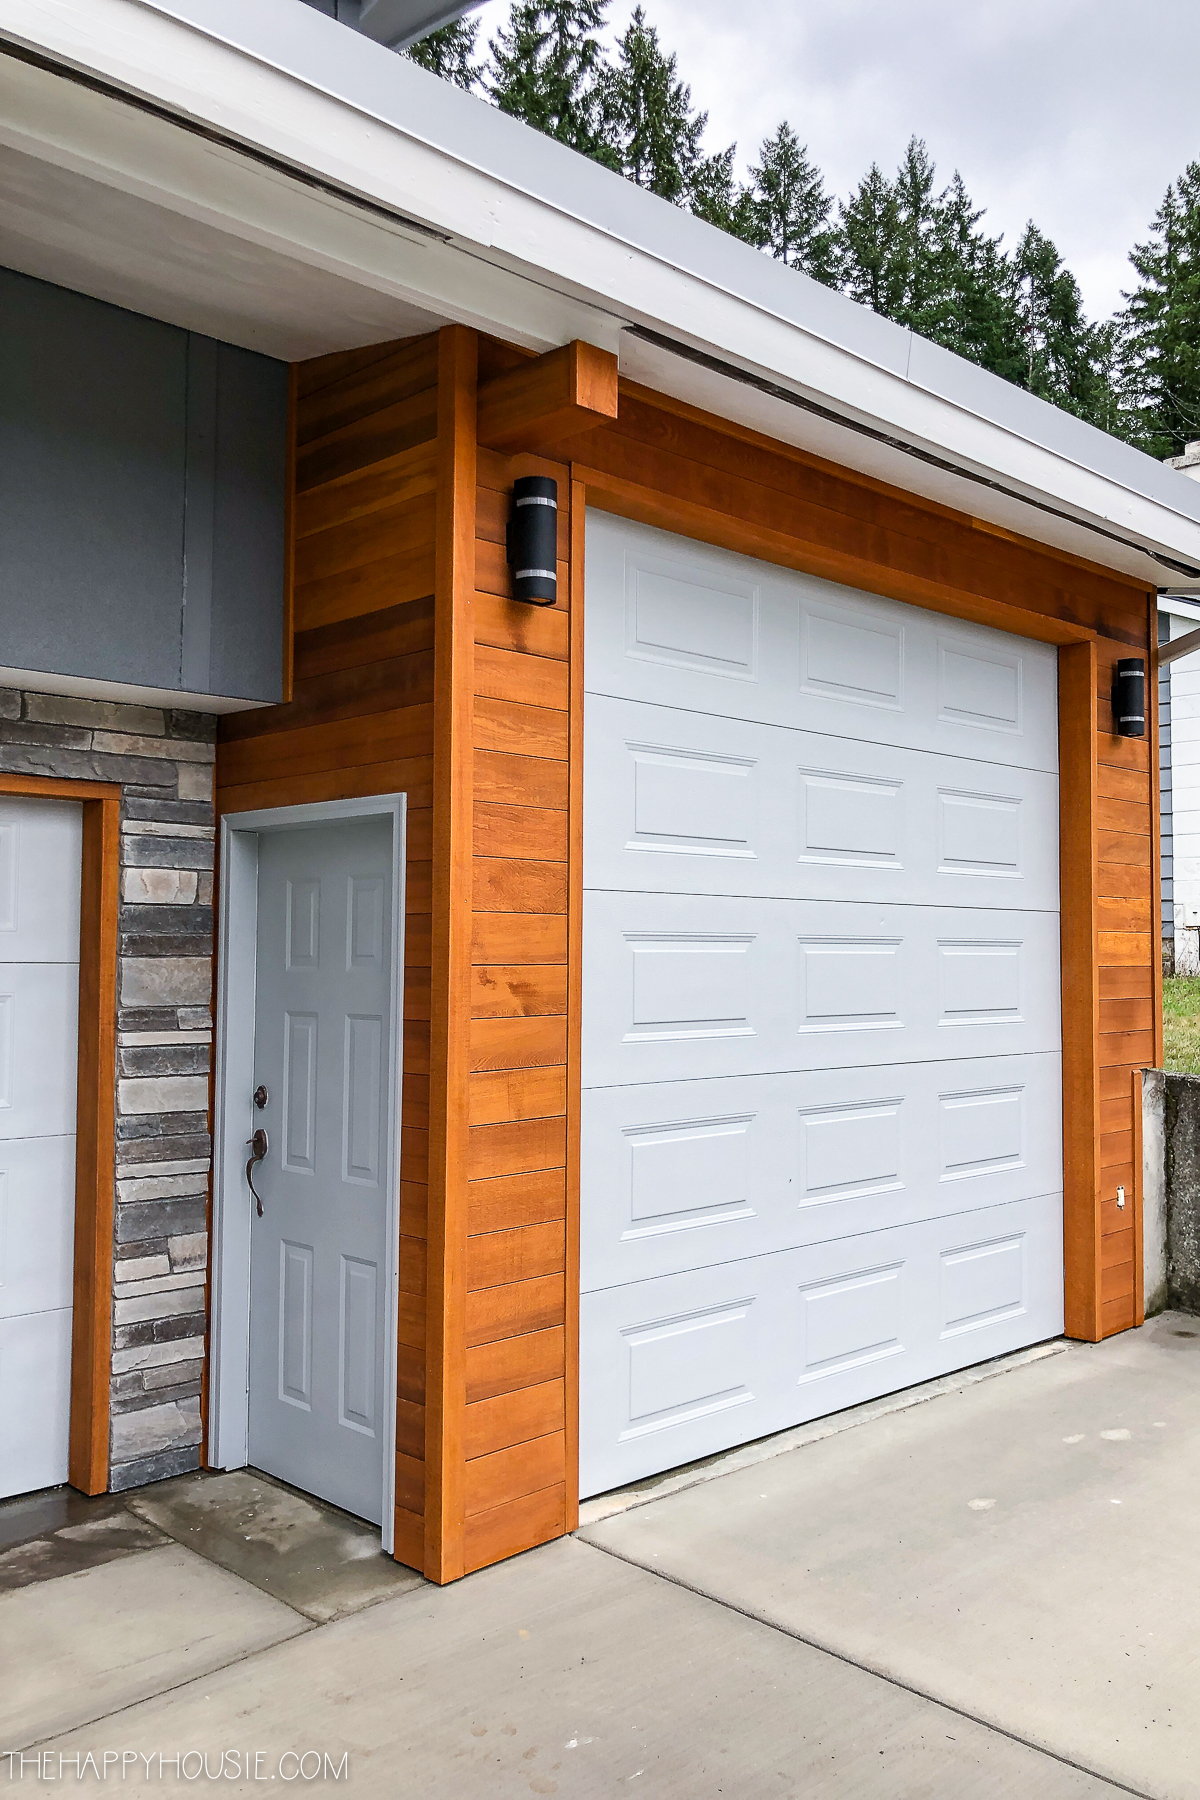
Then we used the same natural cedar to trim out both garage doors. Do they look white to you? Well, they aren’t! I actually chose a grey paint colour two down on the paint chip from the darker grey we used on the main body of the house. I pulled both colours out of the warm grey tones in the cultured stone that we chose. It’s hard to tell they aren’t just white, but I think it gives the doors a softer feel and they look fresh and cleaned up again. We also used the same light grey colour on the garage entry door on the side of the large garage.
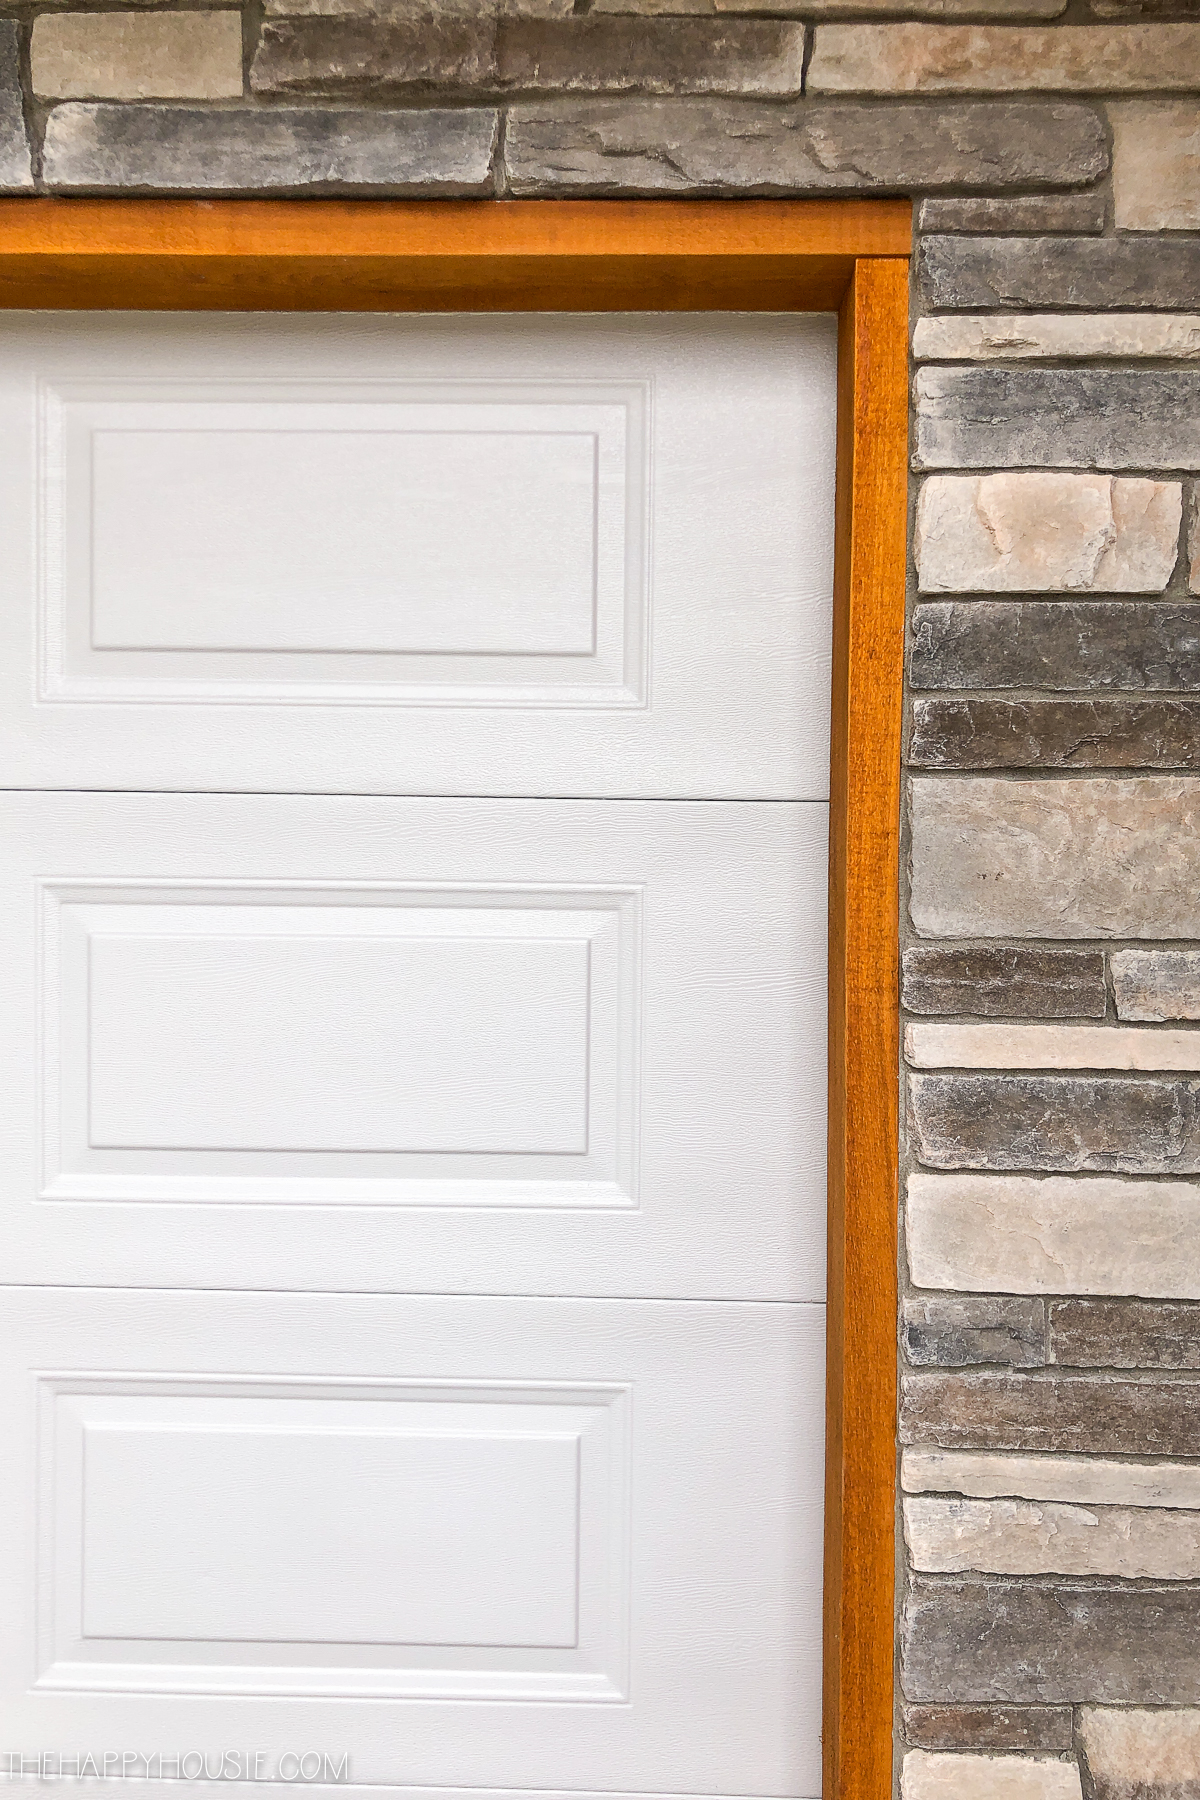
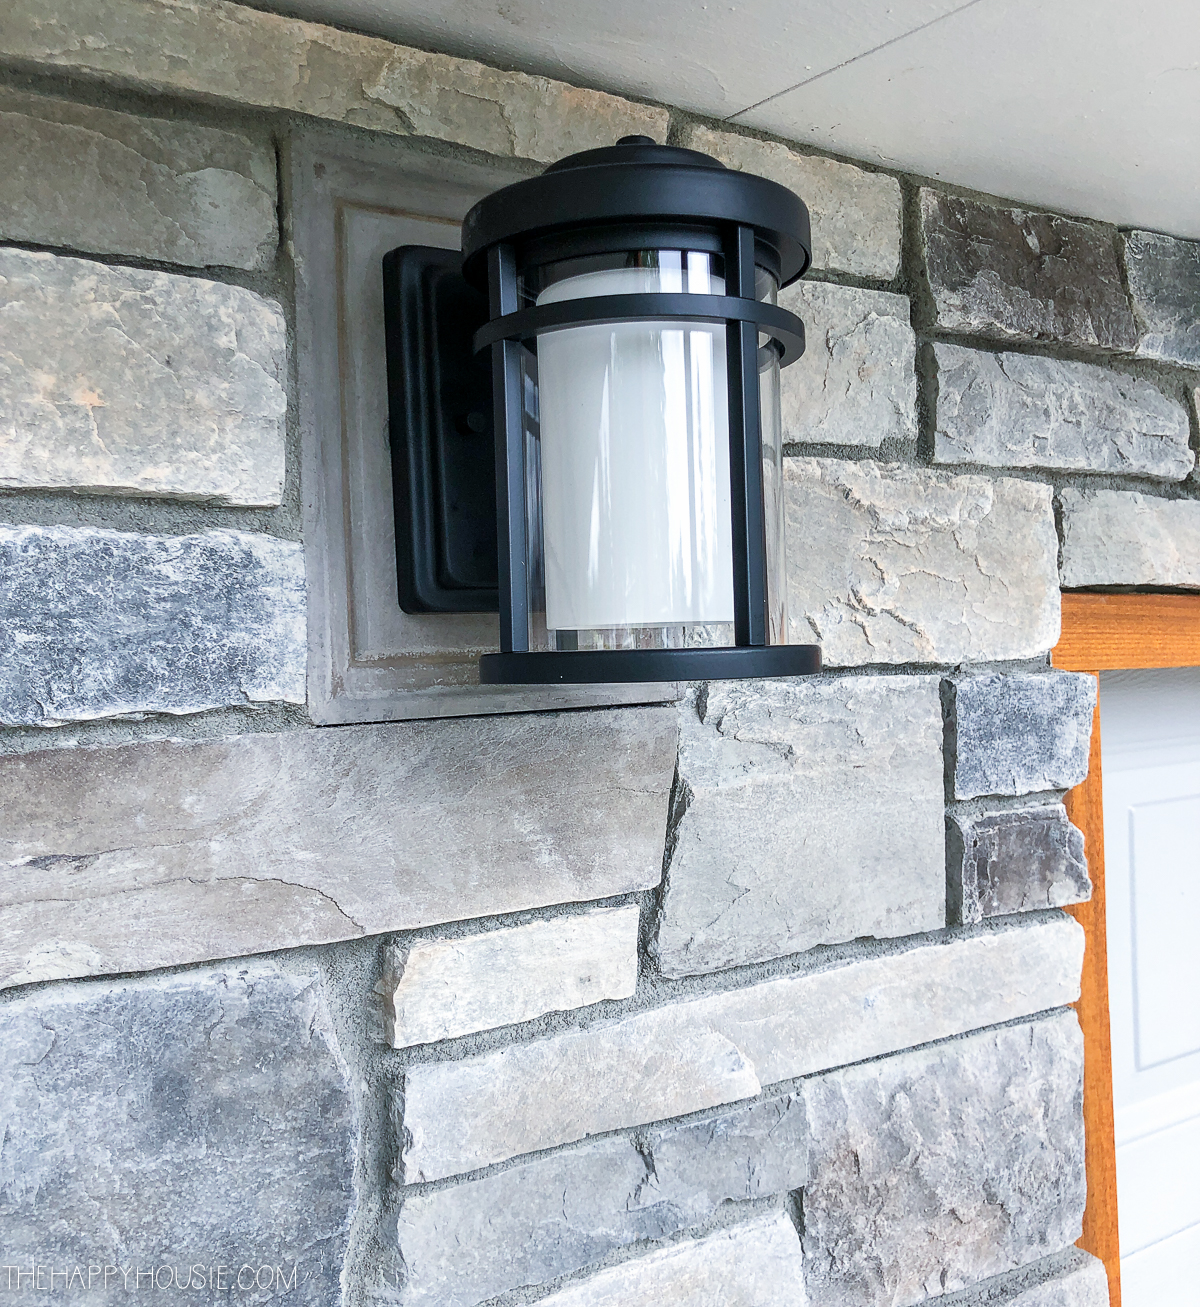
As I mentioned, we added cultured stone to the bottom potion of the house to replace the old wavy cedar siding that was in rough condition. We ordered the textured stone from a company called Cultured Stone and had a local contractor install it. He did a beautiful job! I’m so glad that we went the extra mile and added some different finishes to this otherwise quite flat exterior as it has given it so much more character and interest.
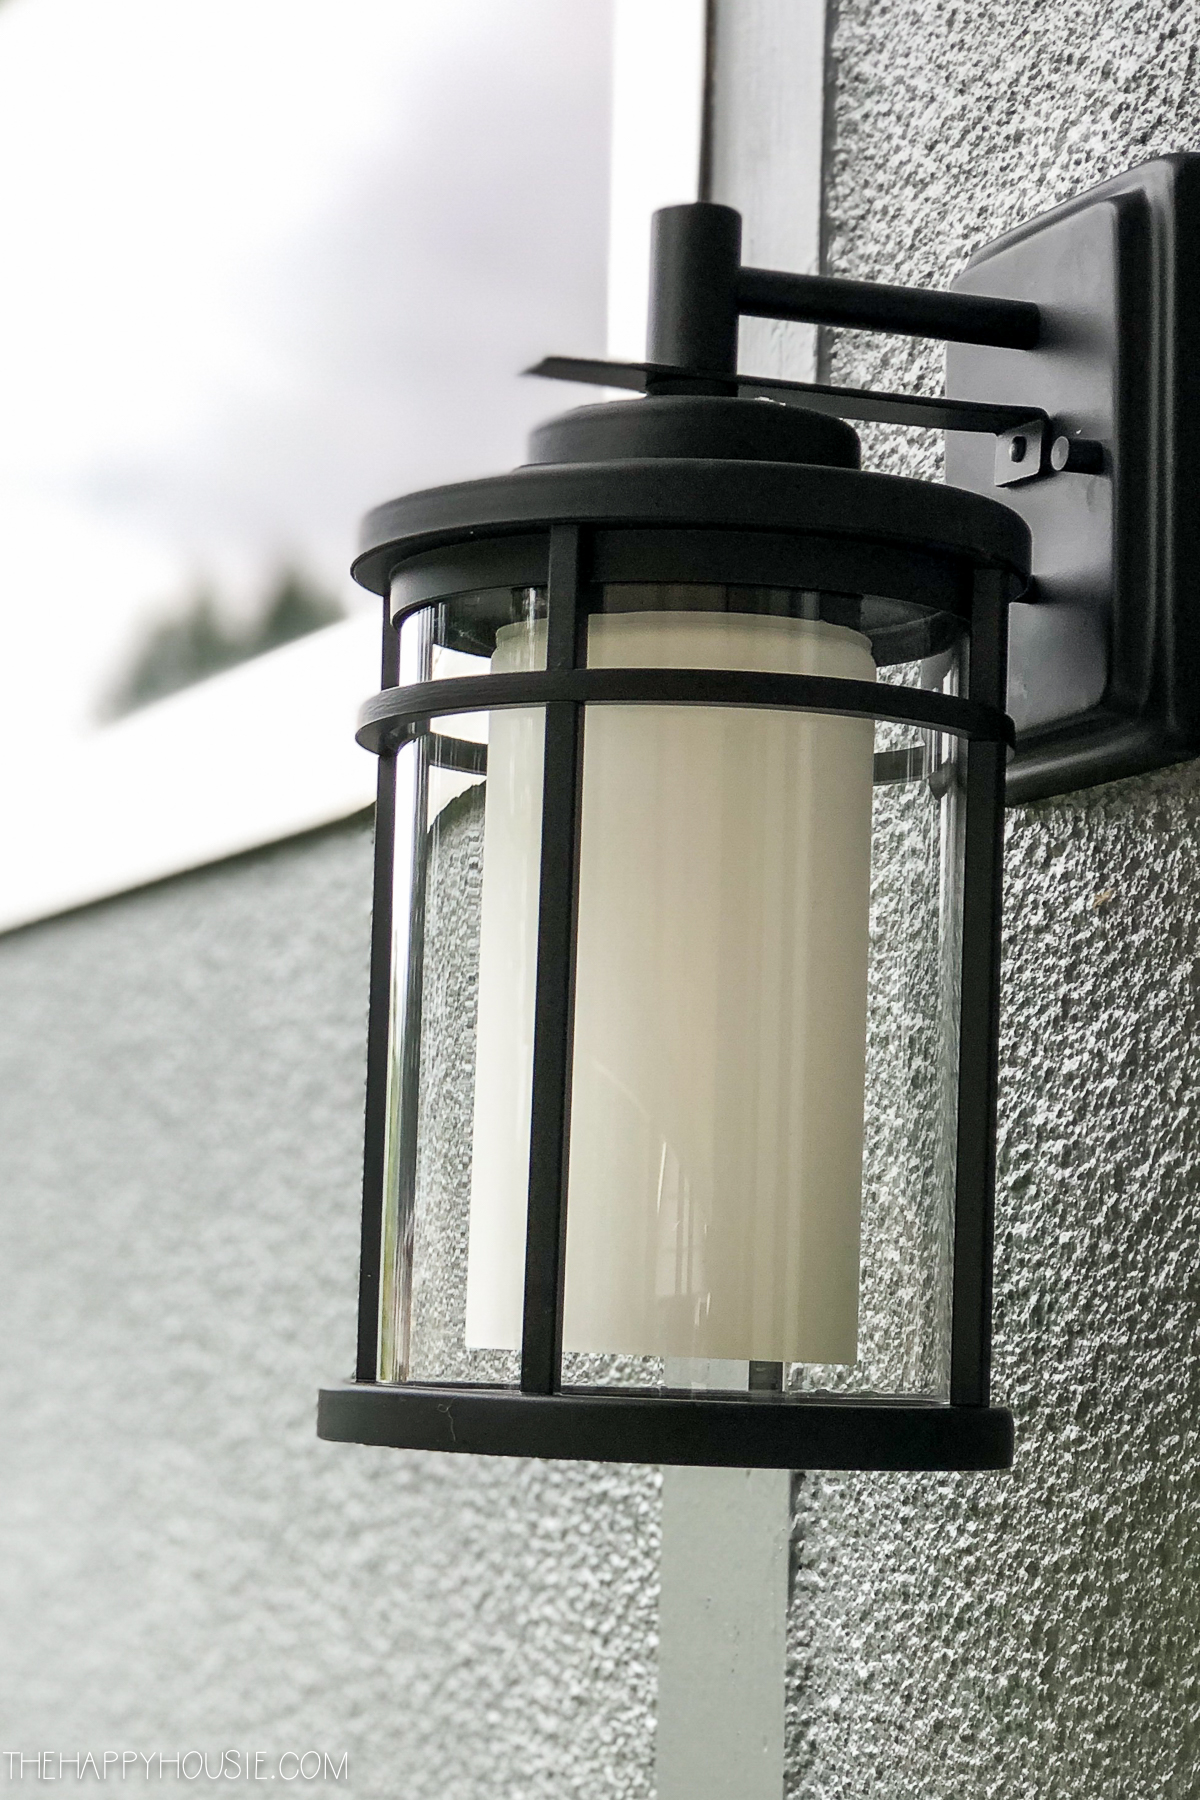
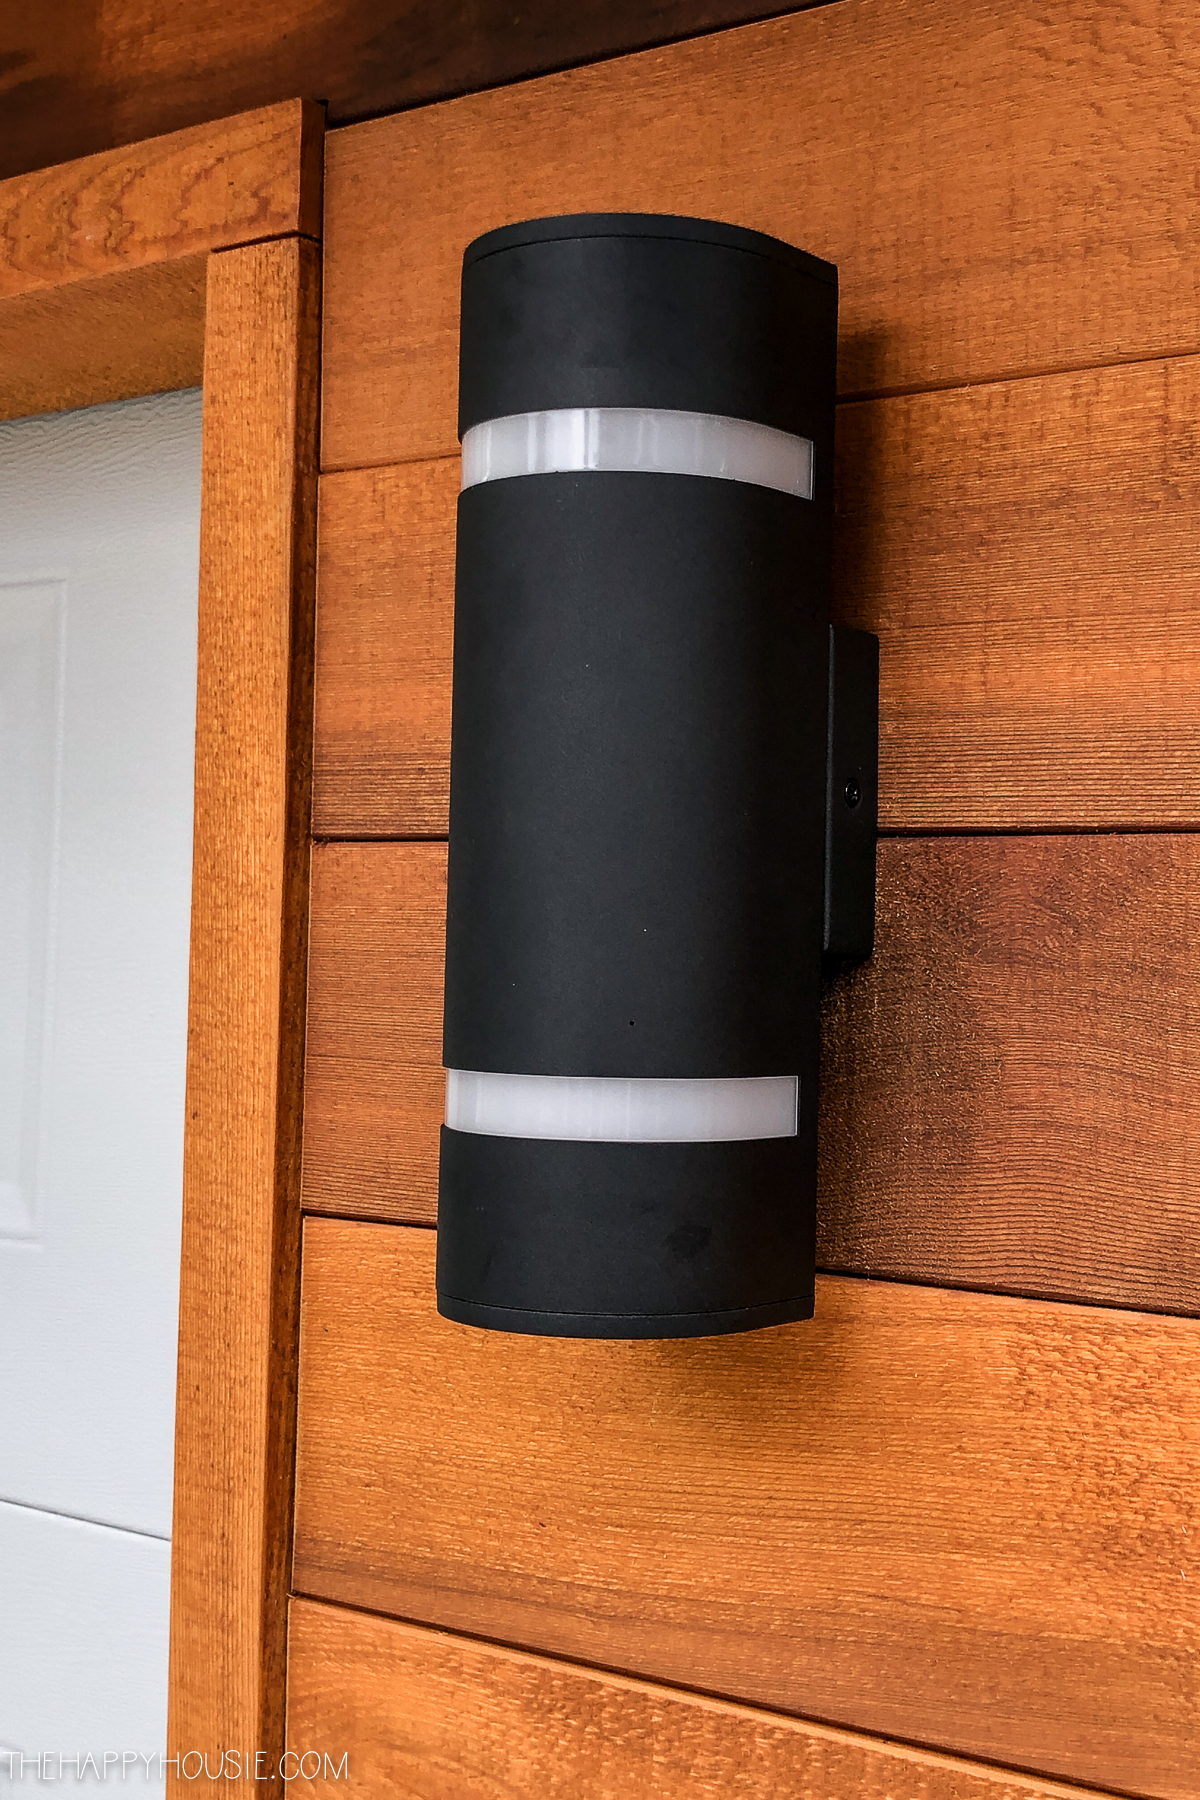
We picked up some new light fixtures at a nearby home centre, and my husband installed them himself. Now we just need a new doorbell, mailbox and some house numbers to complete the look.
Want to remember this? Just PIN it!

Well, what do you think?
Budget wise, it wasn’t exactly a cheap project. Obviously all that concrete work and the machine work in the front yard was quite a big investment. We saved a bit by planting the lawns and gardens ourselves. The cultured stone came out to about $3000, materials/ installation, and the cedar work came out to be about $1300 with materials and installed. We spent about $400 on paint (as we painted the sides and back of the house, as well), and then about $250 on light fixtures. The new front door was just over $500 with installation and hardware.
We are definitely happy with how this project came out; and it definitely morphed and changed over time – it wasn’t exactly what I originally proposed in this post but I’m happy with the subtle updates we chose instead. I also shared how we made quick work of finishing off the painting part of this big makeover – it involves my new favourite DIY tool! Head over here to read all about it.

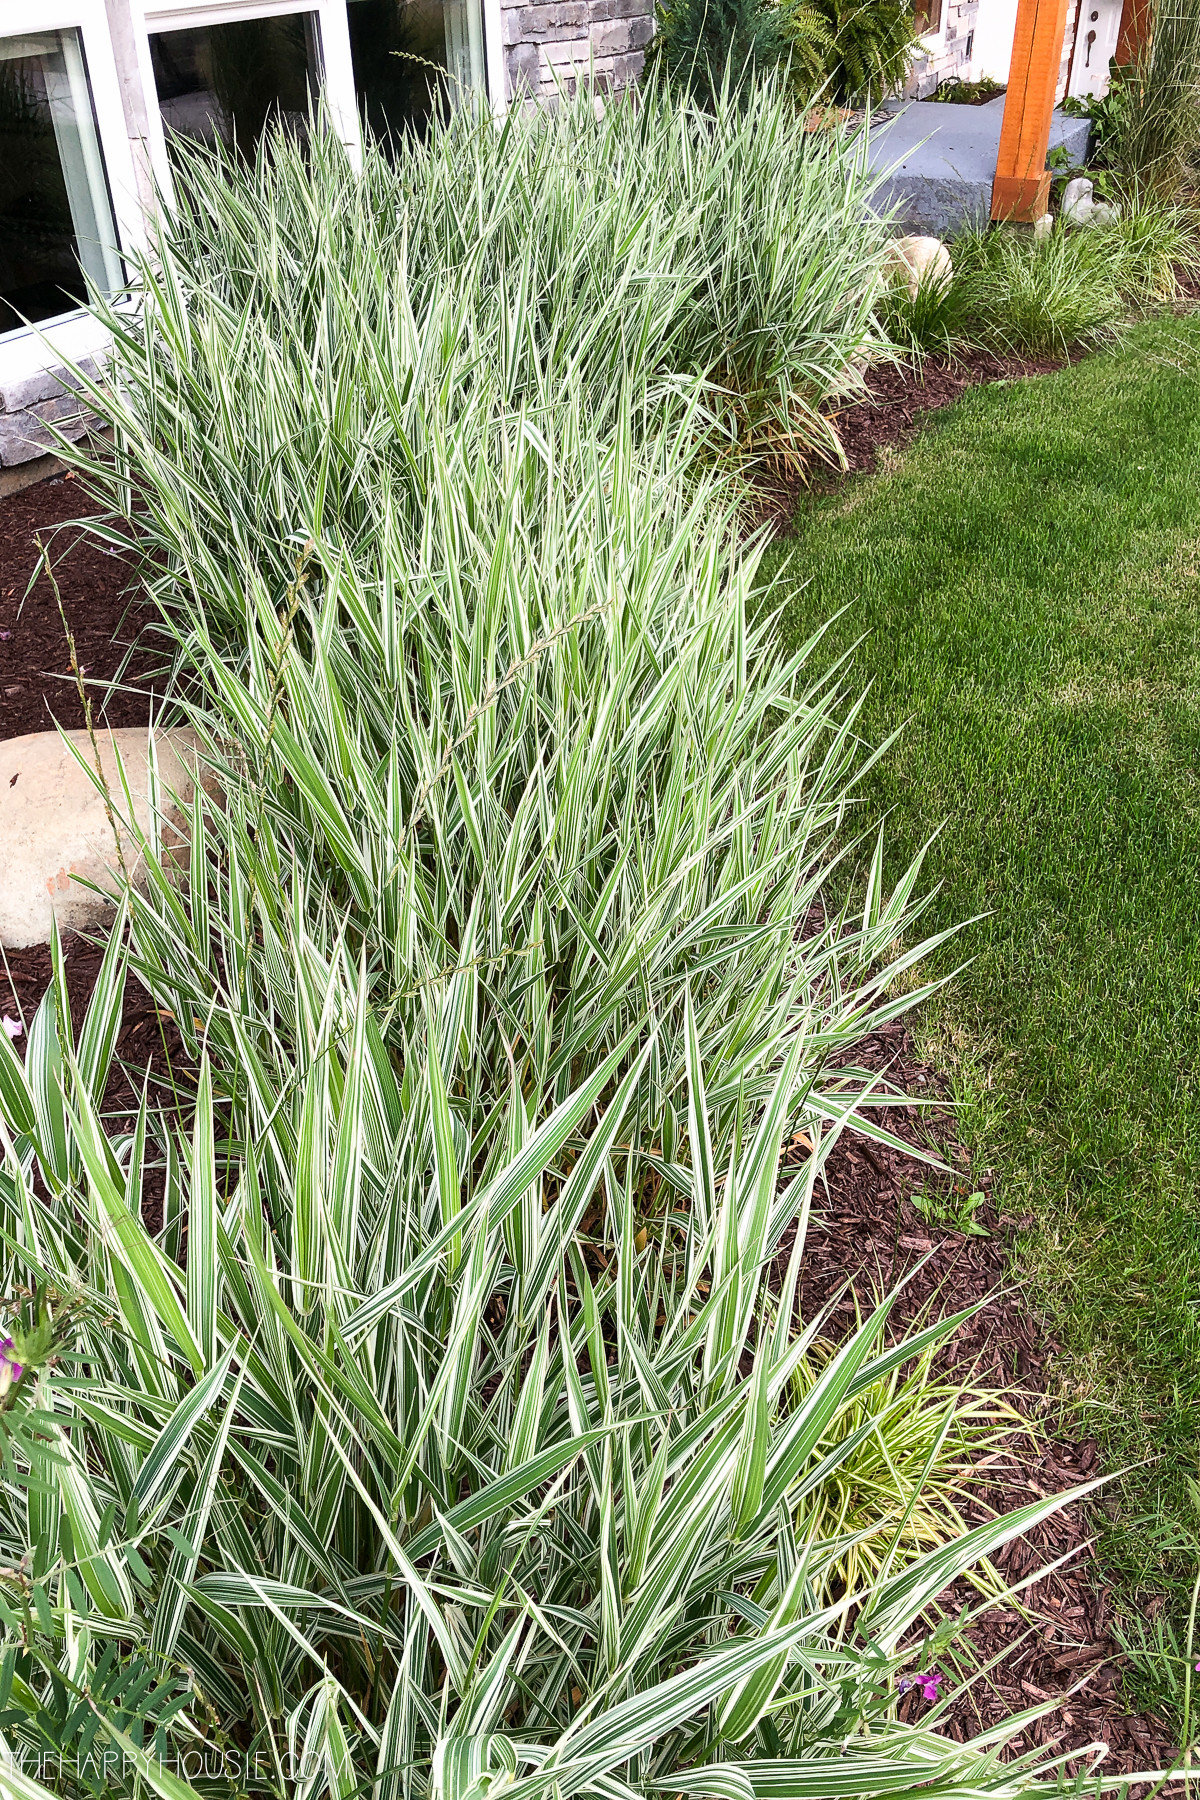
Such a beautiful transformation! Do you happen to remember the name of the tall ornamental grass you planted to the right of the steps?
Hi Ali – the taller grasses in the small bed between the steps/walkway and the driveway are called Mexican Feather Grass. Hope that helps!
Krista
The cedar siding looks great!
Annie
Your Ho me exterior is gorgeous Have not been receiving updated post for sometime. So glad noticed this posting on bloglovin. The transformation is incredible!! Congratulations on your new exterior. .
Beautiful!! I love your remodel! Do you happen to have the exact paint colours you used for the siding and the garage doors? Those colours would be perfect for our house!
Hi Elizabeth – I think I shared the paint colours in this post How To Paint Your House Quickly & Easily
Ooo I would love a floor plan for this house!!
I think I shared the floorpan in this post: Kitchen Reveal Part Two: the Main Kitchen Krista
What is the name/color of the cultured stone? Love it!
What’s the diy tool?
Hi Lindsey – thanks for the reminder! You can read all the details about how we painted our exterior in this post.
Your house looks lovely! What a difference! I hope your family has a lovely celebration this weekend!
Your exterior update looks amazing! You took your house from drab to fabulous!
It looks awesome! This change is so dramatic, the cedar and stone looks great with the paint color you chose, and the landscaping is perfect. You and DH have the magic touch when it comes to decorating. Love everything you did. Thanks for sharing.
Absolutely amazing! Your BC home looks stunning and now has superb road appeal. A big investment, but I think it was worth it!
Thanks for sharing!!