
How-To Revamp a Laundry Room / Mud Room on a Budget
If you are a regular follower it may seem like the laundry room has been a long time coming. I have a confession to make. It has been finished for a couple of weeks now. But other “projects” began….so I have put off writing about it. Today I will recap the steps we took to revamp the laundry mud room. Tomorrow I will be back with a super image heavy post and very few words to reveal the new room in all it’s color.
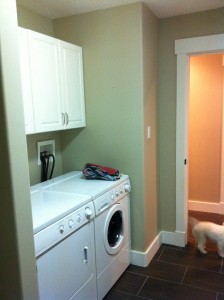
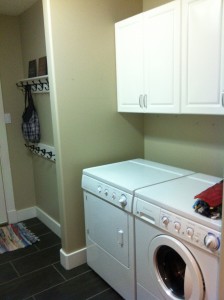
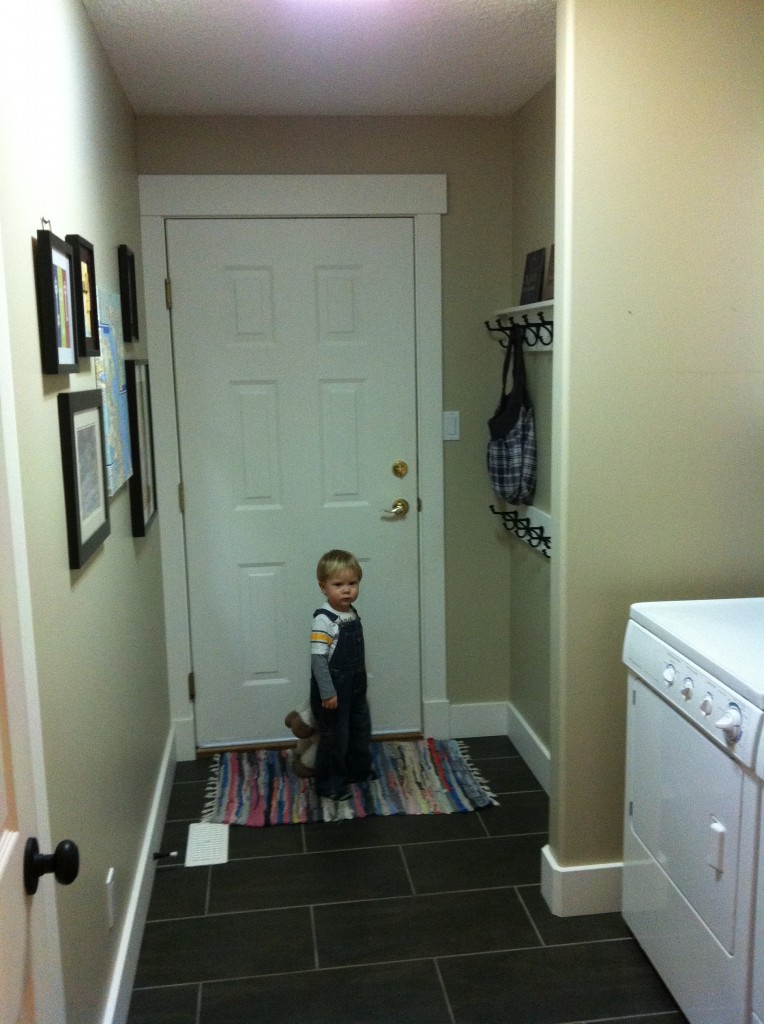
Remember the plain ol’ boring laundry mud room that we started with:
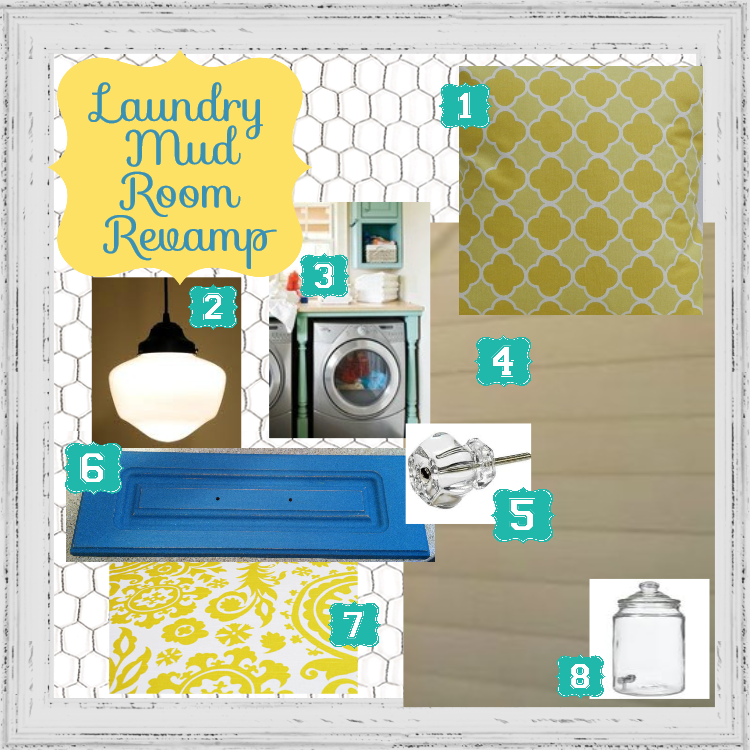
Aside from the tile, the two year old, and the washer/dryer the plan was to change just about everything. Do you remember the inspiration board?
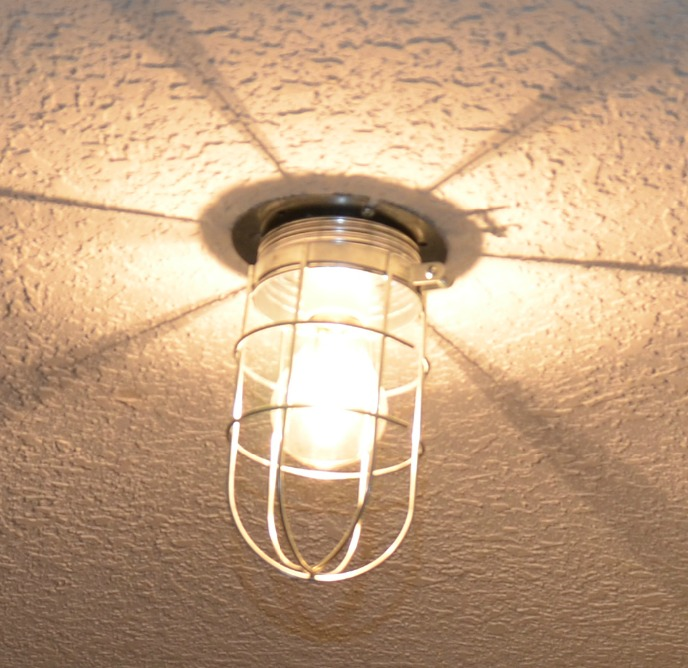
Some of our plans changed (we didn’t do the stencil or use that light fixture) while many other details stayed according to plan. We decided that our dining room fixture was too large to put in the small room so we purchased a simple (and cheap – only $10!!) outdoor cage light fixture from Home Depot to use instead:
The process:
We began by adding horizontal paneling up the walls to about 5 feet. That was finished with a two trim boards, the holes filled, and the cracks Dapped.
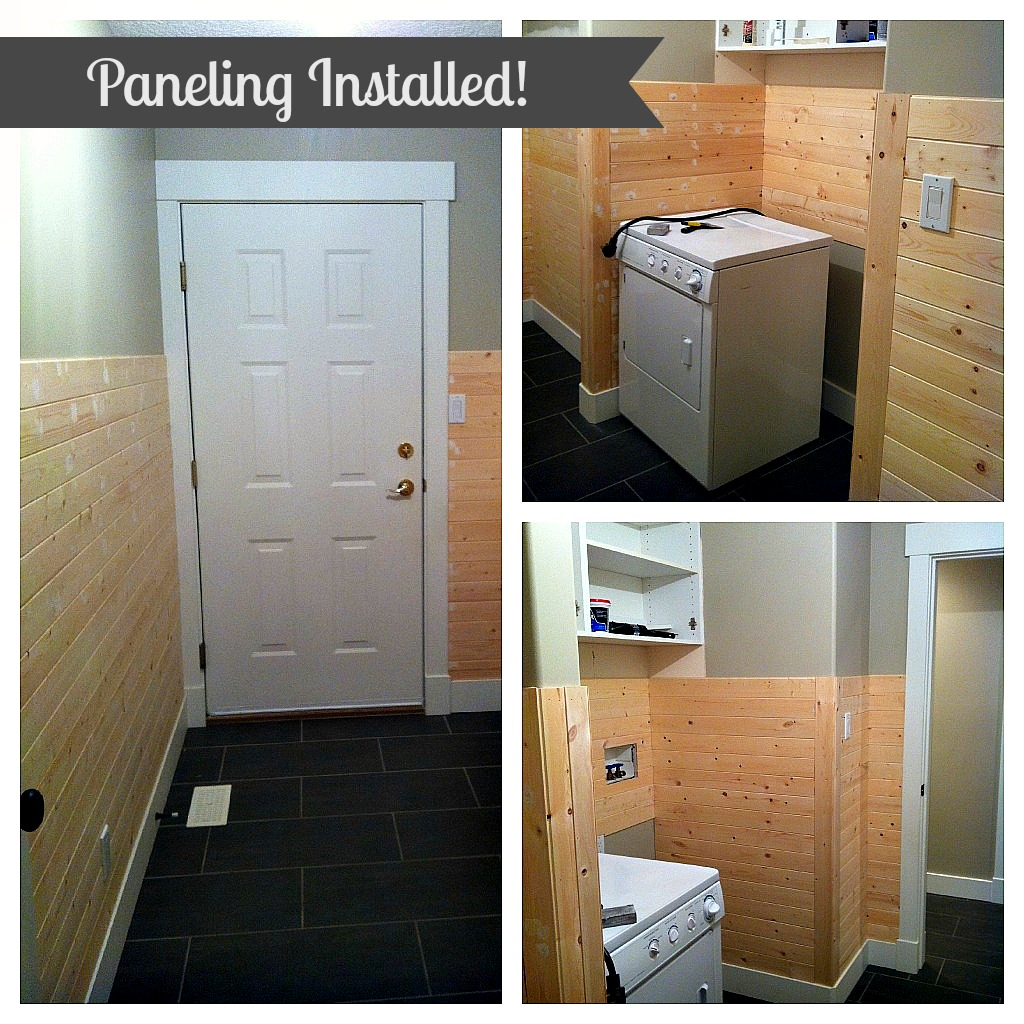
The paneling was then primed and painted with two coats of Benjamin Moore’s Cloud White.
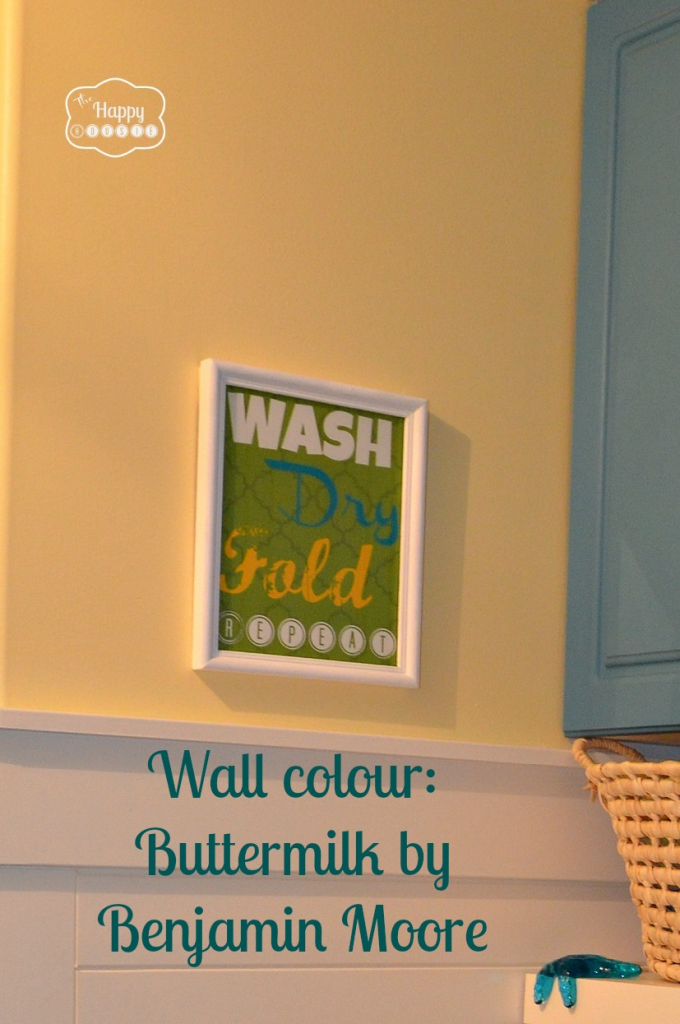
Next up was to paint the upper walls. After my hand painted stencil idea majorly flopped we switched instead to using a warm creamy yellow called “Buttermilk” by Benjamin Moore.
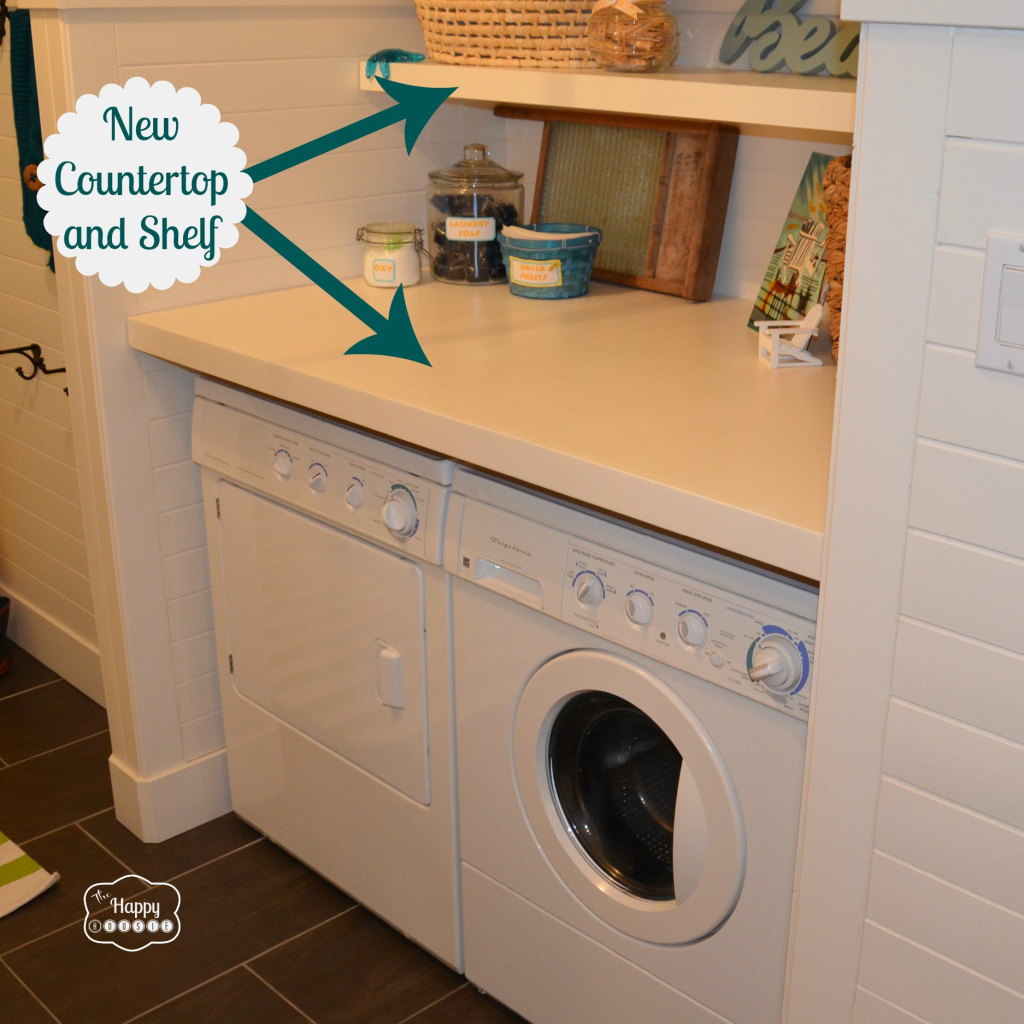
My Dad (thank you!) built a solid wood countertop for us with a nice thick lip/edge to sit over the washer/dryer as well as a matching shelf to sit between the washer/dryer and the upper cabinet. These were also primed and painted Cloud White and a couple coats of Varathane was added overtop for additional protection.
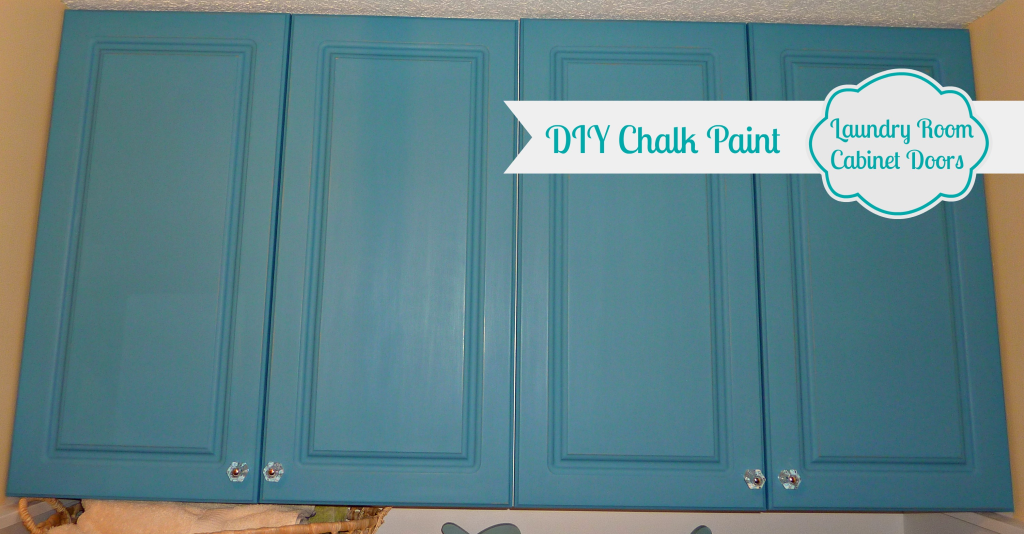
In order to accommodate the additional shelf we moved the cabinets up to the ceiling. I then painted the cabinet doors using DIY chalk paint (made with leftover B.M. Ash Blue from our ensuite).
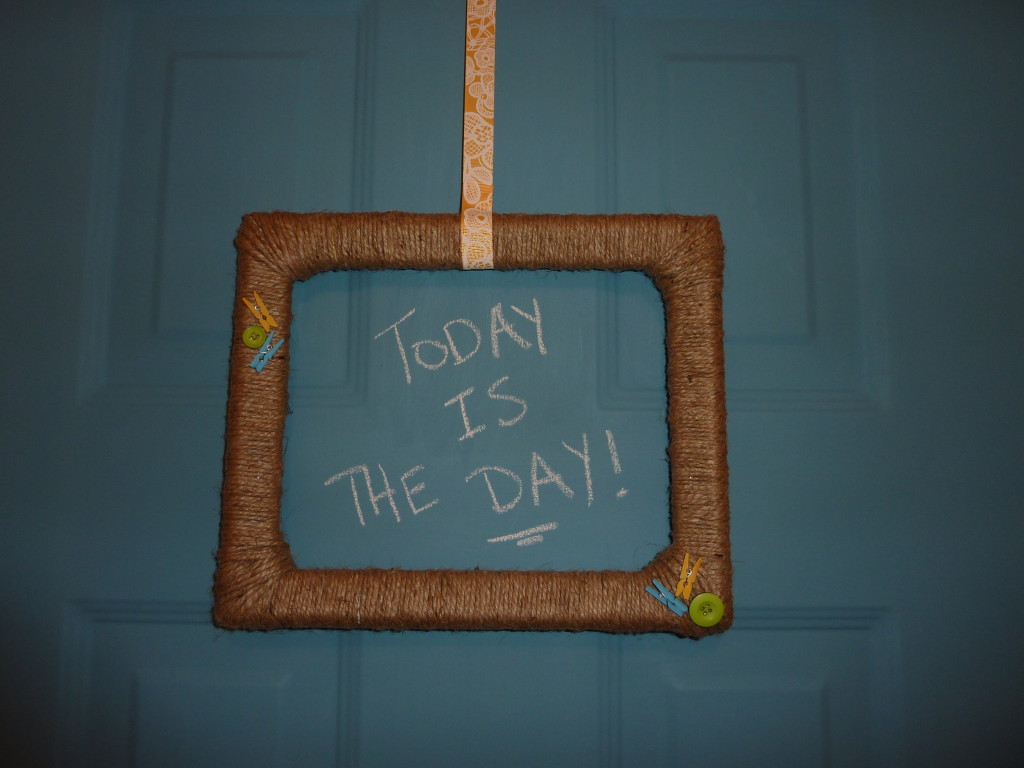
I was soooo in love with the colour that I had to add the same colour in DIY chalk/chalkboard paint to the interior of the back door.
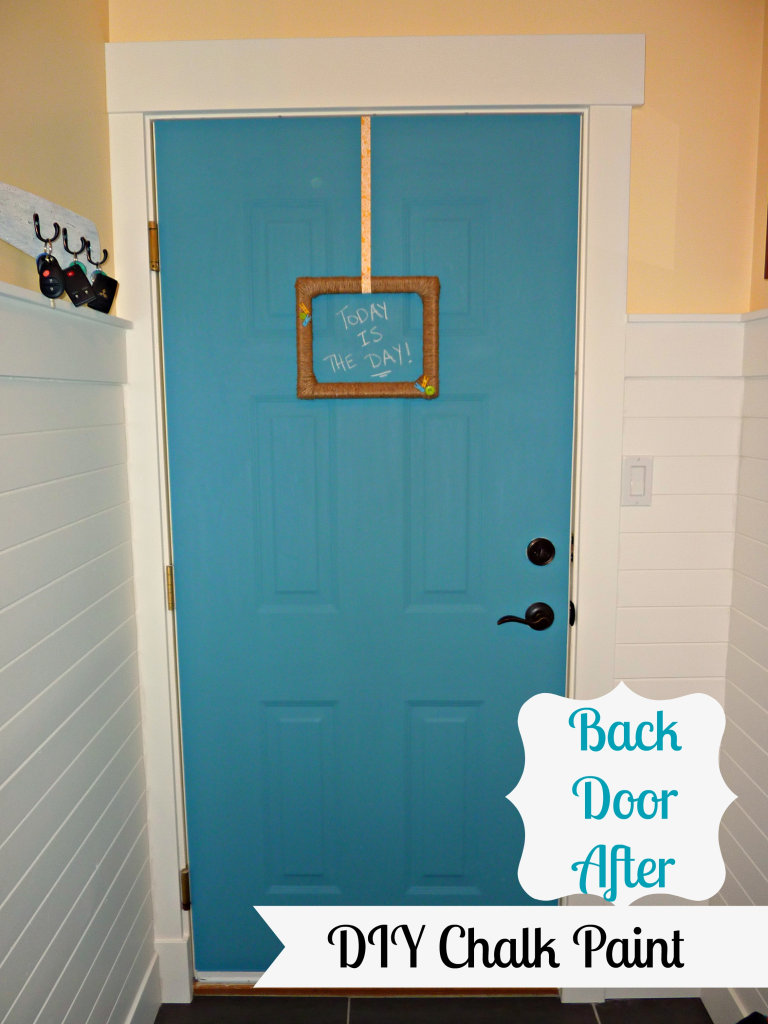
Now it functions as a chalkboard… and I made a quick and easy twine frame wreath to write little messages inside of. Now I will never forget to return library books again! Fingers crossed.
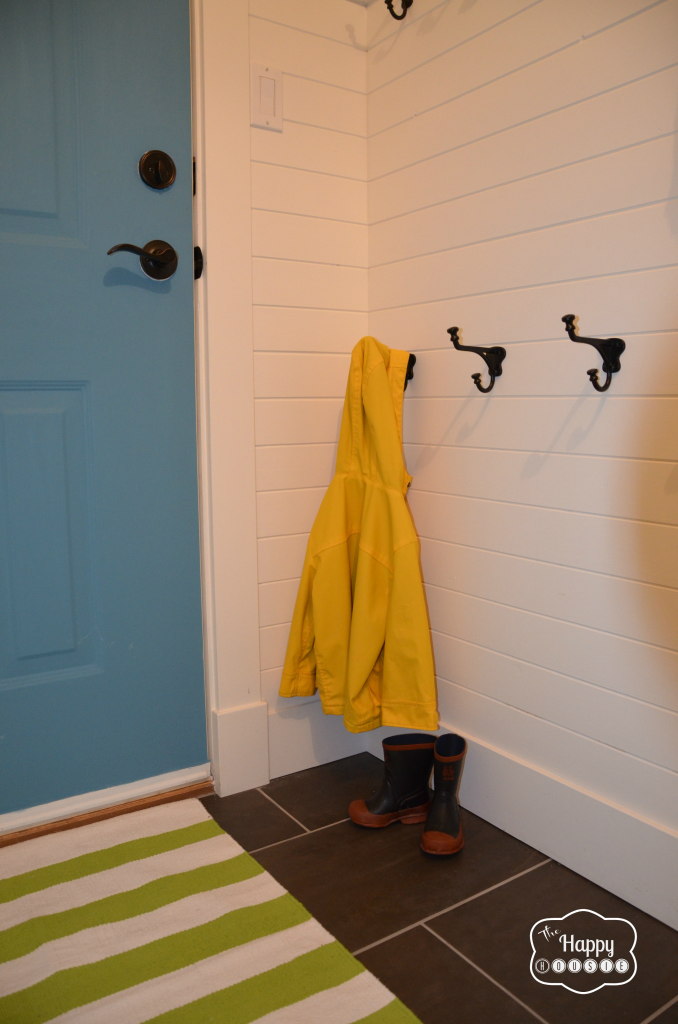
We then rehung our black hooks to the cubby by the back door… I LOVE having all these hooks in the laundry/mud room since it functions as our main entrance from the garage.

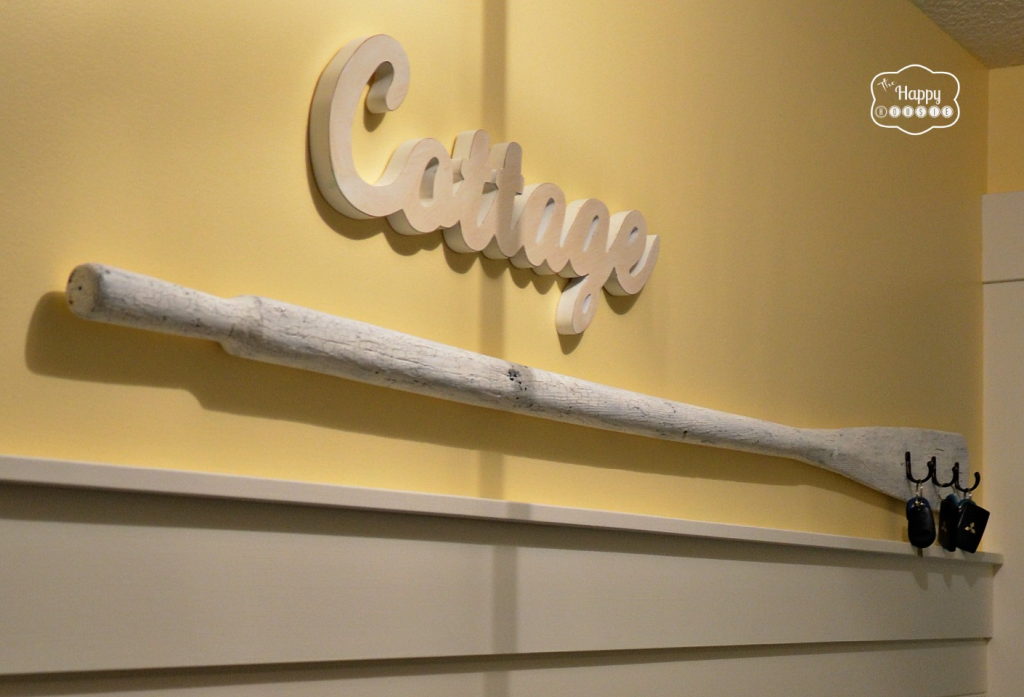
We also added hooks to an upcycled vintage oar to hold our keys and attached the oar to the long wall.
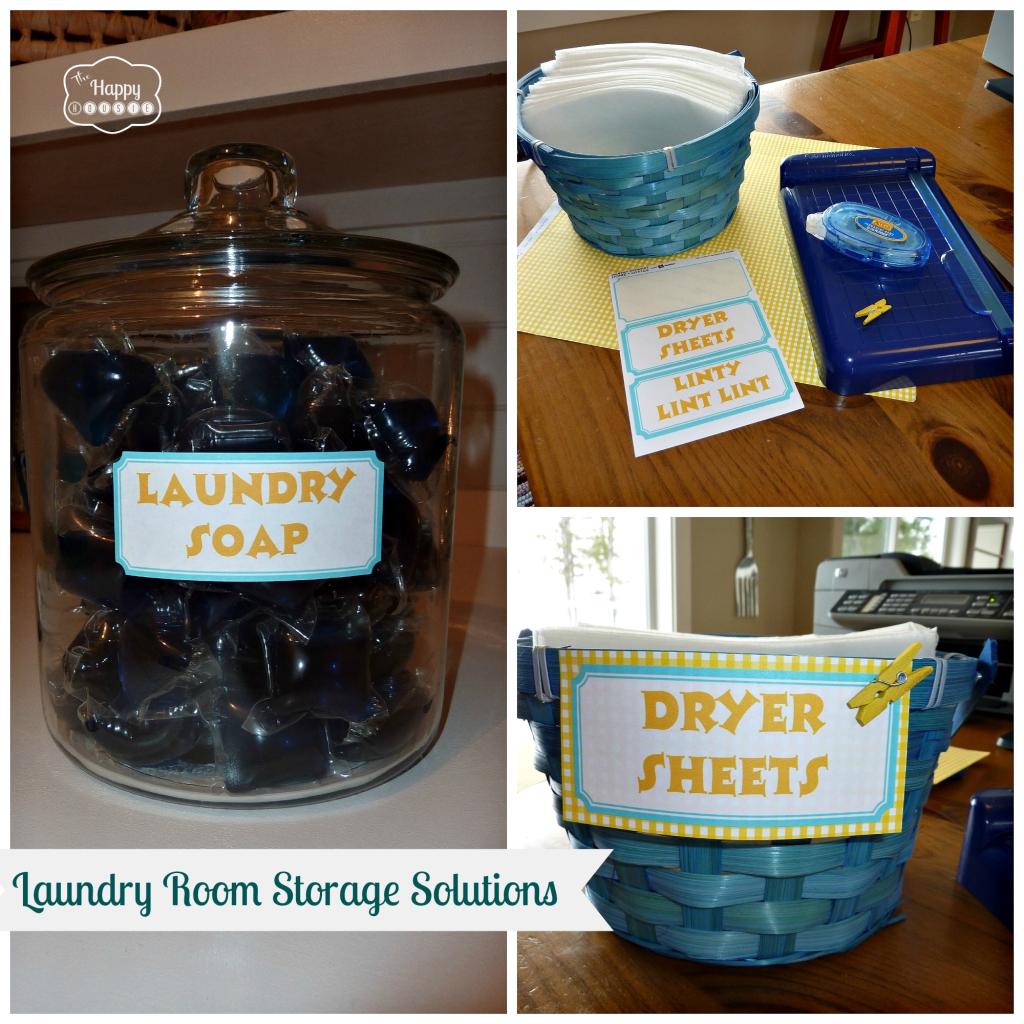
While working on finishing the laundry room we needed it to be functional, so we got some storage jars and baskets to help keep us organized. The turquoise baskets were $1 Easter Baskets that we removed the handles from! To label our storage I used Martha Stewart by Avery labels following the same process as I used the make labels in our pantry.
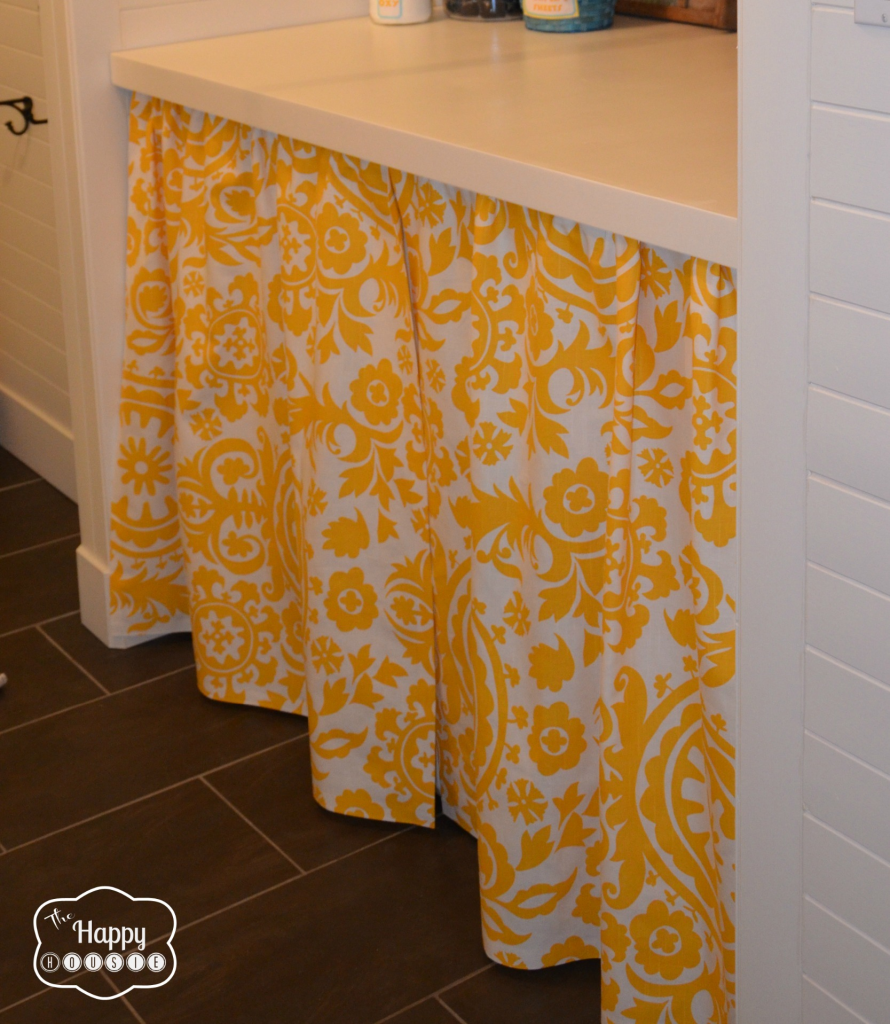
The next step was to create a simple DIY NO-Sew Curtain to hang below the new countertop and cover the washer/dryer.
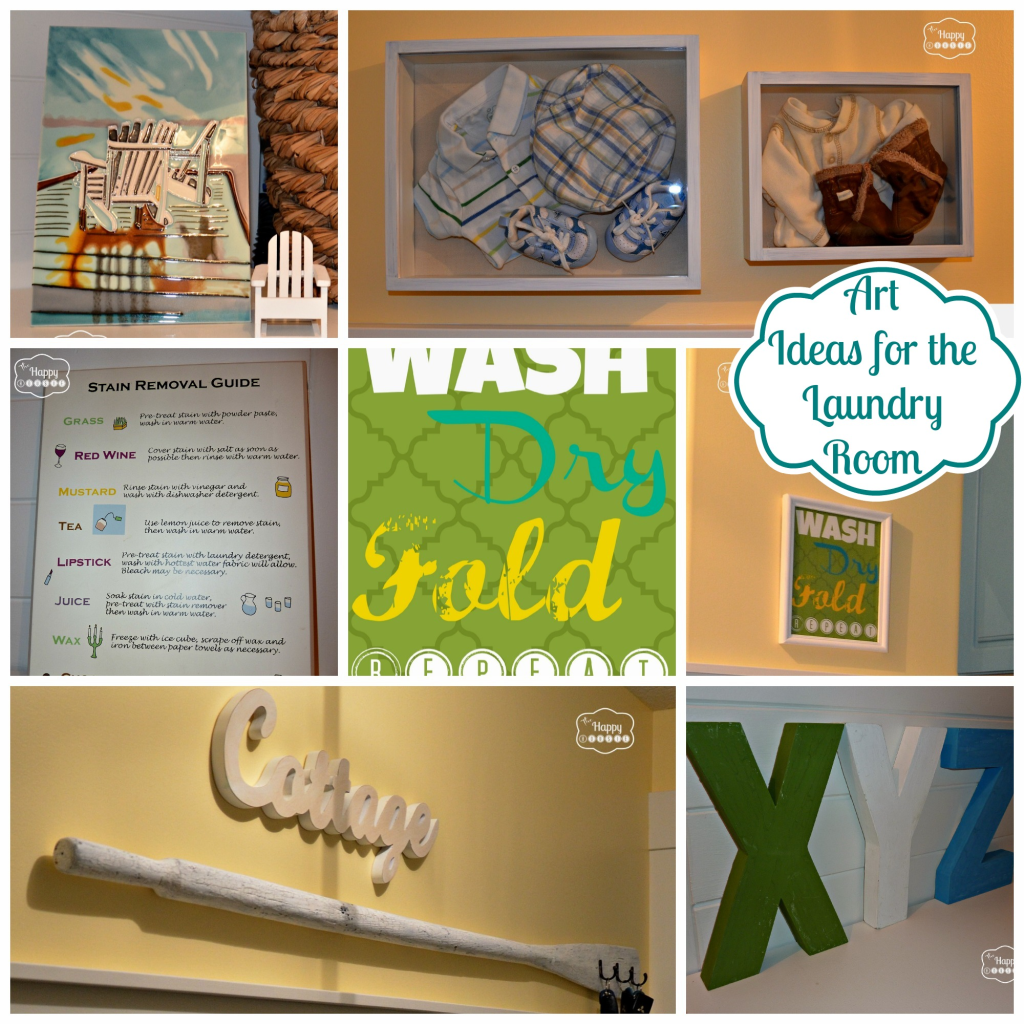
 Then it was time to dress the room! My favourite part! Click here for more about the Laundry Room Art Ideas including a Free Printable!
The whole revamp was completed on a fairly low budget. Here is an (approximate) breakdown of what we spent:
Paneling and trim: $120
Wood for countertops: $60
Paint: $40 (only trim paint was required, we already had the blue, yellow and Varathane leftover)
Cabinet Hardware: $15
Hooks for Oar: $10 (we already had the other hooks)
Glass jar for laundry soap: $10 (Walmart)
Huge Chunky Basket: $35 (Michaels, on sale – but total splurge)
Small blue baskets: $3 (Walmart)
Labels: $2 on clearance (Staples)
Light Fixture: $10 (Home Depot)
Striped Rug: $12 (Home Sense)
Fabric for curtain: $23 with shipping (Fabric.com – check for online coupons first)
No-Sew Tape: $0 (already owned from another project but it costs about $4-5)
Curtain Rod and hooks: $0 (already owned)
Art: $0 (we simply reworked things we already had in the house)
Total spent: $340
I am pretty thrilled with the results for that budget! What are some ways that you save money when revamping a room? I would love to hear your stories, ideas and tips! Leave me a comment!
I’ll be back tomorrow with a super image-heavy post about how the laundry room looks now!
Thanks for reading. And remember, my housie friends, HOME wasn’t built in a day. Enjoy the journey.


i love the way you revamp your laundry room..the new paint make more cool and refreshing… love to do the laundry all the time if this is my place..
Another outstanding project Krista! There are SO many features that are just terrific, but my fave of this makeover is the framed clothes. Having treasured items of clothing on display would bring back special memories every time you look at them.
coming over from your FB page to see this post! LOVE, love, love you laundry room. I really like the countertop on top of the machines. Must make folding laundry really easy. Great ideas.
Thanks for stopping by Lois! I will hop over and check out your blog as well. I love the countertop! It is also super handy for putting bags/groceries etc. on when I come in from the garage. I LOVE it too!
Krista
Wow, Krista! That is a transformation and a half! I’m so jealous!
Thanks so much Tara! I am totally pumped that you came by today. Thanks!
Krista