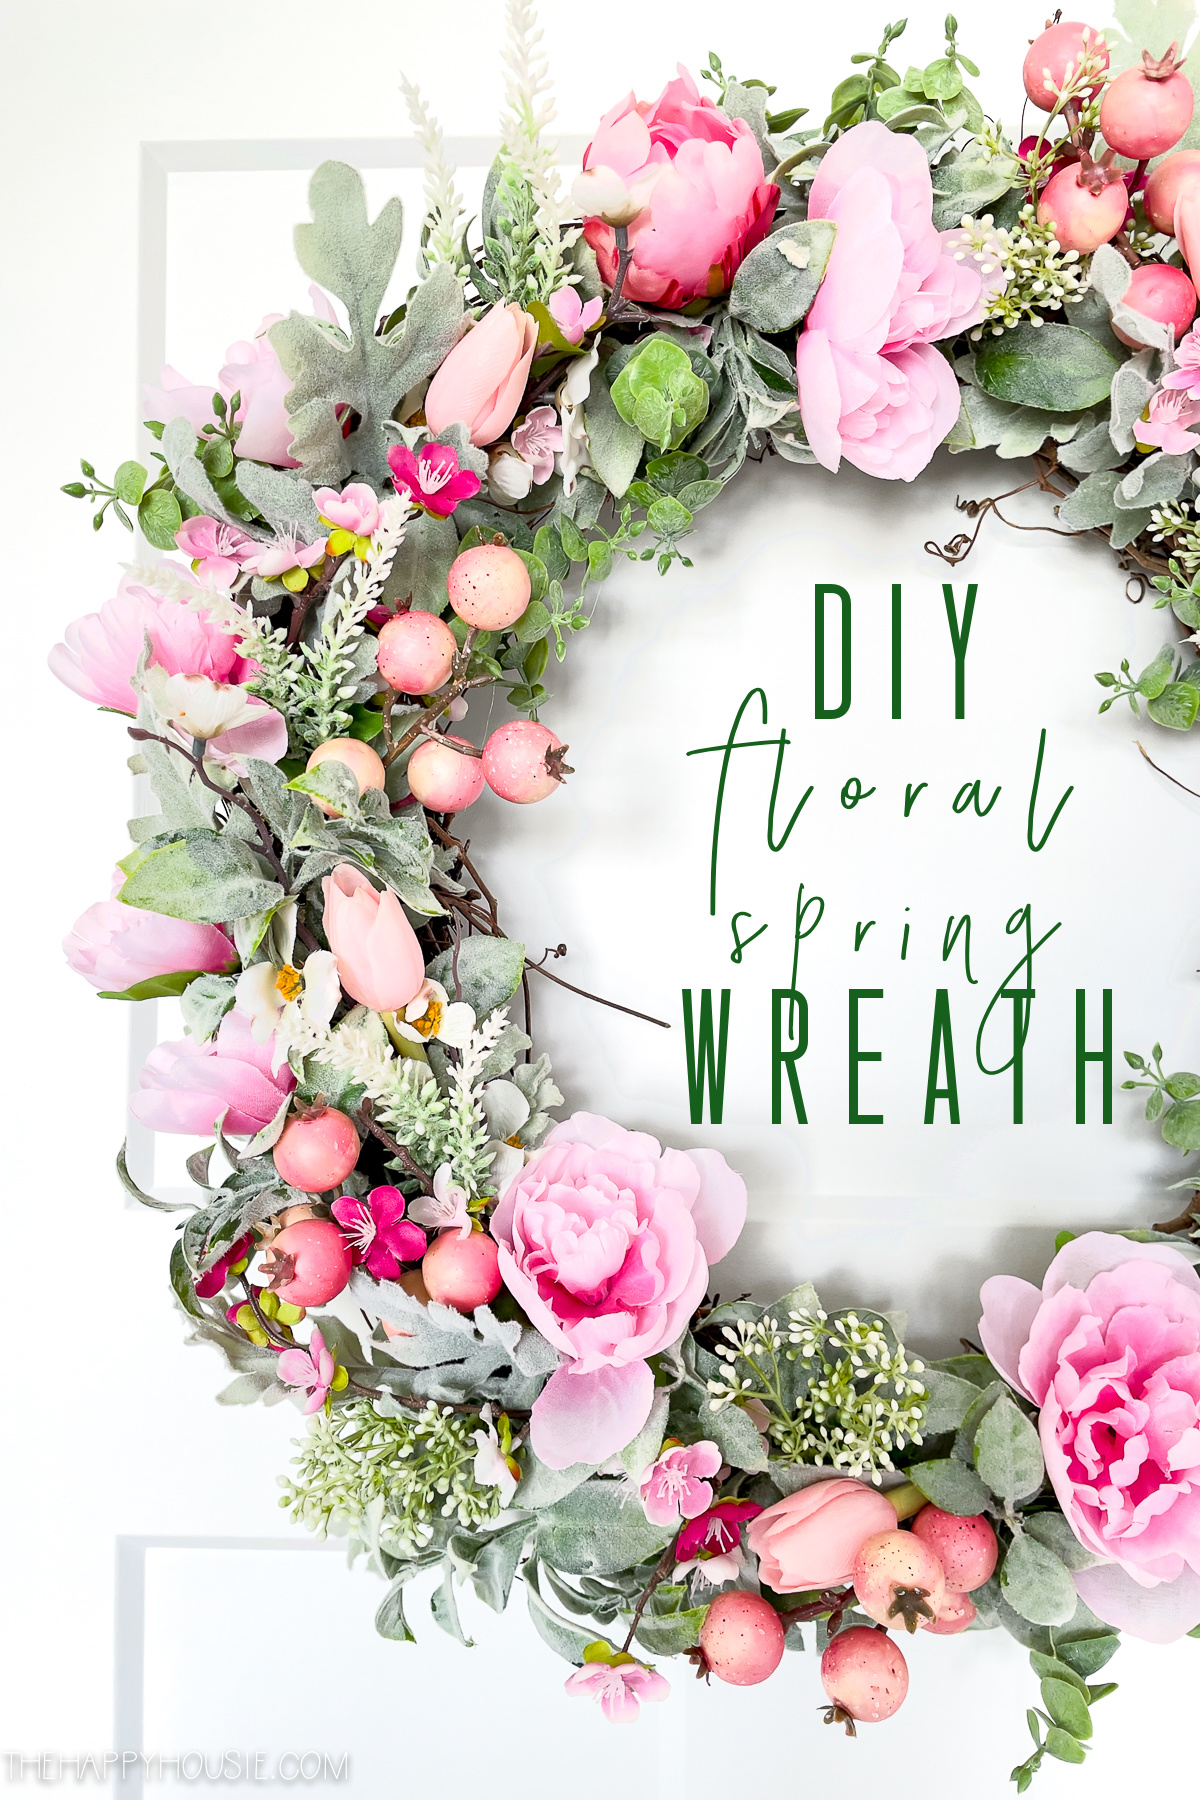
Full Floral DIY Spring Wreath
How to create a beautiful high-end looking full floral DIY spring wreath on a low-end dollar store budget.
To me, one of the best parts of Spring is longer days with more sunshine, though I have to admit we have very temperamental spring weather here on the west coast. It can go pretty quickly from rain to sun back to rain. We, definitely try to embrace those sunny, beautiful moments as much as we can. Once spring arrives, I am always ready to get outside and freshen up our front porch. And part of refreshing the porch is coming up with a new spring wreath DIY to add to our door!
One of my favourite parts about crafting and DIYing is trying to make high-end looking projects out of much less expensive supplies and materials. For example, I recently shared my DIY textured vase makeover, where I took super inexpensive thrift store vases and gave them a high-end Pottery Barn style feel. A few months back I shared how I turned a $50 FB marketplace dining table into a completely refreshed waxed oak piece that would have cost hundreds or even thousands had we purchased it brand new.
Today I’m sharing a super easy DIY spring wreath using mainly dollar store florals that has a super high-end feel to it! This full floral DIY spring wreath is the perfect front door accessory for our spring front porch decor. I’ll be back tomorrow to share our spring front porch decor!

Spring Wreath DIY Tips:
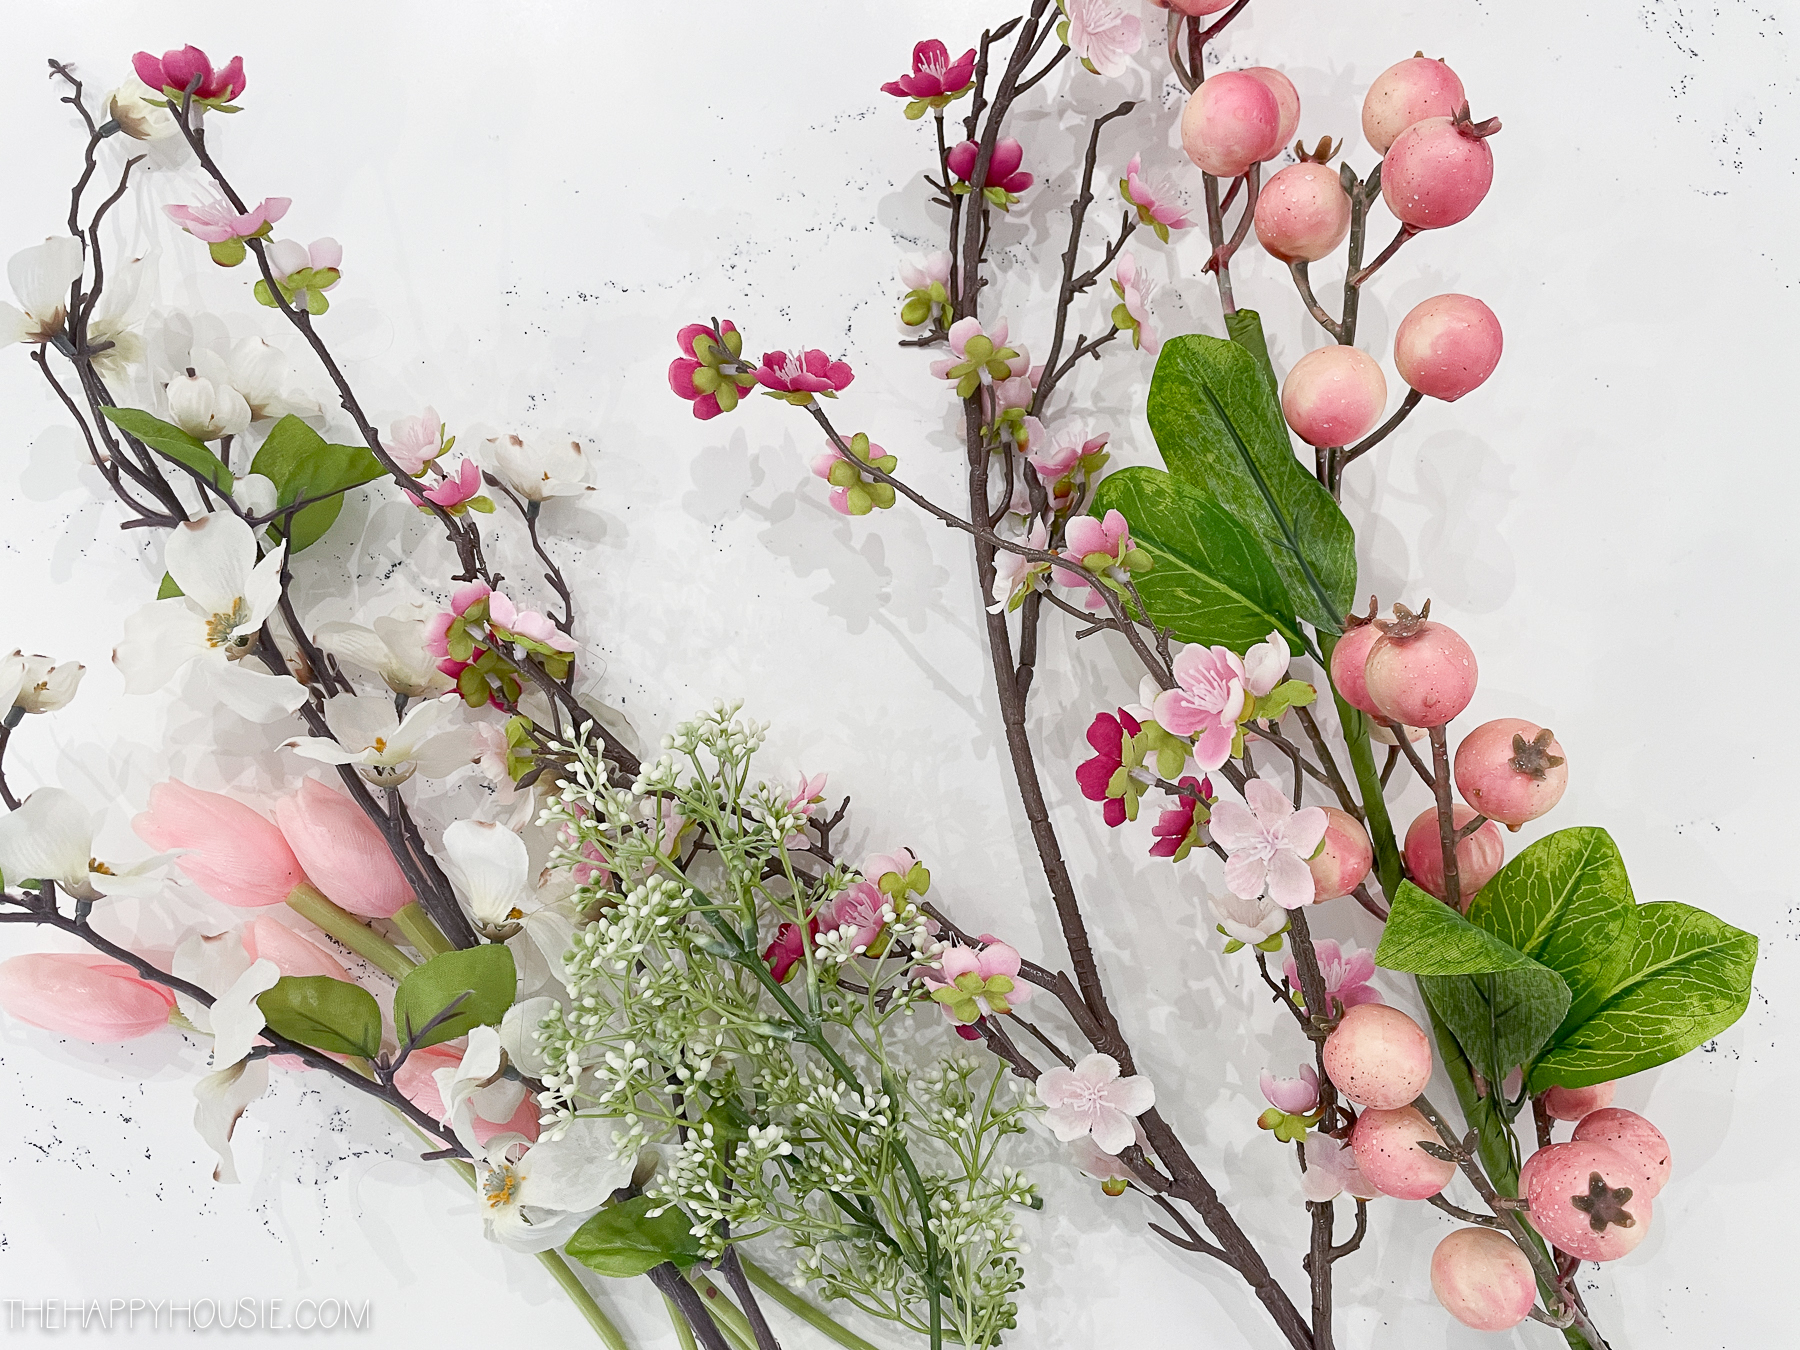
To make a full floral wreath, you can really go with any colour scheme that suits your needs and style. It’s simply a matter of personal preference, as the techniques I’m sharing work with whatever type of colours or branches that you enjoy most. You could go white a pink and white theme (like I did), bright and multi-coloured, or even all white. It’s good to have a mix of textures, tones, and kinds of florals. For example, I used a mix of longer branching florals like the cherry blossoms and dogwoods, some berry style branches, and then some higher florals like tulips and peonies.
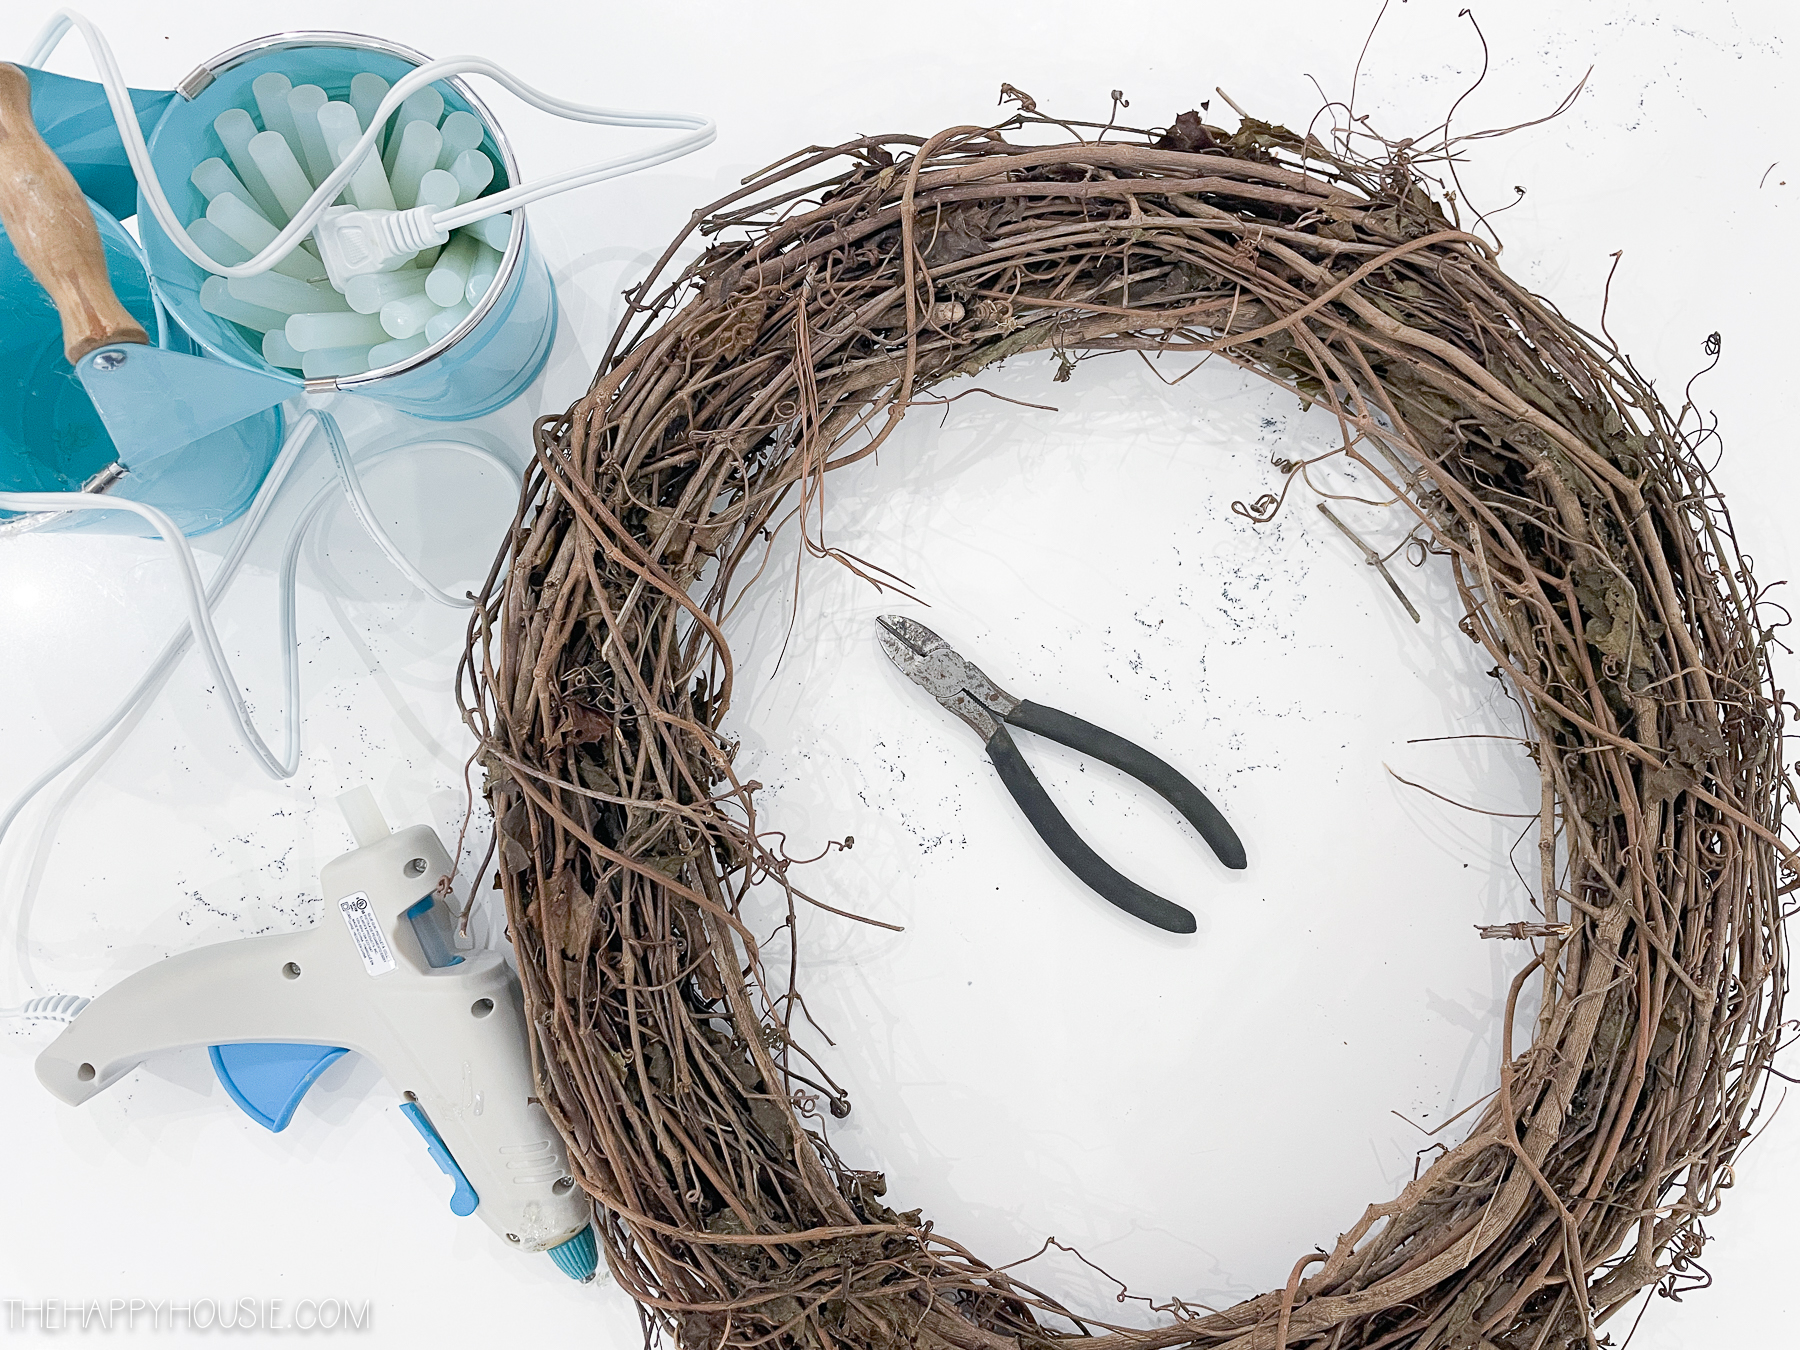
Materials
- grapevine wreath form (I picked mine up in the Walmart craft section)
- 1-2 branches each of 3-4 types of greenery
- 1-2 branches or bunches of 4-5 types of flowers
- glue gun and hot glue sticks
- wire snippers to cut through the faux floral branches
How to Make this DIY Spring Wreath:
I gathered together some greenery I had in my totes leftover from previous projects. If you don’t have any on hand, you can easily pick up some greenery stems at either your local Dollarama or a craft store like Michaels (make sure to use your coupons or wait for a BOGO sale).
I ended up using 1 stems of each type of greenery, but none of the fern fronds that you see pictured…

I also gathered 1-2 stems of various florals that I had in my spring bin. In addition to what you see below, I added in one bunch of peonies from the Dollar Tree. Most of these florals were originally from Dollarama, but I did purchase the pink berries at Michaels a couple of seasons back. I just used on stem of them.
Using wire cutters, I cut all of the greenery and floral branches into smaller sized sections.

I also used a grapevine wreath form, glue gun, and hot glue.
Next, I began adding them to the grapevine wreath form. For most branches, I was able to just place and tuck them inside the grapevine form (kind of weaving them underneath the branches to hold them in place).
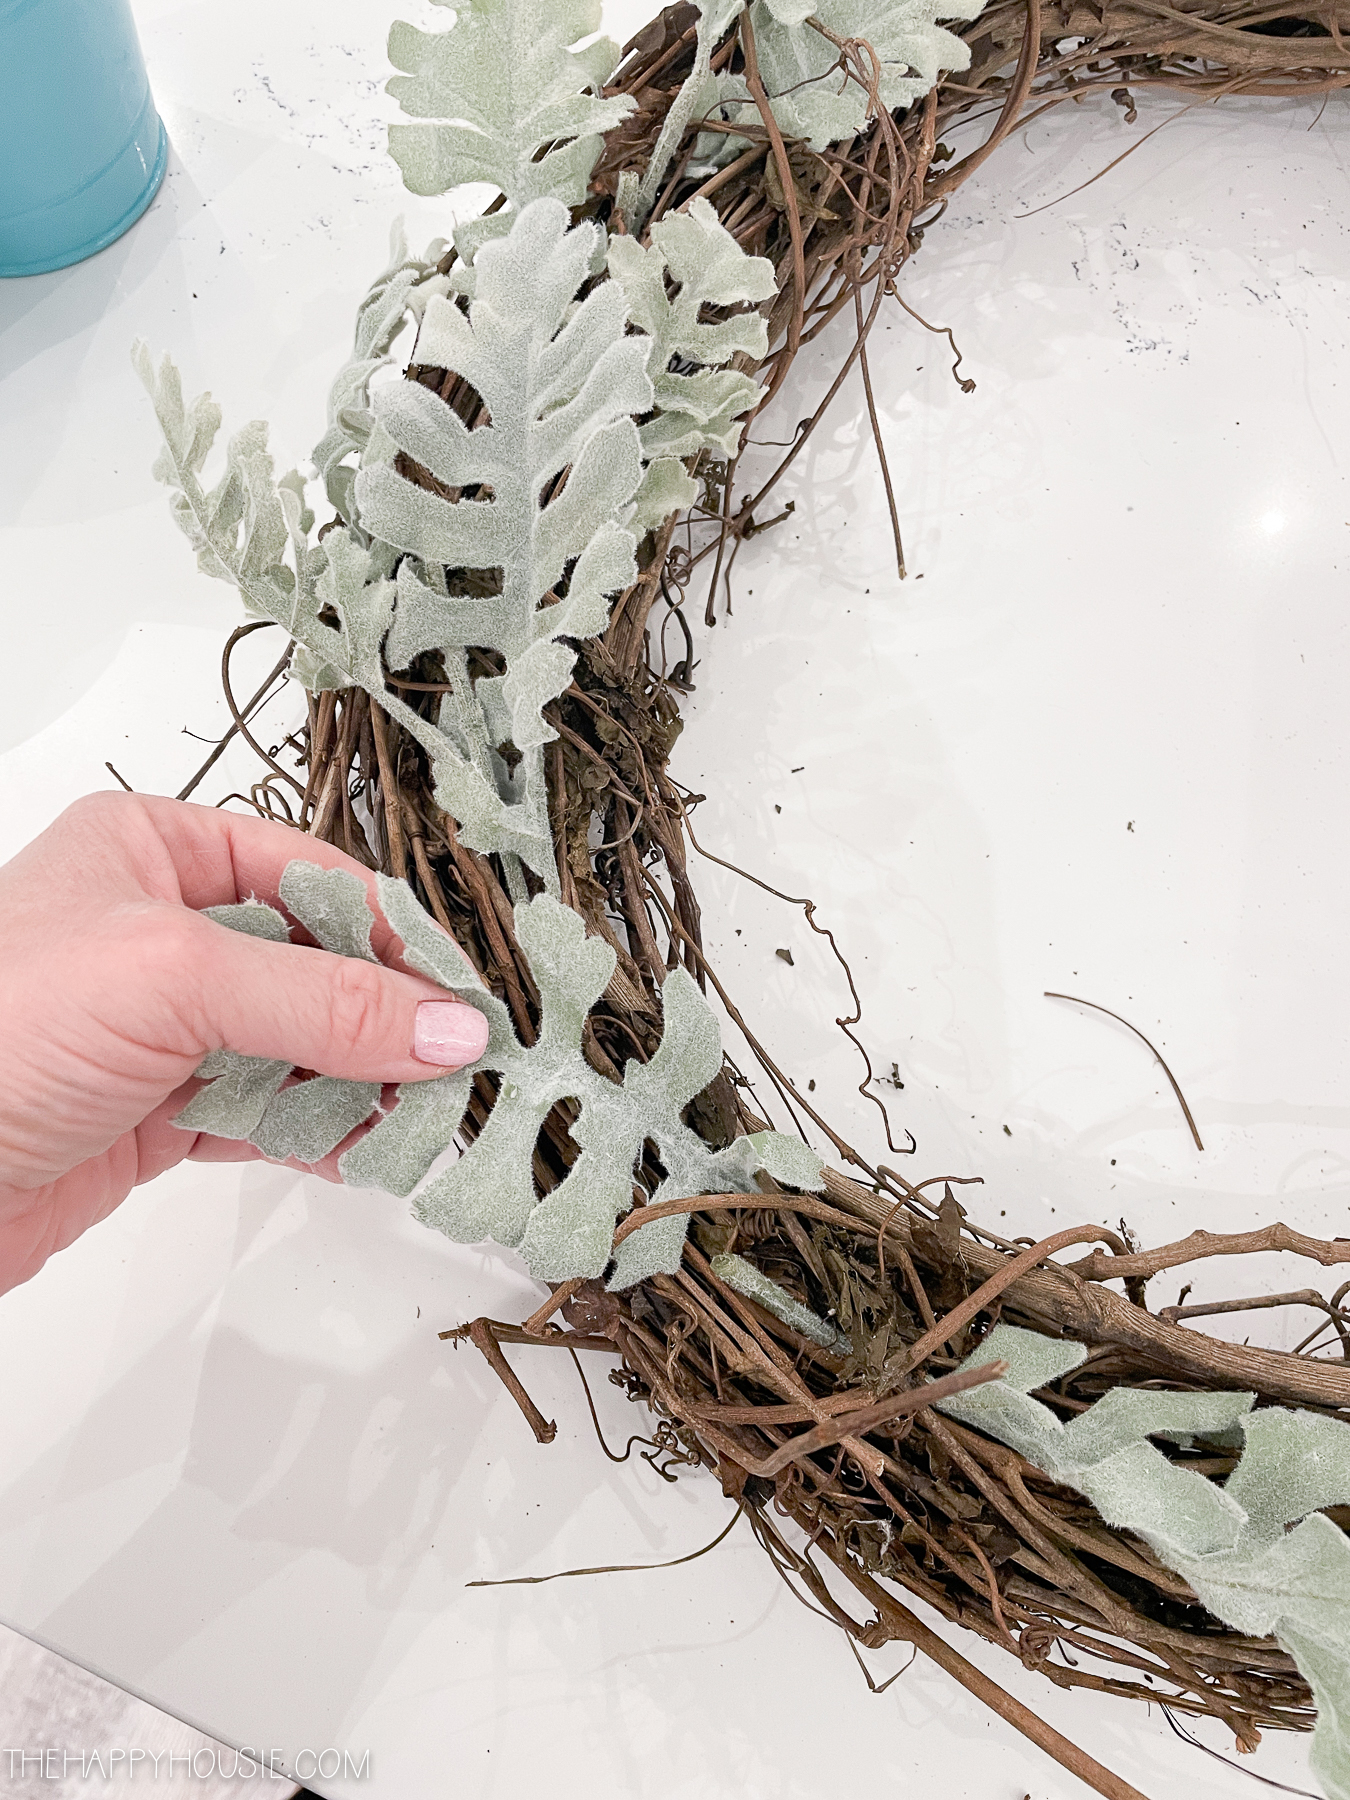
First, I layered on the greenery branches and then added in the floral sections.

Step-by-Step Floral Spring Wreath DIY tips:
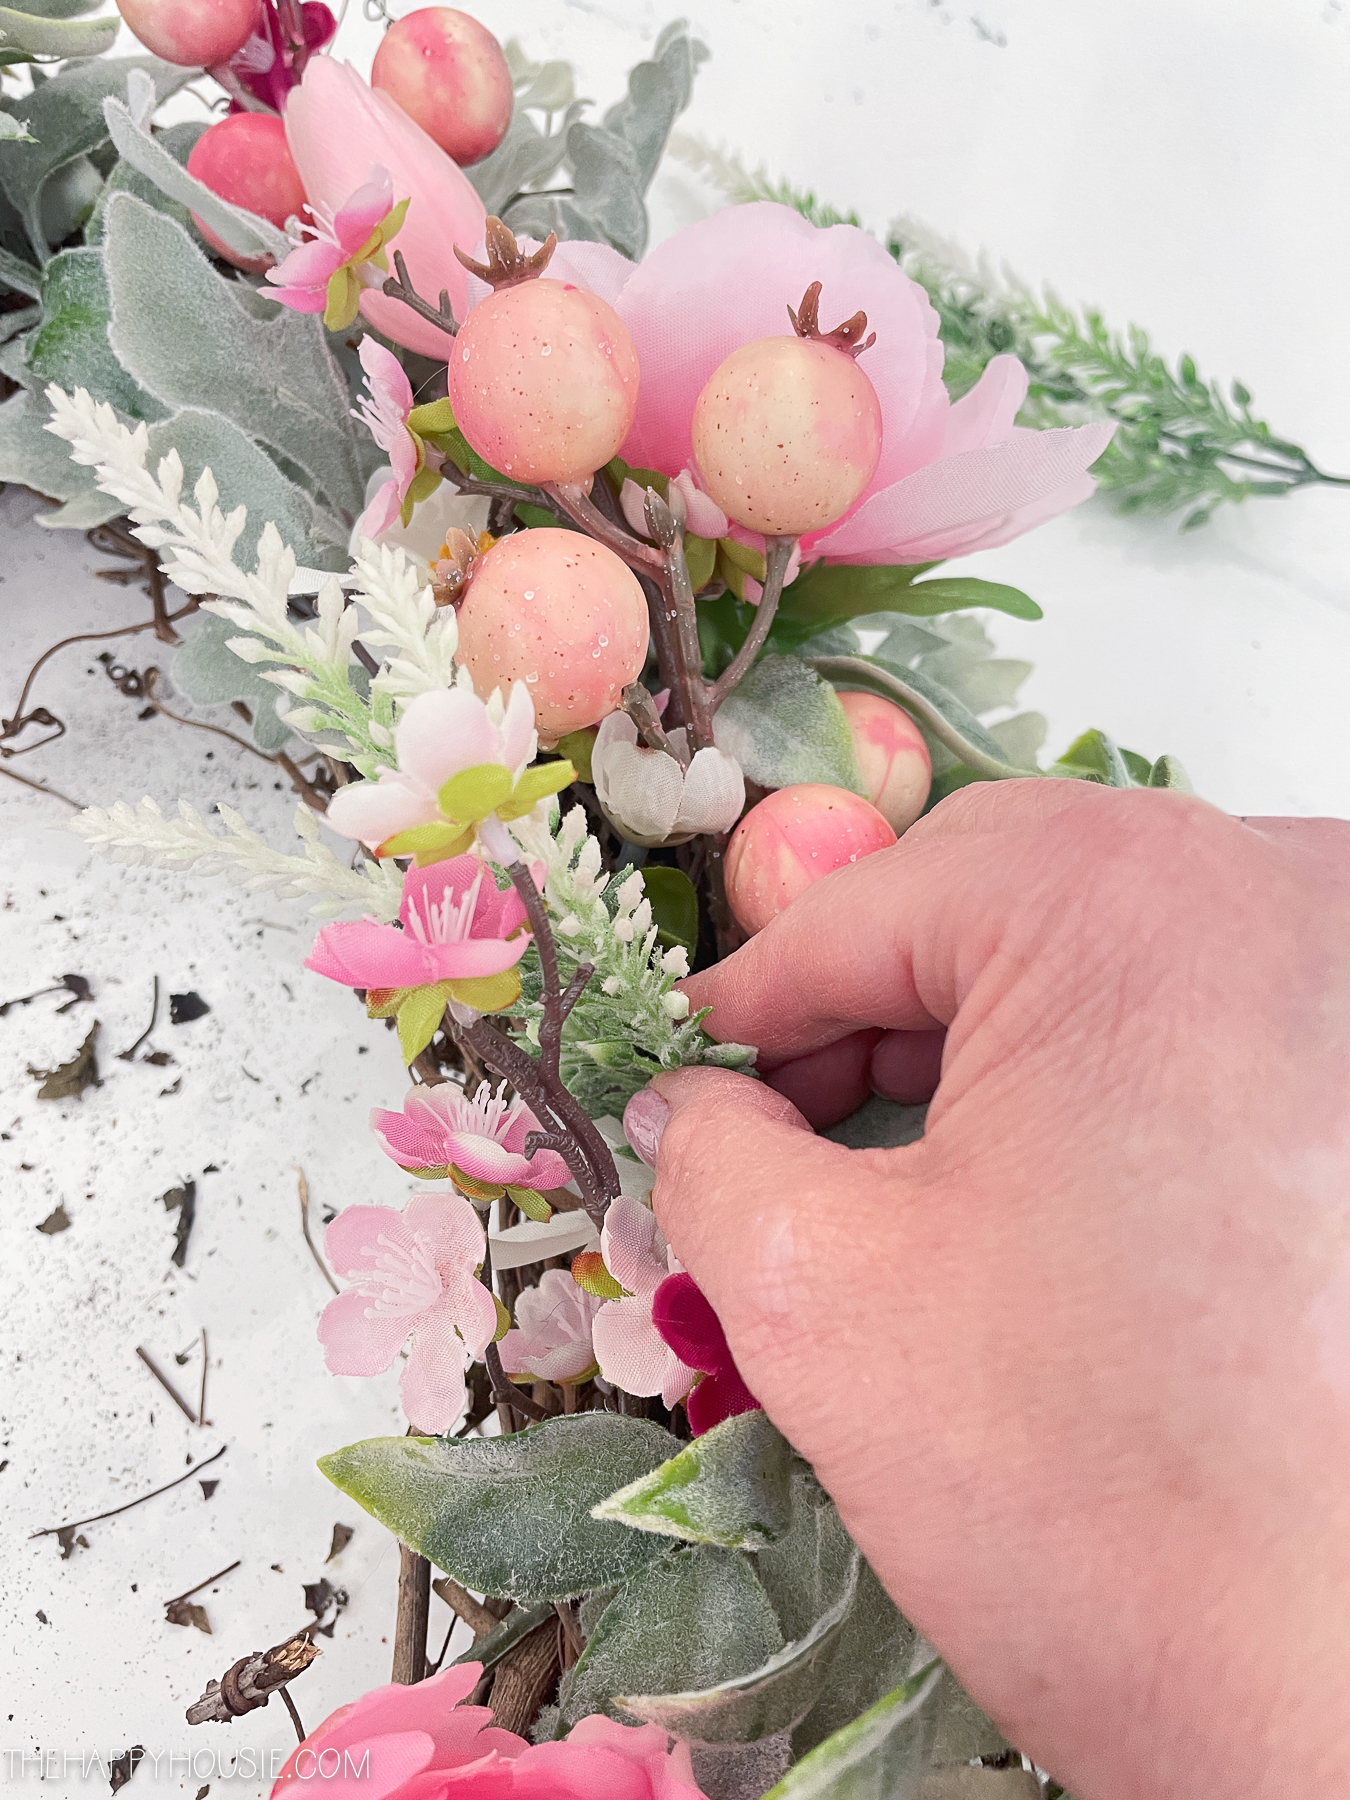
To layer over the floral branches, I began with the longer dogwood and cherry blossom branches and spaced them out evenly around the wreath. Next I added in the berry sections. This was followed by the tulips, and then the peonies. Lastly I added in the white-tipped greenery/floral branches. If a section did not naturally fit securely into the grapevine form, I added hot glue to the end. I then held it in place on the wreath for a few seconds while the hot glue set.
The nice thing about working this way is that you can move things around if you don’t like your arrangement. I didn’t have to use very much hot glue until closer to the end of layering in the floral pics.
Floral DIY Spring Wreath on our Front Door:

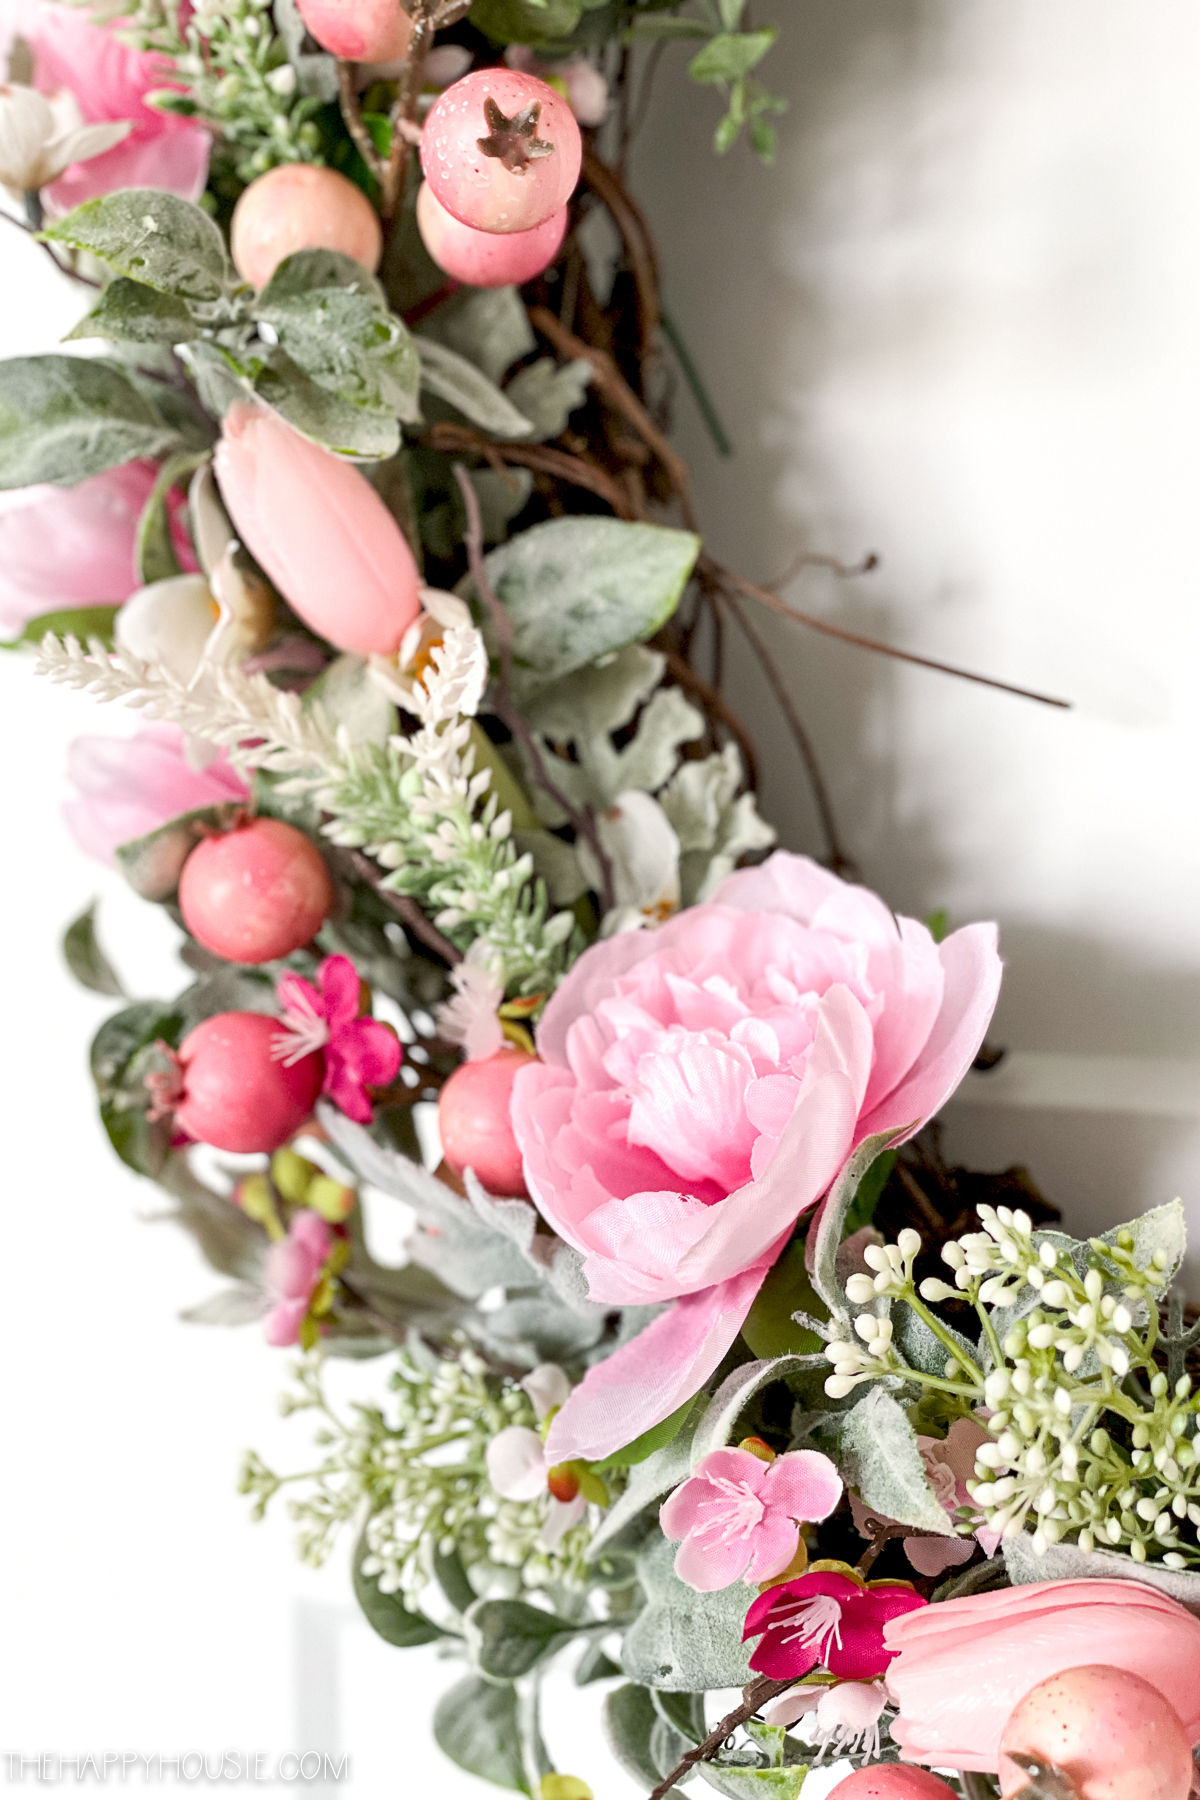
Pretty full of flowers, right? I love how the soft greeny-grey foliage looks with the pink florals. I almost didn’t use the peonies (which are just from the Dollar Tree), but I’m glad I added them in at the end. To me, this wreath looks like it would be really expensive to buy!
If I hadn’t already owned the greenery and florals, I estimate that I would have spent about $30-35(Canadian) to make this wreath. Not super cheap, but pretty inexpensive. Especially when you consider what it would cost to purchase such a full floral wreath like this.
For example, I think this one from Balsam Hill has a similar look and feel, but retails for $199 USD!

And, in comparison, here’s my full floral DIY spring wreath…


Want to remember this? PIN it for later!
Other Spring Wreath DIYs I’ve shared…

Ombre Tulip Easter/Spring Wreath
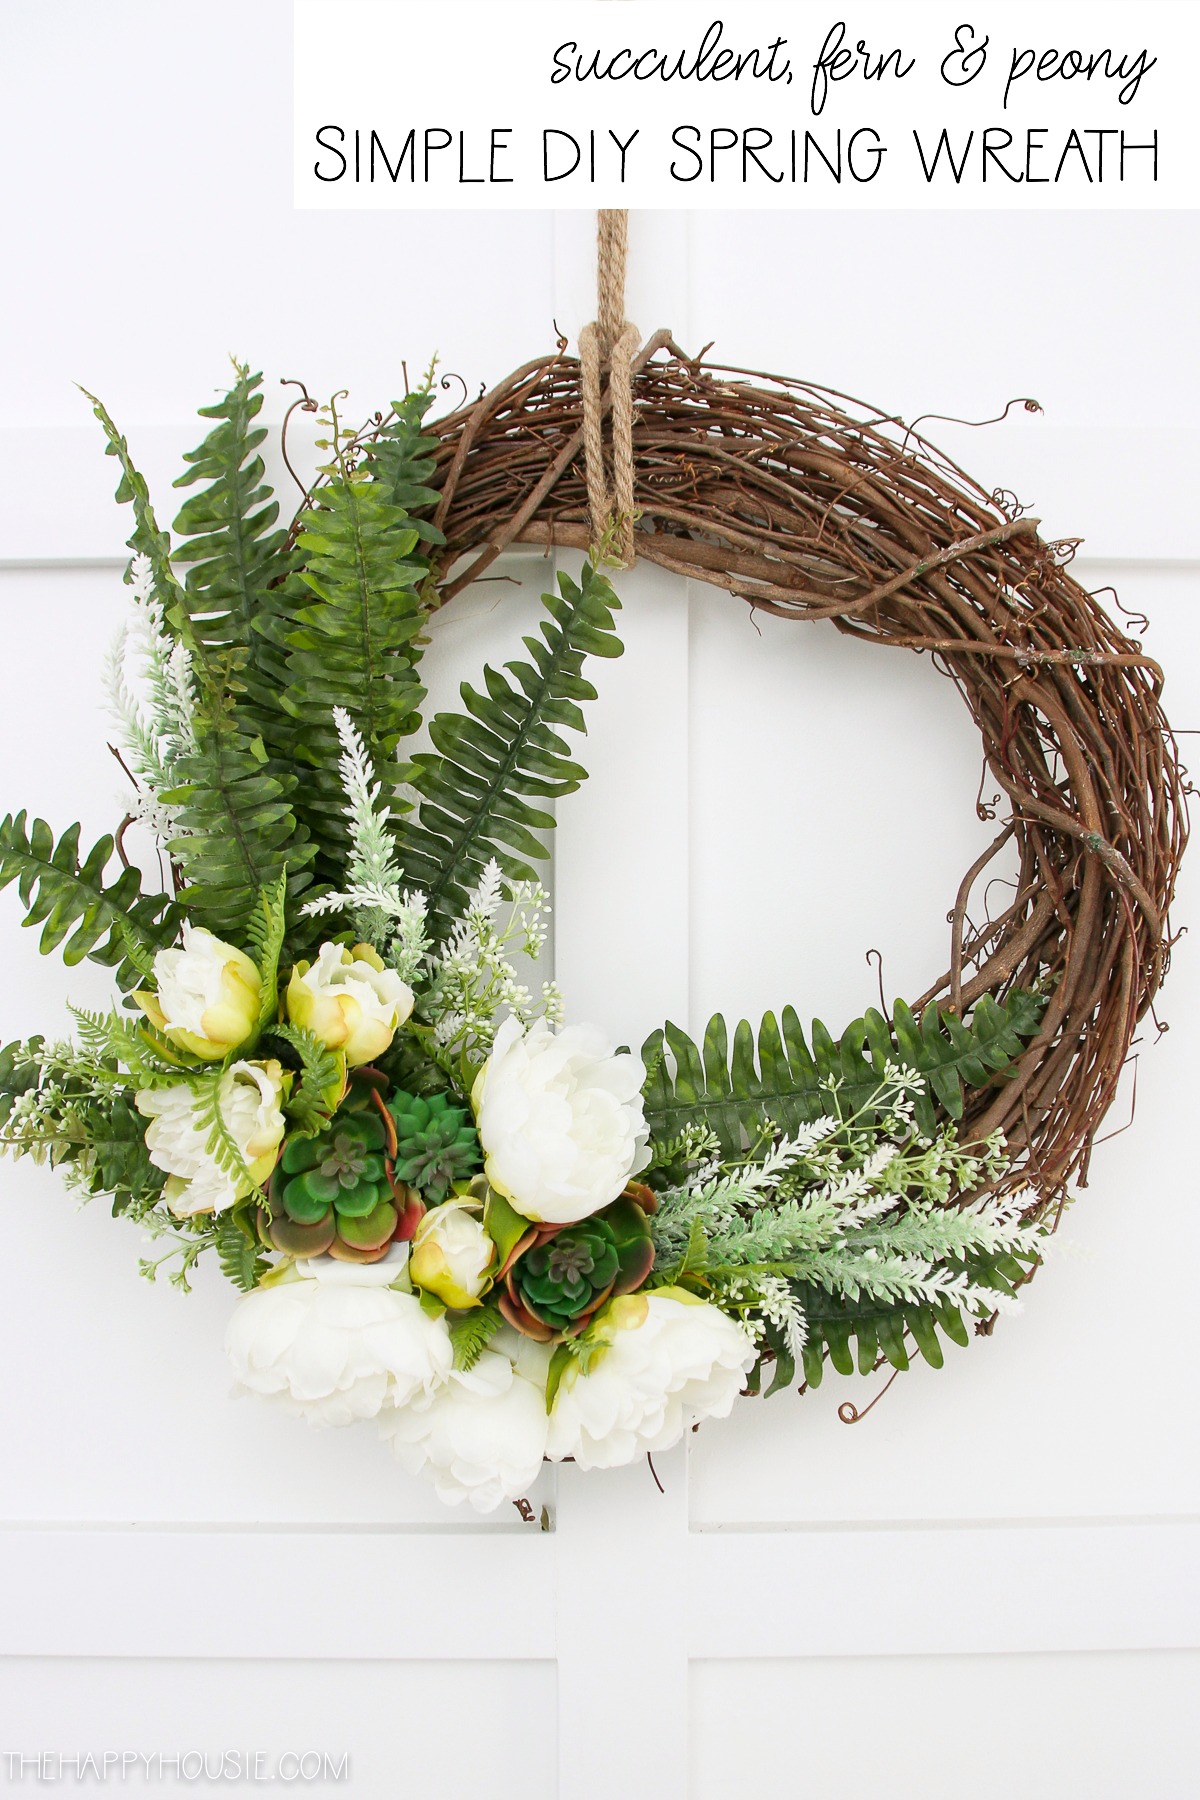
Spring Floral and Fern Wreath

Dollar Store Forsythia Wreath

Spring Monogram Wreath