
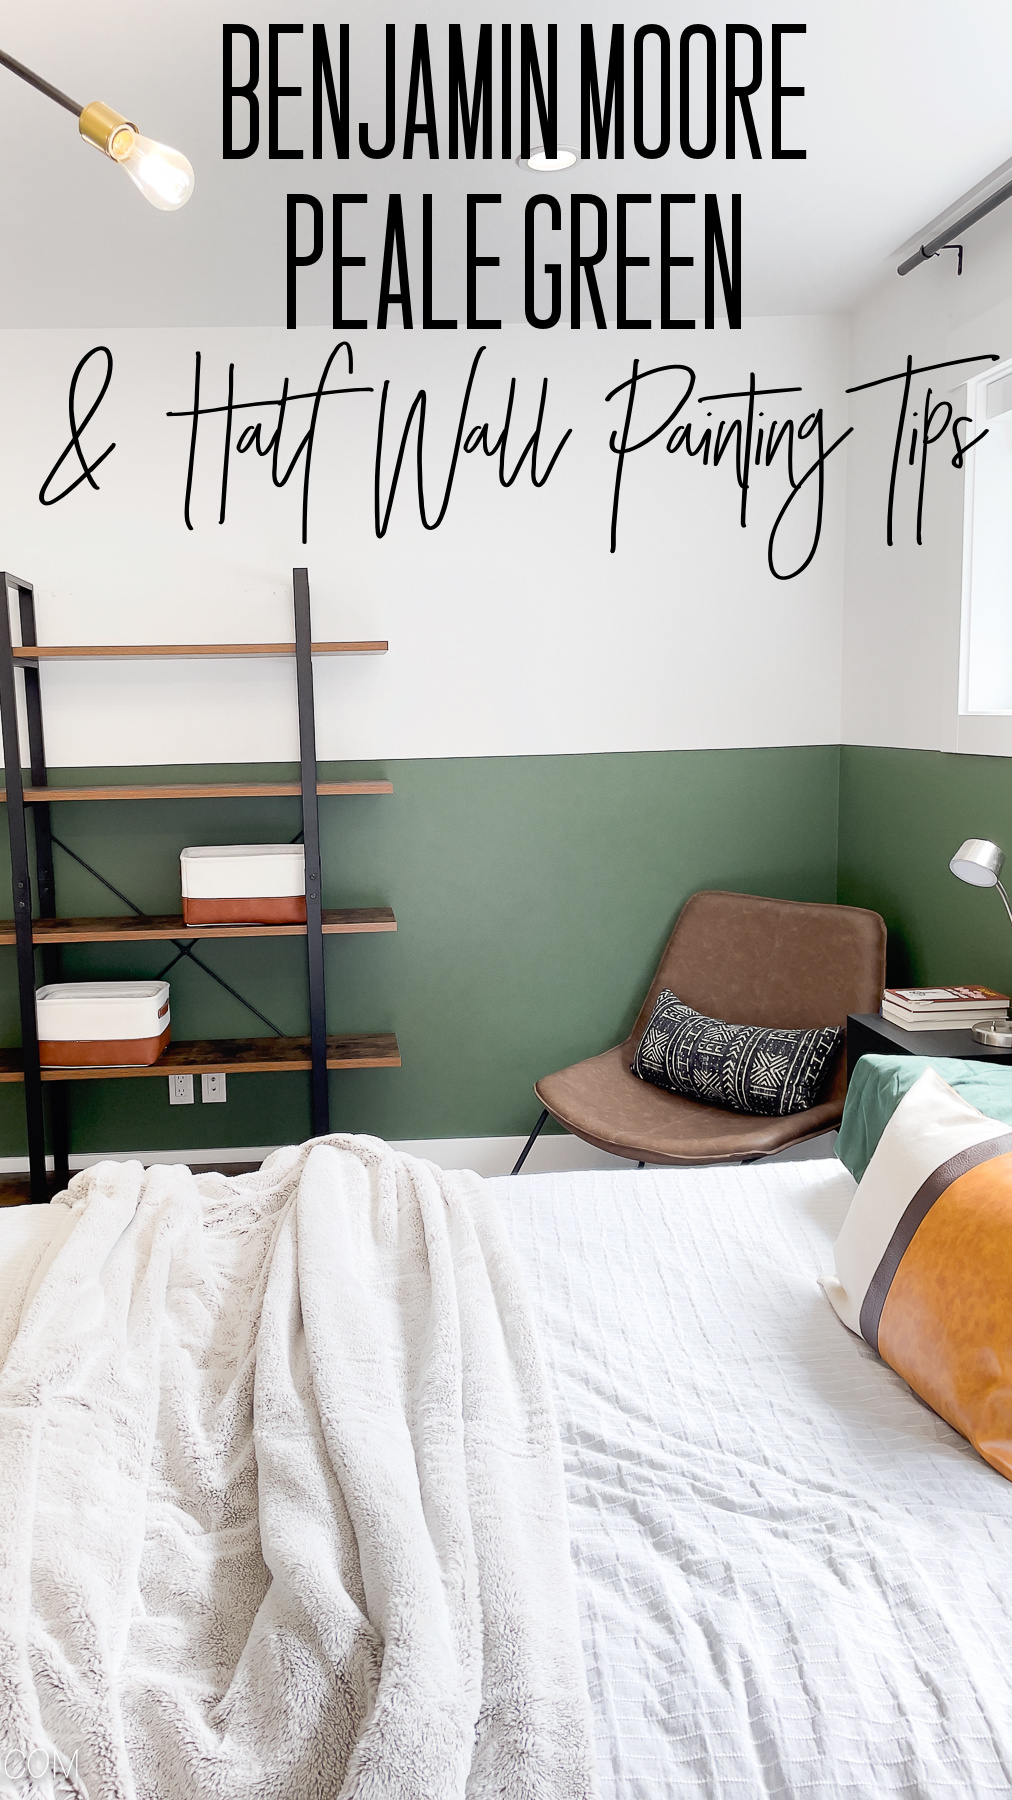
Week 6: Benjamin Moore Peale Green Paint
Week Six of the One Room Challenge of a teen boys bedroom makeover featuring Benjamin Moore Peale Green Paint applied to just the lower half of the wall.
It feels like progress on this teen boy bedroom makeover is a bit slow coming, and I am thankful for the extra weeks that the One Room Challenge has added to the process. To think, that it used to all be done within a six week time frame. Pre-Covid, of course, when shipping and supply issues weren’t really a thing. Last week I shared my comparison of four dark green paint colors by Benjamin Moore.
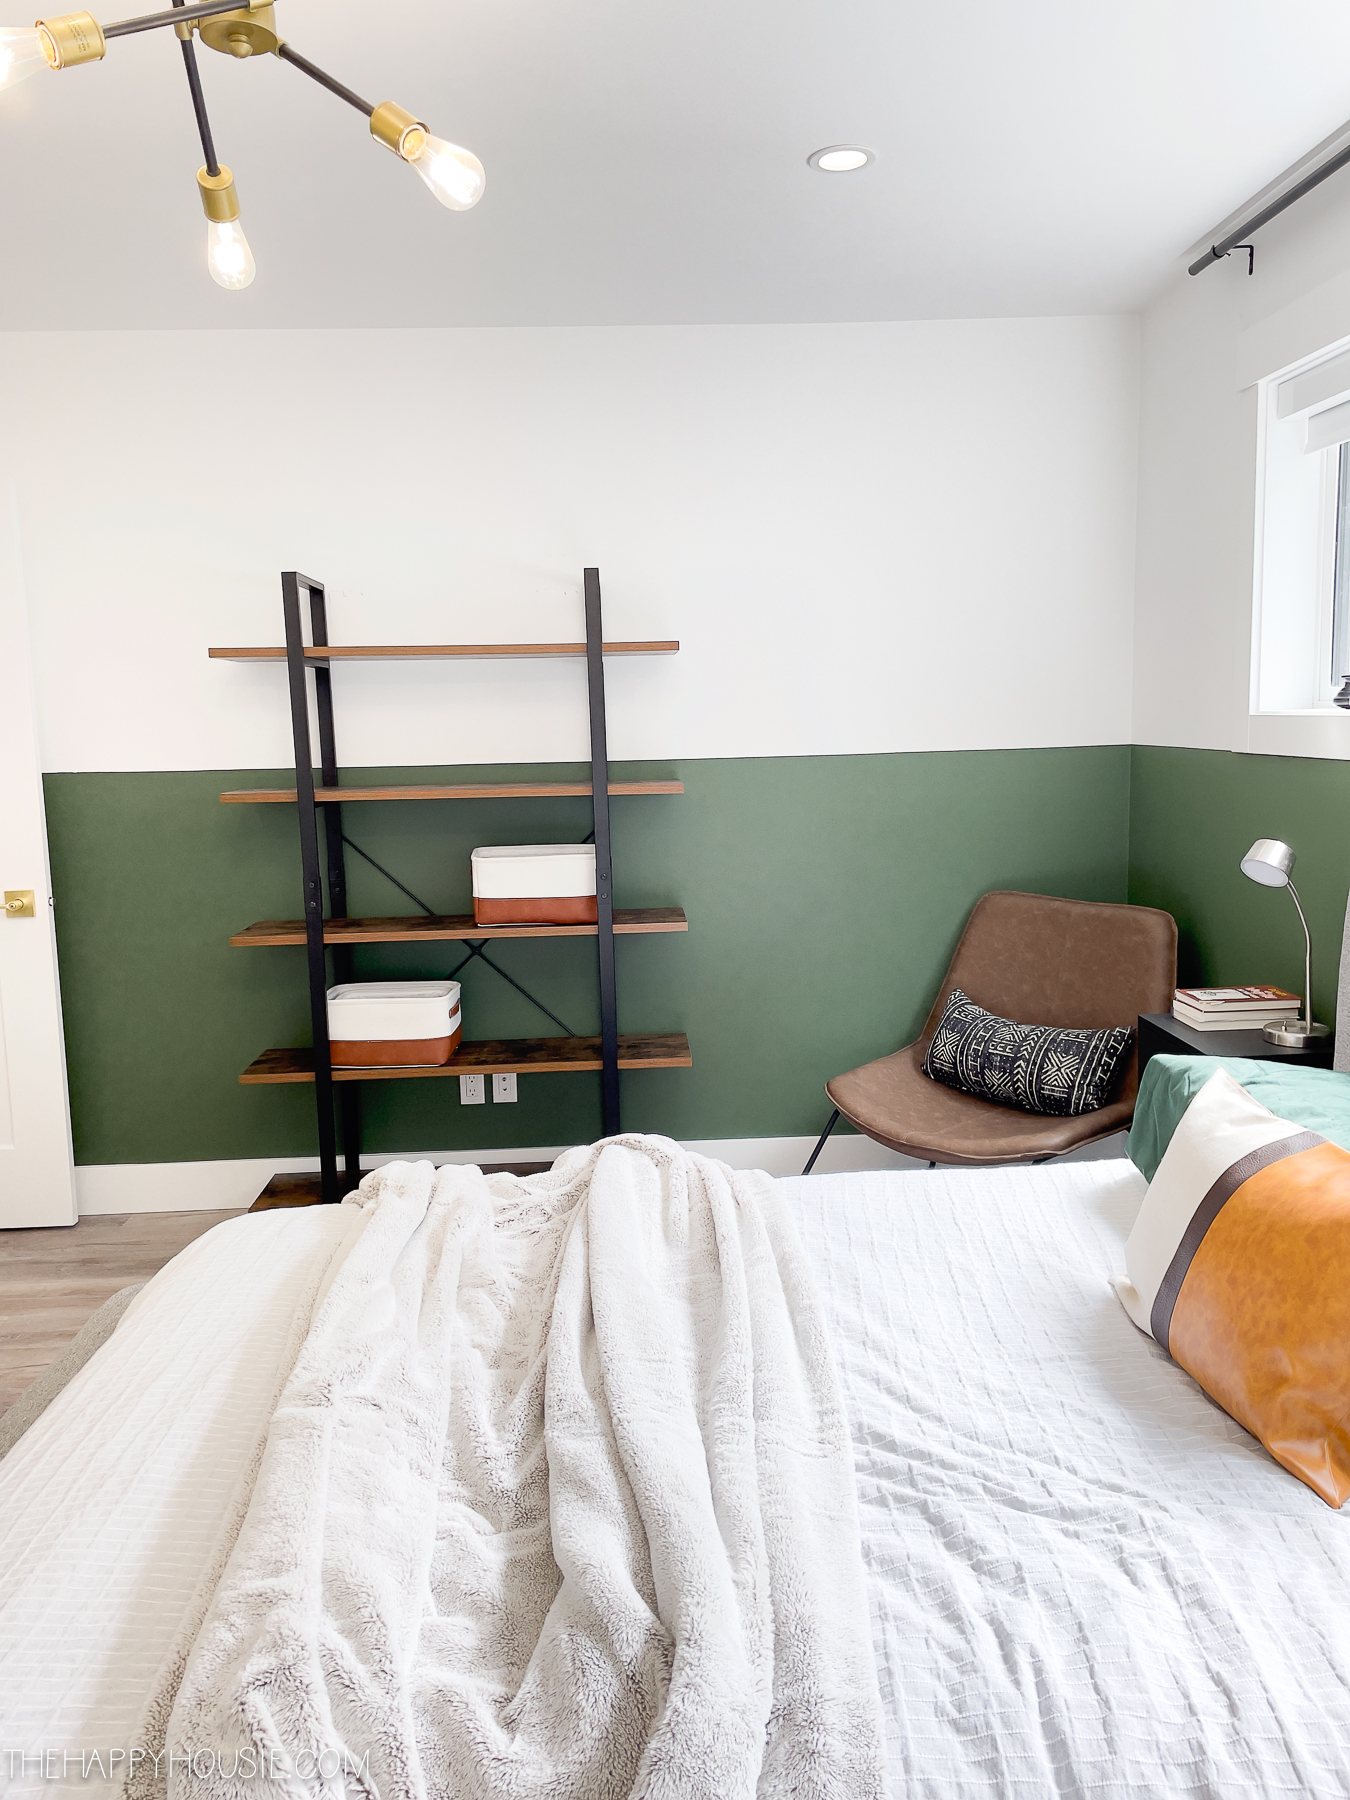
Well, the selection was made, and this weekend I painted the room! The bottom half of the walls only, so it went pretty quickly. I LOVE how it turned out, and more importantly, my teen boy is loving how this Benjamin Moore Peale Green paint looks in his bedroom!
If you’ve been following along the last few weeks, then you know that I’ve just started the first big makeover project of our new build house; adding character to our oldest son’s bedroom. Here is my original before post for this project. This week is Week Six in the process, which means there are two more weeks to go; the final week of which is the room reveal!
The One Room Challenge
If you’re not familiar with the One Room Challenge (hereafter I’ll call it the ORC), I’ll bring you up-to-date. It’s a 8-week long challenge in which decorators, designers, and homeowners pick a space in their home to completely update. There are feature designers for each session, as well as many guest participants (like myself) who join in each week. You can read more about this event here.

I love how One Room Challenge because it pushes you to try and get things done in a timely manner! Making decisions can be hard for me at times, so I love the extra pressure to get things decided on and DONE.
Testing Dark Green Paint Colors:
Last Week I shared the four dark green paint colours that we considered for this space; from left to right below they are Benjamin Moore: Cushing Green, Peale Green, Boreal Forest, and Backwoods. I brought in some of the other pieces going into this design to help us choose our favourite.
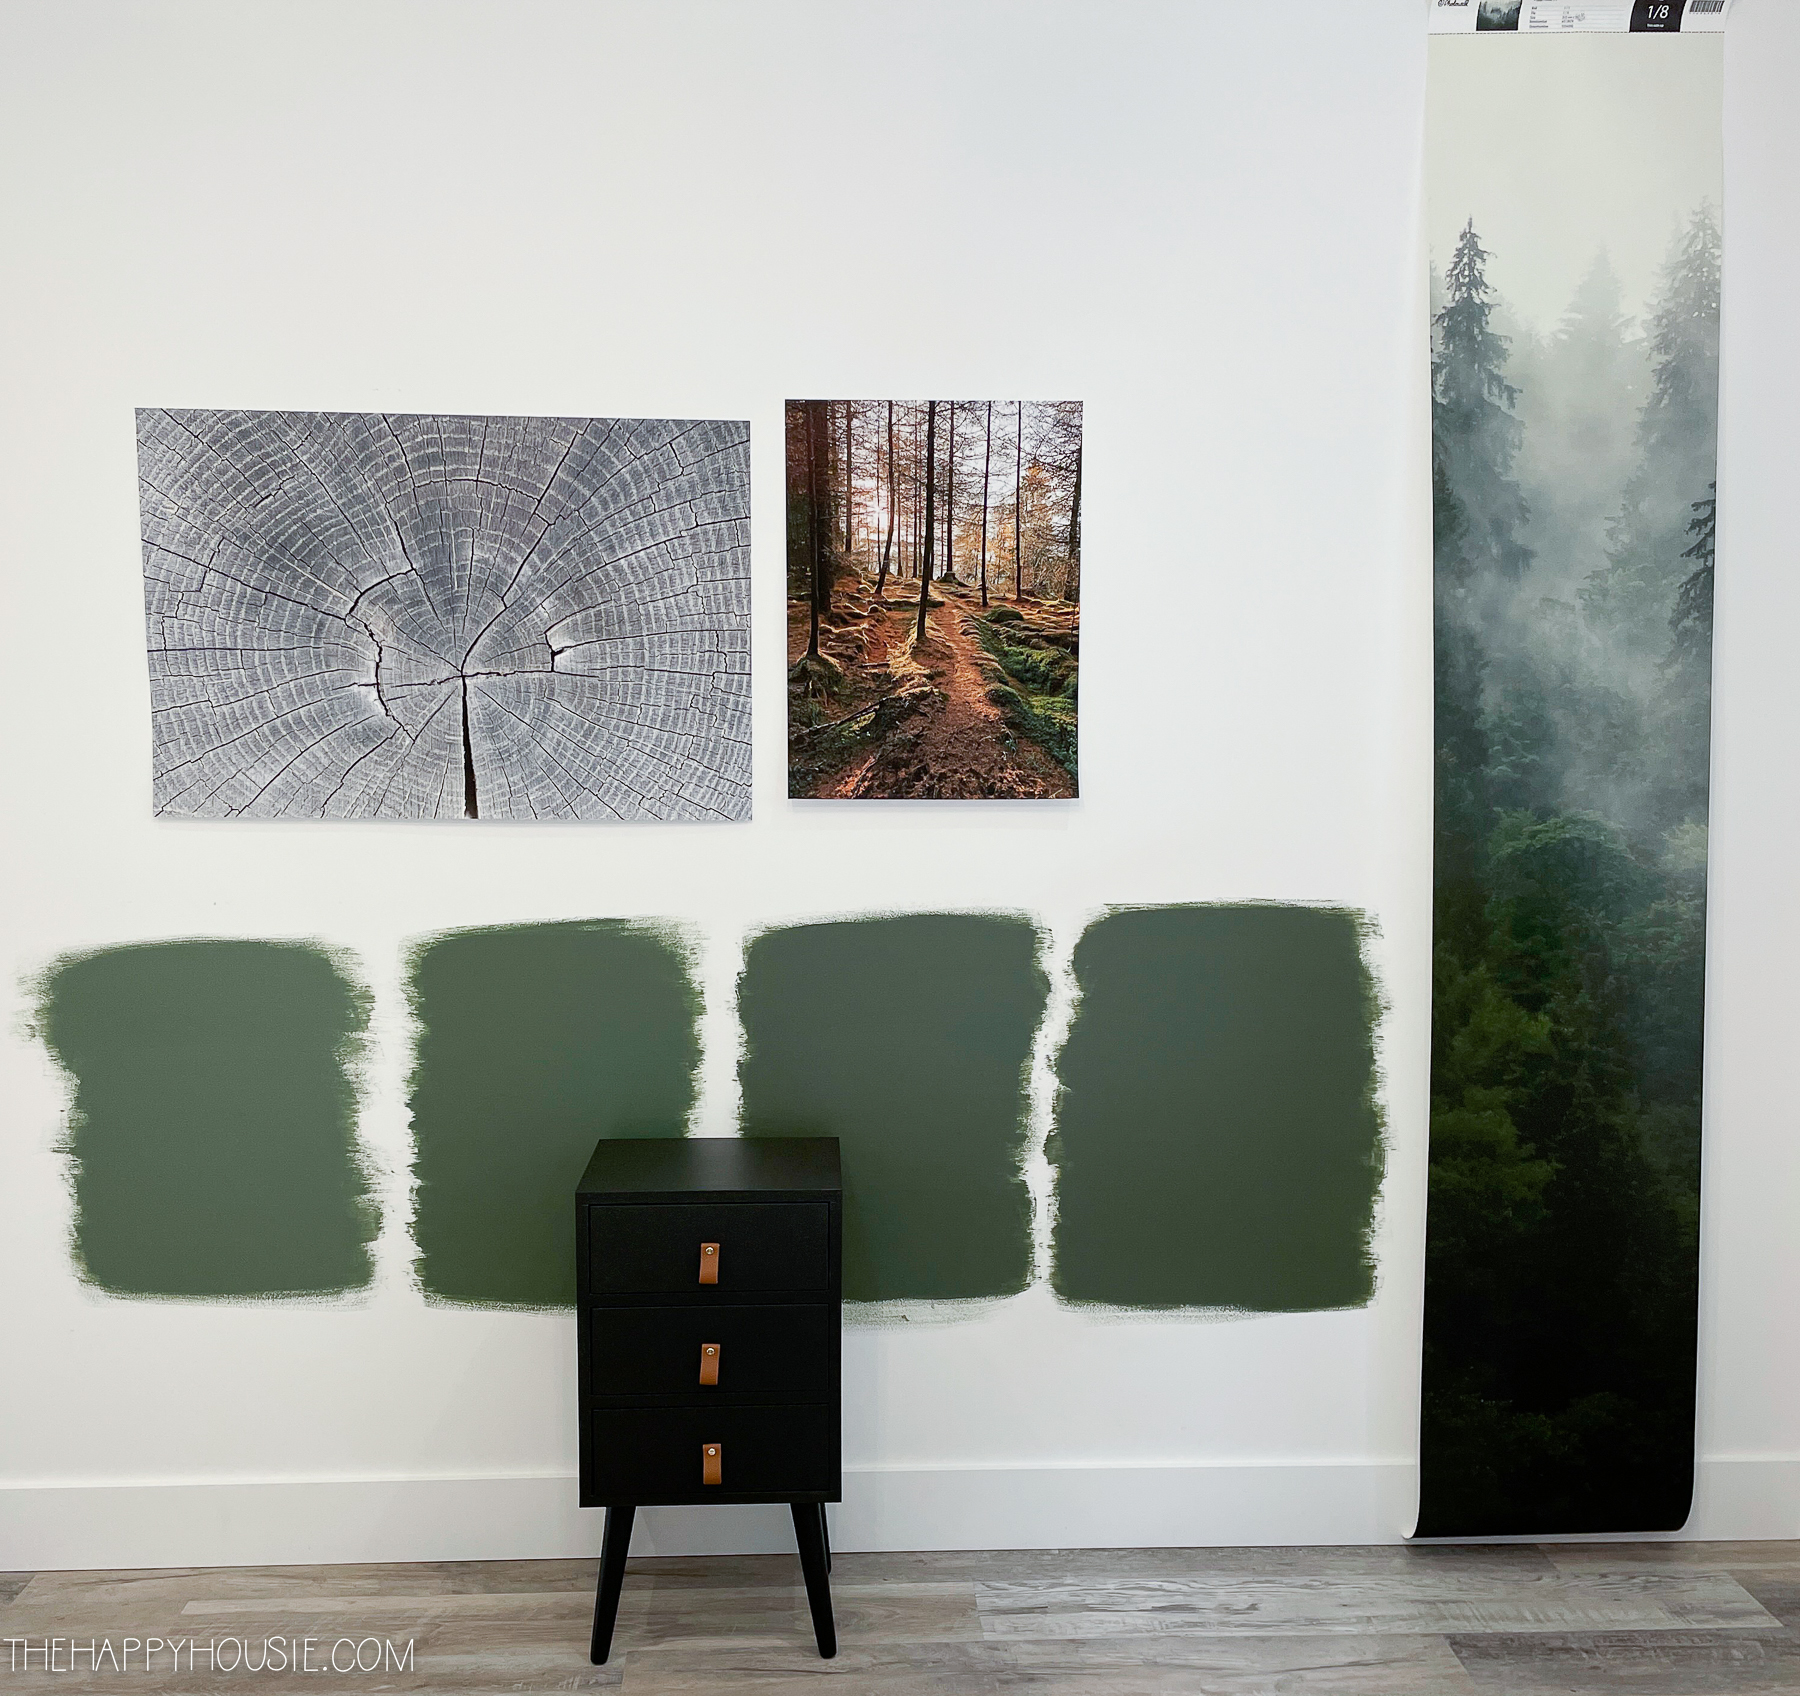
My son, Leif, and I both decided on the second one from the left. It’s Benjamin Moore’s Peale Green, as we felt it was the most “green” and had the least grey/brown undertones of the four we chose.
Benjamin Moore Peale Green:

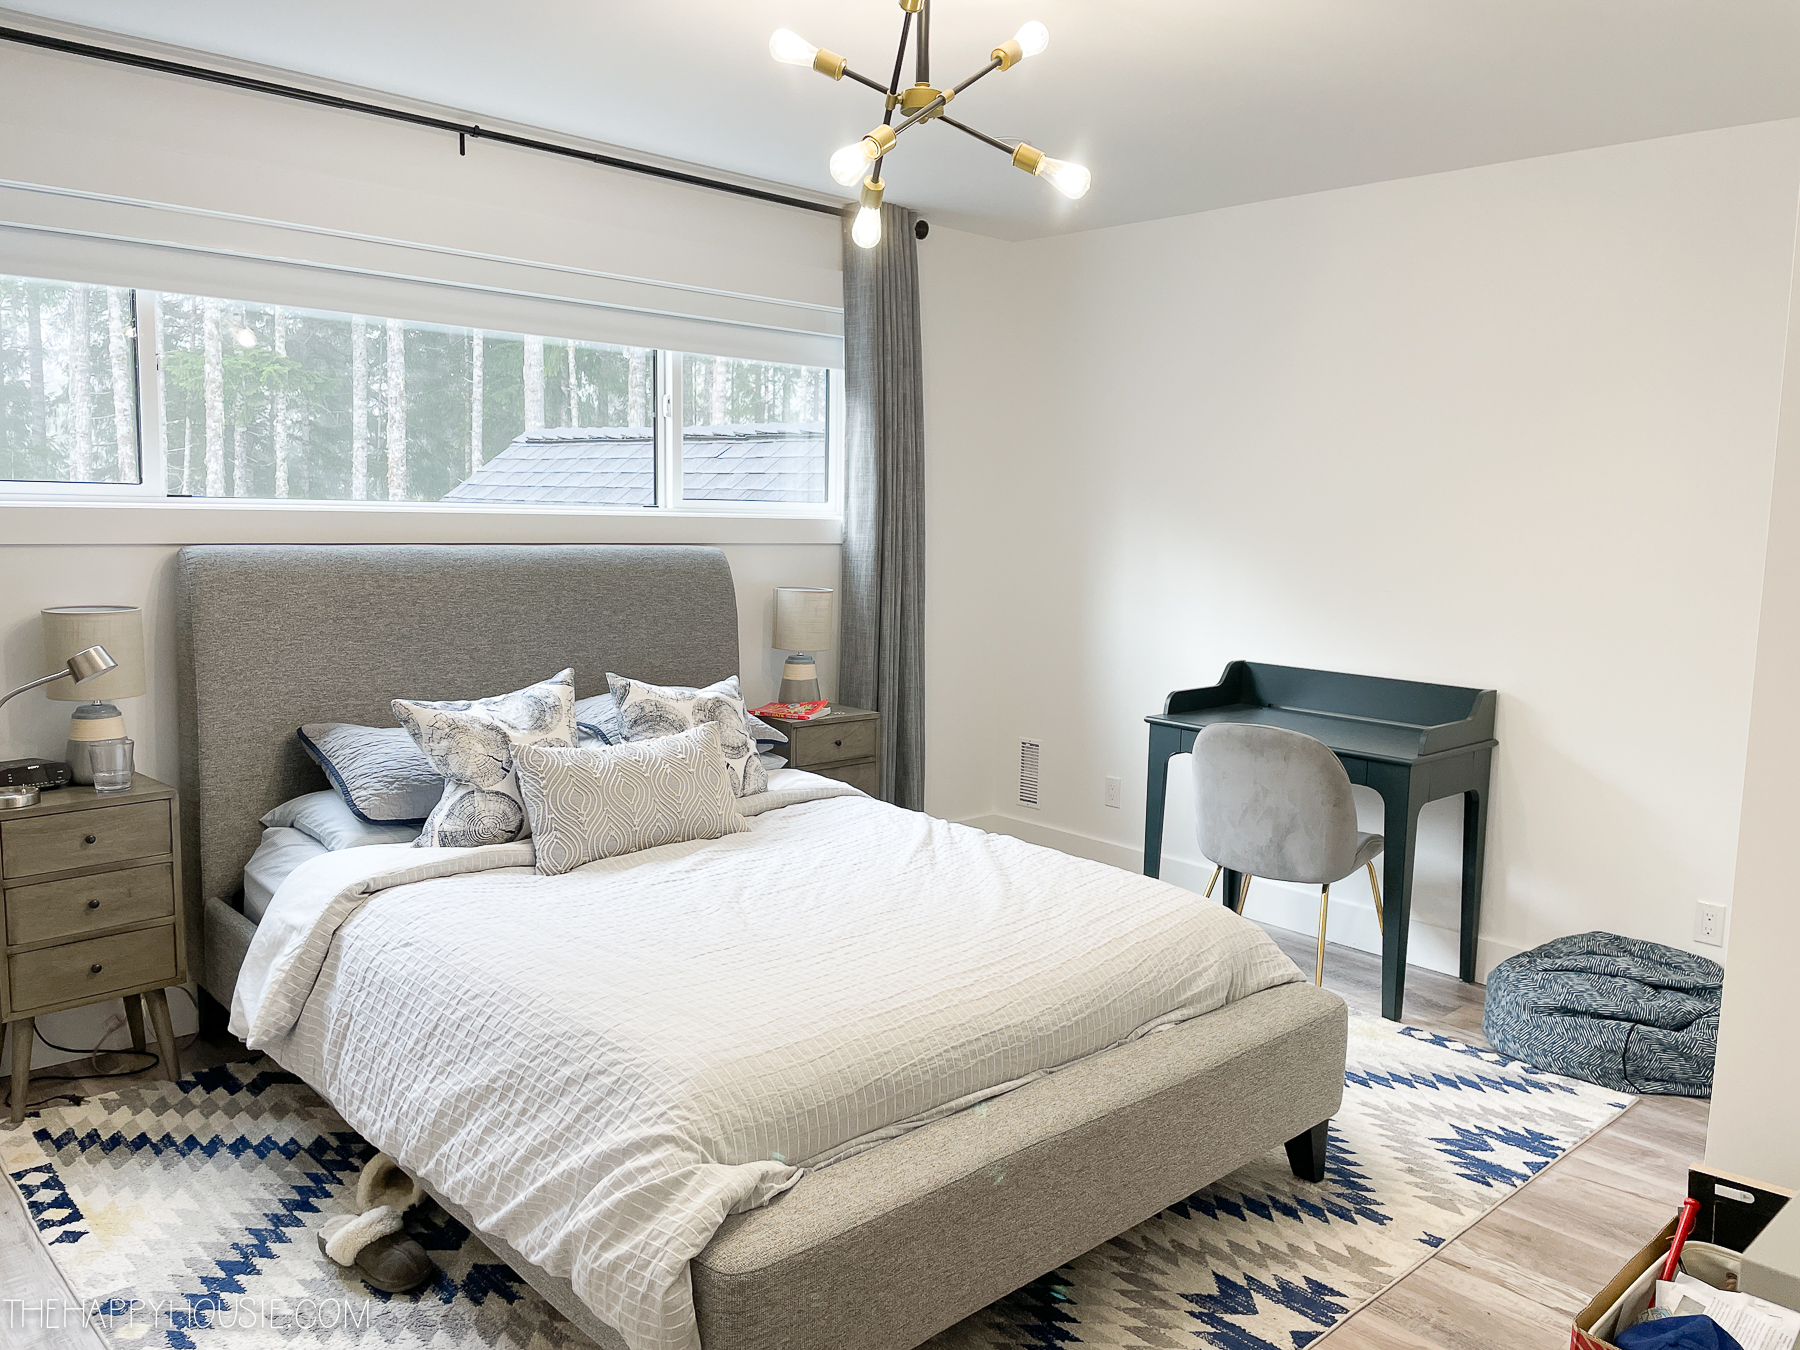
Before tackling the paint this week, his bedroom looked like this…
Tips for painting a half wall
I really wanted to do a half wall of paint in this room, with a crisp line between the dark green and the white.
1)Decide on your height
We decided to carry the paint along at the level of his lower window trim, so there was a straight line directly out from the window. Determine a point that makes sense in your space.
2) Measure up from the baseboard or floor
After measuring the height from the baseboard to the bottom of the window trim, we used our measuring tape and measured and marked that same height in several spots around the room.
3) Use a long straight level to make your pencil line
We used a level to join up the points that we have marked/measured, and made sure that the line was straight based on the spirit level. We then used a pencil to draw a straight line with the spirit level acting as the ruler.
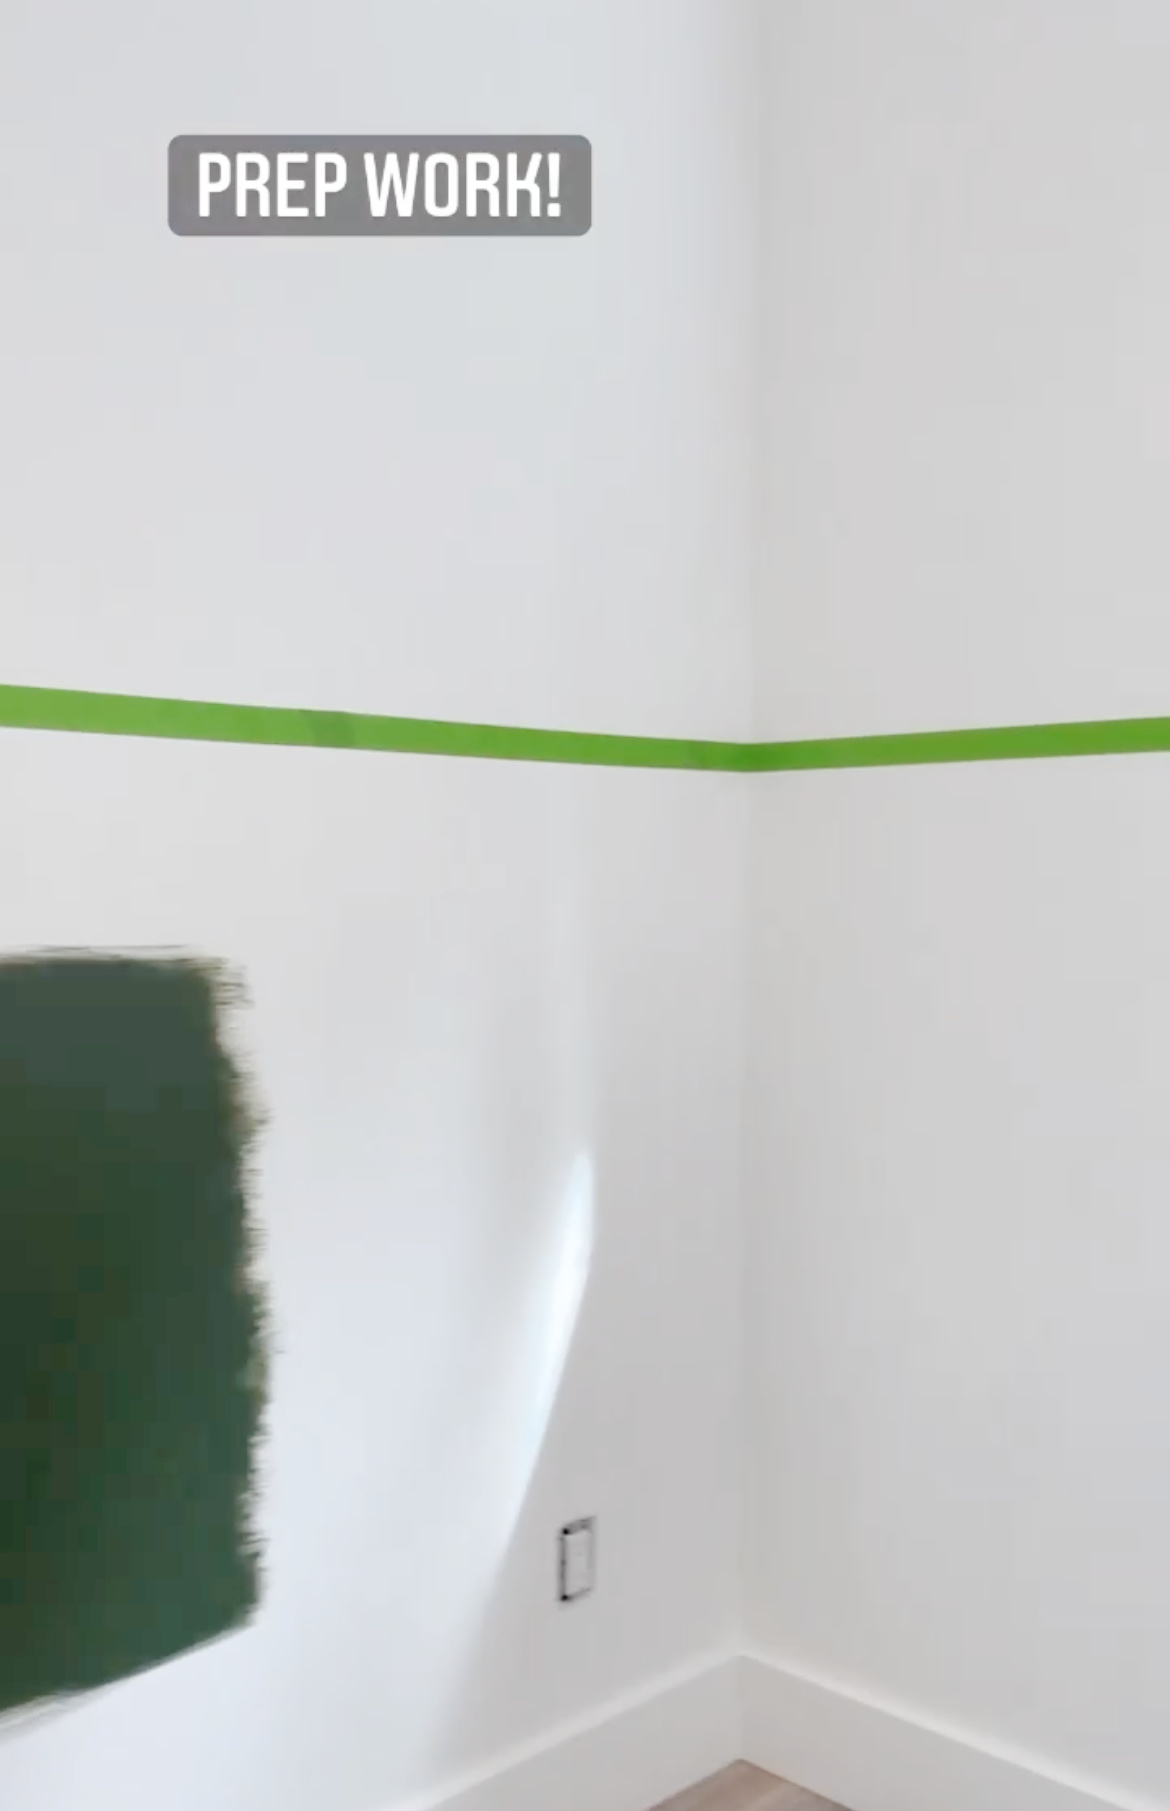
4) Tape with good quality painters tape
I used some green Frog Tape to tape just above the pencil line all the way around the room. I also taped off the trim and baseboards because the colour is so dark and I wanted to protect them as well.
5) Press down the edge firmly
After applying the tape, I went back and pressed firmly with my hand along the bottom edge of the painters tape to ensure a good seal.
6) Paint along or down, not up into the tape
When painting, I did my best to paint down or straight along the edge of the painter’s tape, and not up into it. This helps ensure less chance for the paint to bleed up and under the taped edge.

7) Remove once both coats are done
Once two coats of paint were complete and it was dry, I removed the painters tape. You can remove it while the second coat is still wet, if you are sure the coverage is enough and you only need two coats.
8) Touch up any mistake spots
There are a few little spots where the paint bled up and under the tape, so I went back and touched those up with a small brush and some of my original white paint. I had to do the same on a few spots on the baseboard and trim.
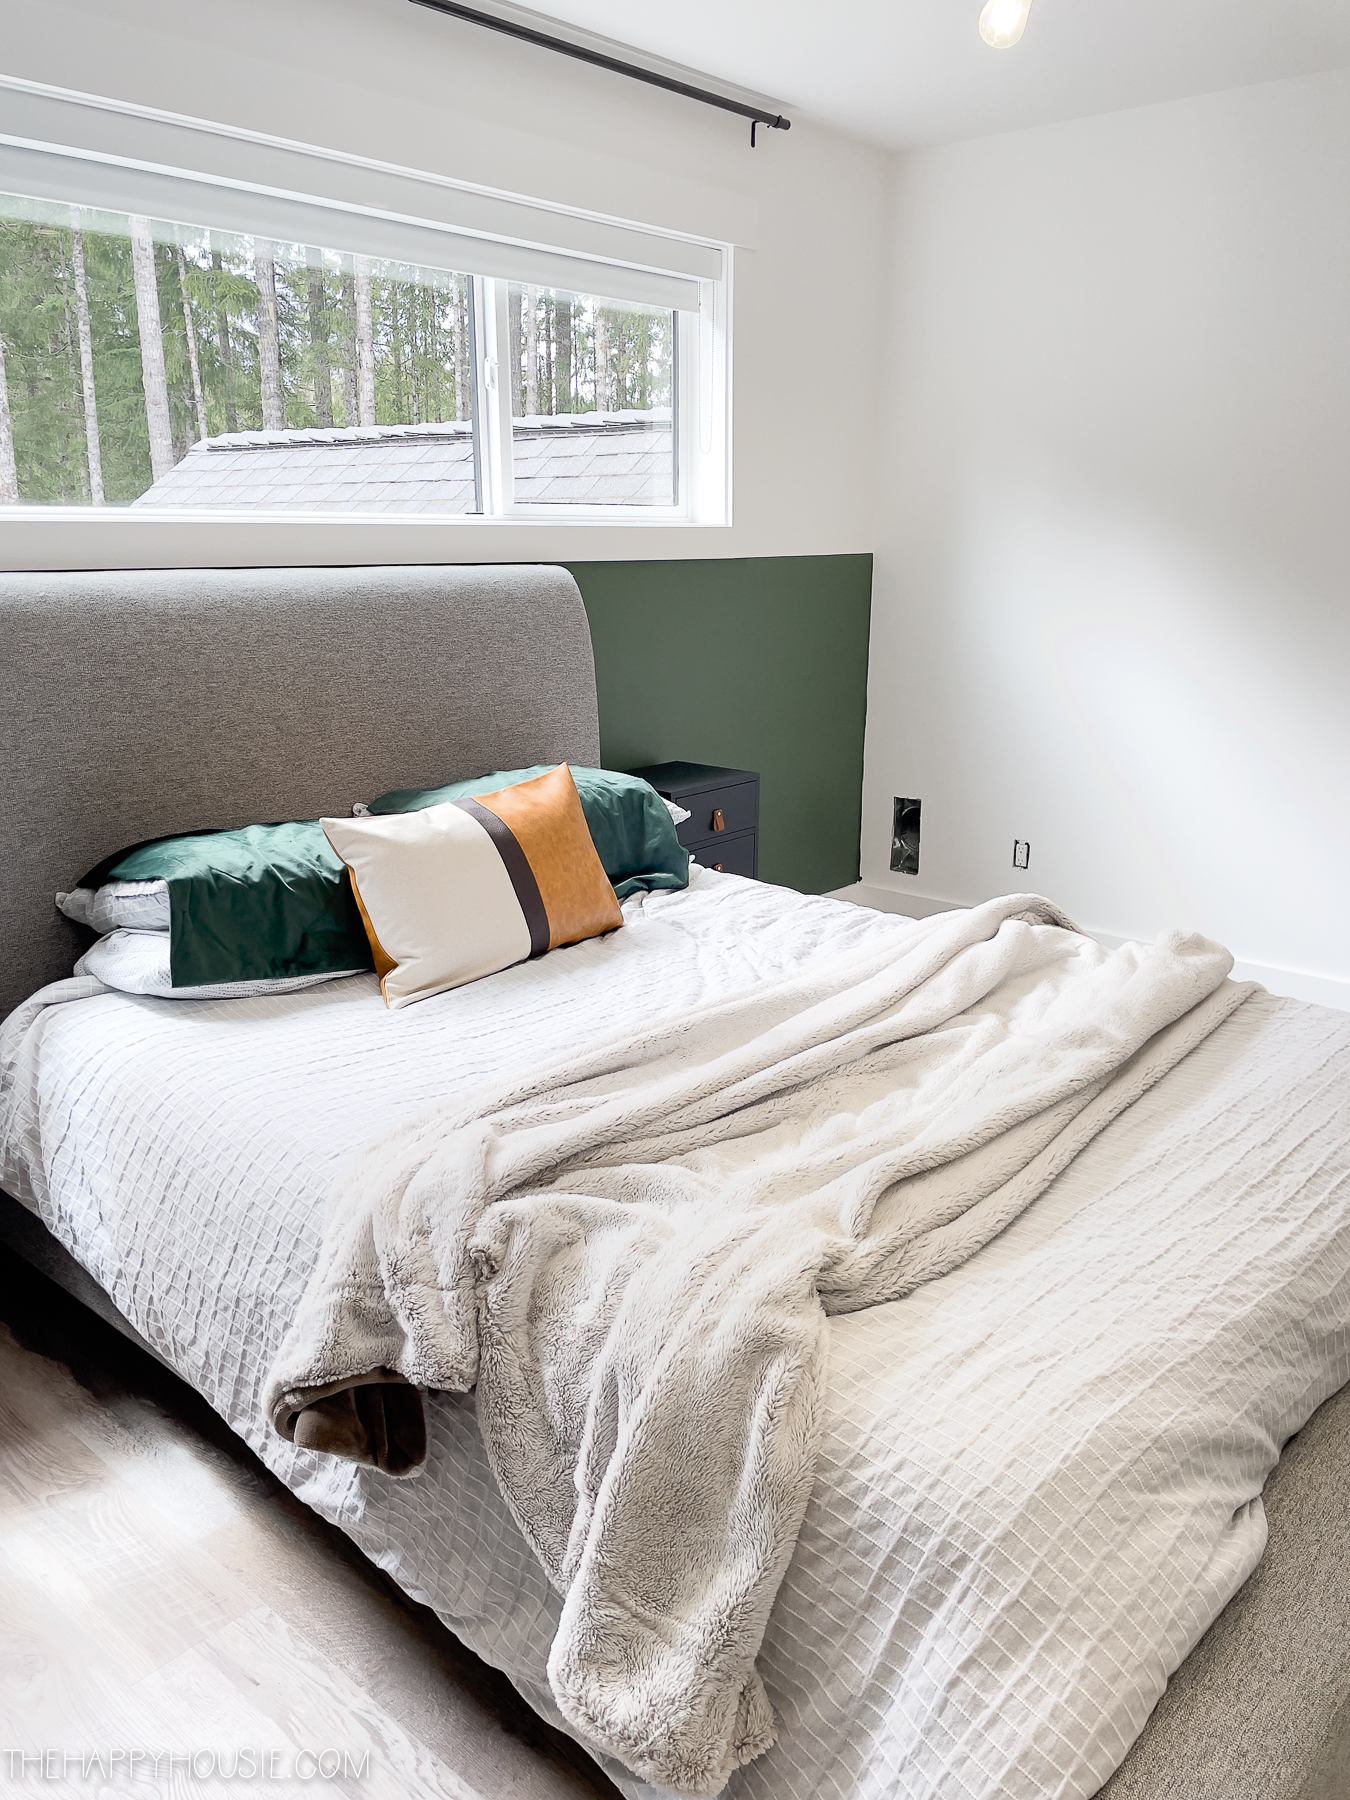
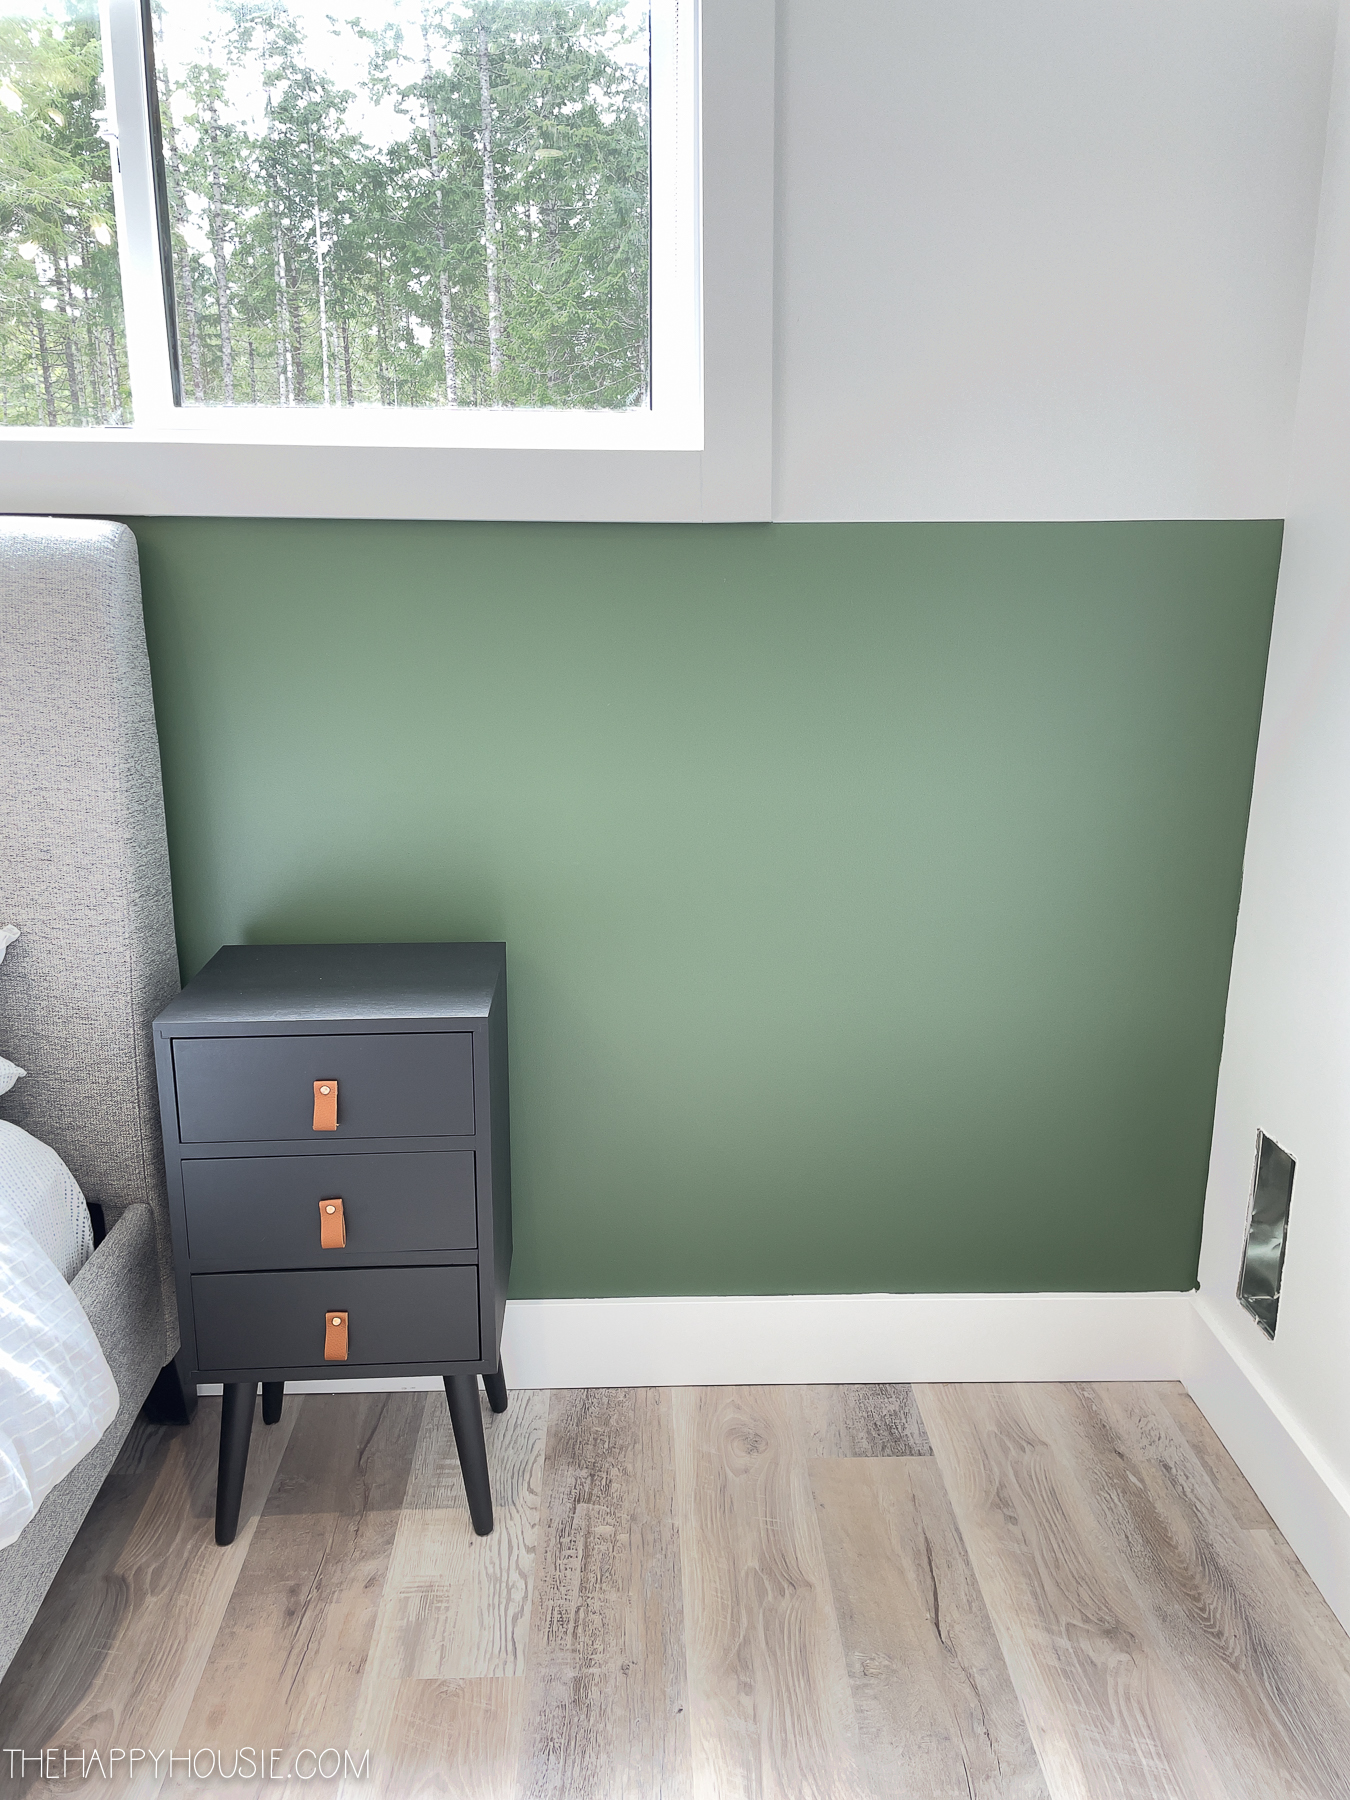
Benjamin Moore Peale Green on the Walls:
My husband had a chance to build the furniture this week one day while we were all at work and school, so I brought in a few of the pieces to see how the room is coming together.
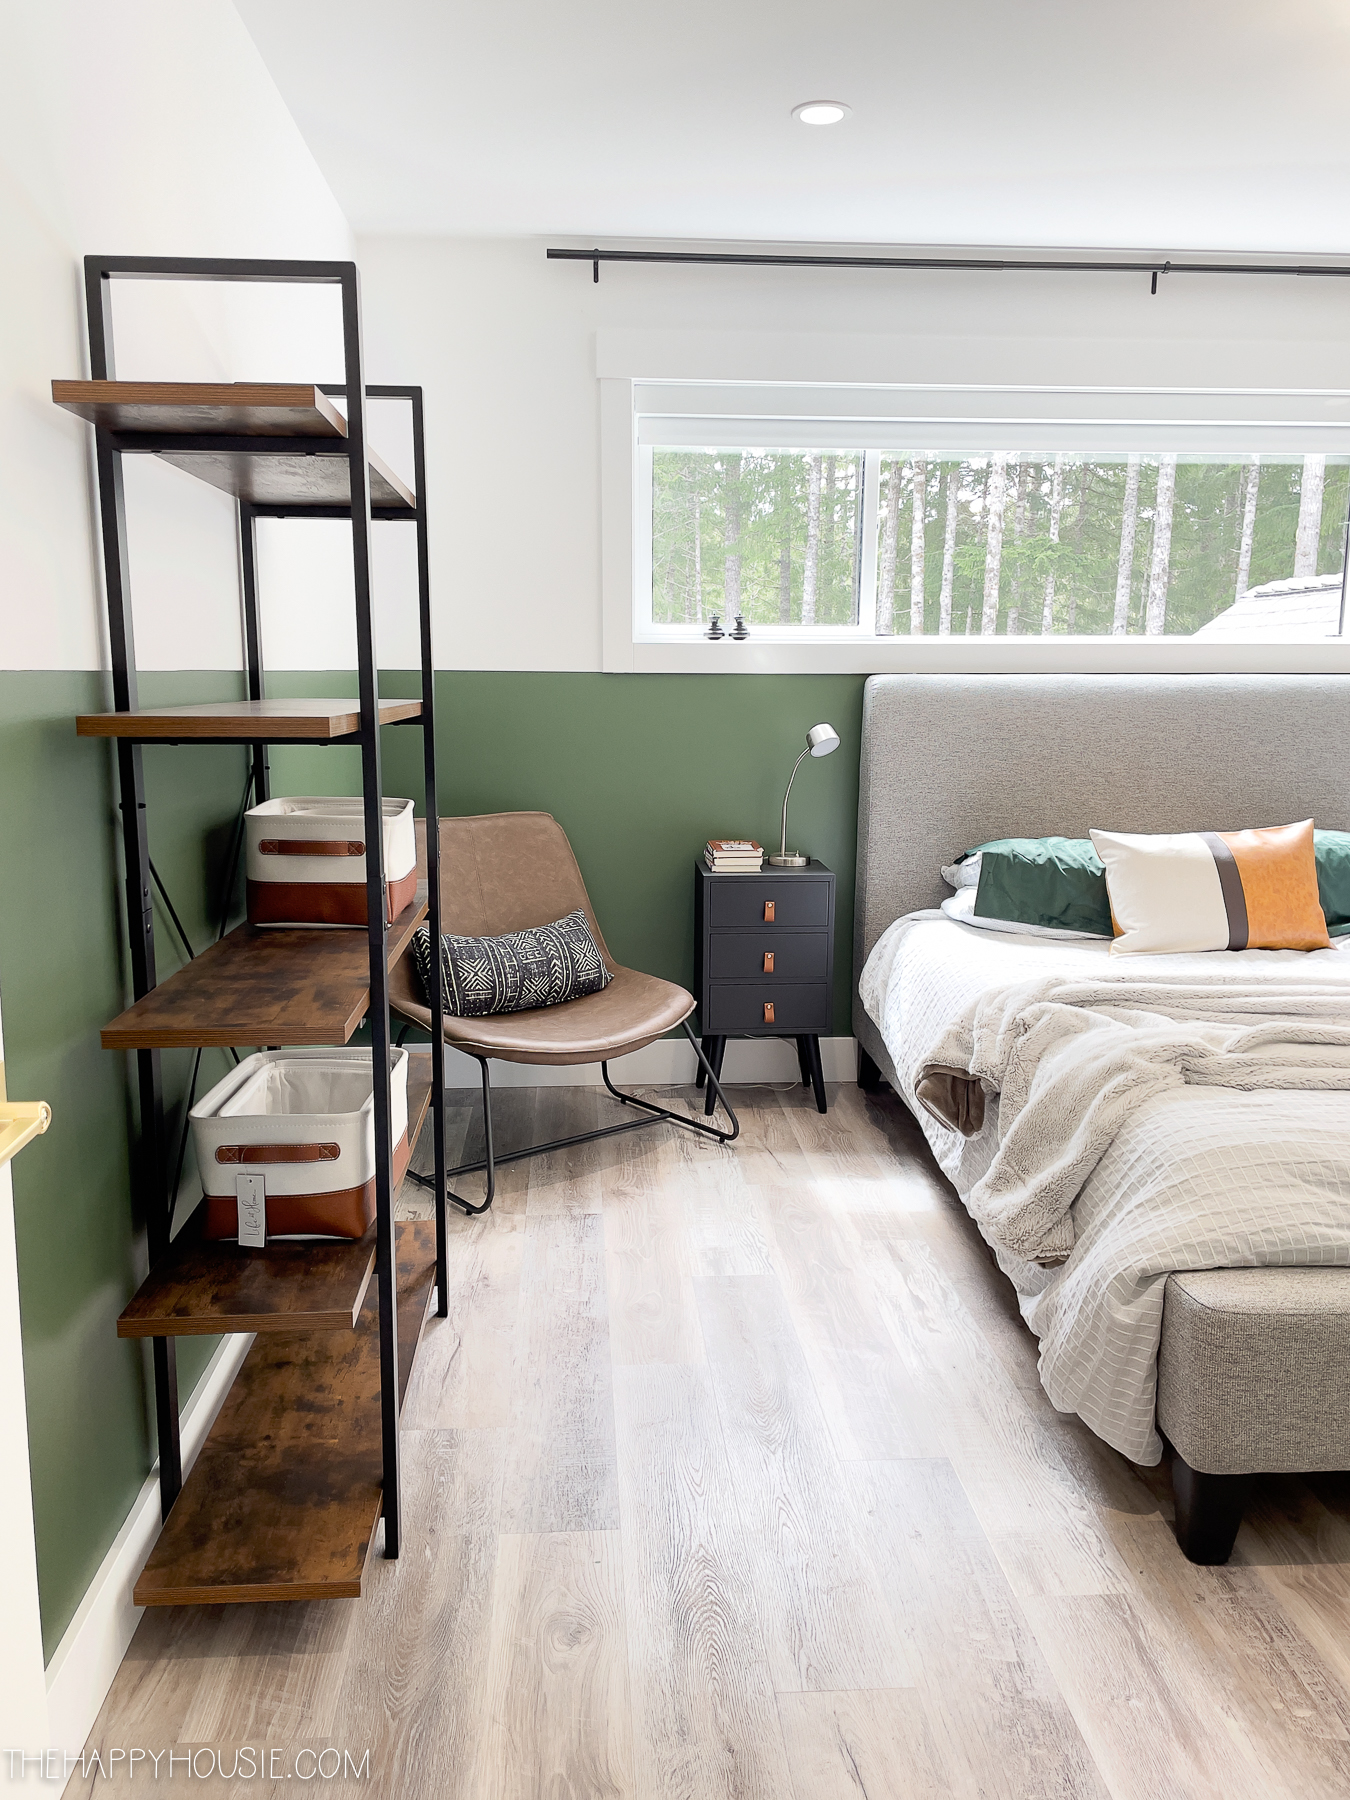
I’m super happy with my decision to do the half-wall in paint. I think the extra colour adds a lot to the space, and yet it doesn’t feel to dark or heavy because the top half of the walls are still so light.
We’re still playing around with how we plan to arrange the different pieces of furniture.

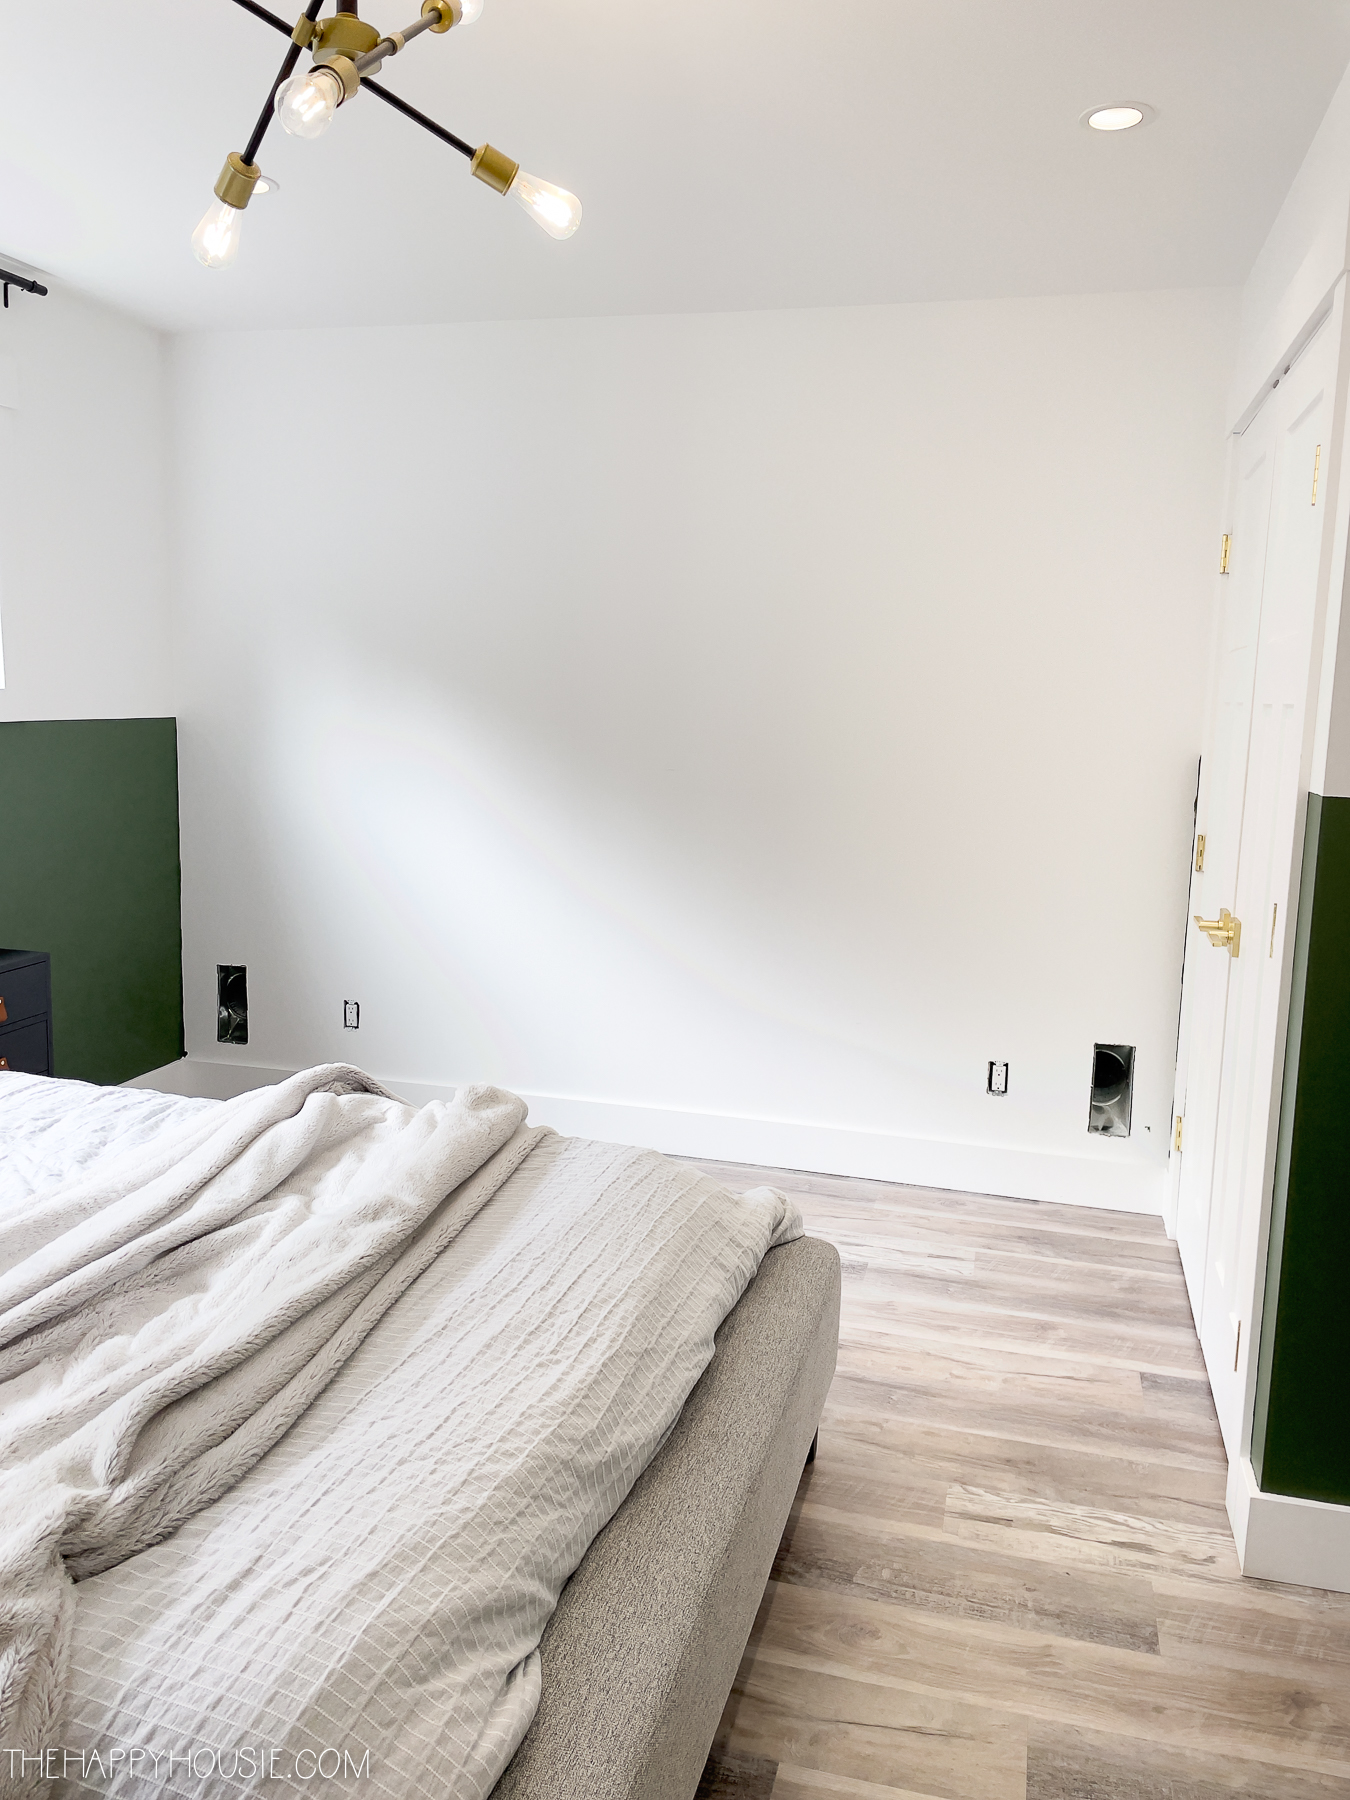
Next week it’s time to apply the wallpaper mural (Foggy Forest from Photowall). I can’t wait to get it up, though I admit I’m always a little bit apprehensive before I tackle a wallpaper project. I’m not as confident with my wallpapering skills as I am with my painting skills… less practice I guess!

It is going right here…
My TO DO List…
Done, or nearly…
- Update the nightstands with black paint and new hardware.
- Select and order or make art for the far wall.
- Choose a paint colour.
- Paint the lower half of the walls dark green.
- Order a new desk chair.
- Determine the final furniture layout.
- Build his new desk and bookcase
- Sell his current bookcases and desk.
Still to do:
- Install the wallpaper mural
- Lay down the new rug
- Install the lamps on the wall beside his bed.
- Style the room (bookcase, desk, bedding etc.)
- MAYBE… give his closet a little decorative upgrade, depending on time.
I can’t wait to see this space come together, and I know Leif is excited about it too!
You can see my other articles on this room makeover here:
One: Teen Boy Bedroom Makeover BEFORE
Two: Teen Boy Bedroom Makeover Plans
Three: Teen Boy Bedroom Makeover Decisions and Progress
Five: Dark Green Paint Colours
My Previous One Room Challenge Makeovers…
This is my EIGHTH time participating in the ORC as a guest participant! Here are some of then other ORC makeovers I’ve tackled over the years…
ORC Spring 2020: Modern BOHO family room makeover reveal
Primary Bedroom and Ensuite Makeover Reveal: ORC Spring 2019
Spring 2018: Surf Style Kid’s Bedroom Makeover Reveal
Master Bedroom Makeover Reveal: ORC Fall 2016:
ORC Spring 2016: Living Room Makeover Reveal
Craft Room Makeover Reveal: ORC Spring 2015
ORC Fall 2014: Main Bathroom Makeover Reveal


What color white is above the green?
It is Chantilly Lace – also by Ben Moore:)